

Three.js 之 17 Import Model 导入模型
source link: https://gaohaoyang.github.io/2022/08/09/three-import-model/
Go to the source link to view the article. You can view the picture content, updated content and better typesetting reading experience. If the link is broken, please click the button below to view the snapshot at that time.

本系列为 Three.js journey 教程学习笔记。
Three.js 提供了很多原始模型,但如果我们需要更复杂的模型,最好使用 3D 软件建模,然后导入到场景中。本节我们就来学学如何导入一个做好的 3D 模型。
3D 模型的各种格式
3D 模型有各种各样的格式,详情可参考维基百科List_of_file_formats#3D_graphics。这些格式各有特点。接下来我们列举一些比较常见和流行的。
- COLLADA
我们不会关心所有的模型。因为 GLTF 模型已经逐渐变为标准,并且能应对绝大部分你遇到的场景。
GLTF 是 GL Transmission Format 的缩写。由 Khronos Group 创造(他们还创造了 OpenGL, WebGL, Vulkan, Collada 并且有很多成员在 AMD / ATI, Nvidia, Apple, id Software, Google, Nintendo, etc 公司 )。
GLTF 在近些年已经变得越来越流行。它可以支持各种数据集,你可以在其格式中使用几何体和材质,同时也可以包含相机、光照、场景、动画、骨骼等。同时支持各种文件格式,例如 json、二进制 binary、embed texture 嵌入纹理等。
GLTF 已经成为了实时渲染的标准,并且也正在成为大部分3D软件、游戏引擎和库的标准模型。这意味着你可以轻松的在各个环境中熟练使用它。
但这并不是说 GLTF 可以覆盖所有场景,如果你仅仅是需要一个几何体,那么可以选择 OBJ、FBX、STL 或 PLY 格式。
寻找一个模型
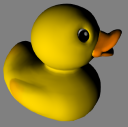
我们后续会学习在 Blender 中创建模型,但现在我们先寻找一个创建好的模型。我们可以在 GLTF 团队的示例中看到各种各样的模型。链接为 glTF Sample Models。首先我们动一个简单的小黄鸭模型作为示例开始入手。
GLTF formats
虽然 GLTF 就是一种格式,但是其内部包含了其他格式。我们会发现有很多文件夹,如下图
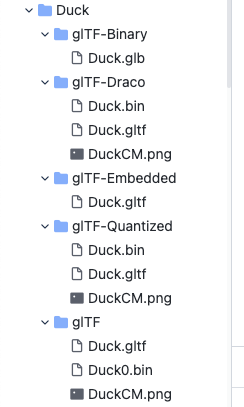
我们来说说这些都是什么
- glTF-Binary
- glTF-Draco
- glTF-Embedded
glTF 是默认格式。Duck.gltf 是一个 JSON 文件。包含了各种信息,包含相机、光照、场景、材质等,但没有几何体或纹理贴图。Duck0.bin 是一个二进制文件。通常包含了几何体和UV贴图坐标、法线坐标等。DuckCM.png 是鸭子的纹理贴图。
当我们载入 Duck.gltf 时,它会自动载入其他两个文件。
glTF-Binary
包含了所有上述的数据,是个二进制文件,不能直接打开。
这个文件格式会更轻量化一些,只有一个文件,也易于载入。但不太方便修改内部的数据。例如你想修改纹理贴图,换一张更压缩的贴图时,就会比较麻烦,因为这些数据都是被集合在了一起,同一个二进制文件中。
glTF-Draco
有点像说的第一个格式,不过使用了 Draco algorithm 来压缩几何体的数据。如果你对比 .bin 文件的大小,你就会发现这个会更小一点。
glTF-Embedded
这个格式有点像 glTF-Binary 因为也是只有一个文件。但这个文件是一个 JSON 因此你可以在编辑器里打开。
选择合适的模型格式
根据不同场景做出不同的选择才是最优方案。
如果你想修改 textures 或导出的光线坐标,最好选择第一个默认的 glTF。它还具有分别加载不同文件的优势,从而提高了加载速度。
如果想要每个模型一个文件,并且不关心模型内的素材修改,那么二进制 glTF-Binary 更适合。
在这两种情况下,您都必须决定是否要使用 Draco 压缩,但我们稍后会介绍这部分。
导入模型的实践
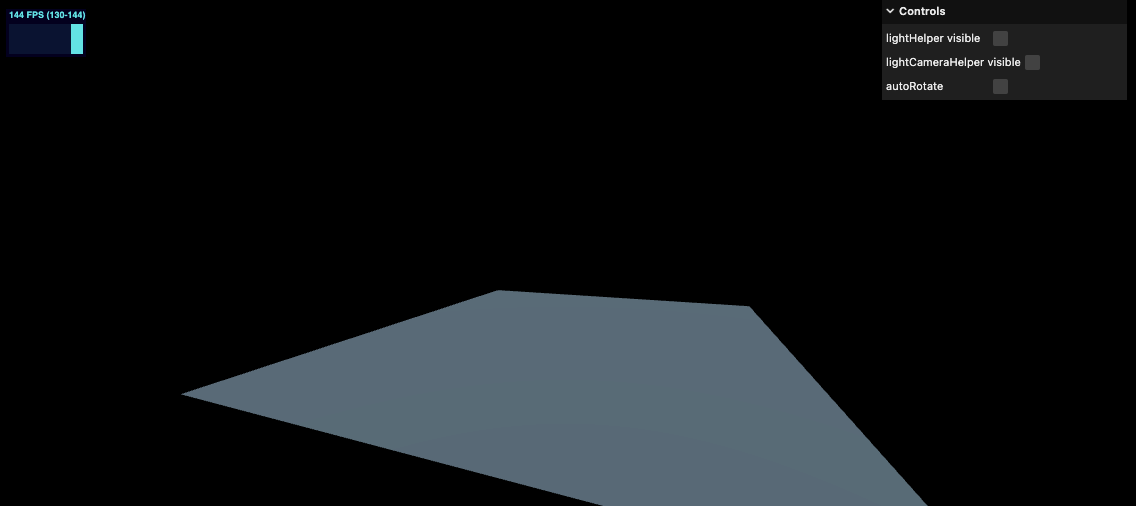
我们准备一个空白的平面、环境光和平行光。初始代码如下:
import * as THREE from 'three'
import './style.css'
import { OrbitControls } from 'three/examples/jsm/controls/OrbitControls'
import * as dat from 'lil-gui'
import stats from '../common/stats'
import { listenResize } from '../common/utils'

// Canvas
const canvas = document.querySelector('#mainCanvas') as HTMLCanvasElement

// Scene
const scene = new THREE.Scene()

// Gui
const gui = new dat.GUI()

// Size
const sizes = {
  width: window.innerWidth,
  height: window.innerHeight,
}

// Camera
const camera = new THREE.PerspectiveCamera(75, sizes.width / sizes.height, 0.1, 100)
camera.position.set(4, 4, 12)

// Controls
const controls = new OrbitControls(camera, canvas)
controls.enableDamping = true
controls.zoomSpeed = 0.3
controls.target = new THREE.Vector3(0, 3, 0)

/**
 * Objects
 */
// plane
const plane = new THREE.Mesh(
  new THREE.PlaneGeometry(15, 15),
  new THREE.MeshStandardMaterial({
    color: '#607D8B',
  })
)
plane.rotateX(-Math.PI / 2)
plane.receiveShadow = true
scene.add(plane)

/**
 * Light
 */
const directionLight = new THREE.DirectionalLight()
directionLight.castShadow = true
directionLight.position.set(5, 5, 6)
directionLight.shadow.camera.near = 1
directionLight.shadow.camera.far = 20
directionLight.shadow.camera.top = 10
directionLight.shadow.camera.right = 10
directionLight.shadow.camera.bottom = -10
directionLight.shadow.camera.left = -10

const directionLightHelper = new THREE.DirectionalLightHelper(directionLight, 2)
directionLightHelper.visible = false
scene.add(directionLightHelper)

const directionalLightCameraHelper = new THREE.CameraHelper(directionLight.shadow.camera)
directionalLightCameraHelper.visible = false
scene.add(directionalLightCameraHelper)

const ambientLight = new THREE.AmbientLight(new THREE.Color('#ffffff'), 0.3)
scene.add(ambientLight, directionLight)

// Renderer
const renderer = new THREE.WebGLRenderer({
  canvas,
  antialias: true,
})
renderer.setSize(sizes.width, sizes.height)
renderer.setPixelRatio(Math.min(window.devicePixelRatio, 2))
renderer.shadowMap.enabled = true

// Animations
const tick = () => {
  stats.begin()
  controls.update()

  // Render
  renderer.render(scene, camera)
  stats.end()
  requestAnimationFrame(tick)
}

tick()

listenResize(sizes, camera, renderer)

gui.add(directionLightHelper, 'visible').name('lightHelper visible')
gui.add(directionalLightCameraHelper, 'visible').name('lightCameraHelper visible')
gui.add(controls, 'autoRotate')
import { GLTFLoader } from 'three/examples/jsm/loaders/GLTFLoader'

// ...

/**
 * Models
 */
const gltfLoader = new GLTFLoader()
gltfLoader.load(
  '../assets/models/Duck/glTF/Duck.gltf',
  (gltf) => {
    console.log('success')
    console.log(gltf)
  },
  (progress) => {
    console.log('progress')
    console.log(progress)
  },
  (error) => {
    console.log('error')
    console.log(error)
  },
)
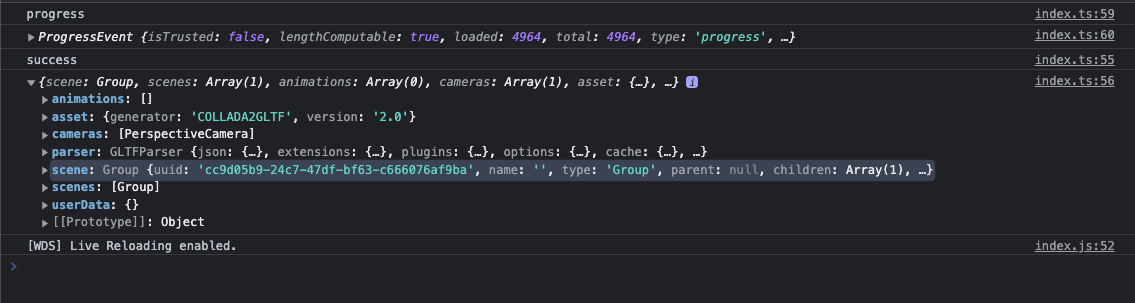
可以看到模型已经被正常载入,接下来让我们将它添加到场景中吧
添加到场景
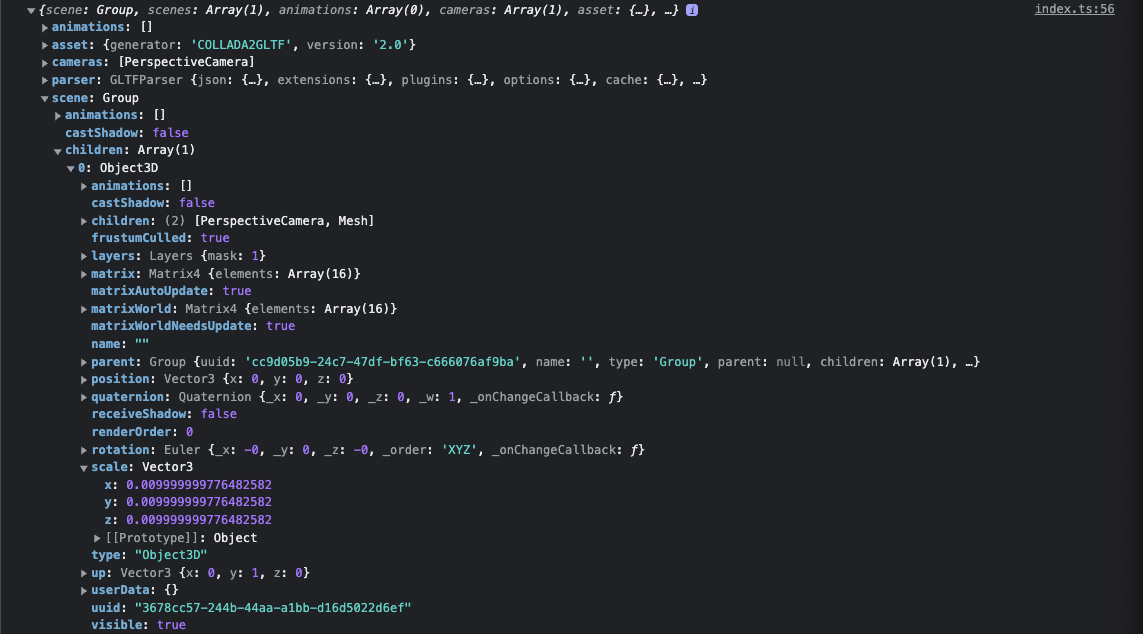
可以看到导入的模型 scene 的目录结构大致如下,可以看到除了模型之外还有很多其他的对象。
THREE.Group: scene
└───Array: children
    └───THREE.Object3D
        └───Array: children
            ├───THREE.PerspectiveCamera
            └───THREE.Mesh
我们有以下几种方式将模型添加到场景
- 将模型的整个 scene 添加到我们的场景里。虽然它的名字是 scene,实际上是一个 Three.Group
- 将 scene 下的 children 添加到我们自己的 scene 中,并忽略用不到的 PerspectiveCamera
- 过滤 children 的内容,移除掉不需要的对象,如 PerspectiveCamera
- 仅添加 Mesh 到场景里,但有可能会有错误的缩放、位置、角度等问题
- 打开 3D 软件将 PerspectiveCamera 移除,再重新导出模型
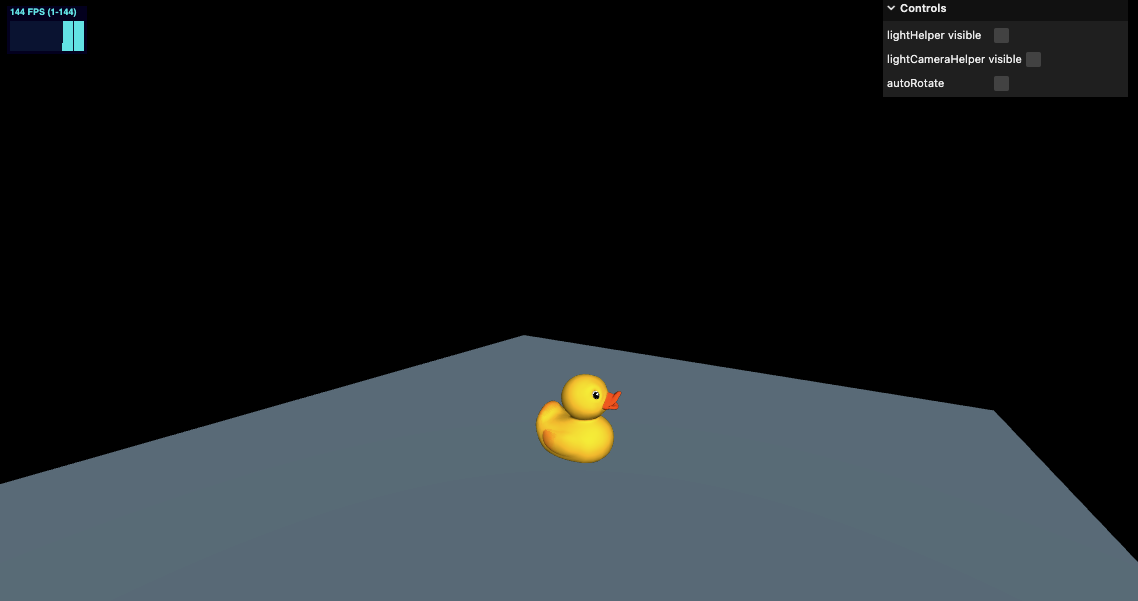
因为我们的模型很简单,因此我们可以将其返回的 scene.children[0] 整体添加到我们的 Three 场景中(即上述的第二种方式)。代码如下
/**
 * Models
 */
const gltfLoader = new GLTFLoader()
gltfLoader.load(
  '../assets/models/Duck/glTF/Duck.gltf',
  (gltf) => {
    console.log('success')
    console.log(gltf)
    scene.add(gltf.scene.children[0])
  },
  (progress) => {
    console.log('progress')
    console.log(progress)
  },
  (error) => {
    console.log('error')
    console.log(error)
  },
)
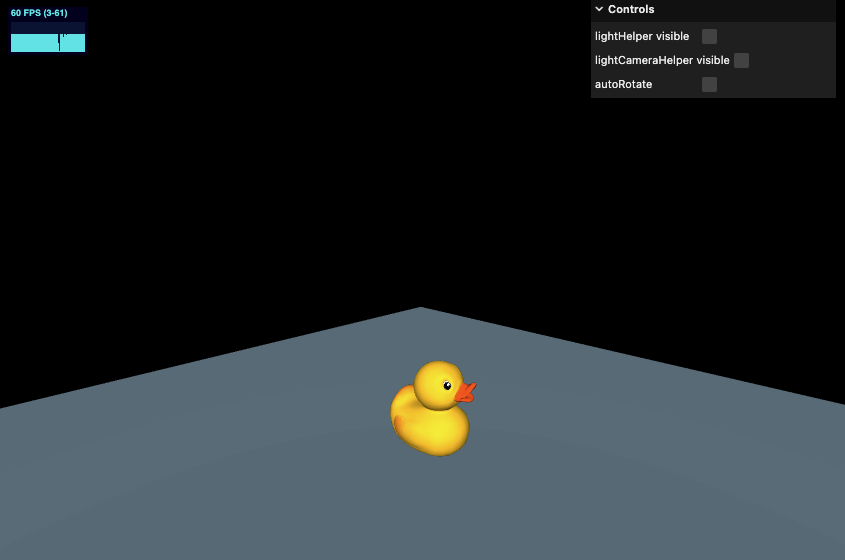
我们也可以尝试其他的格式导入,除了 Draco 压缩格式外,其他都生效了,效果如上图。Draco 我们后续会说的,它需要一个特殊的 loader。
/**
 * Models
 */
const gltfLoader = new GLTFLoader()
gltfLoader.load(
  // '../assets/models/Duck/glTF/Duck.gltf',
  // '../assets/models/Duck/glTF-Binary/Duck.glb',
  '../assets/models/Duck/glTF-Embedded/Duck.gltf',
  (gltf) => {
    console.log('success')
    console.log(gltf)
    scene.add(gltf.scene.children[0])
  },
  (progress) => {
    console.log('progress')
    console.log(progress)
  },
  (error) => {
    console.log('error')
    console.log(error)
  },
)
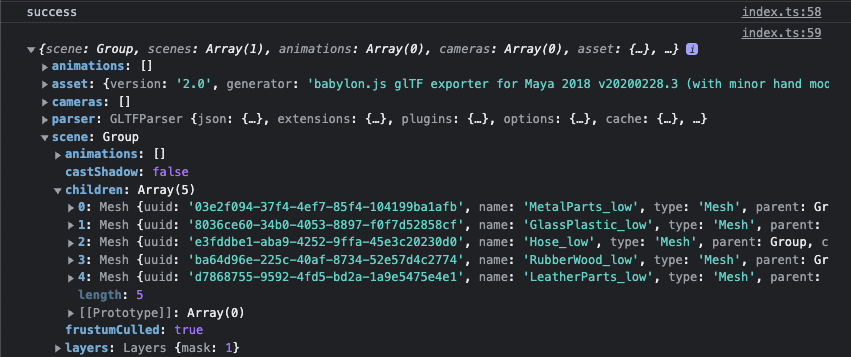
接下来我们导入 FlightHelmet 飞行员头盔模型
/**
 * Models
 */
const gltfLoader = new GLTFLoader()
gltfLoader.load(
  '../assets/models/FlightHelmet/glTF/FlightHelmet.gltf',
  (gltf) => {
    console.log('success')
    console.log(gltf)
    scene.add(gltf.scene.children[0])
  },
  (progress) => {
    console.log('progress')
    console.log(progress)
  },
  (error) => {
    console.log('error')
    console.log(error)
  },
)
可以看到只导入了模型的一部分

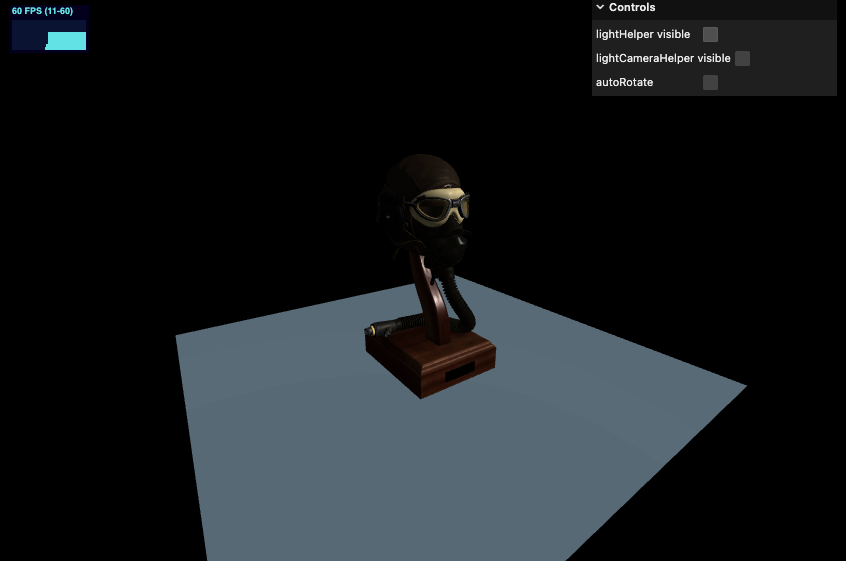
这是因为这个模型被拆成了多个部分,如果想要完整导入,我们需要添加它的父节点,同时再修改一下缩放比例
/**
 * Models
 */
const gltfLoader = new GLTFLoader()
gltfLoader.load(
  '../assets/models/FlightHelmet/glTF/FlightHelmet.gltf',
  (gltf) => {
    console.log('success')
    console.log(gltf)
    gltf.scene.scale.set(10, 10, 10)
    scene.add(gltf.scene)
  },
  (progress) => {
    console.log('progress')
    console.log(progress)
  },
  (error) => {
    console.log('error')
    console.log(error)
  },
)
Draco 压缩
- Draco 压缩可以比默认的模型 size 更小
- 压缩被应用在了 buffer data 中,尤其是几何体部分
- Draco 不是 glTF 特有的,但是 glTF 和 Draco 同时流行起来,所以 glTF 导出器实现了 Draco 的导出
- Google 创造的开源压缩算法
- Draco 的解压器也有 Web Assembly 的实现版本,这意味着可以多线程解压 Draco 模型(worker 线程中完成),得到更好的性能
我们需要 DracoLoader 来载入这个特殊的压缩模型。同时需要指定包含 WASM/JS decoder 的路径。指定 decoder 的路径时,我们要将 node_modules 里的 draco 文件夹复制到我们的服务路径上。这个路径是 node_modules/three/examples/js/libs/draco。
代码如下:
/**
 * Models
 */
const gltfLoader = new GLTFLoader()
// draco
// Optional: Provide a DRACOLoader instance to decode compressed mesh data
const dracoLoader = new DRACOLoader()
// Specify path to a folder containing WASM/JS decoding libraries.
dracoLoader.setDecoderPath('../assets/draco/')
// Optional: Pre-fetch Draco WASM/JS module.
dracoLoader.preload()
gltfLoader.setDRACOLoader(dracoLoader)
gltfLoader.load(
  '../assets/models/Duck/glTF-Draco/Duck.gltf',
  (gltf) => {
    console.log('success')
    console.log(gltf)
    // gltf.scene.scale.set(10, 10, 10)
    scene.add(gltf.scene)
  },
  (progress) => {
    console.log('progress')
    console.log(progress)
  },
  (error) => {
    console.log('error')
    console.log(error)
  },
)
再增加影子效果如下

在线 demo 链接
可扫码访问

什么时候选择使用 Draco 压缩模型?
虽然看起来 Draco 压缩是双赢的局面,但事实并非如此。确实,它会让几何图形更轻轻量化,但首先必须加载 DRACOLoader 类和解码器。其次,计算机需要花费时间和资源来解码压缩文件,这可能会导致体验开始时出现短暂的冻结,即使我们使用的是 worker 和 Web Assembly 代码。
所以必须适应并决定最佳解决方案是什么。如果你只有一个几何尺寸为 100kB 的模型,可能不需要 Draco。但是,如果你有许多 MB 的模型要加载并且不关心体验开始时的一些冻结,你可能需要 Draco 压缩。
如开头我们所述,glTF 模型是支持动画的,并且 Three.js 也可以处理这些动画。
载入一个有动画的 demo
我们使用 Fox 狐狸模型,这个模型包含了一些动画能力
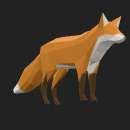
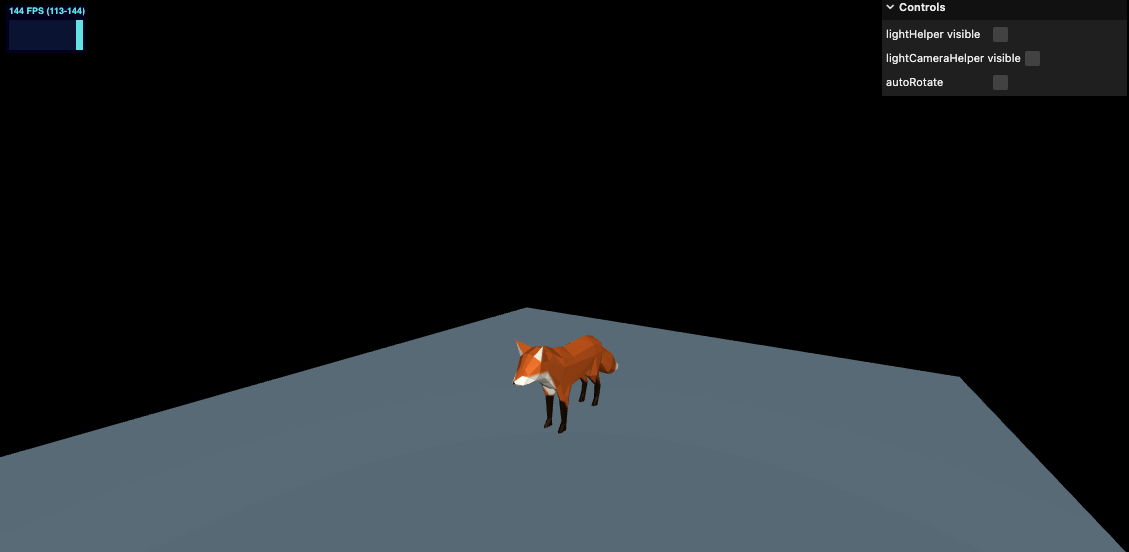
先将模型载入,并控制一下缩放比例
/**
 * Models
 */
const gltfLoader = new GLTFLoader()
gltfLoader.load(
  '../assets/models/Fox/glTF/Fox.gltf',
  (gltf) => {
    console.log('success')
    gltf.scene.scale.set(0.03, 0.03, 0.03)
    scene.add(gltf.scene)
  },
  (progress) => {
    console.log('progress')
    console.log(progress)
  },
  (error) => {
    console.log('error')
    console.log(error)
  },
)
我们可以看到模型里返回了3个 AnimationClip 类型的对象
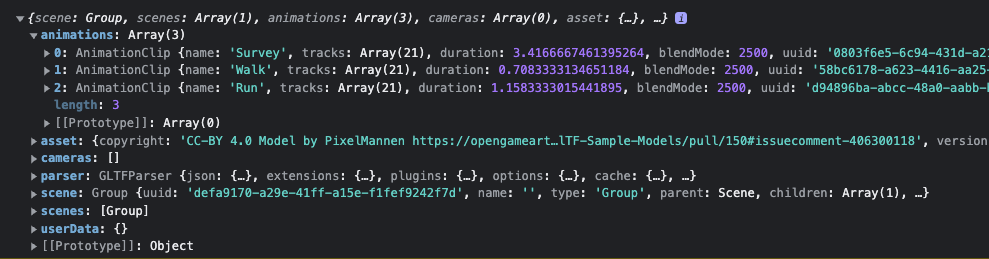
想要使用这些动画片段,我们需要使用 AnimationMixer,一个 AnimationMixer 可以包含一个或多个动画片段。
通过 AnimationMixer 载入动画片段,并在 tick 中每帧进行 update。代码如下
/**
 * Models
 */
let mixer: THREE.AnimationMixer | null = null
const gltfLoader = new GLTFLoader()
gltfLoader.load(
  '../assets/models/Fox/glTF/Fox.gltf',
  (gltf) => {
    console.log('success')
    console.log(gltf)
    gltf.scene.scale.set(0.03, 0.03, 0.03)
    scene.add(gltf.scene)

    mixer = new THREE.AnimationMixer(gltf.scene)
    const action = mixer.clipAction(gltf.animations[0])
    action.play()
  },
  (progress) => {
    console.log('progress')
    console.log(progress)
  },
  (error) => {
    console.log('error')
    console.log(error)
  },
)

// ...

// Animations
const clock = new THREE.Clock()
let previousTime = 0
const tick = () => {
  stats.begin()
  controls.update()

  const elapsedTime = clock.getElapsedTime()
  const deltaTime = elapsedTime - previousTime
  previousTime = elapsedTime

  // update mixer
  if (mixer) {
    mixer.update(deltaTime)
  }

  // Render
  renderer.render(scene, camera)
  stats.end()
  requestAnimationFrame(tick)
}

tick()

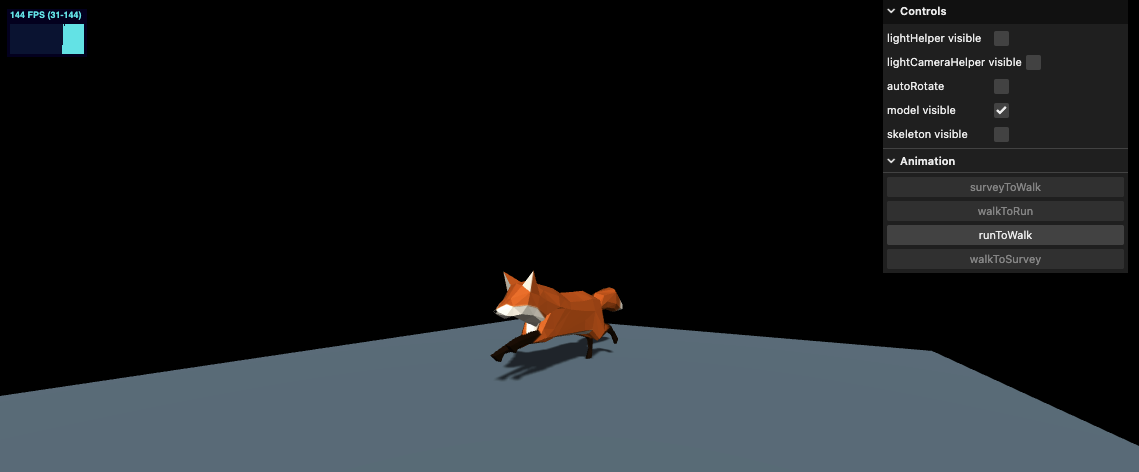
我们尝试再复杂一点,让狐狸从巡视状态转变为走路状态,再从走路状态转变为奔跑。
在模型载入时将所有的动画全部开启,并将不需要的动画的权重 weight 先降为 0,在点击 GUI 按钮后,再进行权重过渡。代码如下
gltfLoader.load(
  '../assets/models/Fox/glTF/Fox.gltf',
  (gltf) => {
    // ...
    // Animations
    mixer = new THREE.AnimationMixer(gltf.scene)
    actionSurvey = mixer.clipAction(gltf.animations[0])
    actionWalk = mixer.clipAction(gltf.animations[1])
    actionRun = mixer.clipAction(gltf.animations[2])
    actionWalk.setEffectiveWeight(0)
    actionRun.setEffectiveWeight(0)
    actionSurvey.play()
    actionWalk.play()
    actionRun.play()

    createGUIPanel() // 创建 GUI 面板
    //...
  },
)
在创建GUI面板函数 createGUIPanel 中,实现点击按钮过渡效果。
我们实现4个按钮,surveyToWalk, walkToRun, runToWalk, walkToSurvey 过渡这3个动画。过渡的过程核心就是修改动画的权重 weight,代码如下:
const createGUIPanel = () => {
  // ...

  const executeCrossFade = (
    startAction: THREE.AnimationAction | null,
    endAction: THREE.AnimationAction | null,
    duration = 3,
  ) => {
    if (!startAction || !endAction) return
    endAction.enabled = true
    endAction.time = 0
    endAction.setEffectiveTimeScale(1)
    endAction.setEffectiveWeight(1)
    startAction.crossFadeTo(endAction, duration, true)
  }

  const guiObj = {
    surveyToWalk: () => {
      executeCrossFade(actionSurvey, actionWalk)
    },
    walkToRun: () => {
      executeCrossFade(actionWalk, actionRun)
    },
    runToWalk: () => {
      executeCrossFade(actionRun, actionWalk)
    },
    walkToSurvey: () => {
      executeCrossFade(actionWalk, actionSurvey)
    },
  }

  const animationFolder = gui.addFolder('Animation')
  animationFolder.add(guiObj, 'surveyToWalk')
  animationFolder.add(guiObj, 'walkToRun')
  animationFolder.add(guiObj, 'runToWalk')
  animationFolder.add(guiObj, 'walkToSurvey')

  // ...
}
同时在 tick 函数中,我们将动画过渡过程中,按钮置灰,避免动画错乱。同时将不可能的过渡状态也置灰处理。代码如下
const tick = () => {
  stats.begin()
  controls.update()

  const elapsedTime = clock.getElapsedTime()
  const deltaTime = elapsedTime - previousTime
  previousTime = elapsedTime

  // update mixer
  if (mixer) {
    mixer.update(deltaTime)
    if (actionSurvey) {
      surveyWeight = actionSurvey.getEffectiveWeight()
    }
    if (actionWalk) {
      walkWeight = actionWalk.getEffectiveWeight()
    }
    if (actionRun) {
      runWeight = actionRun.getEffectiveWeight()
    }
    const animationFolder = gui.children[5] as dat.GUI
    (animationFolder.children[0] as dat.Controller).disable(surveyWeight !== 1);
    (animationFolder.children[1] as dat.Controller).disable(walkWeight !== 1);
    (animationFolder.children[2] as dat.Controller).disable(runWeight !== 1);
    (animationFolder.children[3] as dat.Controller).disable(walkWeight !== 1)
  }

  // Render
  renderer.render(scene, camera)
  stats.end()
  requestAnimationFrame(tick)
}
在线 demo 链接
可扫码访问

Three.js Editor
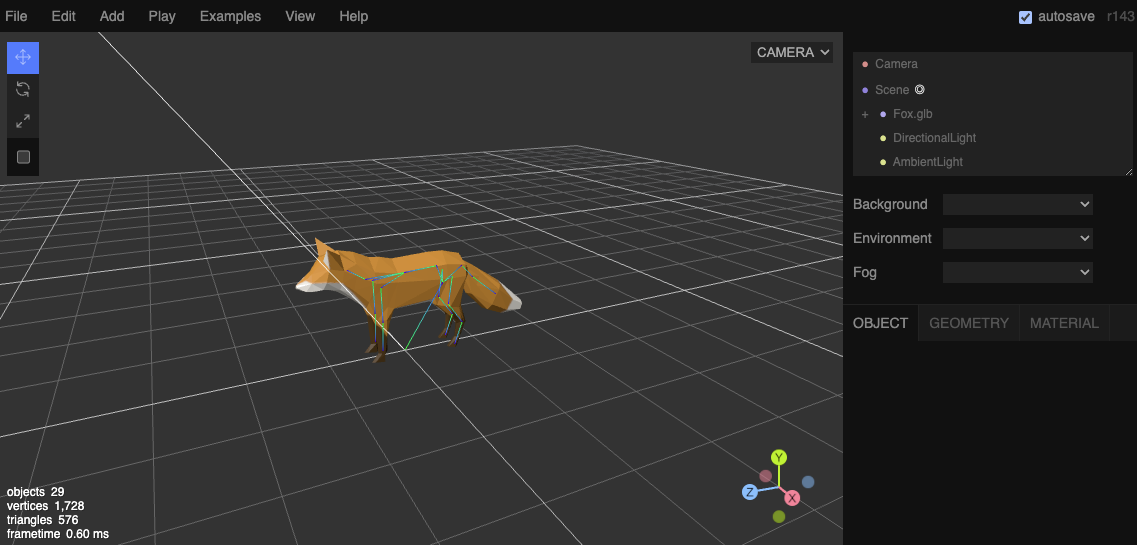
最后在说一下 Three.js 在线编辑器。我们在日常想载入一个新的模型时,有时为了方便预览,可以使用这个在线编辑器。
我们必须使用单个文件的模型,例如二进制或 embed 文件,我们直接将文件拖入编辑器,就可以看到了,再添加环境光和平行光,如下图
如果我们要测试动画,可以在节点上添加脚本,例如我们在 Scene 上添加脚本,先选中右上角
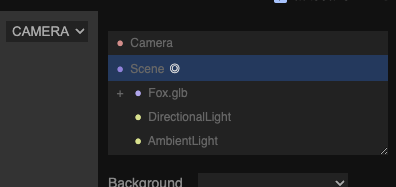
下面的 script 里可以编写代码

编写如下代码
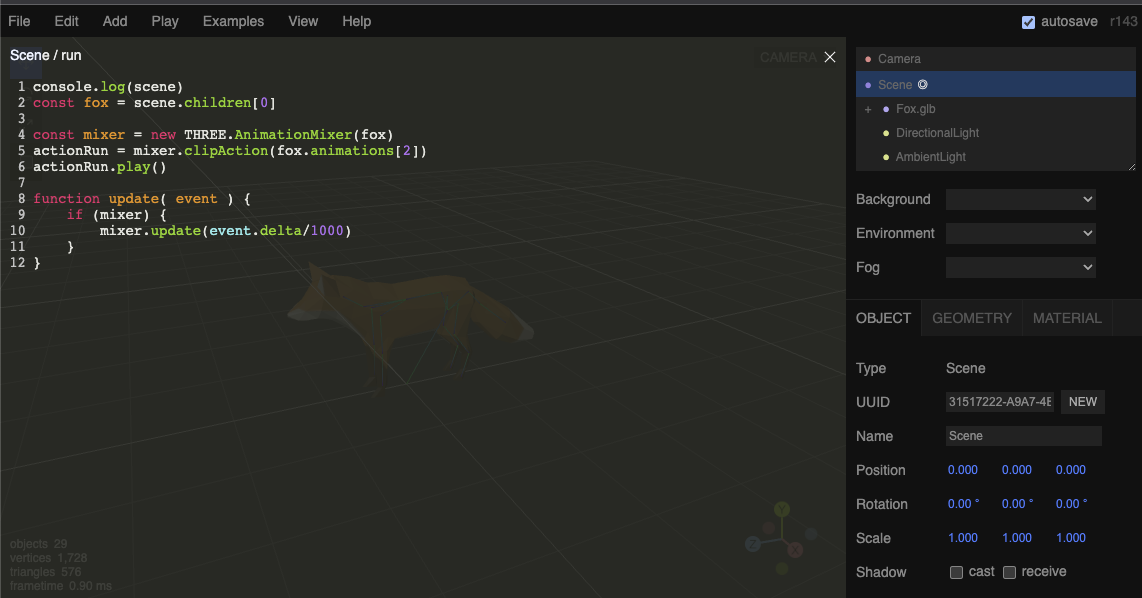
console.log(scene)
const fox = scene.children[0]

const mixer = new THREE.AnimationMixer(fox)
actionRun = mixer.clipAction(fox.animations[2])
actionRun.play()

function update( event ) {
	if (mixer) {
    	mixer.update(event.delta/1000)
	}
}
点击菜单栏的 play 就可以预览了,同时此时的 chrome devTools 也是有效的,可以便于调试。效果如下
本节我们学习了 3D 模型相关内容,学习了 3D 模型的各种格式,学会了如何导入一个模型,以及 Draco 压缩模型的特点。学习了如何使用模型内置的动画。最后学习了 Three.js 在线编辑器的使用。接下来我们将学习了解 Blender 是使用。
Recommend
About Joyk
Aggregate valuable and interesting links.
Joyk means Joy of geeK