
0

开箱即用的前端图片压缩方案
source link: https://developer.51cto.com/article/715813.html
Go to the source link to view the article. You can view the picture content, updated content and better typesetting reading experience. If the link is broken, please click the button below to view the snapshot at that time.

开箱即用的前端图片压缩方案-51CTO.COM
开箱即用的前端图片压缩方案
作者:徐小夕 2022-08-08 08:29:55
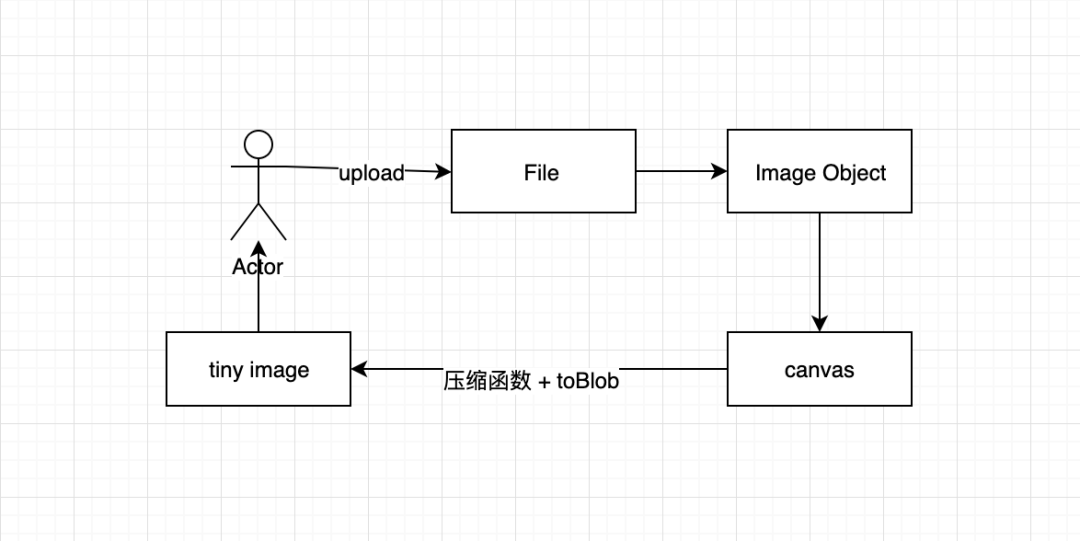
前端实现图片压缩无非就是在用户上传图片文件后, 将file转换成image对象,然后再利用canvas 及其 api 将图片压缩成指定体积。
前端实现图片压缩的背景
我们都知道在“寸土寸金”的互联网时代,速度是第一竞争力, 虽然我们的5G发展已经摇摇领先, 但是也经不住用户在一个网页里传很多“巨无霸”图片, 最终导致的结果就是页面“龟速”打开......

那么作为技术人, 当然也有一堆的解决方案, 比如:
- 压缩图片再上传
- 将图片上传到图床, 利用图床压缩能力和CDN节点就近分发
- 图片流式加载
- 图片懒加载/ 预加载
当然聪明的小伙伴也会将上面的方案组合, 设计更优秀的图片“提速”方案。
今天不会和大家把所有方案都介绍一遍,因为网上也有很多实践, 接下来会从前端技术提升的角度, 分享一下如何用原生 javascript, 实现从图片上传到图片自定义压缩的完整方案,大家可以把文章中介绍的方案直接用于自己的实际开发中,或者基于它设计更棒的图片压缩方案。

实现图片压缩的方案
前端实现图片压缩无非就是在用户上传图片文件后, 将file转换成image对象,然后再利用canvas 及其 api 将图片压缩成指定体积如下流程:
首先我们先实现将file转换成image对象,这里我们用到了FileReader API, 代码如下:
// 压缩前将file转换成img对象
function readImg(file:File) {
    return new Promise((resolve, reject) => {
     const img = new Image()
     const reader = new FileReader()
     reader.onload = function(e:any) {
      img.src = e.target.result
     }
     reader.onerror = function(e) {
      reject(e)
     }
     reader.readAsDataURL(file)
     img.onload = function() {
      resolve(img)
     }
     img.onerror = function(e) {
      reject(e)
     }
    })
}
这里使用 promise 来设计生成图片数据的方法,接下来我们看看核心的图片压缩源码:
/**
 * 压缩图片
 * @param img 被压缩的img对象
 * @param type 压缩后转换的文件类型
 * @param mx 触发压缩的图片最大宽度限制
 * @param mh 触发压缩的图片最大高度限制
 * @param quality 图片质量
 */
 function compressImg(img: any, type:string, mx: number, mh: number, quality:number = 1) {
    return new Promise((resolve, reject) => {
     const canvas = document.createElement('canvas')
     const context = canvas.getContext('2d')
     const { width: originWidth, height: originHeight } = img
     // 最大尺寸限制
     const maxWidth = mx
     const maxHeight = mh
     // 目标尺寸
     let targetWidth = originWidth
     let targetHeight = originHeight
     if (originWidth > maxWidth || originHeight > maxHeight) {
      if (originWidth / originHeight > 1) {
       // 宽图片
       targetWidth = maxWidth
       targetHeight = Math.round(maxWidth * (originHeight / originWidth))
      } else {
       // 高图片
       targetHeight = maxHeight
       targetWidth = Math.round(maxHeight * (originWidth / originHeight))
      }
     }
     canvas.width = targetWidth
     canvas.height = targetHeight
     context?.clearRect(0, 0, targetWidth, targetHeight)
     // 图片绘制
     context?.drawImage(img, 0, 0, targetWidth, targetHeight)
     canvas.toBlob(function(blob) {
      resolve(blob)
     }, type || 'image/png', quality)
    })
}
这里通过控制 canvas的宽高,以及对 canvas 的 toBlob设置参数,来实现自定义的图片压缩。
Recommend
About Joyk
Aggregate valuable and interesting links.
Joyk means Joy of geeK