

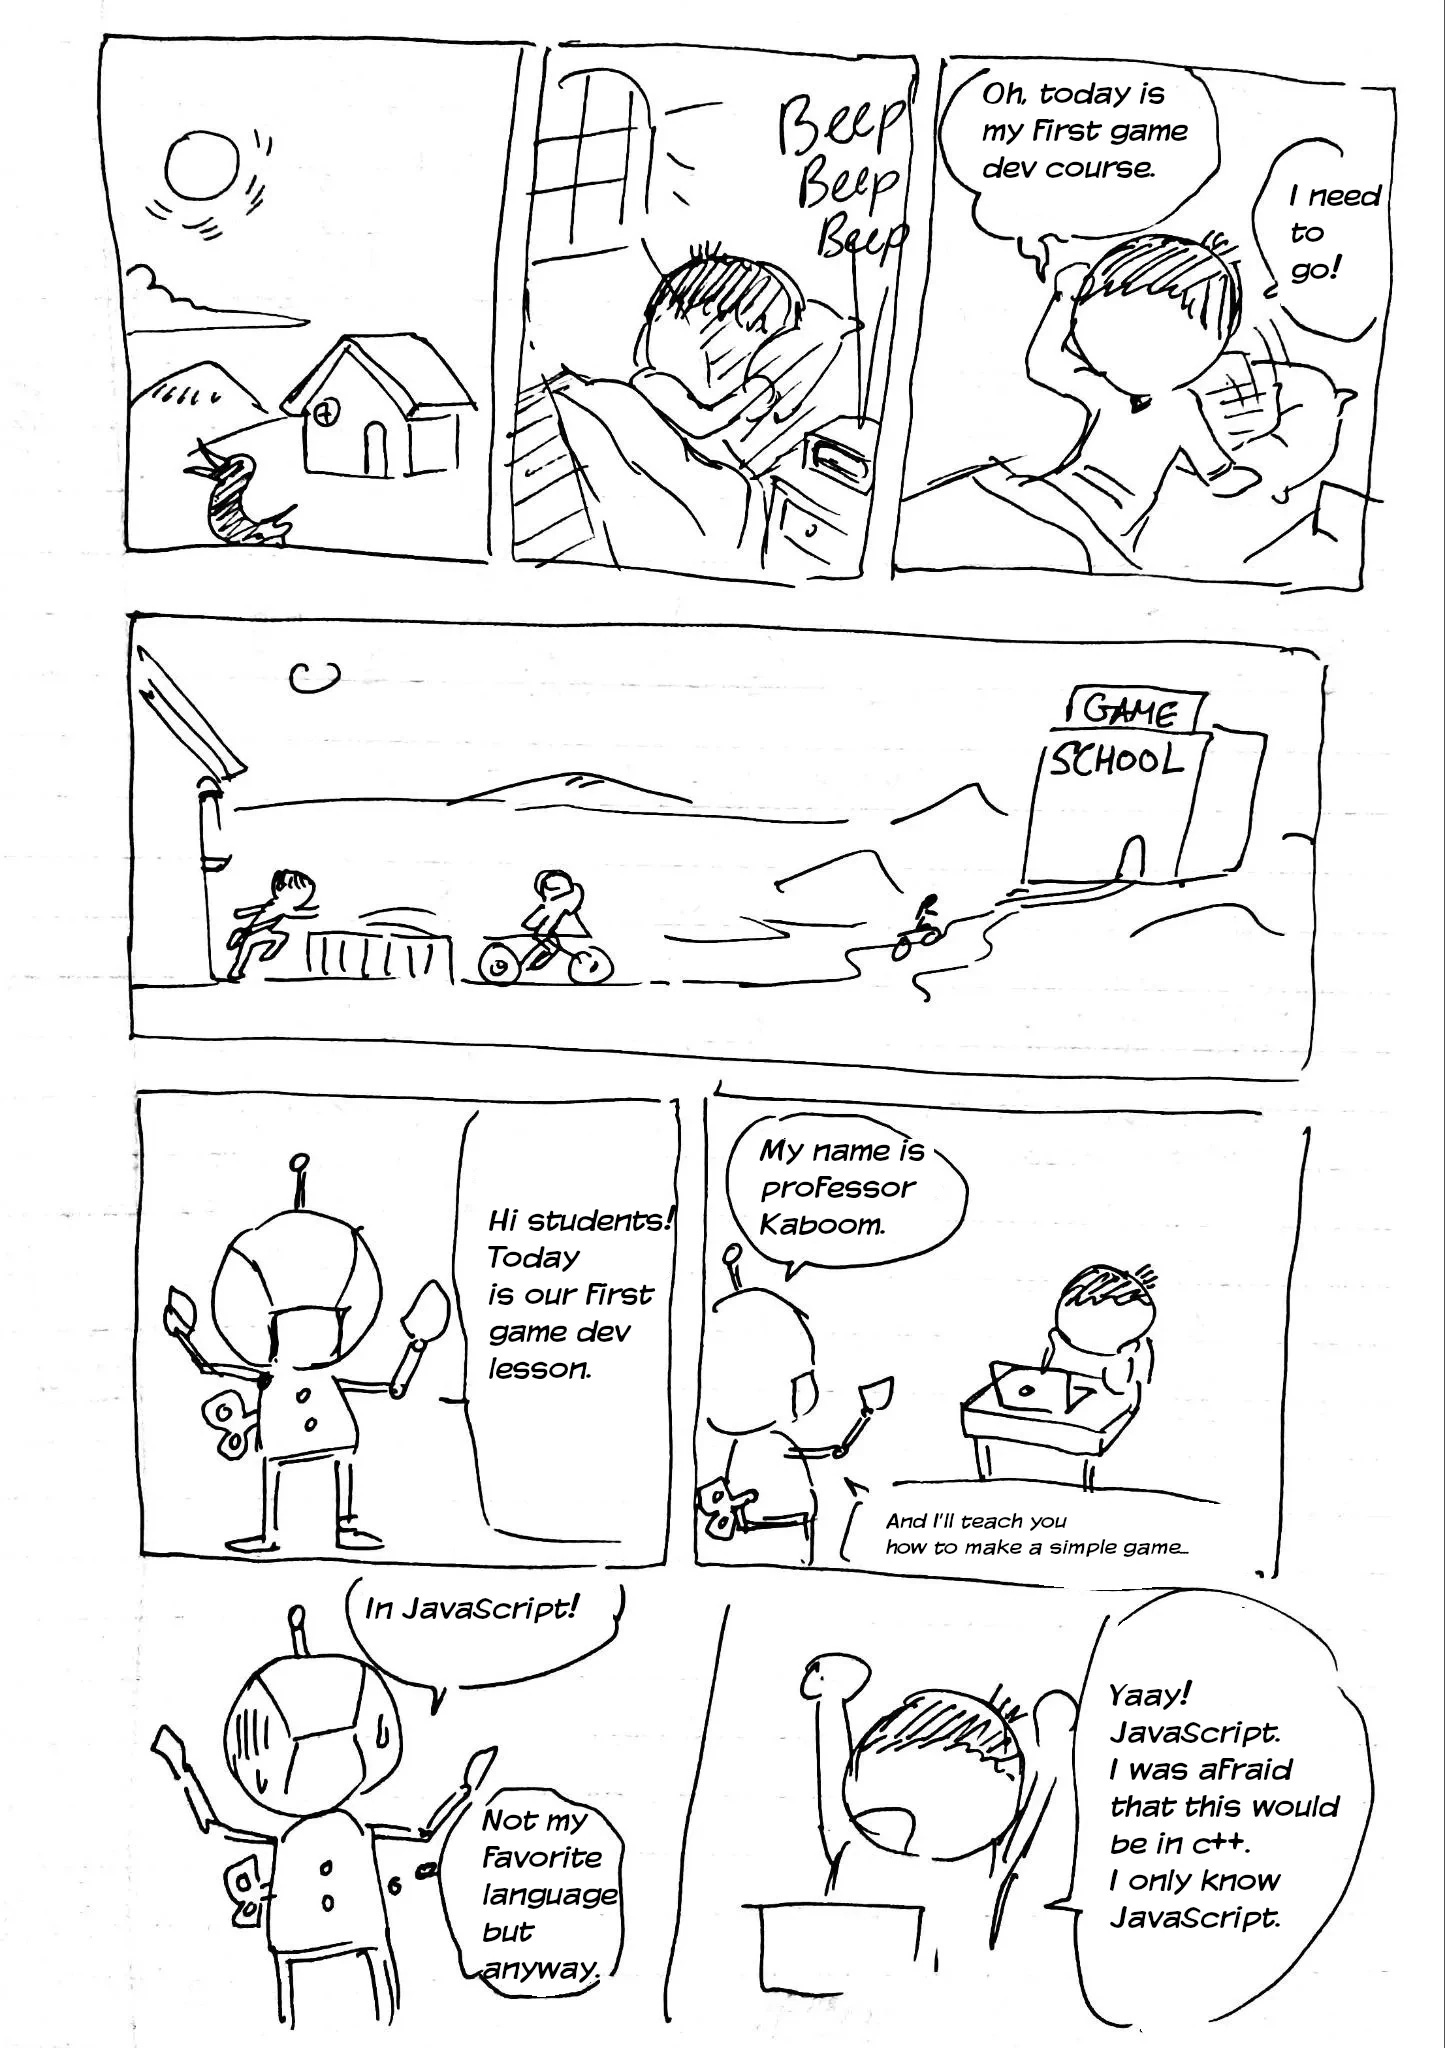
Simple game programming through a comic
source link: https://nassimcomics.substack.com/p/simple-game-programming-through-a-comic
Go to the source link to view the article. You can view the picture content, updated content and better typesetting reading experience. If the link is broken, please click the button below to view the snapshot at that time.


What is Kaboom ?
Kaboom is a javascript library which makes making games really easy. To get started you only need a cdn link.
What you can do is to create a folder called for ex: gameFolder and inside an html file called index.html with the following content.
<html>
   <body>
     <script src="https://unpkg.com/kaboom/dist/kaboom.js"></script>
   </body>
</html>
The script tag contains our cdn link which contains the kaboom.js library we’re going to use. The next step is to create a new javascript file inside your folder. Call it main.js . Now you need to include a script tag referring to it in your html.
<html>
   <body>
     <script src="https://unpkg.com/kaboom/dist/kaboom.js"></script>
     <script src="main.js"></script>
   </body>
</html>
The last step needed before actually starting programming is to start a web server. There are many options to do so. You could use the live server extension for VSCode or if you’re a beginner you can use Replit which allows you to program through your browser without installing anything on your machine. It’s also free to use. (Disclaimer: I work at Replit)
At the end of all of this you should have the following folder structure
/gameFolder
   - index.html
   - main.js
~ (Optional) If you want to use Replit ~
Replit has the concept of a Repl which can be viewed as a virtual computer that contains all the files you need to run a specific program. I made one for you so you have all the files you need to get started without having to download anything.
Once you have created a Replit account by going to replit.com go to this link and click on the fork button on the right side of the page. You’ll land in a code editor where you can see all the files on the left.
If you aren’t familiar with the term fork it’s jargon used in software engineering for making a copy of the current state of a codebase. So by telling you to fork my Repl you’re making a copy of it that you can edit much like in Google docs.
The last thing to note is that each time you write some code you have to click on the green run button to run it.
![[crop output image]](https://substackcdn.com/image/fetch/f_auto,q_auto:good,fl_progressive:steep/https%3A%2F%2Fbucketeer-e05bbc84-baa3-437e-9518-adb32be77984.s3.amazonaws.com%2Fpublic%2Fimages%2F95d7604c-1443-429a-909d-ebc6b5fe24e3_450x298.gif)
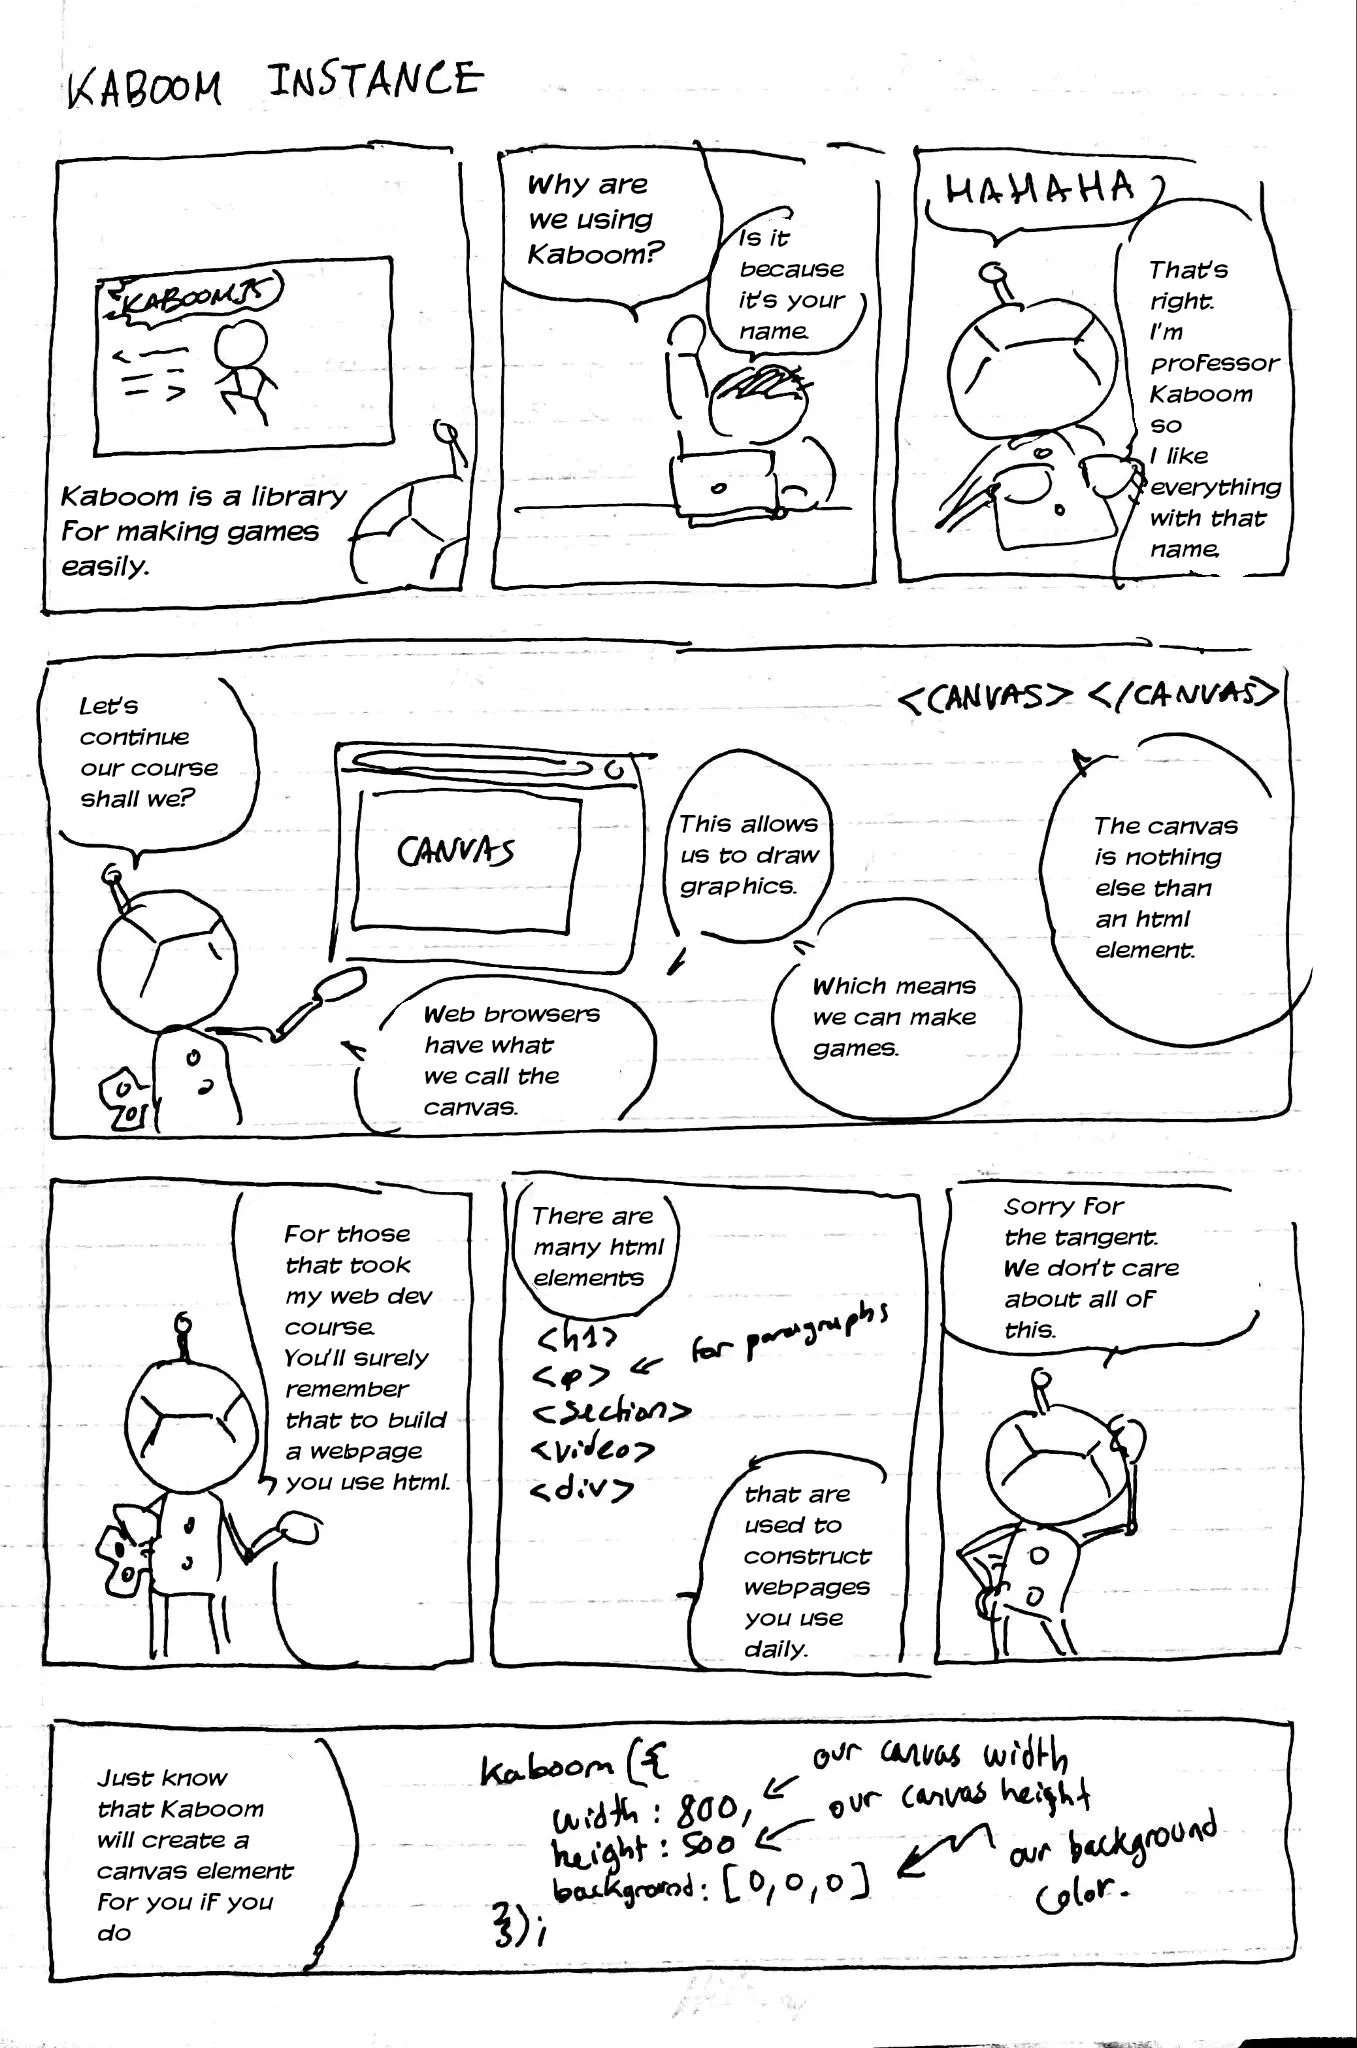
kaboom({
  width: 800,
  height: 500,
  background: [0,0,0]
});
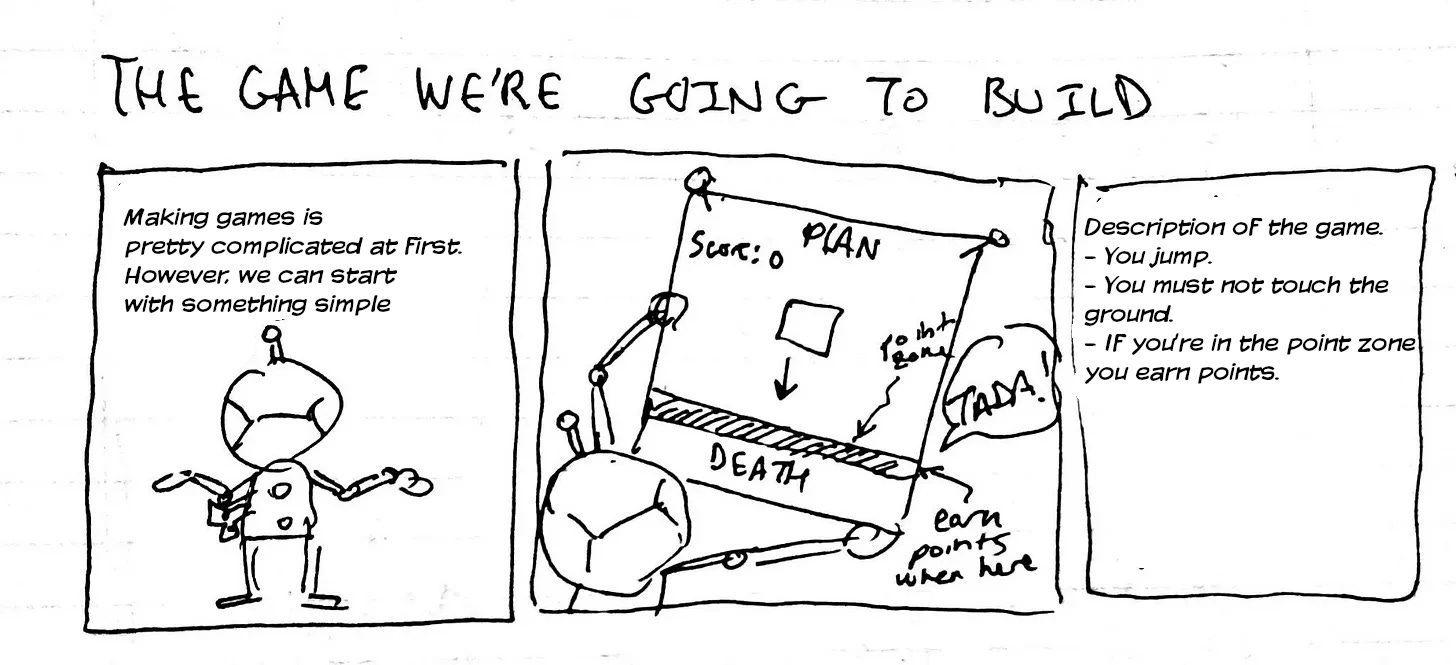
Creating game objects we need
In Kaboom a game object is constructed by using a list of components. Those components are defined by the Kaboom API.
In this step we’re going to specify the list of components we need for all of our game objects we want to create. Let’s start with the ground. Add the following code to your main.js file.
const groundCompList = [
rect(800, 100),
pos(0, 400),
color(222, 255, 255),
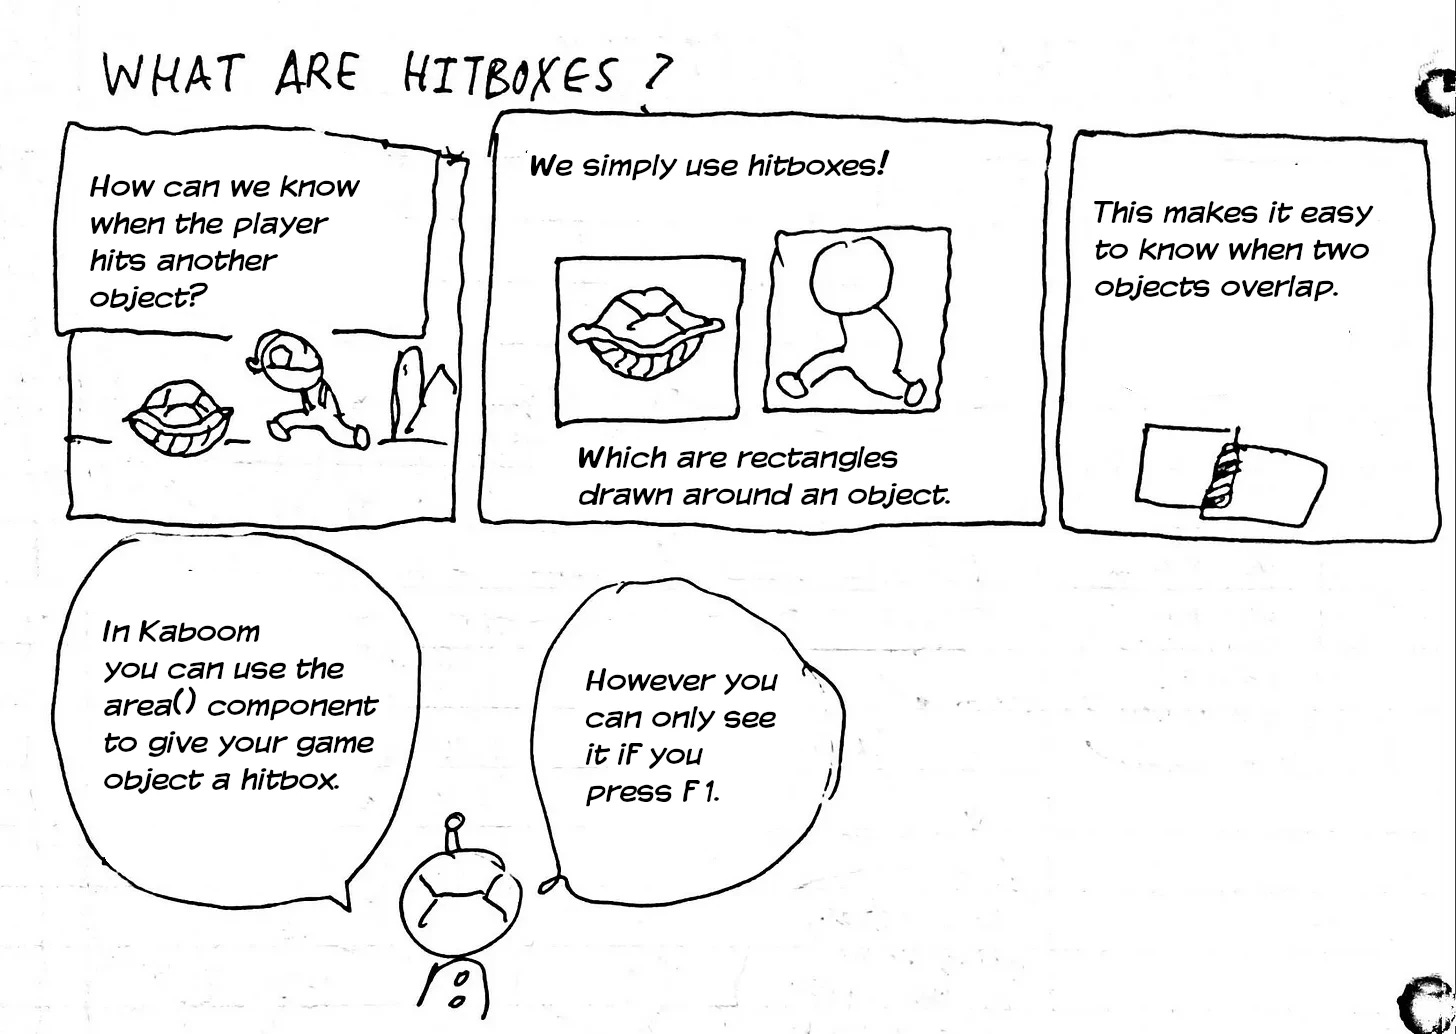
area(),
solid(),
"#ground"
];The components we’re using here are rect, pos, color, area, solid and a tag which is a plain string.
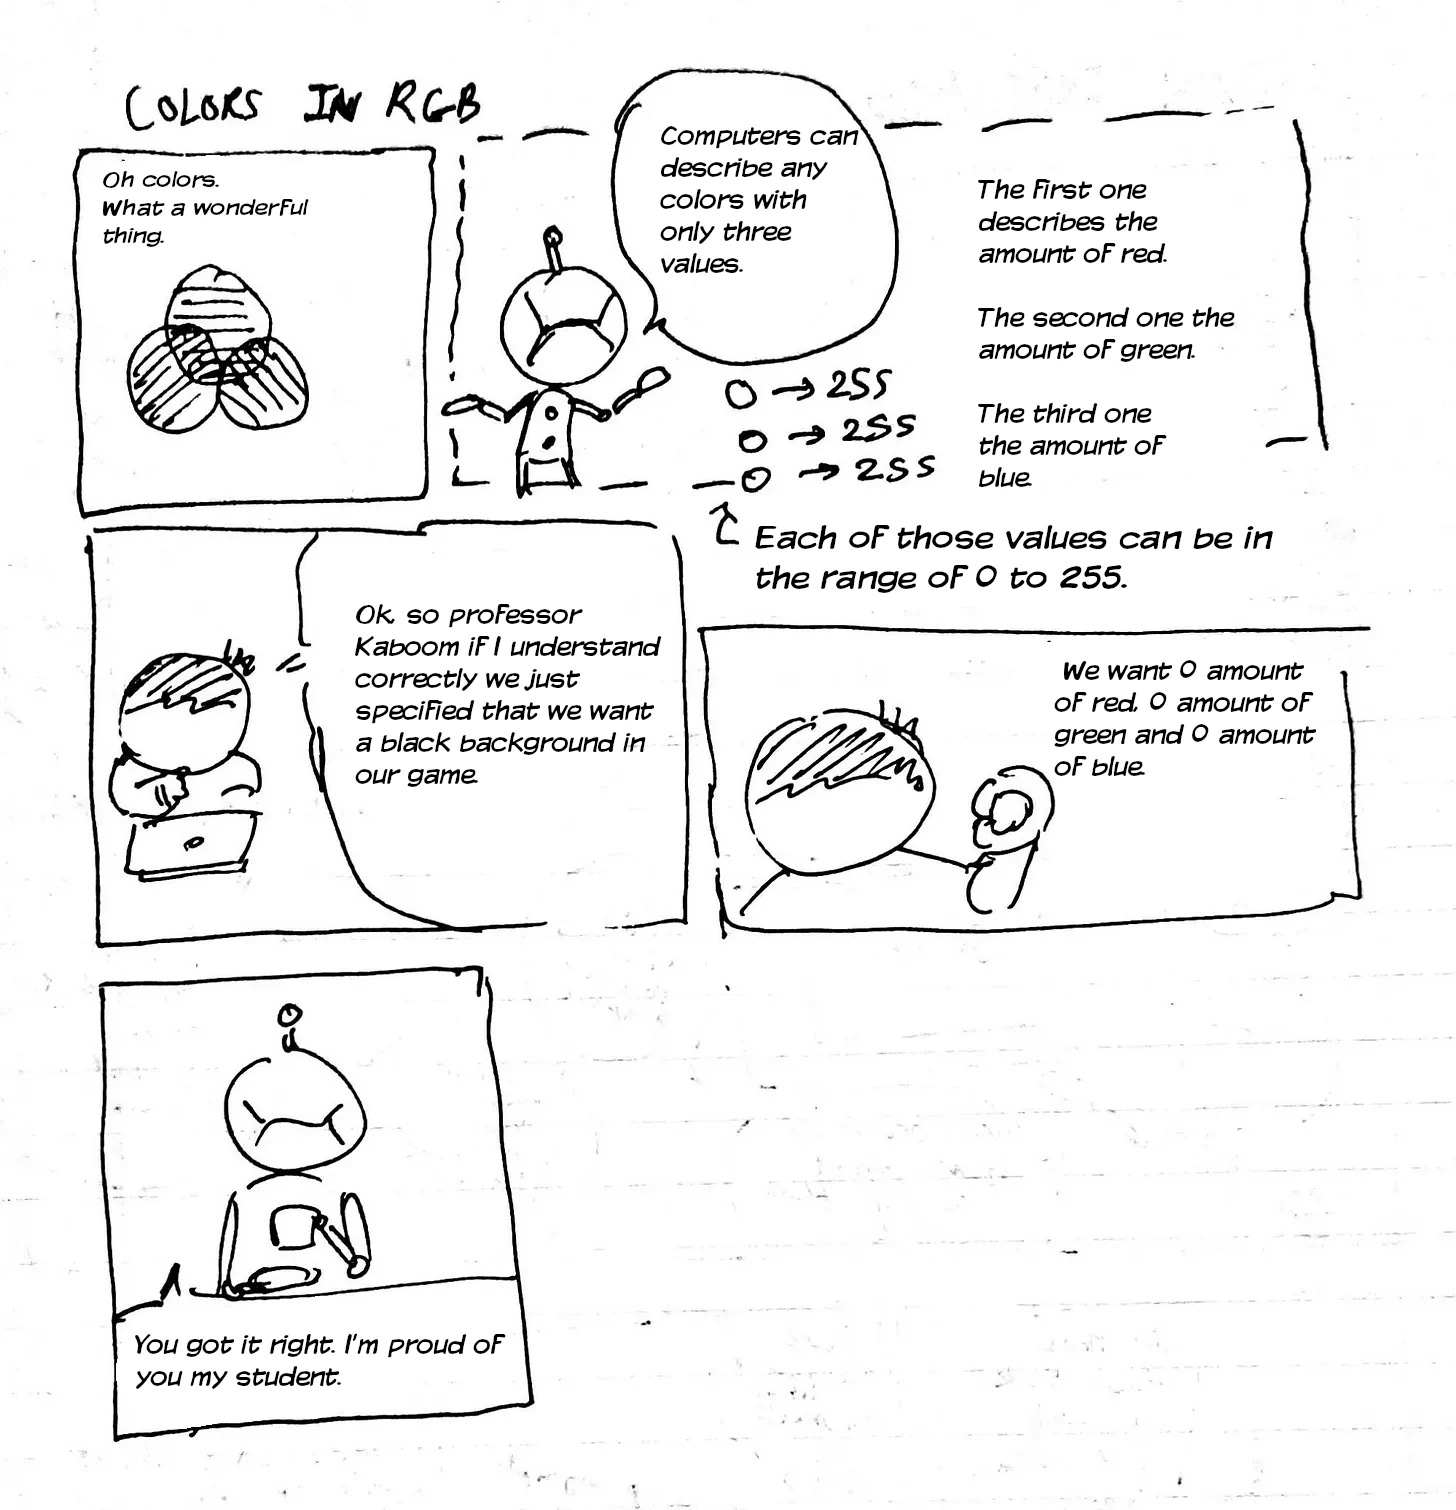
rect : used to draw a rectangle with the width and height you want. Here we draw a rectangle which is of the width 800px which is our canvas width.pos : used to position our game object on the canvas.color : used to specify the game object's color in RGB. area : used to draw a hitbox over our game object. solid : used to prevent a game object affected by gravity to push the one which uses this component."#ground" : used to tag a game object. Can be any string.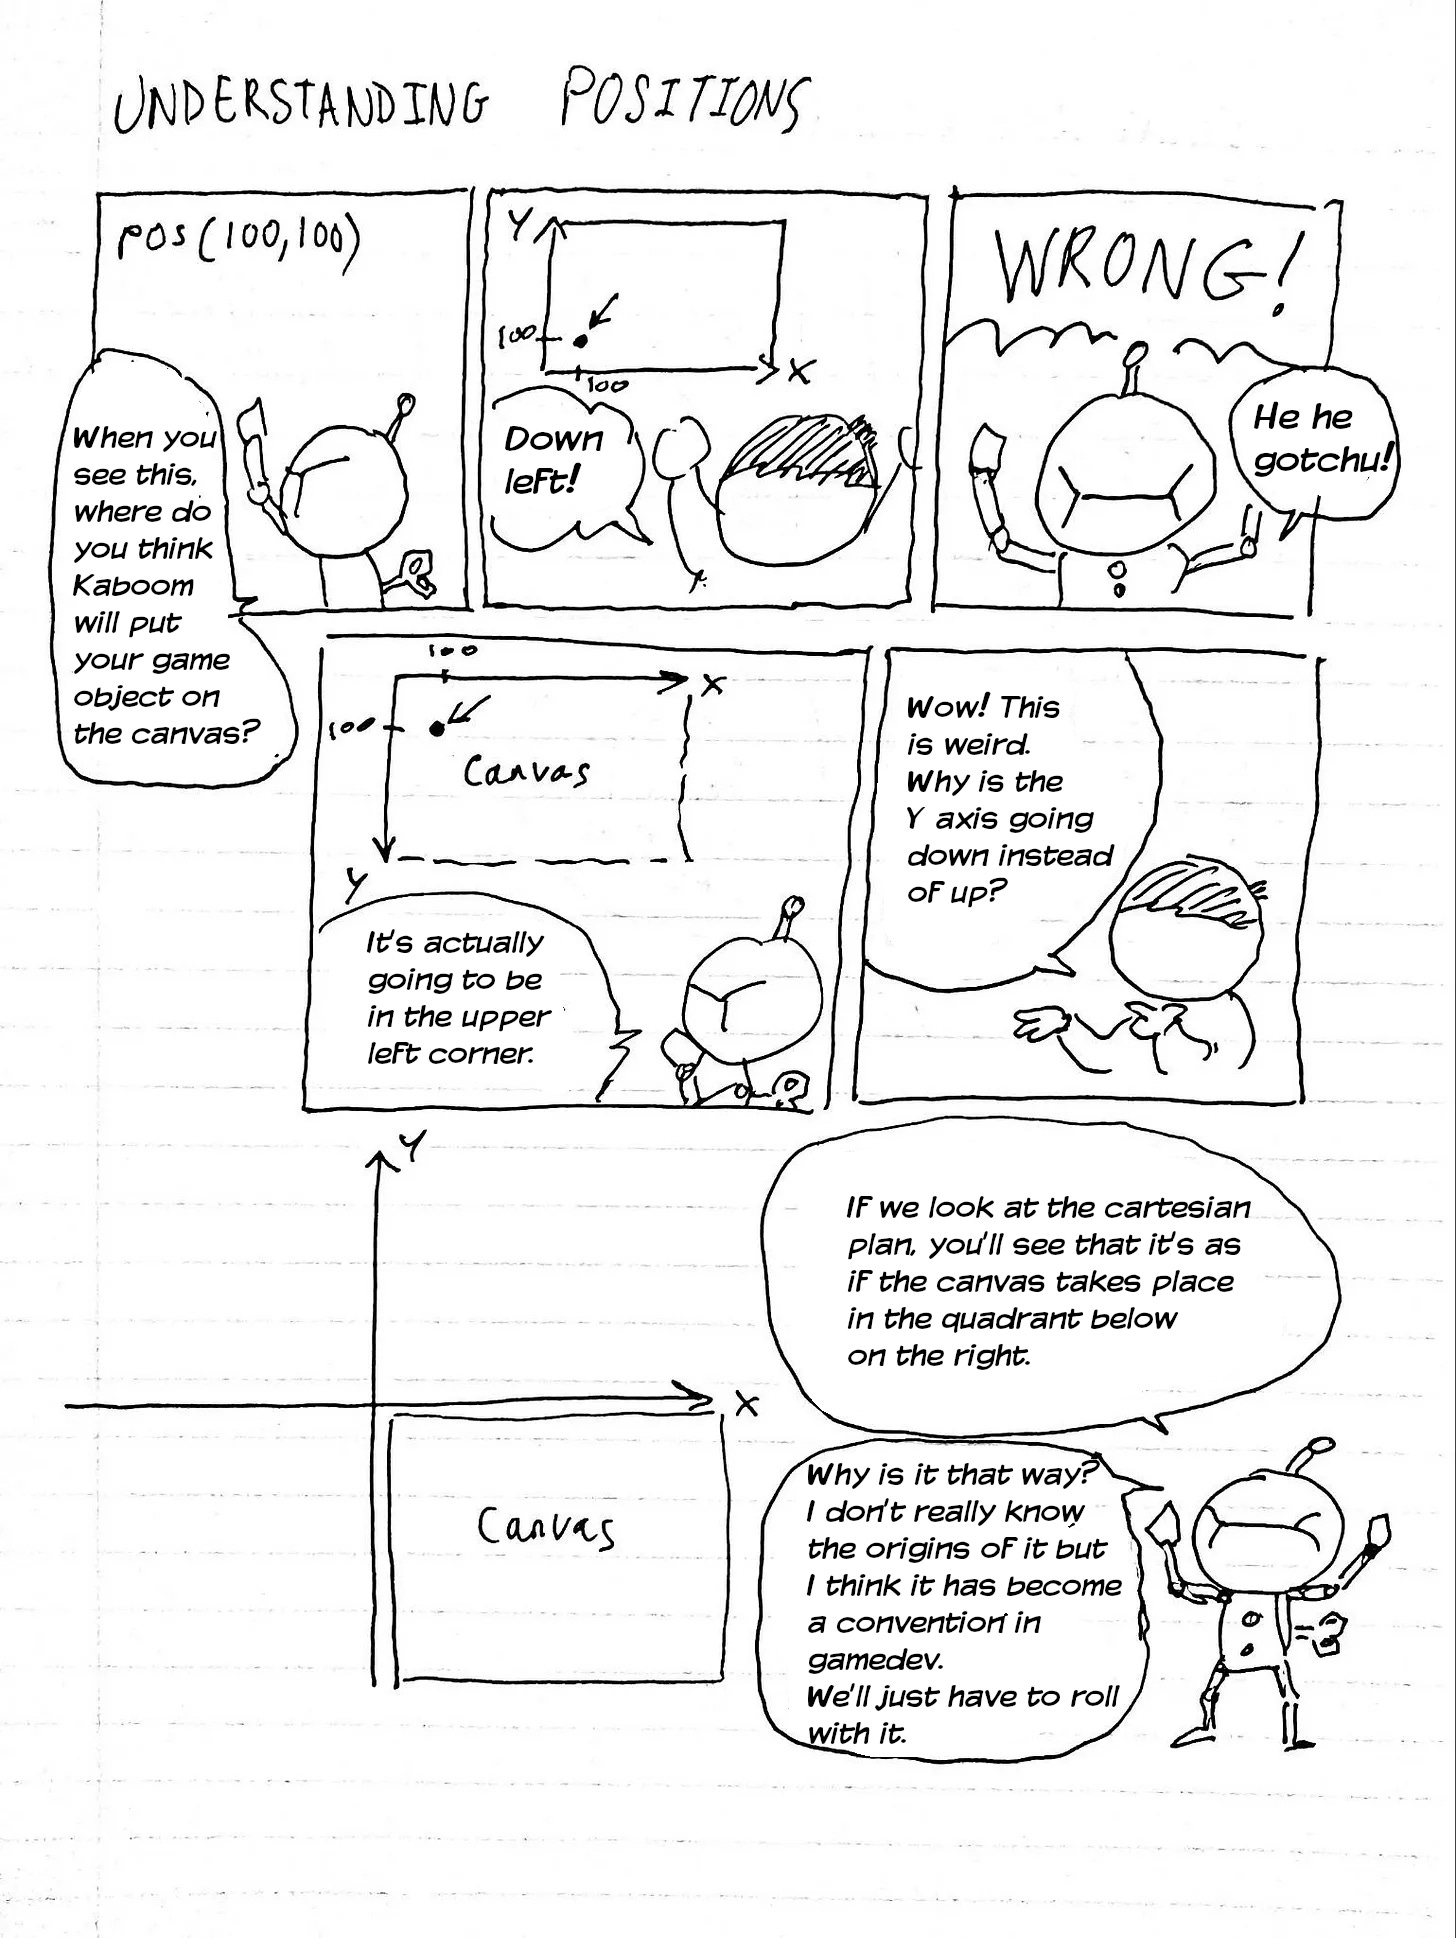
Now that you know how to make lists of components, we need to do the same for other objects we need. Here is the code you need to add :
const pointZoneCompList = [
  rect(800, 50),
  pos(0, 350),
  color(100, 100, 100)
];

const playerCompList = [
  rect(100, 100),
  pos(250, 150),
  area(),
];

const scoreCompList = [
  text("score: 0"),
  pos(0, 0),
  {
    value: 0
  },
];
The pointZone is going to be greyish and allow the player to know where they need to go to acquire points. You can see that the color component is used. The three values corresponds to r, g, b values respectively.
I want to point your attention towards the scoreCompList. First you’ll notice the use of the text component which allows you to display text. However, what is more interesting is that you can store data within your game objects. For example, here we have the score’s value set initially to 0. You can store arbitrary data in there. I could do the following (don’t actually add this in your code) :
{
  value: 0,
  name: "Something"
}
Later we'll be able to access this data to update the score.
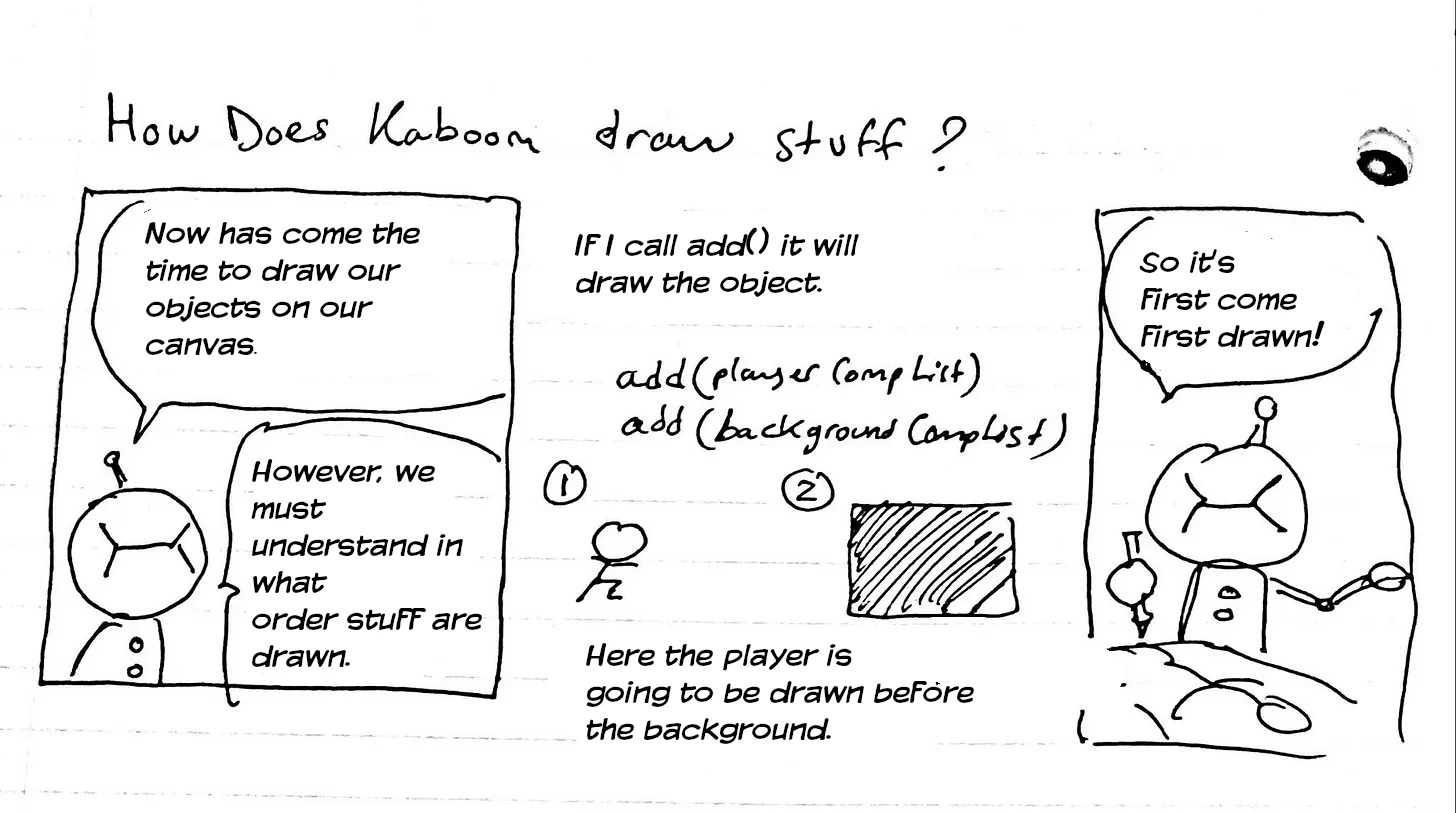
Now has come the time to actually create our game objects and make them appear on the canvas. To do we’ll use a the add function of kaboom which takes a list of components and returns a game object. Add the following code :
const groundObj = add(groundCompList);
add(pointZoneCompList);
const playerObj = add(playerCompList);
const scoreObj = add(scoreCompList);
You’ll noticed that we declared groundObj, playerObj and scoreObj to hold our game objects because we’re going to need them later do stuff with those objects. However, there is no need to do the same with the pointZone.
Making the player jump
Fortunately for us making a character jump in Kaboom is really easy. We first need to listen on when the player clicks so we can make the player jump. Kaboom has the onClick event listener.
The body component is what we need to add to make the player subject to gravity and collisions. We will add this component only when the user clicks. Note that we need this component to have access to the jump() method which makes our player jump.
Kaboom has this handy little method called use() which allows us to add components to a game object after it was created. The other cool thing is that it will only add the component once even if you call use() multiple times. This means that we can simply include playerObj.use(body()) within the onClick listener without worrying that body() is going to be added every click because it’s only done once. Write the following :
onClick(() => {
  playerObj.use(body())
  playerObj.jump()
})
Updating the score

The next step is to write the logic that determines when the player will earn points.
To do this I’ll introduce the onUpdate function which is ran at constant frames per second usually 60fps.
onUpdate(() => {
  if (groundObj.pos.y - playerObj.pos.y <= 150) {
     scoreObj.value += 1;
     scoreObj.text = "score: " + score.value;
  }
});
In this snippet we want to check if the distance between the player and the ground is below or equal to 150. If it’s the case we are in the point zone where we award points by increasing the value of the score. Note that we use the y positions of the ground and player because we are interested in calculating the vertical distance between the two.
Collision detection with the ground
We are arriving at the last step of this game dev tutorial. We need to check when the player hits the ground so we can restart the game. To not keep you waiting, here is the code you’ll need :
playerObj.onCollide("#ground", () => {
  scoreObj.value = 0;
  playerObj.pos.x = 250;
  playerObj.pos.y = 150;
  playerObj.unuse("body");
})
The onCollide function takes the tag of the object we want to check collisions with our player.
If there is collision it runs the arrow function we provided in the second parameter.
We reset the score.
We then put back the player where they were initially on the canvas.
Finally, we remove the body component because we want our player to be suspended in the air until they click.
We finished our game! Here is the full code :
kaboom({
  width: 800,
  height: 500,
  background: [0, 0, 0]
});

const groundCompList = [
  rect(800, 100),
  pos(0, 400),
  color(222, 255, 255),
  area(),
  solid(),
  "#ground"
];

const pointZoneCompList = [
  rect(800, 50),
  pos(0, 350),
  color(100, 100, 100)
];

const playerCompList = [
  rect(100, 100),
  pos(250, 150),
  area(),
];

const scoreCompList = [
  text("score: 0"),
  pos(0, 0),
  {
    value: 0
  },
];
const groundObj = add(groundCompList);
add(pointZoneCompList);
const playerObj = add(playerCompList);
const scoreObj = add(scoreCompList);

onClick(() => {
  if (scoreObj.value === 0) scoreObj.text = "score: " + 0;
  playerObj.use(body());
  playerObj.jump();
});

onUpdate(() => {
  if (groundObj.pos.y - playerObj.pos.y <= 150) {
    scoreObj.value += 1;
    scoreObj.text = "score: " + scoreObj.value;
  }
});

playerObj.onCollide("#ground", () => {
  scoreObj.value = 0;
  playerObj.pos.x = 250;
  playerObj.pos.y = 150;
  playerObj.unuse("body");
})
Link to kaboomjs.com.
Link to the game’s code on Replit.
If you enjoyed this tutorial in form of a comic feel free to subscribe to this newsletter. I make comics related to tech, computer science and software engineering.
Thanks for reading Nassim's comics! Subscribe for free to receive new posts and support my work.
Recommend
About Joyk
Aggregate valuable and interesting links.
Joyk means Joy of geeK