

Introducing: Windows 11 Context Menu In Advanced Installer
source link: https://www.advancedinstaller.com/adding-items-to-windows-11-context-menu.html
Go to the source link to view the article. You can view the picture content, updated content and better typesetting reading experience. If the link is broken, please click the button below to view the snapshot at that time.

Introducing: Windows 11 Context Menu In Advanced Installer
Written by Alexandra Stoienescu · July 29th, 2022
Ready, Set, Go!
We are very excited to announce the latest feature in Advanced Installer version 19.7: Windows Explorer context menu entries for Windows 11.
We are aware of how challenging it is to add menu items for unpackaged desktop applications to the new Windows 11 context menu.
You’d have to make modifications within your application’s code and re-implement the context menu using IExplorerCommand. Then, you have to create a sparse package to give identity to your package - and still have one last step to write some more code to register and unregister your MSIX sparse package. Seems like a bit of a hassle, right?
Advanced Installer’s Technical Approach to Windows 11 Context Menu
When it comes to adding context menu entries for your application, the Advanced Installer’s team has compressed the entire technical complexity of the Windows 11 context menu entries into a simple, straightforward GUI option that requires only one click to activate.
What do I mean by that?
No manual editing of the registry entries
Modifying shell registries through the Registry Editor comes with certain risks. No more risks when using the “New Shell Context Menu” toolbar button in Advanced Installer.
Automatic generation of the MSIX sparse package to grant identity to your application
You’ll need to just check the Windows 11 Context Menu checkbox, and your unpackaged Win32 desktop application is automatically given access to Windows 11 context menu feature. No need to worry about creating, registering, and unregistering the MSIX sparse package.
![]() Learn more about the MSIX Sparse packages in How to Create a Sparse Package article.
Learn more about the MSIX Sparse packages in How to Create a Sparse Package article.
Adding, Editing, Removing Items to Windows 11 Context Menu using Advanced Installer
Let’s see how you can enable this feature in Advanced Installer.
1. Update the Advanced Installer version to 19.7
Keep in mind that you can run Advanced Installer 19.7 side-by-side with your current version without having to upgrade your current project. Check out our Complete Guide - How to Upgrade to a Newer Version of Advanced Installer.If you are new to Advanced Installer, you can try Windows 11 Context Menu through our 30-day full-feature trial.
2. Go to the File Associations page.
To create a new Shell Context Menu, you can either use the New Shell Context Menu button from the toolbar or right-click and select New Shell Context Menu Entry.
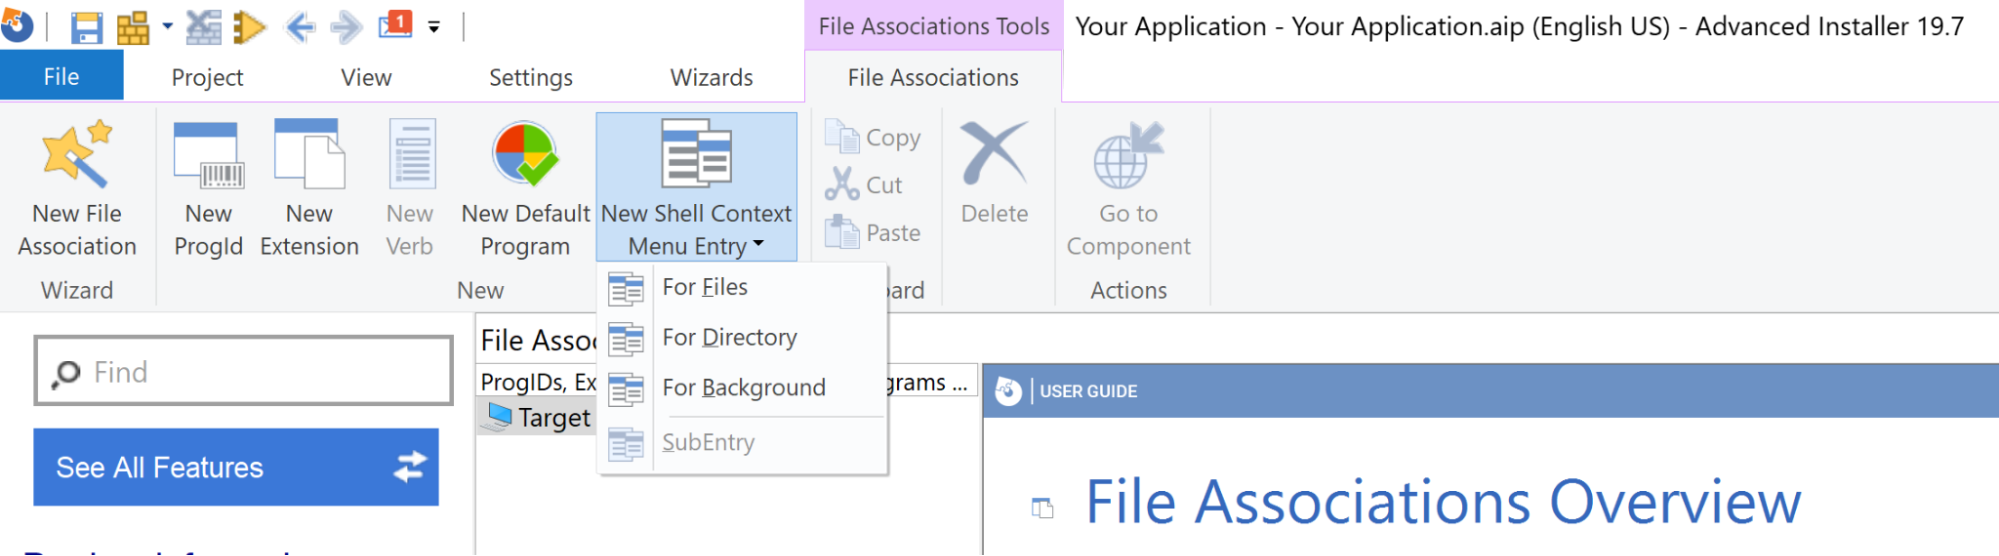
![]() The context menu items can be located in either the file, the folder, or the background context menu.
The context menu items can be located in either the file, the folder, or the background context menu.
3. Configure your Context Menu Properties
Here, make sure to enable the Windows 11 Context Menu option.

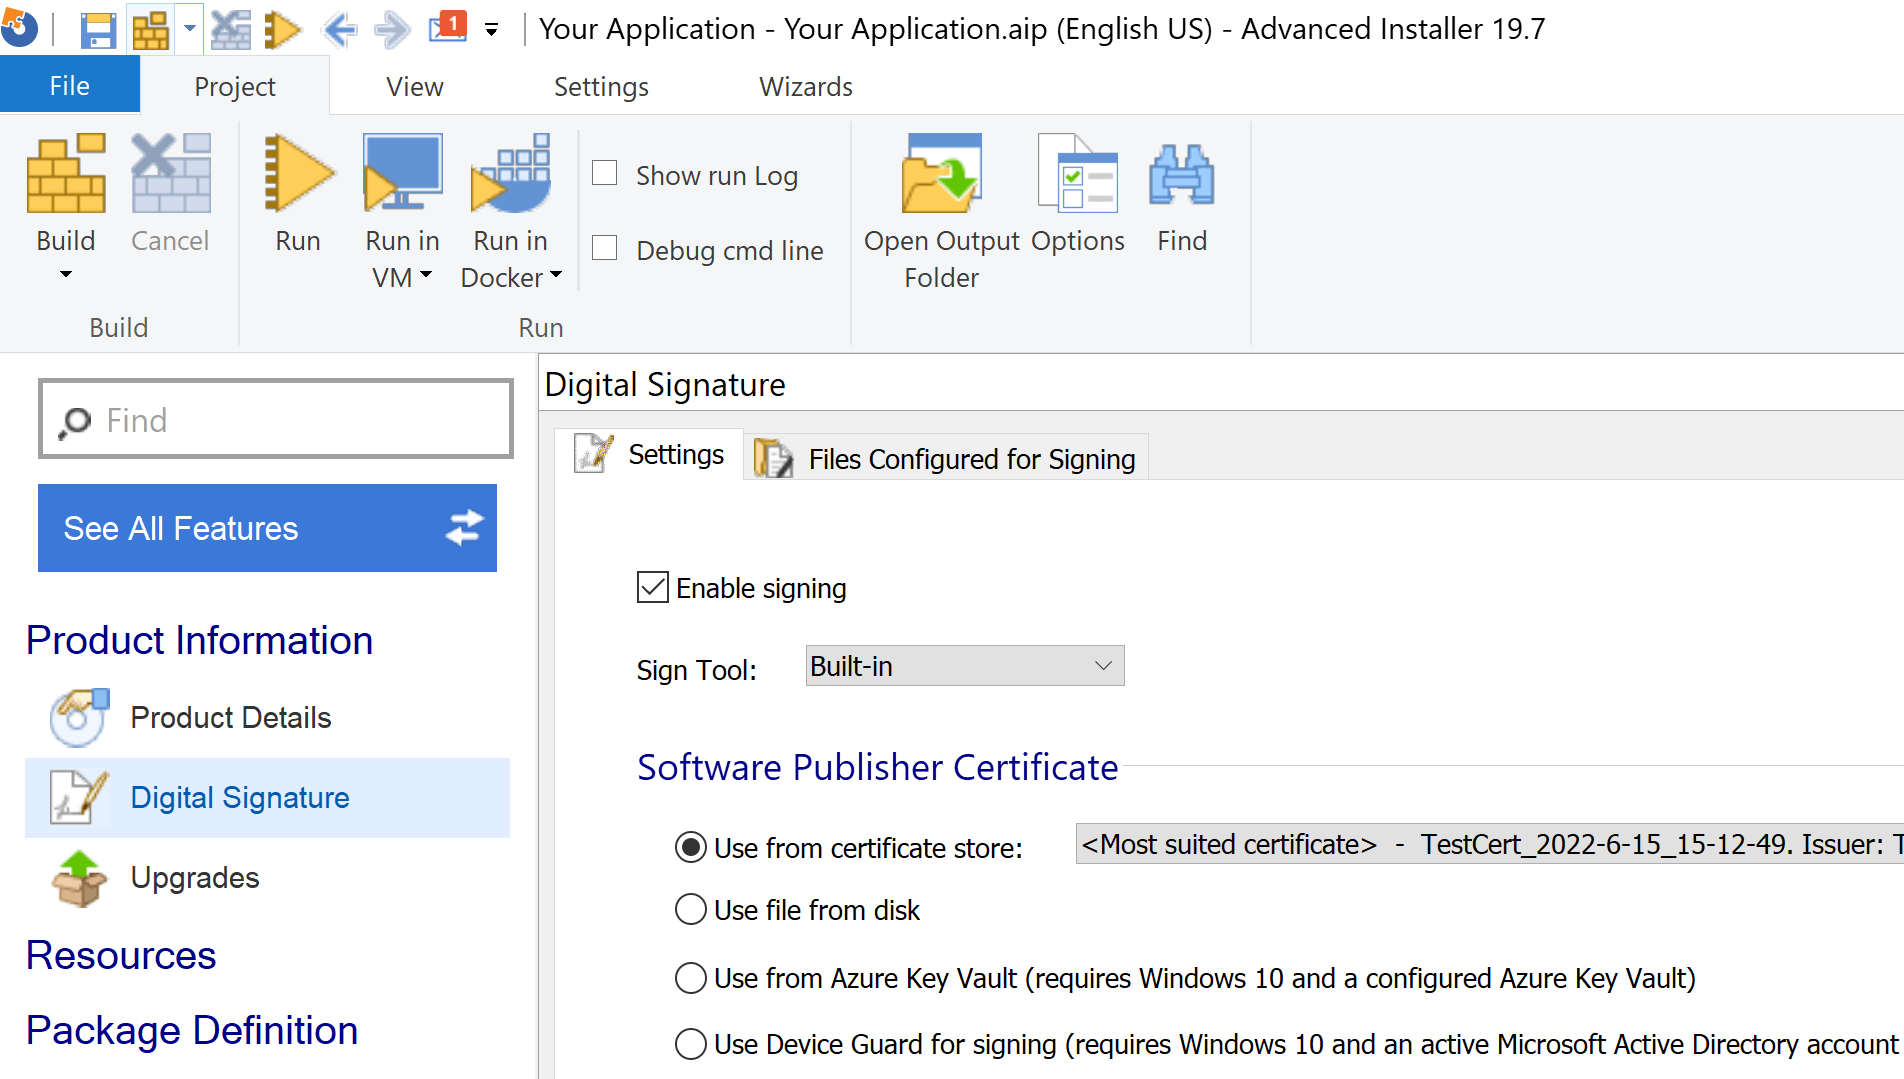
4. Digitally sign your package
Since we are using an MSIX sparse package to achieve this functionality, we need to digitally sign it. To do this, simply go to the Digital Signature page and choose your preferred certificate.
5. Build and install your package
And that’s it! As you can see, there are just four easy steps required for adding items to the Windows 11 context menu.
Adding Items to the Windows 11 Context Menu - Step-by-step Video Tutorial
Do you have any questions or want to suggest an improvement to the Windows 11 Context Menu? Please share your thoughts with us in the comments section below.
Recommend
About Joyk
Aggregate valuable and interesting links.
Joyk means Joy of geeK