
5

#夏日挑战赛# HarmonyOS - 实现签名功能
source link: https://blog.51cto.com/harmonyos/5526551
Go to the source link to view the article. You can view the picture content, updated content and better typesetting reading experience. If the link is broken, please click the button below to view the snapshot at that time.

#夏日挑战赛# HarmonyOS - 实现签名功能
推荐 原创作者:范颖
我刚接触HarmonyOS不久,接触到了很多不一样的东西。虽然遇到了很多问题,但学习本来就不是一蹴而就的,所以我决定从简单到复杂,所以这次我分享一个用canvas实现的签字效果。

签字效果的实现,以及签字相关的预览、撤销、清空等功能,目前还在学习HarmonyOS中,更多的功能还没有完善出来,后续我会对这个功能不断地完善。
- hml代码如下
<div class="container">
    <div class="title" >
        <text>
            canvas 签字功能
        </text>
    </div>
<!-- 刷新按钮 -->
    <div class="area">
        <canvas ref="canvas" class="canvas" style="width:{{width}}px;height:{{height}}px;"
                ontouchstart="touchStart"
                ontouchmove="touchMove"
                ontouchend="touchEnd">
        </canvas>
    </div>
    <div class="btns">
        <button class="btn" onclick="preview">预览</button>
        <button class="btn" onclick="revert">撤销</button>
        <button class="btn" onclick="clear">清空</button>
    </div>
    <div class="preview" >
        <image id="preview" src="{{image}}" style="width:{{width2}}px;height:{{height2}}px;">

        </image>
    </div>
</div>
- css样式如下
.container {
    display: flex;
    justify-content: center;
    flex-wrap:wrap;
    width: 100%;
}

.title {
    width:100%;
    height:60px;
    text-color:#000;
    opacity: 0.9;
}
.title text{
    font-size:24px;
    padding-left:10%;
    line-height: 50px;
}
.canvas{
    border:1px solid green;
}
.btns{
    width:350px;
    height:60px;
    align-items: center;
    justify-content: space-around;
}
.btn{
    border-radius: 0;
    border:1px solid green;
    width:20%;
    text-color:#000;
    background-color: #fff;
}
.preview{
    background-color: #fff;
}
- index.js中data的数据
data: {
    title: "",
    width:350,
    height:250,
    width2:0,
    height2:0,
    lineWidth:4,
    lineColor:'#000',
    ctx: null,  // 画笔对象
    startX: 0,
    startY: 0,
    endX: 0,
    endY: 0,
    storageSteps: [], // 记录每步操作
    isEmpty: true, // 画板是否为空
    image:"",
    message:"",
},
- 实现签字效果
在onShow生命周期里面初始化canvas画布,其中getBoundingClientRect方法是获取元素的大小及其相对于窗口的位置,ctx是画布对象。
onShow() {
    this.initialize();
},
initialize(){
    const canvas = this.$refs.canvas;
    this.canvasRect = canvas.getBoundingClientRect();
    this.ctx = canvas.getContext('2d');
},
- touchStart、touchMove、touchEnd函数以及draw函数实现签字效果。通过touch事件获取当前的坐标值,然后通过canvas的绘制路径的API来绘制经过的路径,每执行完一次touch事件把当前的画布记录下来供后面的撤销等功能用。
touchStart(e){
    this.startX = e.touches[0].localX - this.canvasRect.left;
    this.startY = e.touches[0].localY - this.canvasRect.top;
    this.endX = this.startX;
    this.endY = this.startY;
    this.draw();
},
touchMove (e) {
    this.endX = e.changedTouches[0].localX - this.canvasRect.left;
    this.endY = e.changedTouches[0].localY - this.canvasRect.top;
    this.draw()
    this.startX = this.endX;
    this.startY = this.endY;
},
touchEnd (e) {
    this.endX = e.changedTouches[0].localX - this.canvasRect.left;
    this.endY = e.changedTouches[0].localY - this.canvasRect.top;
    let imgData = this.ctx.getImageData(0, 0,this.width, this.height)
    this.storageSteps.push(imgData)
},
//绘制
draw(){
    this.ctx.beginPath();
    this.ctx.moveTo(this.startX, this.startY);
    this.ctx.lineTo(this.endX, this.endY);
    this.ctx.lineCap = 'round';
    this.ctx.lineJoin = 'round';
    this.ctx.lineWidth = this.lineWidth;
    this.ctx.strokeStyle = this.lineColor;
    this.ctx.stroke();
    this.ctx.closePath();
    this.isEmpty = false;
},
属性值
| 属性 | 描述 |
|---|---|
| moveTo() | 路径从当前点移动到指定点 |
| lineTo() | 从当前点到指定点进行路径连接 |
| lineCap | 属性设置或返回线条末端线帽的样式 |
| lineJoin | 属性设置或返回所创建边角的类型,当两条线交汇时 |
| lineWidth | 线条的宽度 |
| strokeStyle | 设置描边的颜色 |
| stroke | 进行边框绘制操作 |
- 实现撤销效果(根据storageStep中的数据来显示画布的信息,其中数据已经在touchEnd函数中保存)
// 撤销
revert () {
    this.storageSteps.pop()
    const len = this.storageSteps.length;
    if (len) {
        this.ctx.putImageData(this.storageSteps[len - 1], 0, 0);
    } else {
        this.clear()
    }
},
- 实现清空效果 - 清空storageStep数组中的所有数据。
// 清空
clear () {
    this.ctx.clearRect(0, 0, this.width, this.height);

    this.storageSteps = [];  // 清空清楚步骤记录
    this.image = "";
    this.width2 = 0;
    this.height2 =0;
    this.isEmpty = true;  // 清空标记
},
- 实现预览效果。预览效果就是把画布信息转化为base64,用到了toDataURL方法,返回一个包含图片展示的 data URI。
// 预览
preview () {
    const base64 = this.$refs.canvas.toDataURL('image/png');
    console.log(base64)
    const img = this.$element("preview");
    this.image = base64;
    this.width2 = 350;
    this.height2 = 250;
},
注意:
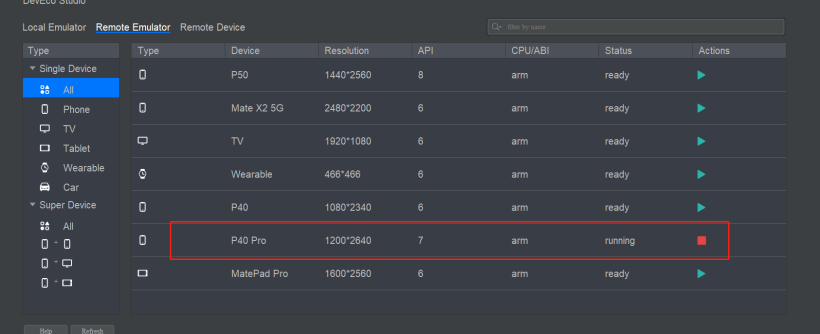
我在写这个效果的过程当中发现canvas中有一些函数需要较高的JS API版本才能实现,比如getBoundingClientRect和toDataURL函数,它们所支持的版本为JS API6及以上。如果版本过低,这两个函数会报错。该签名效果是在P40 pro上模拟成功的。
以上就是我实现签名效果的全部内容,最终效果如动图所示。虽然样式比较简陋,但是目前已经实现了签名的基本功能,后续我会不断地完善与改进,争取写出更完整优美的demo。欢迎大家一起研究讨论,希望本次内容能够对大家有所帮助。
更多原创内容请关注: 中软国际 HarmonyOS 技术团队
入门到精通、技巧到案例,系统化分享HarmonyOS开发技术,欢迎投稿和订阅,让我们一起携手前行共建鸿蒙生态。
- 打赏
- 1赞
- 收藏
- 评论
- 分享
- 举报
Recommend
About Joyk
Aggregate valuable and interesting links.
Joyk means Joy of geeK