

Harbor企业级私服Docker镜像仓库搭建及应用 - 包子wxl
source link: https://www.cnblogs.com/wei325/p/16468479.html
Go to the source link to view the article. You can view the picture content, updated content and better typesetting reading experience. If the link is broken, please click the button below to view the snapshot at that time.

Harbor企业级私服Docker镜像仓库搭建及应用
Docker Hub作为Docker默认官方公共镜像,如果想要自己搭建私有镜像,Harbor是企业级镜像库非常好的选择。
所谓私有仓库,也就是在本地(局域网)搭建的一个类似公共仓库的东西,搭建好之后,我们可以将将镜像提交到私有仓库中。这样我们既能使用Docker来运行我们的项目镜像,
也避免了商业项目暴露出去的风险。
Harbor作为一个企业级私有Registry服务器,提供了更好的性能和安全,提升了用户使用Registry构建和运行环境传输镜像的效率。虽然Harbor和Registry都是私有镜像仓库的选择,但是Harbor的企业级特性更强,因此也是更多企业级用户的选择。
Harbor实现了基于角色的访问控制机制,并通过项目来对镜像进行组织和访问权限的控制,也常常和K8S中的namespace结合使用。此外,Harbor还提供了图形化的管理界面,我们可以通过浏览器来浏览,检索当前Docker镜像仓库,管理项目和命名空间。
有关Harbor的架构,可以参考阅读这一篇《Harbor整体架构》一文,里面讲述了Harbor的6大核心组件构成,有兴趣的朋友可以一读。
下面列出了Harbor的搭建过程
下面就详细的基于Registry搭建私有仓库的步骤,首先我们可以准备两台服务器,这里我有两台Linux服务主机,他们的角色如下:
| 主机名 | 角色 | 备注 |
|---|---|---|
| 192.168.101.20 | Harbor镜像库 | 部署Harbor,推送镜像 |
| 192.168.101.21 | 镜像使用 | 从Harbor服务器下载镜像使用 |
两台机器记得关了防火墙
#查看防火墙状态
systemctl status firewalld.service
#关闭防火墙
systemctl stop firewalld.service
#永久关闭防火墙
systemctl disable firewalld.service
二、搭建企业级镜像仓库
2.1 一些准备工作
(1)安装docker
如果还没有安装docker,那么请先安装docker,已安装则跳过。
#安装需要的安装包
yum install -y yum-utils
#设置镜像仓库为阿里云的
yum-config-manager --add-repo http://mirrors.aliyun.com/docker-ce/linux/centos/docker-ce.repo
#更新yum索引安装包
yum makecache fast
#安装docker
yum install docker-ce docker-ce-cli containerd.io
#启动docker,设置docker开机启动
systemctl start docker && systemctl enable docker
docker --version
(2) 安装docker-compose
这里选择Github源:
curl -L https://get.daocloud.io/docker/compose/releases/download/1.25.0/docker-compose-`uname -s`-`uname -m` > /usr/local/bin/docker-compose
sudo chmod +x /usr/local/bin/docker-compose
docker-compose --version
(3)下载harbor离线包
下载地址:https://github.com/goharbor/harbor/releases
这里选择版本为v2.5.3,下载完成后传输到你的服务器上并解压,或服务器上直接下载,这里服务器上直接下载:
[root@localhost ~]# mkdir dev
[root@localhost ~]# cd dev
[root@localhost dev]# wget https://github.com/goharbor/harbor/releases/download/v2.5.3/harbor-offline-installer-v2.5.3.tgz
[root@localhost dev]# tar zvxf harbor-offline-installer-v2.5.3.tgz
修改harbor配置文件
#进入解压文件夹
[root@localhost dev]# cd harbor
#把配置文件harbor.yml.tmpl复制一份为harbor.yml
[root@localhost harbor]# cp harbor.yml.tmpl harbor.yml
#修改配置文件
[root@localhost harbor]# vi harbor.yml
修改harbor.yml文件内容
# Configuration file of Harbor

# The IP address or hostname to access admin UI and registry service.
# DO NOT use localhost or 127.0.0.1, because Harbor needs to be accessed by external clients.
hostname: 192.168.101.20

# http related config
http:
  # port for http, default is 80. If https enabled, this port will redirect to https port
  port: 80

# https related config
#https:
  # https port for harbor, default is 443
#  port: 443
  # The path of cert and key files for nginx
#  certificate: /your/certificate/path
 # private_key: /your/private/key/path

# # Uncomment following will enable tls communication between all harbor components
# internal_tls:
#   # set enabled to true means internal tls is enabled
#   enabled: true
#   # put your cert and key files on dir
#   dir: /etc/harbor/tls/internal

# Uncomment external_url if you want to enable external proxy
# And when it enabled the hostname will no longer used
# external_url: https://reg.mydomain.com:8433

# The initial password of Harbor admin
# It only works in first time to install harbor
# Remember Change the admin password from UI after launching Harbor.
harbor_admin_password: 123456

# Harbor DB configuration
database:
  # The password for the root user of Harbor DB. Change this before any production use.
  password: root123
  # The maximum number of connections in the idle connection pool. If it <=0, no idle connections are retained.
  max_idle_conns: 100
  # The maximum number of open connections to the database. If it <= 0, then there is no limit on the number of open connections.
  # Note: the default number of connections is 1024 for postgres of harbor.
  max_open_conns: 900

# The default data volume
要修改的点:
-
hostname:改为自己的ip或域名
-
https的注释掉,局域网下不需要
-
harbor_admin_password:设置密码,账号固定是admin了
2.2执行安装
[root@localhost harbor]# ./install.sh
安装完成,输入地址http://192.168.101.20访问,因为端口是80所以不需要输了,如果改了别的端口,则后面带上端口。
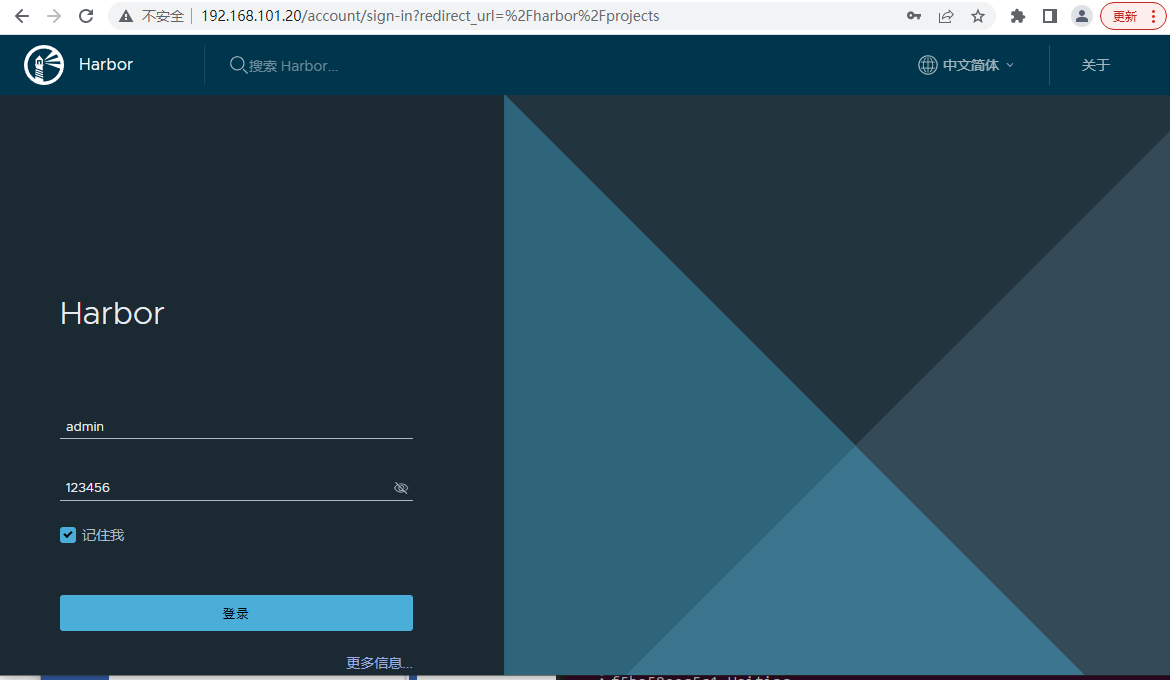
登录进去
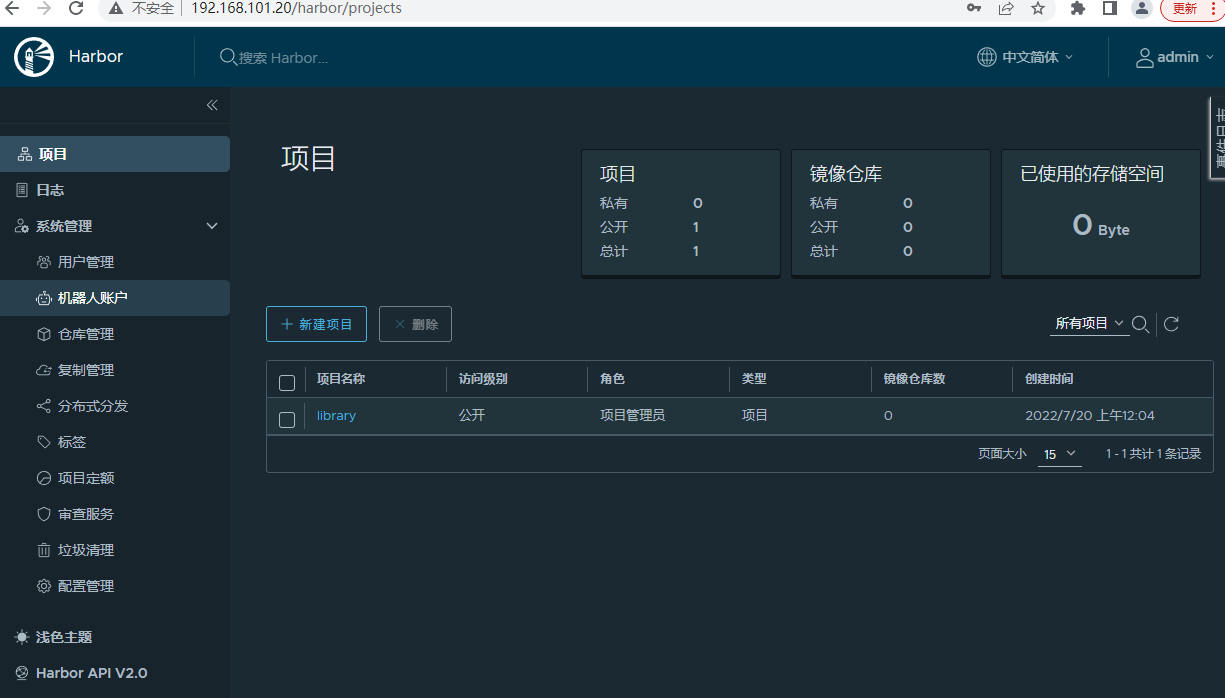
到这里harbor镜像仓库就搭好了,下面演示怎么用镜像仓库。
三、harbor镜像仓库使用
3.1新建项目
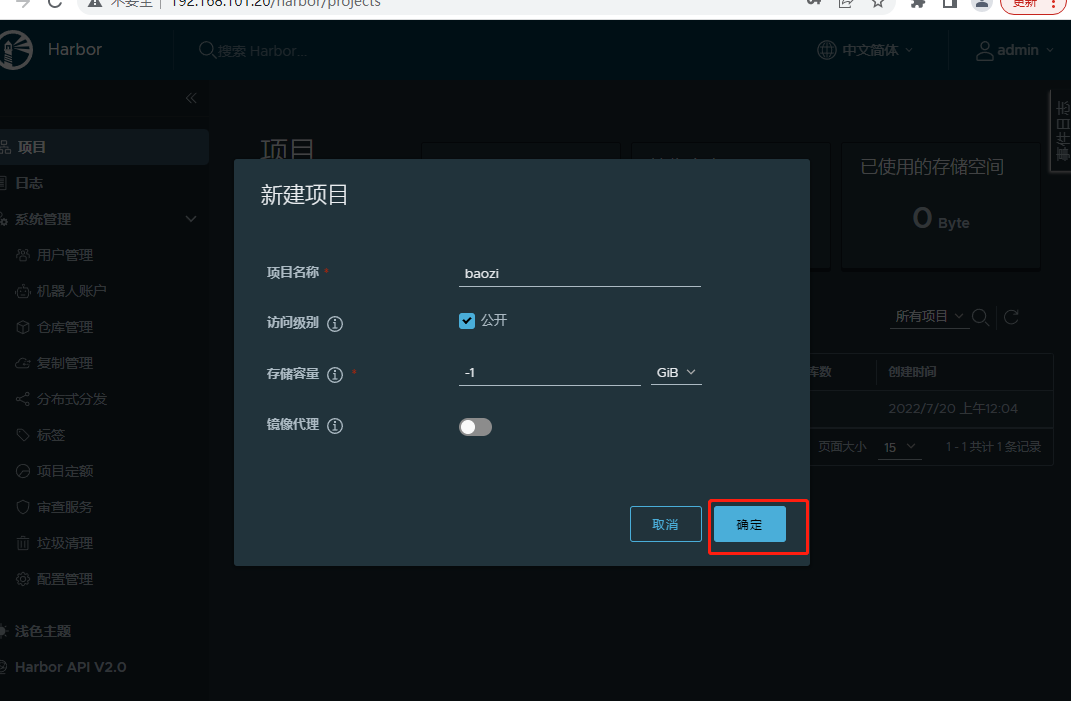
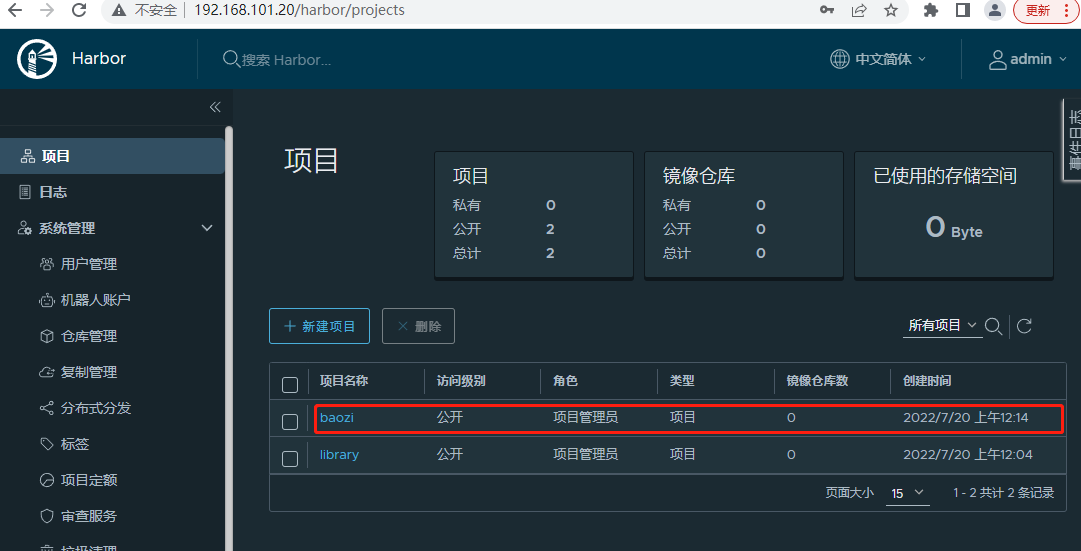
3.2登陆docker仓库
项目建好了,如何推送呢,首先推送的服务器要修改本机的配置文件并重启docker,注意重启docker前先重新加载配置文件。
vi /etc/docker/daemon.json
添加 "insecure-registries":[harbor地址:端口]
{
        "insecure-registries":["192.168.101.20"]
}
重启docker
[root@localhost docker]# systemctl daemon-reload
[root@localhost docker]# systemctl restart docker
然后登陆docker仓库
docker login<harbor所在服务器ip>:<端口>
然后输入用户名密码
[root@localhost harbor]# docker login 192.168.101.20
Username: admin
Password:
WARNING! Your password will be stored unencrypted in /root/.docker/config.json.
Configure a credential helper to remove this warning. See
https://docs.docker.com/engine/reference/commandline/login/#credentials-store

Login Succeeded
现在登陆成功了
3.3新建.NET6项目生成镜像推到docker仓库
新建一个.NET6项目,发布,在发布文件夹建一个Dockerfile文件,内容为:
FROM mcr.microsoft.com/dotnet/aspnet:6.0 AS base
WORKDIR /app
EXPOSE 80
COPY . .
ENTRYPOINT ["dotnet", "DoetNet6.Demo.dll"]
项目目录为:
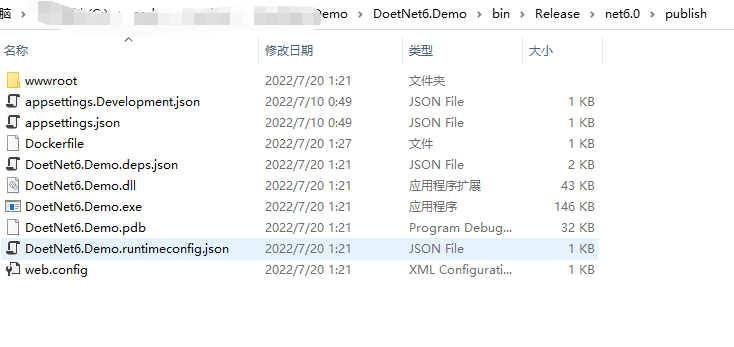
然后把这些文件上传到上面的192.168.101.20服务器的/wwwroot文件夹下
执行 docker build -t <镜像名> . 生成镜像,注意后面有一个点不要忽略。
[root@localhost publish]# docker build -t dotnet6demo .
然后成功生成镜像
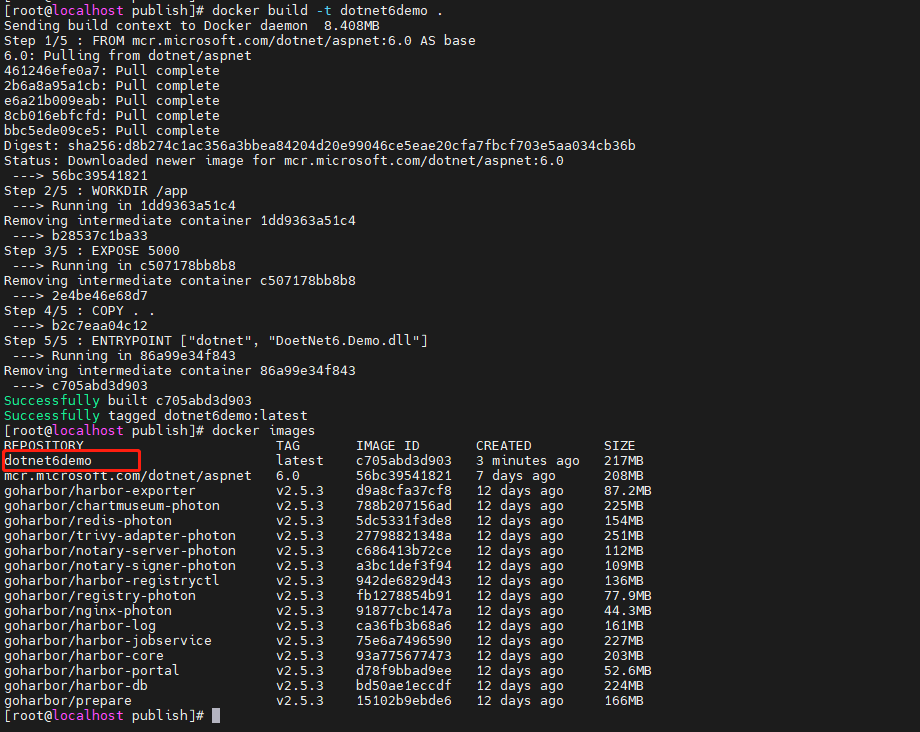
然后把镜像推到harbor仓库
给镜像打标签
docker tag <本地镜像名称>:<版本号> <harbor地址:端口>/<harbor项目名称>/<harbor的镜像名>:<harbor版本号>
推送到harbor仓库
docker push <harbor地址:端口>/<harbor项目名称>/<harbor的镜像名>:<harbor版本号>
[root@localhost publish]# docker tag dotnet6demo:latest 192.168.101.20/baozi/dotnet6demo:v1
[root@localhost publish]# docker push 192.168.101.20/baozi/dotnet6demo:v1
这时候我们的镜像仓库里面就有了
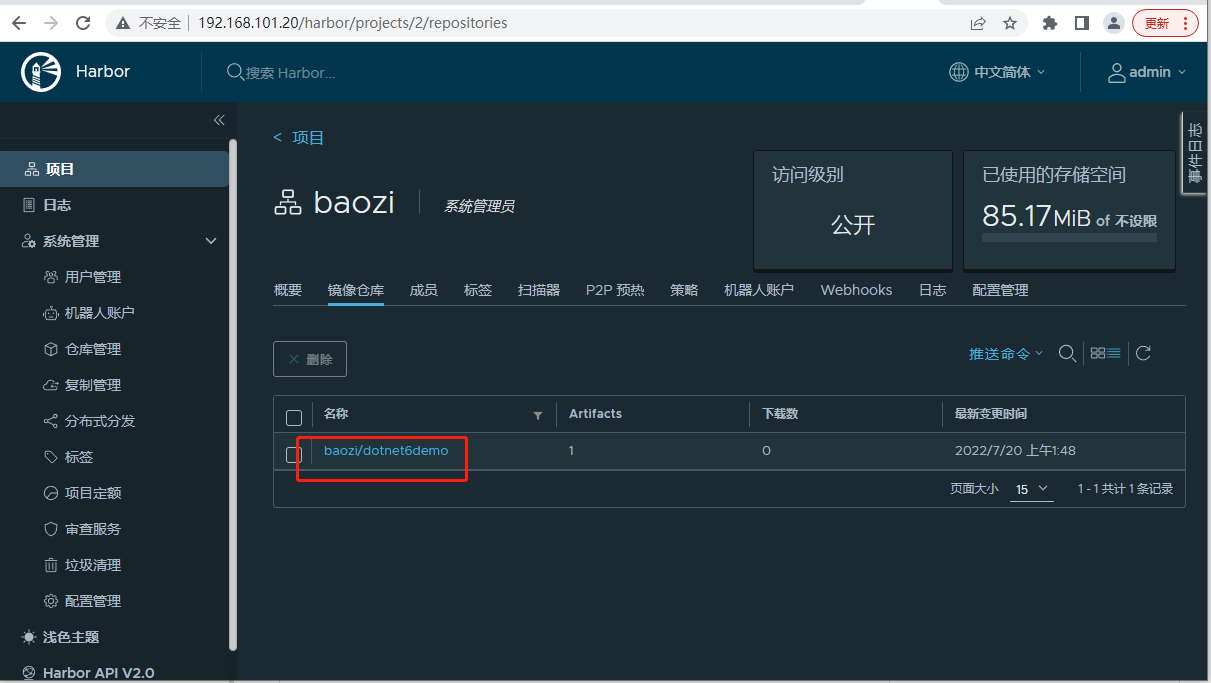
3.4拉取docker镜像运行
现在用另一台机器ip:192.168.101.21拉取镜像运行
首先安装docker,上面已经有了。
然后修改docker下的daemon.json配置,把habor地址填进去,上面也有了
vi /etc/docker/daemon.json
添加 "insecure-registries":[harbor地址:端口]
{
        "insecure-registries":["192.168.101.20"]
}
重启docker
[root@localhost docker]# systemctl daemon-reload
[root@localhost docker]# systemctl restart docker
docker pull <harbor地址:端口>/<项目名称>/<镜像名>:<标签版本>
拉取镜像
docker pull 192.168.101.20/baozi/dotnet6demo:v1

docker run -d --name dotnet6demo -p 5001:80 192.168.101.20/baozi/dotnet6demo:v1
-d:后台运行
--name:docker名称
-p:把本机的5001端口映射到docker的80端口
验证:访问http://192.168.101.21:5001

访问成功!整个harbor的搭建,镜像推送,镜像拉取运行整个流程就完成了!
最后有一点要注意的是:如果项目设成私有的,拉取镜像的服务器要docker login xxx登陆harbor才能拉取成功。
github下载harbor慢的话,这里云盘取:https://pan.baidu.com/s/1lZX_BDZpoYtKd6u4PzdrMw?pwd=8y6c
Recommend
About Joyk
Aggregate valuable and interesting links.
Joyk means Joy of geeK