

Improving Social Feature in Korean Learning App | UX Case Study
source link: https://uxplanet.org/improving-social-feature-in-korean-learning-app-ux-case-study-a104ceed4bb1
Go to the source link to view the article. You can view the picture content, updated content and better typesetting reading experience. If the link is broken, please click the button below to view the snapshot at that time.

Improving Social Feature in Korean Learning App | UX Case Study
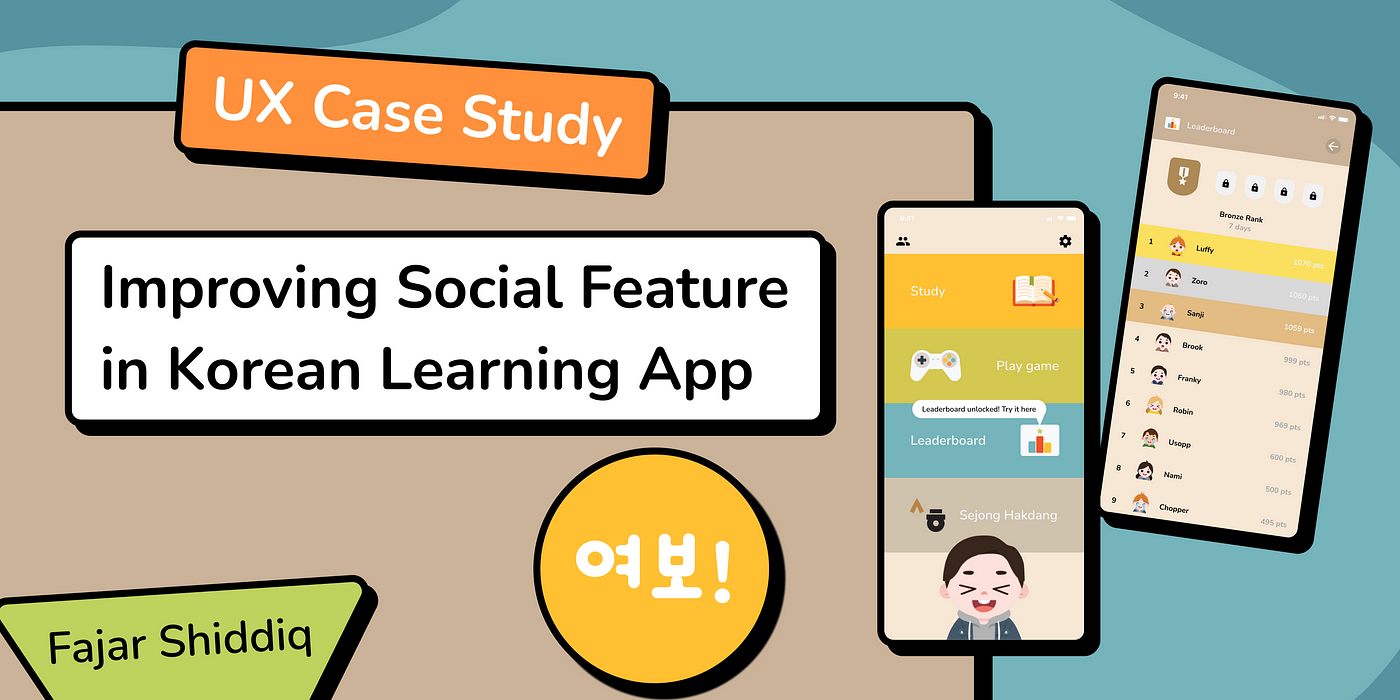
Disclaimer: This is an exploratory project, I do not have a professional contract with Sejong Korean Grammar or any institute related to the app.
The Intro
Say Hi
Hi there! Let me introduce myself first. So, my name is Fajar Shiddiq, my branding is Fajars, you can call me that too. I am a random person, like yeah, you can see from my Medium cover which seems very…poor design, isn’t it?
Anyway, I currently studying management at university but I also like to make design, UI/UX design like this one. I will tell you more about me on the way down, so, let’s go!
What You Can Expect from This Case Study
Unlike others who show the prototype of their project last, here, I show you my project prototype upfront! Maybe this can set you some expectations about what is this project about.
Final prototype:
You’ve seen the prototype, now what? What is this project about?
Korean learning App Sejong Korean Grammar lacks social features, I’m here to fix it.
Project Overview
I will answer your big questions early right now, so, here is the project overview.
What platform is this app I’m projecting?
It’s mobile, Android.Is this freelance, student, or exploratory work?
It’s exploratory, though I got the project reference from an online UI/UX class.Was this ever built?
Yes, this is a redesign project based on the real app called Sejong Korean Grammar.Is this a team project?
No, this is completely a solo project but I have mentors and a community who support me in the way.What is the timeline for this project?
15 May 2022–23 May 2022. I started to do the user research on 15 May and finished the final prototype (with iteration) a week later on 23 May.What is my role?
End-to-end UI/UX designer. From user research to usability testing and this case study.Is this product released? If it’s, how do I define success?
This product is just a prototype of solutions based on user experiences. I define success by how my provided solutions can positively impact users.What is this project outcome?
This case study and problem-solving prototype.
Background and Why (in the first place)
So, the background why I ended up making this project. Well, I have some experience in making UI design for mobile apps and websites, I also have some experience in graphic design, you can see my portfolio here. With that little experience, I started to focus on my career and future as a UI/UX designer, or product designer (I currently studying business, so…).
With my spirit rising to be a great UI/UX designer, I try to take some certification, online, of course. My first UI/UX certification is from Skilvul in UI/UX Design Mastery Class. I got an A+ grade in that class and has certified as a beginner UI/UX designer.
In that class, there was this one challenge about solving a problem from Learning Management System (LMS) app and I need to build a solution from the challenge. I did finish the challenge but it was not enough (it’s a kinda mini project), so, after I finished the class, I started to think about my next project.
I still use the learning app theme and started to research people who use mobile learning apps and what problems they are experiencing. The reason why I advanced with this learning app theme is that this is my first project. I can try to explore new things but for the first time, I think the best way to do it is by doing what I know already, and that’s it.
Besides making this project for my portfolio, my other orientation is to solve problems. I’m gonna tell you more about it in the research section, but for now, my objective here is purely problem-solving and implementing what I have learned. Of course, this is my way of learning and gaining experiences too. That’s why!
What I Do (roles and responsibility)
As I mentioned in the project overview above, my role in this project is as an end-to-end UI/UX designer, maybe all-rounded. I do all the work from planning to testing, from research to prototyping, from ideation to conclusion, and from within to beyond.
I have experience as a UI and graphic designer, so, designing is not a new thing for me (though I still need to learn more). The interesting thing that I do with my role in this project is that I have to do research and get to know the user, which is new for me. Also, the testing and all the feedback session was very fun and unique, I enjoyed this.
My responsibility as an all-rounded UI/UX designer was huge (or at least, many). I had to maintain all the process alone and let my creativity out even in the hard times. Another thing is I had to plan the activity as clearly as I can so that when one stage is done, I know what’s the next thing to do. If you ask what is the specific technical responsibility that I have, then the answer is all of it, like yeah, I do all the things in this solo project, and that was fun!
I’m grateful that I can do stuff alone like working on a project or anything. That’s why even with my other activities, I can still finish the project and wrap it up nicely (or not) with this case study.
By the way, if you find that this case study contains so many stories that I tell, then it is. I love to tell stories and you know what, even when you going to write on Medium, the button says “Write a story”. So, that’s why this case study is going to be more like a design story than a design process because as I said, it is!
Featured Facts about This Project
Why do I have this featured facts section in my case study? What for? Well, you probably know already that I love to tell a story and just like this, writing all the stuff while having fun because I love it. Why I have featured facts in the intro section because I want to share all the things that excited me while doing the project. Many things and stuff, just like this few I gonna share here (yeah, just a few from a lot!).
The Plan Book

This is my notebook, just that. The classic notebook that I love to write and plan anything there. I do most of my planning section in the book, also for hard sketch designing. There is nothing special in this book, but why do I feature this is because I love the book! Like I love it, I love to do anything in my notebook and that’s awesome! This may be too much, but my classic notebook should have its place since this is my design story.
Iteration Sketch

I’m in the intro section but I already show you my iteration sketch, so fun! SO yeah, this is my plan and hard sketch for the iteration design that I made after doing the usability testing. Why I show this first in the intro section is because I love it, designing stuff based on the feedback is great! That makes us as a designer can always bring the best product for users, based on feedback.
Behind The Case Study
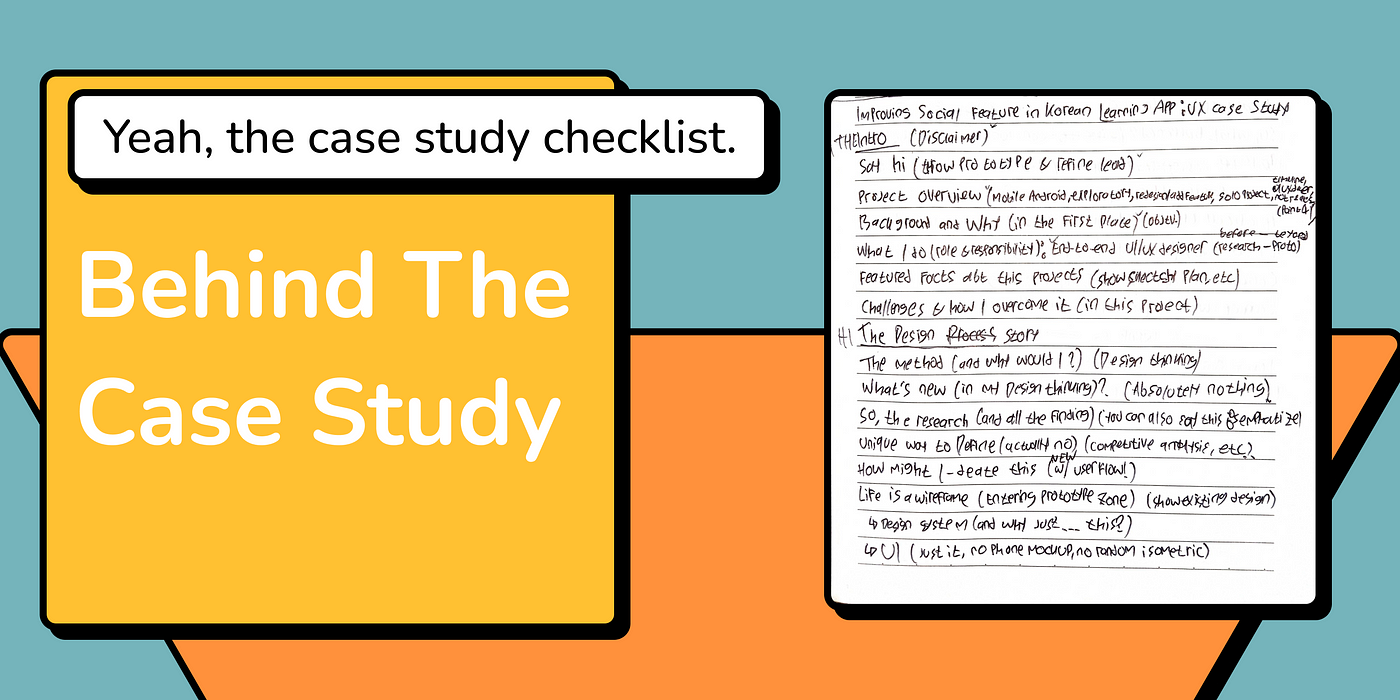
You probably think that this featured facts section is just some scanned image of my notebook. Well, that’s true. This behind the case study is just a checklist of this article, like yeah, this case study. So, I have done some research about how to write a good case study and then I try to build it in my way like this. What is unique about this is that my case study is story-driven and not like a regular-without-story case study. Well, I don’t know what a good case study looks like but here we are.
FigJam

I started to think that I show too many featured facts like why should I share all this stuff, but yeah after all this case study is my design story. So, FigJam is my favourite tool! I once love to use Miro for online whiteboarding, it’s pretty good by the way, but since FigJam is my new tool then I’m very interested in it. With all the features and its cute sticky note, FigJam is cool. Fun fact: I love hanging around using FigJam!
Challenge and How I Overcome It
Building new stuff, especially the important ones can be very challenging, and this project indeed gets the challenge itself. From so many challenges that I face while working on this project, here they are and how I overcome them.
Newcomer problem
They are so many things that were new to me while working on this project. Things, such as I don’t know how to find respondents to all the technical things, are relatively new for me. How I overcome it is by keep learn from other people and implementing it as I need it.Research and finding respondents
Honestly, I just have one respondent and tester for this project. Why? Because I don’t know how to find people that available to be interviewed and tested my project from research to testing sessions. It can be hard because I don’t have the budget to pay people to join my research. How I overcome it is I just use one person for this project but soon, I’ll try to reach more people in the community to join and ask them if they want to be part as respondents and testers.Focus issue
I’m working on this project alone and sometimes it can be hard to keep on track because of my issue focusing on things. I don’t know about this but I always try to keep the focus on whatever the external situation is. That just like, I’m still trying.Another thing that I forgot
There are so many challenges in every stage but I forgot! I’ll tell more about this in every project section so it will flow nicely with the stage. That’s all.
The Design Story
The Method (and why would I?)
When talking about the method in the design process, this is usually a part when people just show that design thinking poster out of nowhere. Well, I use the design thinking method too but I’ll tell you why I used it instead of explaining what design thinking is.
Yeah, I use design thinking as my design process method. I’m sure you already know what design thinking is so I won’t show you that poster from Interaction Design. But in case you haven’t know what it is, then let me tell you in a very simple way; design thinking is a process to understand the challenges and ideate solutions from them. Just it. Oh, one more, it includes these 5 stages; empathize, define, ideate, prototype, testing.
Why would I use design thinking as my method is because…yeah, it easier? I haven’t learned about design sprint, double diamond, or other design processes so I just use design thinking first since I am already familiar with it. Also, design thinking is flexible and non-linear so the way I use it can be customized as I like it wants to be.
What’s New (in my design thinking?)
Nothing.
This is just a regular design thinking process but I used it in my way so you might be familiar with it or else you will find it unique, I don’t know. Yeah so, I used this method relatively linear from empathizing to testing and I’ll also explain it linearly.
So, The Research (A.K.A empathize)

Here we go, the first stage in design thinking, empathizing. At this stage, I didn’t do a lot of work besides researching and extracting information, since my respondent is just one, of course. The empathize method like user research is relatively new for me but in the end, I can make it done and go to the next step. So, here are what I do in empathize stage.
User Research

My first step after defining that I want to build a case study and conduct research was reaching for the person I know and asking her to join my project as a respondent. My objective in this stage is to gain more knowledge about what the user needs in a mobile learning app. I don’t specify what the app is and just generally talking about any learning apps.
After confirming with my respondent that the research will be an in-depth interview held via WhatsApp call, I started to make the research kit such as questions and research scenarios. As you can see in the image above, I make several questions for the user about their experience using mobile learning apps. I also make the research scenario so the interview session can be wrapped up as planned.
The 30 minutes interview session is done nicely with the respondent giving so much information about her behaviour when using the mobile learning app and what is her needs in that app that enjoy her to use it.
So, the respondent currently using 5 language learning apps, mostly Korean. She also used many other learning apps besides language apps, she has experience in using mobile learning apps. One of her favourites is this app called Sejong Korean Grammar. It is a Korean language learning app that was originally built by the Korean institute itself called King Sejong Institute Foundation.

When I asked my respondent to explain what is that they like about the app, she told much information about the app’s advantage that makes it easier and good as a mobile learning app. She also explains what is the disadvantage of the app that will make it good to be fixed.
After the research session, I decided to advance with this app as my first project. I’ll break down all the data from the user that I get in the next stage, extracting data.
Extracting Data

This breaking down user data is how I change my direction in making this project. I got enough information about the user experience when using this Sejong Korean Grammar app and since I haven’t specified my project detail, then I decided to go with this one.
I converted data from the user research session into FigJam so I can organize it using sticky notes and make it easy for the next step. Here is some point that I find from the user research data and why they matter.
The user has used several mobile learning apps for various reasons
The user experiences using the mobile learning app make it easier to understand user behaviour and needs.The User actively uses mobile learning apps to learn Korean
Since my respondent is an active user of several mobile learning apps, I can ask her to tell what is the difference between apps A and B. Also, with the specific Korean learning type, the next step competitor analysis can be done clearly.The User loves the app because it’s from a credible institution
One of the reasons why my respondent enjoys using this app is because it’s original from the Korean institution itself. This can bring fact that users would love to use products from a credible source.The app has met user criteria for a language learning app
My respondent said that this whole app fulfils her needs as a language learning app. This can be a good reference for what the user needs and how to design the best experience for it.Gamification and cute graphic
Another thing that users love about the app is the fun way of learning, this app implement gamification features nicely and also with cute graphics. The colourful life on this app can make it easier for anyone who wants to learn Korean simply but enjoyable.The user wants the app to have social features
Though this app has met the user criteria for a mobile learning app, this app still lacks social features. The lack of social features itself is one of the crucial parts of a learning platform to have a community. My respondent said that if the app has social features like a forum and community, it can solve another problem for users who can’t learn alone.
There is so much more data that I get from the user research session, but those I mentioned above is the part that I highlight and found to be useful for the next stage.
Unique Way to Define (actually, no)

After researching and stuff then getting to know what the user wants, it’s time to define! As I said before, I decided to go with this Sejong Korean Grammar app for my project. I didn’t just advance into it because that’s the only choice, but because the problem is worth solving. A mobile learning app does need that social feature and now I’m defining all its problems.
I use three methods in this defining stage; competitive analysis, defining user pain points and defining how might I. Yeah, a very standard method but still cool! Here we go then.
Competitive Analysis

Why I decided to use competitive analysis as one of my methods is because it’s easier. You know it, right, just like getting some reference about what other products have that can also be implemented on ours.
In the case of mobile language learning apps, there are so many choices and reference out there but this time, I just chose three. How I chose which one is I’m going to compare it’s not that complicated. I choose these three apps because they are the competitor in the mobile language learning app industry, especially in learning Korean.
Duolingo
A language learning app that supports many languages and has lots of lessons.Kkuljaem Korean
Korean language learning app, build by an Indonesian Company.Podo
Korean learning app made by Korean language teachers.
And here is my analysis.
Duolingo

The first competitor is Duolingo. Duolingo is a learning platform (not just a mobile app) that focused on language lessons. Duolingo has lots of language choices like Korean itself. Its simple but funny interface makes it more enjoyable for anyone to use the app.
Duolingo has several social features like adding friends and a leaderboard with ranks. There is also some external forum that users can join. The leaderboard feature can be useful to give motivation for students to keep advancing until reach a higher rank.
These social features that Duolingo has can be useful as a reference to add because of their positive benefits.
Kkuljaem Korean

Another competitor in the Korean learning app market is Kkuljaem Korean, it is a Korean language learning app made by an Indonesian company. The interface itself is also clean, simple, and easy to use.
Kkuljaem Korean has a forum feature in which students can open a thread to ask questions or answer others. This app also has a QnA feature so students can ask directly about the lessons.
These features can be useful to add as a reference because of their generous benefits, but the differentiation of forum and QnA features can confuse users like what feature should I use to ask about the thing I just learned.
Podo

Podo is a Korean learning app that was originally made by Korean teachers itself. This app focuses on delivering lessons that are easy to understand for student and another feature that indicate this app is enhanced by Korean teacher.
Podo has a feature in which students can send a letter to the teacher and the teacher will respond and give feedback. This feature is a type of one-on-one social feature which can be good for students who love to have a chat with the teacher.
This feature has a unique benefit but still can’t solve the problem where users want to have a full forum and community with other students, not just teachers or mentors.
What Do I Get from Them? (competitive analysis results)

The leaderboard feature from Duolingo can be great so the student will have extra motivation to learn more and reach a higher rank. The option to add friends is also good for together learning.
Live forum and community from Kkuljaem Korean are also good. Students can ask anything they are curious about in the forum and get answers in real-time. This feature is great but needs to be maintained correctly so the community can stay on the right discussion path.
Writing a letter feature from Podo has its unique benefits. Having a chat with a letter is good for students so they can interact directly with their teacher and get feedback. As I mentioned before, this feature, however, still can’t solve the problem of users who want to have a live forum and community with others.
Getting data from the competitive analysis is helpful for the next stages since it is a reference to how competitors deal with the problem of lacking social features and designing a better user experience.
User Pain Points

So, I gathered data from user research and competitive analysis to define what is the things that users experience from the Sejong Korean Grammar App? What are their pain points? Here are all of them that I defined, I also got this data directly from user research.
Not enough interactions
Users feel that the app interactions are still not enough even though there are many features like play games and quizzes but still…not enough.No leaderboard, no rank
The rank system has been used in many products these days. As in other apps like Duolingo, users need more challenges to keep themself motivated and have a purpose.QnA feature is not effective, community feature is much better
Users feel that the provided QnA feature provided on the app is not effective since it’s just like a regular contact us form and does not guarantee would be answered.No discussion forum or social features. The social feature is core for students who can’t study alone
As users said, social features are crucial, especially in learning apps.
How Might I (solve the problem?)

Here we go! The how might I stage where I can generate solutions from user pain points above and bring it to the ideation stage. I generate each user pain points a solution and then prepare to vote it so I can bring voted solutions to the next stage.
By the way, if you look at the image above, then you’ll see that +1 stamp over three notes. Well, since I worked alone, then I think I should have some vote quotas that I can use to vote this how might I solutions. So, here it is all the solutions that I generate from user pain points.
Build more interactive features that users can enjoy
Vote: 0Build a leaderboard and give users learning scores so they can advance to the higher rank on the board, leaderboard style like Duolingo, with the rank
Vote: 1Optimize the QnA feature and change the name to contact institute so users don’t confuse with the feature
Vote: 1Build a discussion forum and social feature, user can add their friend and share learning progress, and maybe can also play games together
Vote: 1
With the problem has been defined, now it’s time to move forward to the ideation stage and ideate the best solution ideas!
How Might I-deate This (new with user flow!)

Holy moly, I’ve been writing this case study for days and this is just halfway done! So, yeah, this is the third stage of my design thinking process, ideate. After defining the problem in the define stage, now it’s time to explore more of the ideas to get the best problem-solving solution. Let’s go!
Solution Ideas (already in affinity diagram)

Well, here are my solution ideas that I generate from the how-might-I stage. I’ve already sorted it in the affinity diagram so it is all grouped in their respective categories.
As you can see on my sticky notes above, I ideate a total of eleven solutions ideas parted into seven categories whicareis; leaderboard, point-based shop, point-based rank, point and streak tracker, change QnA feature name, discussion forum, and add friends feature.
These solutions are oriented around three main problems; having social features, having a leaderboard and rank, and fixing already-provided QnA features, just like the how might I stage defined. Since I got some references from the competitive analysis stage, I now have a more clear purpose for making those new solutions and know what I’ll be building next.
Prioritizing Ideas (originally titled Prioritazion Ideas but Grammarly corrected it)

Now that my solutions ideas are organized, I need to prioritize which one should I do now and which others should I do later. I used this chart or something that contains 4 columns titled do now, do next, do last, and do later based on user value and development effort metric, something like that.
I’m not showing the chart but maybe you can see from my image above that some of the categories are separated. So, just to be clear, here are my ideas after prioritizing.
Do now: Leaderboard, add friends, point-based rank, and change QnA name.
Do next: Discussion forum.
Do last: Point-based shop, point and streak tracker.
Do later: -
So, why. Why I chose to prioritize that way and placed some important features like the discussion forum not in the do now column. Well yeah, as I write before that this metric is based on user value and development efforts, so I need to consider both factors when prioritizing features.
The discussion forum feature (internal and external) itself has good user value as I shortly explained in the competitive analysis stage, but it cost the development effort. Making a discussion forum and maintaining it so it always stays on the right path is not that easy for me right now, so I chose to do it next.
For the point-based shop feature, I think that’s not the focus right now so let’s save it for another time. Also, why I placed the point and streak tracker feature in do last prioritize is because I think I will have that point tracker on the leaderboard feature, and also I didn’t think that having a streak feature is the main focus right now, so…do last.
Another else is to do now. I mean, next, on the next stage.
User Flow

This user flow that I made on FigJam is extra wide! You can access the zoomable PDF file through the link here. It’s my bad that I had to make the user flow so wide and long, I don’t even know how I present this.
Well, so, this user flow has two main flows; unlocking the leaderboard and adding friends. I make it as one flow because it’s relatively on the same flow and also user can complete both tasks directly without changing the flow.
The flow itself it’s just a standard learning app flow like users studying to get points, then unlock the leaderboard, and then list their names by collecting more points. The add friends task itself it’s also a very regular add friends feature on any other apps people used. Yeah, just regular stuff.
And that’s it, I’m sure you will understand my user flow when trying the prototype. Also, this is the last stage that I do use FigJam, next up is Figma zone!
Life Is A Wireframe (entering prototype zone)

Yo, here we are, the stage has come to design it all! From wireframe to clickable prototype, I’m welcoming you to my next stage of design thinking method, the prototype stage! This process is indeed very long since I do so many things and take time, so, enjoy!
Oh, wait, well yeah, so, I’ve actually been struggling while making this prototype and there are a lot of challenges that I face at this stage. I just want to tell you that my prototype process is far from perfect but yeah, why not? So, let’s go!
Existing Design (like yeah, the original design)

This is the original design of the Sejong Korean Grammar app. I just show a few of them since these are what I gonna redesign and optimize in this stage. The original design itself is easy to use, also with its cute graphic, really user-friendly and seems seamless. I do enjoy using the original app while researching the features, actually.
So, in that image above, there are five screens that I show; the home screen, lessons list, about Sejong, QnA, and setting screen. Those are the main feature of the app and yeah, just the main features. As I said before that this original design itself has a nice design, I do want to improve some things like layouts and other stuff.
What to Do (planning plan)

After showing the original design of the app, now I want to tell you about what I’m going to do, at this stage, of course. So here it is; build leaderboard, build point system, build add friends feature, and fix that QnA menu. All of these are based on ideas that I prioritize before the ideate stage. Now, it’s time to make those ideas real!
Wireframe (time to design, finally!)

Oh yeah so, there are about 30+ screens of wireframe that I made, you can view the zoomable image here. So, here is the wireframe that I made for redesigning the app. What I show above in the image are some of the screens that are my core focus on building new features.
In that image, I show you five screens of the wireframe which are the home screen, point system overlay, leaderboard screen, add friends section, and redesign of that About Sejong page. These five screens are the main feature that I’ll build since they are my main focus on this project.
The wireframe itself, I think, is just a standard regular wireframe like just a low-fidelity black and white design, and yeah, that’s what makes a wireframe a wireframe isn’t it? Please do see the zoomable image on the link above if you want to see all the screens.
Design System (and why just…this?)

Here it is, my design system, all of them, really, just this. I know my design system is not that much but I think it’s all enough, I need typography and colour style and use them all over the place, like yeah…just it.
So I’m using this concept or what is it called atomic design system, something like that. I made three organized design systems which are the atom itself, the molecule, and also organisms. For the atom system, I have that typography, colour pallete, button style guide, input field, and icons from Material Design. I didn’t make my icons because this is my first project so…Material Design then.
For molecule and organisms system, I don’t know man, I combined all of it as you see in the image. But yeah all the component that I make is still useful, that’s including; the header bar, status bar, and pop-up menu. There is more of the system like colourful graphics and others that I didn’t redesign, just use the previous design.
UI 1.0 (the first version!)

You can view the full UI in this zoomable image. Here it is then, my user interface design for the new app! After making all of that wireframe before, and then building the design system, now my UI has been finished! By the way, you might be asking why my UI has that 1.0 version? Well, that’s the original version and not the after-iteration one.
So yeah, in this first version of UI, I made 30+ screens based on the wireframe and user flow. I made that in high fidelity and make sure that it’s ready to be prototyped. The overall design it’s just the same as before but added many new features! Here are all of the new features that I built based on the solutions made in the ideation stage.
New Home Screen

This is the new home screen that I redesigned from its original version. This new home screen has a modern and compact style and also still uses colourful matching colours. The use of icon here remains the same but I had to change the setting icon into that filled icon since I need to make it sync with the other icon which is that friends menu.
This new design is based that I want to add a new feature which is a leaderboard and friends menu. Why I place the leaderboard menu on the main screen as a card and the add friends menu displayed as a small icon like setting is because I want to make the leaderboard feature clear since it’s one of the main feature users can see how they rank after studying.
Another reason is why I place add friends menu as an icon because it’s a side option where you can add friends and have a chat with them. The icon placement which is on the upper left side of the screen is easily recognized by users and brings familiarity.
I also made that indicator bar or tutorial bar or whatever the name is, which you can see on the right screen above, the bar tells users that a new feature has been unlocked and will be triggered automatically when users reach some point in their learning process. I also move that user’s avatar from the bottom right side to the bottom centre, this is to bring more balance to the design.
Optimized QnA Menu

I hate the previous QnA feature in this app. Yeah, the feature name was QnA but when you click it, it’s just some kind of contact form that doesn’t guarantee answers if you asking though. From the name of the feature to the ineffective placement make me think to move this stuff into another place. And so, I moved and combined it with the About Sejong menu.
The reason why I decided to combine it is that they are related, like yeah, you can read who is the app maker and have the option to contact them, as I said, this QnA feature just like a contact form.
I finally was able to redesign it and make a more efficient layout on the home screen and the About Sejong screen. It also makes sense for users if they want to ask something to the institute they’ll know the contact form should be on the about menu. And that’s it.
New Point System

When deciding to make a leaderboard feature, there is one plan hole which is how it will work? Of course, if you’re making a leaderboard then you need to have a point system where all the users can collect points and rise higher on the board. And so, here it is, the point system that I made for the app!
Users can get points by finishing lessons, winning games, and other interactive mode the app provided. The points users get after completing those tasks is different, users will get different amount of points in every lesson or game they are completed. For the number of points itself, I haven’t decided how much should users get after completing this and this, but it’s maybe around hundreds of points per task or more.
This point system came along with the leaderboard feature so they are standardized like other apps that have the same feature.
Rank and Leaderboard

One of the main features that I add to this redesign project, is the rank and leaderboard. Here is the leaderboard feature that I’ve talked about all this time, this new feature, with its colourful graphic and easy-to-use style, is all the leaderboard this app ever needs! Well, at least according to me.
The leaderboard style, well, if you noticed, seems like Duolingo one, and yeah I tell you Duolingo is my reference for this project. The leaderboard has five ranks that users can reach using weekly rank-based, just like Duolingo. If you don’t have any idea of how weekly rank works then it’s simply like this, you entered the top 10 of the week on your rank, then next week you’ll be promoted into the next rank, reach the top 10 of the week and users can process their journey trough all five ranks; bronze, silver, gold, platinum, and diamond.
Another thing that this feature has is the displayed points. Since I can’t make the point tracker in this version I think displayed points on the leaderboard can help users know how much their points are. Users can also see other users’ points and make some challenges for themselves to bring motivation and reach number one!
Add Friends Feature

Yo finally, the social feature! This add friends feature is the most anticipated feature after the leaderboard above, this is one of the main solutions that I implement as a new useful feature. And yeah, as you can see, the add friends feature or I can say the friend’s feature has some simple interface but is familiar to users.
The page contains the search friends feature, users ID and information on how to use it, and the friends list that users can have the option to chat with all their friends after added.
To search for friends, users can paste their ID in the column or simply type their account name and choose from the search results. On the search results screen, the interface is simple too, just like the people list on the leaderboard but with add friends button and their ID to make sure users add the right one they’re searching for. So yeah, that’s the add friends feature that seems quite familiar for users because it’s just like the regular friends feature in other apps.
Play with Friends (chat and games!)

After you add your friends to the app, what’s next? Well, you can have a nice chat with them, like yeah, chatting! You can send them your progress or tell them about your lessons recently or just chat around with your friends asking how are they. The chat bubble colour and the interface is also simple with not so much bright colour, just like chatting in another app!
Another thing you can do with your friends is play games! Together! Did you notice that invite to game button in the header of the screen? Yeah! Users can ask their friends to play games and click that button to choose the best games and challenge them all! The game concept here is a simple quiz game just like the lesson exercises, but it will have many options of games of course, with different difficulties. After users won the game with their friends, users can get some points that directly add their points on the leaderboard, this is one of the ways to gain more points!
That is all of the main new features that I built on the app based on generated solution ideas. And below this, is the before and after images of how the app looks before and after I redesign it.
Before and After

The home screen! As I explain already about what are the new features added here, now is to compare it with the old original design. So as you can see, I redesign the menu layout so it looks more modern and has clearer text to see, I mean with a bigger font size. The user avatar is now centred and smaller because of its compact design style.
Since the buttons are now bigger, it does optimise all the menu interfaces and increases button clickability. Users now can easily reach the menu button from either right or left screen, simplified.

New pop-up overlay design. I redesign this pop-up overlay with some new stuff like adding the point system in some pop-ups, increasing colour thickness so the text is more readable, and also adding that cross/close button if case users don’t want to directly move to another page.
This new pop-up overlay design is also slimmer in the size and has compact content displayed. The reason why I change the size is that it will look more pop! Like, pop-up! Yeah, something like that, but really, I like compact interface design.
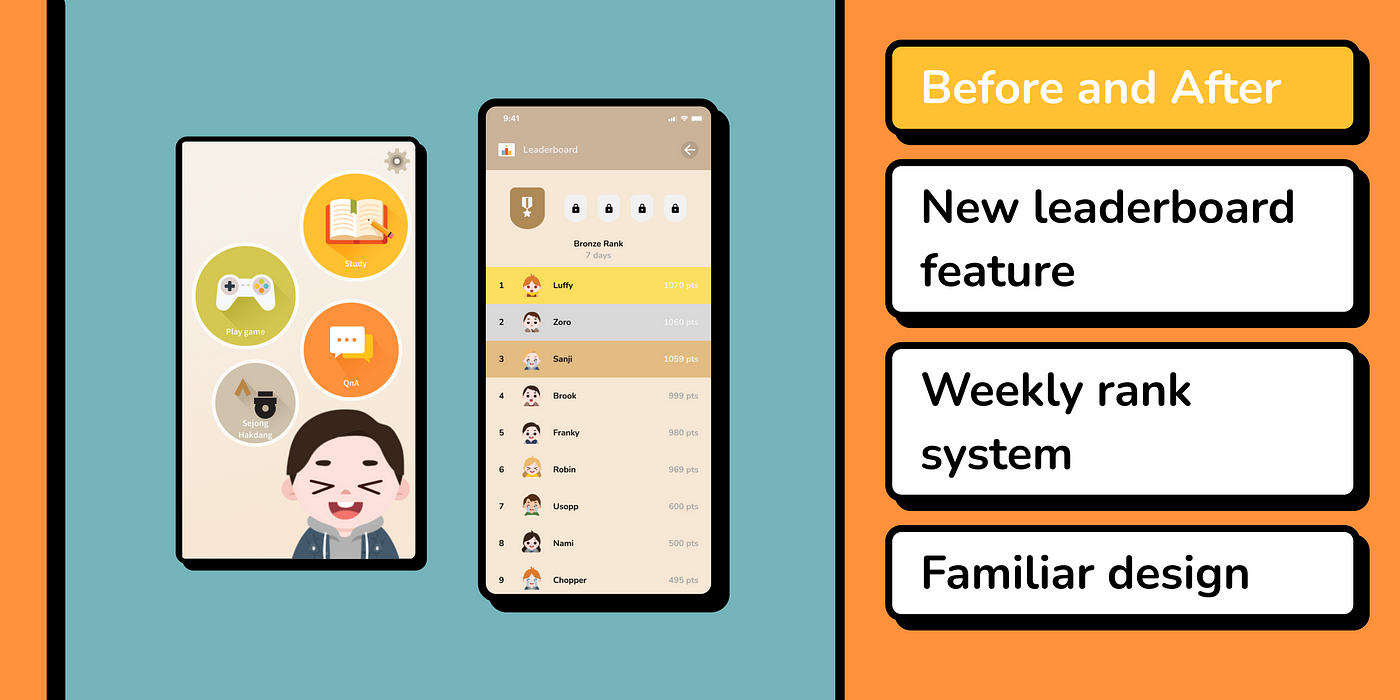
New leaderboard feature! This is a very new feature so I’m not showing any new screen on the before side. The design references of this leaderboard feature as I said in the new feature section is yeah, based on the Duolingo leaderboard. I redesign its style with a new layout and change the colour following the app theme colours.
I added a weekly rank system where users can raise their rank every week simply by reaching the top 10 of the board. The rank icon design here is still simple but of course, there should be an improvement for the next development.
This leaderboard feature indeed has a familiar design which makes it easier for users to understand the shown information. Nice colours match and the simple interface also add an easy-to-use point.

The next new feature that I decided to show in this before and after section, add friends features! This is the social feature that I generate from the solution ideas. Well, I know that many other social features can be implemented on this learning app, but you know, I think that friends feature like this can be great since it has some other features included as having a chat, studying, and playing games with friends features.
Users can add their friends using ID or just directly search their friend account names. The ID system here is simple, because it’s randomly generated and not changeable, if users want to have a custom ID, then they can simply change their account name because the function of the social feature is the same.

Here it is, the QnA feature redesign. As I explained in the new feature section, I did change the QnA feature name to ask questions and move the menu into the about Sejong menu because it’s kinda related there, like a contact form where users can ask anything to the institute.
I combined it with the about Sejong menu and renamed it because yeah as I explained, the previous QnA feature doesn’t seem like QnA at all. I mean, it is just like a regular contact form so I decided to optimize it.
Prototype 1.0 (all the UIs but clickable!)

Let’s go! Access my first version of this project prototype using this link right now! Oh yeah, I already embed the Figma prototype link in the early section of this case study and I won’t embed it again here because I know it, it can cause so much lag! Well, at least for some browsers it can cause a laggy experience. So let’s go, just click on the link and experience my project prototype!
Anyway, this first version of the prototype is the final one that I presented to the respondent in my usability testing session, this prototype already has its core feature and all the generated solution that I implement as new features. So yeah, that’s the prototype and I’ll continue to the next stage!
Oh, by the way, I didn’t use any unique animation and transition in this prototype since I just want to present my work simply so maybe for the next projects, I’ll explore many more! Also, there are indeed some bad designs or functions that happen on the prototype, I haven’t completely mastered Figma so some glitches or bad designs may happen. But yeah the good thing is, the prototype work nicely, isn’t it?
Not Done Yet (design fun fact!)

Look, I forgot what should I write for this section so…yeah, this is basically some fun facts that happen in the design process, in the “design” process.
There are so many things that I experience during the design stage, I mean, the prototype stage. Maybe include the ideate stage when I also design my wireframe there. All the stages that I do in the Figma design file are awesome! But you know, honestly, this is the first real project that I do on Figma. Before, I just do some stuff like trying to make something but not this fun as this project. I love all the features on Figma, including FigJam and Figma community, like yeah, you guys on Figma are so cool!
Since this is my first project on UI/UX design itself, there are so many things that I learn and know more stuff about it. There are just so great and I feel grateful to have a process in this industry and had the chance to explore more of myself while doing the project, it’s all great.
Yeah, that wasn’t anything like fun facts or whatever it is, but I love it. I love the experience I got from the project and can’t wait to explore more of myself in doing the next one! Let’s go!
All The Things in Testing (testing stage!)

Yo! We’re entering the last stage of the design thinking process which is testing. I’m so grateful that I can finish the prototype nicely as I want, now it’s time to test it with my respondent! By the way, in this stage, I’ll explain some things, not just testing but also iteration and the after-iteration prototype, there will be some redesign stuff that I do after the testing step. Well, let’s go then!
My Testing Method (and why it’s very…basic)

Yeah so, in this testing stage, I use this regular testing method which is usability testing with the user via Google Meet. It is easy like I just need to ask the user to join and share the prototype link. My tester here is my previous respondent from the user research stage, why I only test my respondent here is because I still struggling to ask other people, like yeah just try one person first and increase in the next project.
In this one-on-one testing session, I use the task-based usability testing method. Why I used this method is because it is designed to be tested like that isn’t it? I mean, my prototype here is about introducing new features so I want to see if the user can use the feature successfully and also check the usability itself.
So, I made two tasks that the user should perform in the testing stage. I ask the user to share their screen while I filling my research paper form that I made for noting what the user does and does not when using the prototype. I prepared this kind of stimulus research form to fill when and after the user performs tasks. I also made the Single Ease Question (SEQ) form so I can ask the user about how much in the scale they experienced from the testing session. The method is much basic but easy to do and the results are good especially after getting the user feedback.
Persona (I don’t know if I should insert this but…)

Yeah, persona, just regular data about who is my user and what is their behaviour and needs. This is actually my tester data that match the specification of the app user criteria. So yeah, you can see the persona above which is…not very much information there but I think that’s enough.
My app project user here is a 20 y.o. university student who has an interest in learning foreign languages. In the process of learning, she likes to use mobile learning app that meets her criteria of a good and credible learning app. From this information that mostly I got from the user research sessions, I’m able to make this kind of persona my ideal user.
Usability Testing (the main activity!)

My goal and purpose in this testing stage are to test if the user can use my prototype easily and to know if my solution works for them, that’s why I conduct this usability testing. As I said before, I use this task-based method in which I ask the user to perform tasks and see if the user can finish them correctly and easily. There are two tasks here which are unlocking the leaderboard and adding and playing a game with a friend, much like my generated solution from the ideation stage, isn’t it?
The first task, unlock the leaderboard. As I made that leaderboard page as a solution to the problem, I made it unlocked at first when the user just joined the app, but I made some instructions about what can they do to unlock the leaderboard which is to collect come points from finishing lessons. I didn’t tell the user what to do, I just told her that the task is to unlock the leaderboard and let the user flow as I see if my prototype working seamlessly.
The second task is to add friends and play a game with them. After the user successfully unlocks and accesses the leaderboard, I ask the user how the experience is first and then continue with the next task. This task is relatively obvious for the user since it is a very familiar flow about how you added people on the social apps, and yeah, my user understands it nicely. In this flow, I ask users to chat with their friends after adding it to the app and then invite the friend to play a simple game. The chat and game interface is as I explained above is very regular and the usefulness as a prototype is good, my user here surprised that the app really can play games together and this like a new thing for my user.
Me, on the facilitator side, I write what the user doing while exploring the prototype. When I’m interested in some things that the user does, I ask it after the session is completed. This usability testing session is wrapped nicely with the user feeling happy about the prototype and I feel grateful that my generated solutions are working.
User Experience (UX)

Full of things, this session was. Yeah, from the usability testing session with the tester, I got so much information about what they do in the prototype, what they like about it, what they struggle with it, and all the things there. While watching the tester performing tasks, I wrote all the doing in this form as you see above, it is a document about the testing session. The document above is also the experience of the user when using the prototype and what they feel about the new features.
Overall, as I can explain here is that the user feels that their experience while using the new app which is my prototype is great. There is so much stuff that my user like and can bring benefits when they use the real app. The generated solution like leaderboard and add friends features are also very nice, my user said. And yeah, there are so many things that my user share and I documented it on the form above, that’s all of my user experience.
Single Ease Question (SEQ)

One of the crucial things that should be done in the testing session is users rating or evaluation on a scale of numbers, in this case, I use the Single Ease Question (SEQ) model on a scale of 7. Why I decided to use this kind of evaluation because it is indeed very simple and users can understand how to give the rating itself. So yeah, on a scale of 1 to 7, how much do you give for my prototype and my generated solutions?
From my testing session, my tester give me 7 of 7 points for the experience, this is the full perfect rate that users can give and my user did that. The user said that my prototype is perfect enough and has all the features they’re needed, in other words, it solves their problem. I know I only use one person here as my tester but yeah, since this is my first project, having one tester that gives the perfect rating is marvellous!
User Feedback (and review)

7/7 perfect enough, huh? So much value in that points, but it is really that perfect? After I got the rating from the SEQ session, I ask the user about their review and feedback, I divided the user feedback into two columns, one for positive and one for negative reviews.
For the positive review, it is mostly about the new features like leaderboard, point system, add friends and play games, and simple interface. The user feels that all the generated solution ideas work nicely and are easy to use, this also makes the user enjoy exploring new features of the app and have fun playing around.
The negative review, on the other hand, is about some features that need to be optimized like adding a minus point system if users lose a game, adding a friend’s profile page to see their information and also adding some others features like voice chat and emoticons. All the negative reviews here are basically a suggestion from the user for the next development, it all indeed makes sense and I also think that the app really needs those features too.
This feedback and review session give me many insights into how the users experience when using my prototype and how they think about the generated solutions. From the perfect rating given, I feel happy to know that my user can enjoy the solution pretty much and also thankfully for their suggestion about what this app should improve next.
Iteration (because I should care about users, right?)

Finally, I finished all the testing sessions and get reviews from the user! But wait, did my user have some suggestions about the app that can make it greater? What? They do? Well, I guess I should do some iteration here to show how much I cared about the user feedback. Let’s go then! Oh, by the way, I’ll show you just the before and after iteration itself and not all the UI because it’s not that much.
Create a Profile Form

My user was giving suggestions about a profile page for their account and friends account, I then asked her what information should be displayed on that profile page. My user said some things like basic information such as gender and age of their friend, I kinda agree with that because if you know what is your friend demographics, you can know them better.
To create that profile page and display the basic information, I need to redesign some things first like this create a profile form from the signup page. Before there is an avatar and name form that asked for creating a profile, then I decided to add more information which as gender and age so I can display it on the profile page!
My Profile Page

When the goal is to build a friend account page, of course, I need to build the first one for myself too, that’s why I made this profile page, or account page, something like that that displays regular information such as name, ID, gender, age, game history, and leaderboard rank.
At first, I wondered how this page can be accessed, then I decided to make it accessible from that avatar image at the bottom of the home screen, and from that account menu on the setting page. I’m not making a new icon or menu because I think that it can be good that the page can be accessed just from the setting and from user exploration of the home page.
Voice Chat Feature
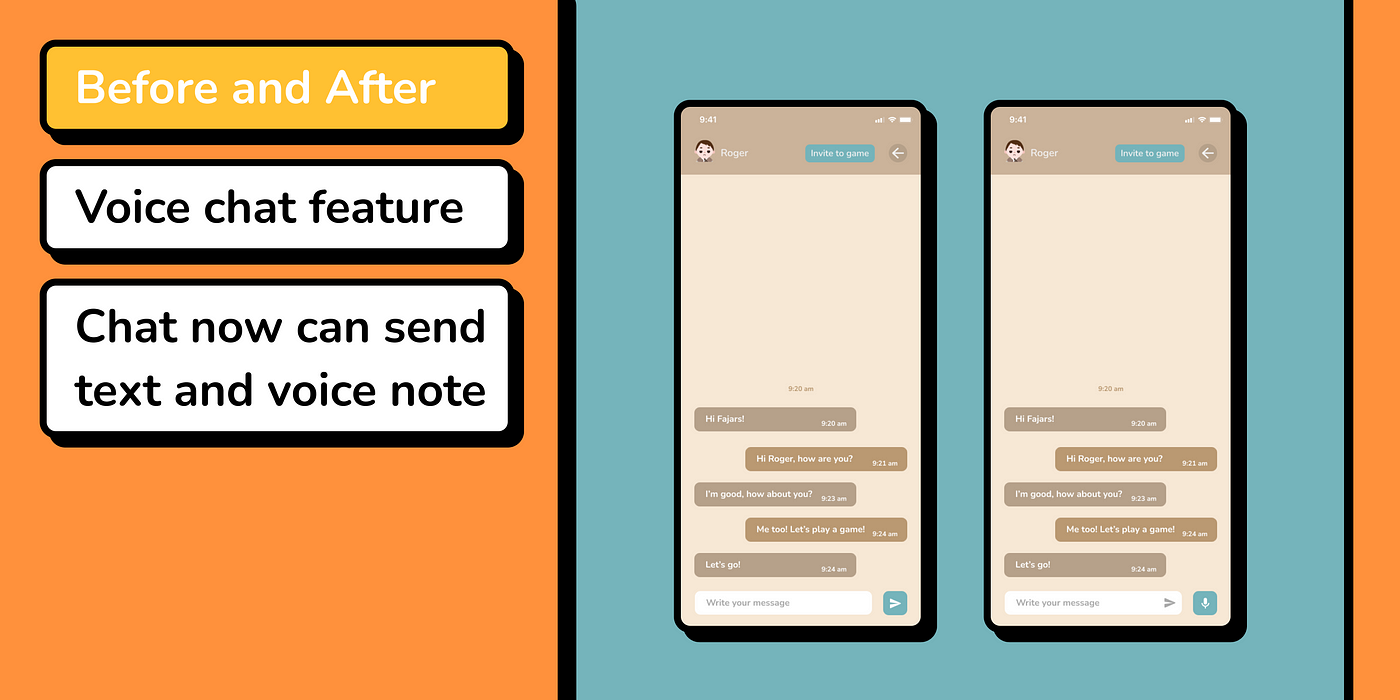
From the chat feature, my user suggests that it will be nicer if it has a voice chat feature, just a voice note so users can study with their friends and also practice their speaking skills together. It didn’t make much hassle for me because I also think that it can be good too for users to have a voice chat feature. So, I added it! By the way, I had to redesign the layout because I need to place that voice feature next to the input text bar, so yeah, I got some references from WhatsApp and other chat apps for the layout design.
Friend Profile Page

Yeah, this is the hottest new feature on the iteration section, the all-new friend profile page! Well yeah, it is basically my profile page for other users. The information is much the same but since this page is accessible from the friend’s list and chat page, there will be this invite to a game button so users can directly invite their friends after seeing their profile.
The interface here is simple enough, I think. The game history card will be a landscape with some information about whether you won or lose a game and show how many points you got or lose. Then below that, there is this leaderboard and rank showing in what rank are your friends right now also with their current points.
Game with Friend Interface (emoji and countdown added)

In the testing session, the user asked if the game page has this ready-go countdown so users can be prepared to play their game, I said it will be, and yeah, here it is, the simple version of that ready-go countdown. I just make it simple because it actually can be more than that. The main thing here is that this ready-go function is to prepare users that the game will soon start, so yeah, I made it!
Also, on the same page, my user suggests this emoji feature that they can use for quick reaction about the game they are playing. It is very good actually, I also love to have some quick chat or reaction while playing games, so, there you go, the quick emoji reaction feature is on!
Minus Point System

I was thought about this before but I haven’t decided to show this kind of system since there are many things to consider when you need to make some penalty or whatever when you’re losing a game. But, since I talked with my user during the testing session, my user told me that this minus point system can be good so users can be serious when doing a task or playing a game. It’s indeed a good idea so I add this minus point system which you can try from my new version of the prototype below!
Prototype 2.0

Yo! Here is the new version of my prototype A.K.A. after-iteration prototype! You can access it from this link right now!
This prototype 2.0 contains all the new iteration features that also completed my design thinking process in this case study.
The Outro
So, What Happened?

It’s been a month since I started this project, and now it’s the best time to close it with some outro story. This project has been so much fun but also very challenging, I’ve received so much help from various parties, and got a lot of new knowledge about how it is to become a UX designer.
There are a lot of things that happen when I’m doing this project but for now, I just want to share some of my findings while completing this case study such as what I learned and all the mess that happened. Yeah, I hope it’s all can bring positive impact for me or anyone who read this or someone else, just to be sure that I’m writing this case study without a fine guideline or something, I just write what I want to write, and if it’s can be helpful or maybe inspiring for anyone, congrats and thank you then!
What I Learned
Doing my very own case study feels like a new start for something bigger. Before this, I was just a wanna-be UI designer who design just two screens and call that a problem-solving solution. Knowing that right now I’m capable of making my case study is very uplifting for me, I know where I want to go and this is the first step.
So, what I learned in this project is a lot! Taking the role as an end-to-end UI/UX designer is very much challenging, I had to feel all the process from the start to finish, from the idea coming to my head to extracting that idea into words in this case study. So many things happen but what I feel I’m grateful to be that I can finish this project. It’s still a long way in my career journey but this project, this case study, this Celeste First Step OST, and this experience is what I’ve been gratefully for.
From the technical aspect, I got Figma as my new best friend! I learned so much about Figma and FigJam features from lots of sources that make me want to choose Figma if I had to only have one application on my PC. All the tools that I used on this project are mostly Figma, Figjam, and my notebook, just that besides regular office tools. There is a lot of stuff that I learned from the technical aspect.
From the human aspect, I learn so much more by deep learning design thinking and its empathising stage. Knowing that as a UX designer I had to always connect with users makes me want to practice more of my human skills and keep going to reach my goal and make the best solution for everyone.
There are more, of course, but I think some of that is the way how I defined what I learned from this project. After all, the journey is still long to go, this is a great start!
Ah yes, for the impact, this project indeed will have lots of impacts for many parties as I said. It has a positive impact on me as a UX designer, it has a nice impact on the app users knowing that their problem has got the solution, and it has more impact on anyone who feels the benefits by reading my case study and experiencing my prototype. Thank you so much!
All The Mess
The first project indeed has much stuff to fix, am I right? Honestly, this project is completely messy! Like, from the start when I didn’t know what to make and I just ask my respondent who is also just one person, this is crazy. Most of the things that happen here are happening in my head, stuff on Figma and FigJam are just a few of my thinking results.
I was very excited back then when I started this project, I still excited right now but since this case study is a hard one to make, I just forgot some of the ideas I was having in my mind. This case study writing really costs so much, but it’s worth the cost. This project was completed in a month, and the design itself is finished like a week for but the next three weeks I’ve been struggling writing this very long case study on Medium, like…what am I doing right now, who would want to read this extra long case study. But yeah, I still do it anyway because I just love it, I love to tell stories and this is my story.
From the design process, if you look at my Figma file, you will see that all the stuff there is very messy and I just let it that way. I still need to practice more on my design skill and organise stuff like components and design systems. There is so much homework to do even after this case study is finished, that’s why this is my first step and I will keep going!
Conclusion (OMG we’re done!)

Wrapping up, this is the conclusion of my case study. Studying a case which is also performing hands-on problem-solving ideas is a very great experience. Even though the project is messy, there are still lots of things to learn and fix for the next projects. I, here, just want to close this with some closing conclusion because I think that all my work is clear enough in the design process and I‘m just so emotional knowing that I actually finish this. I’m sorry if I tell too many stories and not much about the design process, yeah.
Solving problems and generating solutions for users is the best experience that makes this project come to life. Not just for users, solving problems can be implemented on anything, you already know it so yeah, thank you for your time reading this. It’s been so nice to finally wrap this up. Also, sorry if this case study is stray away from the main goal. This is my story after all. Thank you!
Connect with Me (and let’s finish this)

Thank you once more for reading my UX case study, let’s connect and share thoughts about UI/UX stuff!
Connect with me: https://znap.link/thefajars
Connect with me: https://znap.link/thefajars
Connect with me: https://znap.link/thefajars
Signing out.
Recommend
About Joyk
Aggregate valuable and interesting links.
Joyk means Joy of geeK