

Bloc 8.0 Tutorial for Flutter: Getting Started [FREE]
source link: https://www.raywenderlich.com/32962047-bloc-8-0-tutorial-for-flutter-getting-started
Go to the source link to view the article. You can view the picture content, updated content and better typesetting reading experience. If the link is broken, please click the button below to view the snapshot at that time.

Bloc 8.0 Tutorial for Flutter: Getting Started
Learn how to build a Wordle clone app in Flutter using one of the most robust state management libraries: Bloc 8.0.
Version

Hey, you! Did you hear? The new release 8.0 for Bloc has been out for some time now, and you’ll love it! One of the most notable changes is that it removes the deprecated mapEventToState API in favor of on<Event>, introduced in earlier versions. It also has a new way to work with concurrent events, and monitoring Blocs is now easier to do and predict.
In this tutorial, you’ll get to:
- Refresh your knowledge about core concepts like Bloc and cubits.
- Learn about the new event API in Bloc 8.0.
- Understand the concurrency of events in a Bloc.
- Track and debug your Blocs or cubits.
It’s time for you to take advantage of all these new changes by developing a Wordle-like app with Bloc 8.0. Are you ready?
Getting Started
Download the starter project by clicking Download Materials at the top or bottom of the tutorial. Then, open the starter project in VS Code 1.66 or later. You can also use Android Studio, but you’ll have to adapt the instructions below as needed.
Use a recent version of Flutter, 2.10 or above. VS Code should show a notification prompting you to click it to get the dependencies for the project.
If VS Code doesn’t get the dependencies automatically, then download them by opening pubspec.yaml and clicking the get package icon in the top-right corner or by running the command flutter pub get from the terminal.
In this tutorial, you’ll develop an app called Plingo, a word-guessing game like Wordle. You have to guess a five-letter word within five attempts to win. There’s a new random word to guess each time you play. If the user guesses the word, they’ll start or increase a winning streak. If the user fails to guess correctly, then the streak resets. The game also stores statistics for:
- Number of times you’ve played.
- Percentage of games you’ve won.
- Your current winning streak.
- Your longest winning streak.
Here’s a quick rundown of how the project is set up:
- main.dart: Standard main file required for Flutter projects.
- domain.dart: Contains the game logic and corresponding class definitions.
- data.dart: Contains the classes that interact with storage and allows for better data handling.
- app: A folder with the app widget and also a helper file with colors defined by the brand guidelines.
- monitoring: A folder with a helper class that helps you track your Blocs and cubits.
-
presentation: Contains different folders that build the game’s UI:
- bloc has a bloc definition for handling game interactions and possible outcomes from it, like winning or losing.
- cubit has a cubit definition for handling the stats displayed in an in-game dialog.
- pages has all the pages.
- widgets contains all the reusable widgets.
- dialogs has all the game’s dialog.
Build and run the starter project using the emulator of your preference or a mobile device. At this point, you’ll see the following:


As you can tell, the most critical aspects of the game are missing. Plingo doesn’t display anything when you tap a key on the on-screen keyboard. Also, when you tap the stats icon in the top-right corner of the screen, all the stats show as negative numbers.
In summary, all the game logic is missing. You’ll work on implementing it in this tutorial by using Bloc 8.0.
Reviewing Key Terms
Plingo looks great right now. Even though it doesn’t provide interaction for players yet, the game does have a complete UI. This will give you a chance to review a couple of key terms that are crucial for understanding the plugin’s implementation of the BLoC pattern.
BLoC stands for Business Logic Component and is a design pattern created for state management in apps. The general idea of how BLoC interacts in your app is that the user — or a process — triggers an event. Then, a component takes the event and applies business logic to it — for example, by communicating with an external API — transforming the information into a new state. In turn, this state change triggers a change in the UI or another part of your app.
In the end, what Bloc attempts is to control when state changes can occur and enforce a single way to change states throughout an entire app.
bloc is a plugin that has a built-in implementation of BLoC. It has two different variants of these types of components: Blocs and Cubits. Using either option will help you separate presentation from business logic, making your code fast, predictable, easy to test and reusable.
A Bloc is the core definition of the design pattern above, and it relies on events to trigger state changes. Blocs are more complex to understand but provide better traceability and can handle advanced event transformations.
Look at this example implementation of Bloc for a counting app that you can find in the plugin’s documentation:
abstract class CounterEvent {}
class CounterIncrementPressed extends CounterEvent {}

class CounterBloc extends Bloc<CounterEvent, int> {
  CounterBloc() : super(0) {
    on<CounterIncrementPressed>((event, emit) => emit(state + 1));
  }
}
A Cubit is a much simpler implementation of the pattern — it exposes functions to trigger state changes instead of event classes. Its simplicity makes it easier to understand and needs less code. Here’s how the counting app would look with a Cubit:
class CounterCubit extends Cubit<int> {
  CounterCubit() : super(0);

  void increment() => emit(state + 1);
}
OK, now you might be thinking about when to choose one over the other. A good rule of thumb is to start with a Cubit and refactor to a Bloc if you need more traceability or to handle event transformation.
Bloc refers to the class defined in the plugin. This should help you avoid confusion in the following sections.
Handling Game State Changes
Now that you’ve brushed up on some of the core concepts, it’s time you dive into coding.
If you’ve used the plugin before, you might remember the new Events API introduced in v7.2.0. The motivation behind this change was predictability, but it also gave extra simplicity to event handling.
Open lib/presentation/bloc/game_event.dart and look at the different events you’ll process in GameBloc:
-
LetterKeyPressed: An event performed when the user taps a key on the onscreen keyboard,
PlingoKeyboard. - GameStarted: An event triggered when a new game starts, either by opening the app or tapping Play Again when you win or lose the game.
- GameFinished: This event happens when the player guesses the correct word and wins or reaches the max attempts to guess and loses the game.
You’ll start by adding GameStarted. Open lib/presentation/bloc/game_bloc.dart and replace the constructor in line 40 with the following:
GameBloc(this._statsRepository)
    : super(GameState(
        guesses: emptyGuesses(),
      )) {
  on<GameStarted>(_onGameStarted);
}
This code lets GameBloc process GameStarted events. At this point, a compilation error should be showing in your editor since _onGameStarted isn’t yet defined. Fix that by replacing // TODO: Add logic for GameStarted with this code:
void _onGameStarted(
  GameStarted event,
  Emitter<GameState> emit,
) {
  print('Game has started!');
  final puzzle = nextPuzzle(puzzles);
  final guesses = emptyGuesses();
  emit(GameState(
    guesses: guesses,
    puzzle: puzzle,
  ));
}
This function defines the logic that should happen when a game starts. First, nextPuzzle defines a random puzzle from the list of available puzzles. Then, emptyGuesses generates a multidimensional array that handles the letters and words guessed in the form of a 5×5 matrix of Strings. Finally, you emit a new GameState with that information, which also updates the game’s UI.
Right now, GameBloc is ready to handle the start of a game, but that event isn’t added to GameBloc in the app. You’ll now write a few lines of code for that. Open lib/app/app.dart and replace the line below // TODO: Start game here! with:
GameBloc(ctx.read<GameStatsRepository>())..add(GameStarted()),
.. is the cascade operator that allows you to make a sequence of operations on the same object, i.e., GameBloc. The above code takes care of starting a game whenever the app starts.
Now, open lib/presentation/pages/main_page.dart, and replace the definition of onPressed below // TODO: Restart game here! with the following code:
onPressed: () => context.read<GameBloc>().add(const GameStarted()),
This onPressed gets called when the player wants to play again at the end of a game.
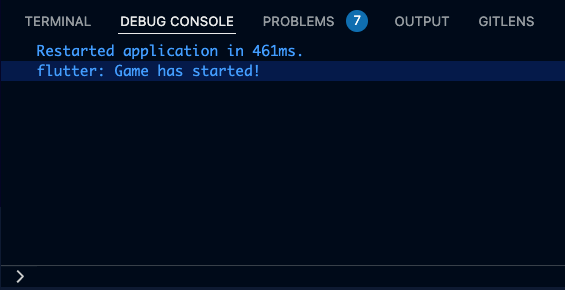
Build and run the project, and you’ll see no difference yet. However, check the debug console, and you’ll see that _onGameStarted got called because the print statement you added before is showing.
Recognizing Key Presses
Now that the game has started, you’ll tackle the LetterKeyPressed event. Open game_bloc.dart again, and add the event handler on the constructor. The end result should look like this:
GameBloc(this._statsRepository)
    : super(GameState(
        guesses: emptyGuesses(),
      )) {
  on<GameStarted>(_onGameStarted);
  on<LetterKeyPressed>(_onLetterKeyPressed);
}
Now, replace // TODO: Add logic for LetterKeyPressed with the following code:
Future<void> _onLetterKeyPressed(
  LetterKeyPressed event,
  Emitter<GameState> emit,
) async {
  final guesses = addLetterToGuesses(state.guesses, event.letter);

  emit(state.copyWith(
    guesses: guesses,
  ));

  // TODO: check if the game ended.
}
With this code, every time you receive a LetterKeyPressed event, you add the letter to the current guesses by checking for the first empty slot and setting its value as equal to the letter pressed — this is what addLetterToGuesses does. Finally, you emit a new state with the new guess list and this, in turn, updates the UI via provider‘s helper, context.watch().
Like before, you need to add the event for GameBloc to process it. Open lib/presentation/widgets/plingo_key.dart and replace onTap with the following code:
onTap: () => context.read<GameBloc>().add(LetterKeyPressed(letter)),
Remember to add the corresponding imports for flutter_bloc and GameBloc at the top.
Build and run the app. Use the keyboard to type a couple of words like CRAVE, LINGO or MUMMY. This will give you a couple of hints about what the five-letter word is, and it might look like this:
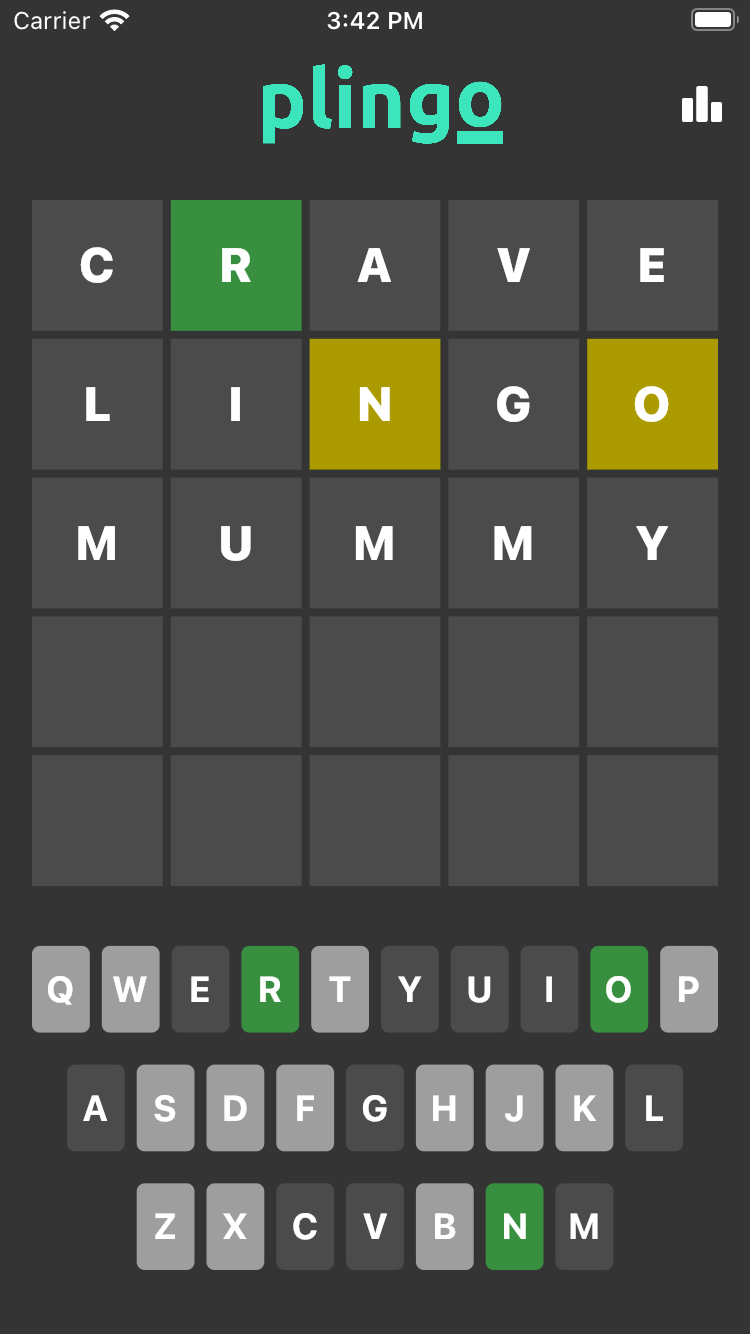
Great job! You’ve added a second event to the game. But, there’s one caveat to the current implementation: concurrency. You’ll tackle this problem next.
Transforming Events
To make this bug more noticeable, open game_bloc.dart and change _onLetterKeyPressed to emit a state in the future. Don’t forget to add the corresponding import 'dart:math'; at the top of the file. Here’s what the end result should look like:
Future<void> _onLetterKeyPressed(
  LetterKeyPressed event,
  Emitter<GameState> emit,
) async {
  final guesses = addLetterToGuesses(state.guesses, event.letter);

  final randGenerator = Random();
  final shouldHold = randGenerator.nextBool();
  await Future.delayed(Duration(seconds: shouldHold ? 2 : 0), () {
    emit(state.copyWith(
      guesses: guesses,
    ));
  });

  // TODO: check if the game ended.
}
Build and run again. Use the keyboard to type CRAZY.

Notice the bug now? Blocs treat events concurrently now instead of doing it sequentially. This means that if an event takes too long to complete, another one might be able to override the changes, leading to unexpected behaviors like the one in your app.
Blocs let you define the way to handle events by setting transformer in the event handler definition on the constructor.
Normally, defining your own transformer function could become difficult to maintain, so you should only do it when required. Luckily, a companion library called bloc_concurrency contains a set of opinionated transformer functions that allow you to handle events the way you want. Here’s a small list of the ones included in bloc_concurrency:
- concurrent(): Process events concurrently.
- sequential(): Process events sequentially.
- droppable(): Ignore any events added while an event is processing.
- restartable(): Process only the latest event and cancel previous event handlers.
For this project, bloc_concurrency is already added to the dependencies in your pubspec.yaml, so you can jump straight in using that. Open game_bloc.dart and add the following import statement at the top of the file:
import 'package:bloc_concurrency/bloc_concurrency.dart';
Then, change the corresponding event handler for LetterKeyPressed in the constructor and replace it with the following:
on<LetterKeyPressed>(_onLetterKeyPressed, transformer: sequential());
Using sequential() allows you to handle events in a sequence, which helps you avoid events from overriding one another.
Build and run the app again, and try to type CRAZY again.
As you can see, the events are now processed in the order you add them, despite some of them taking longer than their predecessors.
Now, it’s time you finish adding the last event that GameBloc processes. Add the event handler for GameFinished. It should look like this:
on<GameFinished>(_onGameFinished);
Then, replace // TODO: Add logic for GameFinished with the following code:
// 1
Future<void> _onGameFinished(
  GameFinished event,
  Emitter<GameState> emit,
) async {
  // 2
  await _statsRepository.addGameFinished(hasWon: event.hasWon);
  // 3
  emit(state.copyWith(
    status: event.hasWon ? GameStatus.success : GameStatus.failure,
  ));
}
Here’s a quick overview of the code you wrote:
- Notice that you’re using
Futureas a return value for_onGameFinishedsinceBlocsupports this return type. - Then,
_statsRepository.addGameFinishedinteracts with local storage for updating the different statistics. - Finally, you emit a new state with the corresponding game result: success for winning or failure for losing.
As a final step, replace _onLetterKeyPressed with the following code:
Future<void> _onLetterKeyPressed(
  LetterKeyPressed event,
  Emitter<GameState> emit,
) async {
  final puzzle = state.puzzle;
  final guesses = addLetterToGuesses(state.guesses, event.letter);

  // 1
  emit(state.copyWith(
    guesses: guesses,
  ));

  // 2
  final words = guesses
      .map((guess) => guess.join())
      .where((word) => word.isNotEmpty)
      .toList();

  final hasWon = words.contains(puzzle);
  final hasMaxAttempts = words.length == kMaxGuesses &&
      words.every((word) => word.length == kWordLength);
  if (hasWon || hasMaxAttempts) {
    add(GameFinished(hasWon: hasWon));
  }
}
With this code, you’re doing two things:
-
emitis no longer wrapped with aFuturelike it was before. - Determining if the game ended after the guesses have updated. You do this by checking if the user guessed the word puzzle — Plingo’s win condition — or if the user reached the max number of attempts without guessing the correct word. If the game meets either condition, then you add a new
GameFinishedevent.
Build and run the app again, and try to win the game. If you lose, just tap Play Again to give it another try. You’ll now see a winning message when you guess the puzzle or a losing message if you reach the max attempts without guessing correctly. Here’s what they look like:


Adding a New Cubit
You’re almost done building Plingo, but a couple of things are still missing. Remember the negative numbers shown when opening StatsDialog? You’ll fix this next.
Open lib/presentation/cubit/stats_cubit.dart and add the following functions to StatsCubit:
/// Fetches the current stats of the game.
Future<void> fetchStats() async {
  final stats = await _statsRepository.fetchStats();

  emit(state.copyWith(stats: stats));
}

/// Resets the stats stored.
Future<void> resetStats() async {
  await _statsRepository.resetStats();

  await fetchStats();
}
These functions are how StatsCubit changes the state. First, fetchStats retrieves the stats from local storage and emits a change with the updated stats. Next, resetStats resets the stats stored locally and then fetches the stats to update the state.
Now, you need to call those functions from StatsDialog. Open lib/presentation/widgets/plingo_appbar.dart and call fetchStats with cascade notation on line 63. Here’s what the StatsCubit definition should look like:
IconButton(
  onPressed: () => showDialog<void>(
    context: context,
    builder: (dContext) => BlocProvider(
      create: (bContext) => StatsCubit(
        context.read<GameStatsRepository>(),
      )..fetchStats(),
      child: const GameStatsDialog(),
    ),
  ),
  icon: const Icon(Icons.leaderboard_rounded),
)
Now, open lib/presentation/dialogs/stats_dialog.dart and change the line below // TODO: Reset stats here! to this:
onPressed: () => context.read<StatsCubit>().resetStats(),
Build and run the app, then tap the stats icon in the top-right corner of the screen to see the stats dialog. You’ll see the actual game statistics in the dialog like this:

Then, tap Reset, and you should see the stats reset back to zero:
Monitoring a Bloc
Now that the game is functional, you need to start thinking about monitoring your app. A good way of doing this is to pay attention to all the different state changes throughout your app. bloc also provides a great way for you to do this with the new BlocOverrides API. It allows you to have many BlocObserver or EventTransformer implementations scoped to different parts of the app so you can track changes on a specific feature or the whole app.
Open lib/monitoring/bloc_monitor.dart and place the following code into it:
import 'package:bloc/bloc.dart';
import 'package:flutter/foundation.dart' as foundation;

/// [BlocObserver] for the application which
/// observes all state changes.
class BlocMonitor extends BlocObserver {
  @override
  void onChange(BlocBase bloc, Change change) {
    super.onChange(bloc, change);
    foundation.debugPrint('${bloc.runtimeType} $change');
  }
}
BlocMonitor is a custom BlocObserver that overrides onChange. This helps you track all the different state changes and prints them to the console via debugPrint. Using this function from foundation allows you to only print to the console when the app has been run in debug mode and also makes state changes available via the flutter logs command later on.
You could track a variety of different Bloc hooks as well:
-
onCreate: Called whenever you instantiate
Bloc. Often, a cubit may be lazily instantiated andonCreatecan observe exactly when the cubit instance is created. -
onEvent: Happens whenever you add an event to any
Bloc. -
onChange: Called whenever you emit a new state in any
Bloc.onChangegets called before a bloc’s state has updates. -
onTransition: Occurs whenever a transition occurs in any
Bloc. A transition occurs when you add a new event and then emit a new state from a correspondingEventHandler.onTransitiongets called before aBloc‘s state updates. -
onError: Whenever any
BlocorCubitthrows an error. -
onClose: Called whenever a
Bloccloses. It gets called before theBloccloses and indicates that the particular instance will no longer emit new states.
Alright, continue by opening main.dart and replace the contents with the following:
import 'package:flutter/material.dart';
import 'package:flutter_bloc/flutter_bloc.dart';

import 'app/app.dart';
import 'data.dart';
import 'monitoring/bloc_monitor.dart';

void main() {
  BlocOverrides.runZoned(
    () => runApp(
      RepositoryProvider(
        create: (context) => GameStatsRepository(GameStatsSharedPrefProvider()),
        child: const PlingoApp(),
      ),
    ),
    blocObserver: BlocMonitor(),
  );
}
With this, you’re creating a new BlocMonitor and tracking all Blocs that run in the zoned override. This means that both GameBloc and StatsCubit report changes to your BlocMonitor.
Build and run your app, and check your debug console. After typing a few words, you should see logs like the following:

Where to Go From Here?
You can download the completed project files by clicking the Download Materials button at the top or bottom of the tutorial.
Are you wondering where to go next? Take a good look at bloc‘s documentation — it’s a great place to go when you have any questions. You can also refer to the library’s release notes too, since they’re full of details and guides for migrating apps from previous versions.
Want to learn more about bloc and concurrency? Check out this article about How to use Bloc with streams and concurrency written by Joanna May from VeryGoodVentures.
You can also hop onto the Flutter desktop hype train with Flutter Desktop Apps: Getting Started, a great video course by Kevin Moore.
We hope you enjoyed this tutorial. If you have any questions or comments, please join the forum discussion below!
raywenderlich.com Weekly
The raywenderlich.com newsletter is the easiest way to stay up-to-date on everything you need to know as a mobile developer.
Get a weekly digest of our tutorials and courses, and receive a free in-depth email course as a bonus!
Recommend
About Joyk
Aggregate valuable and interesting links.
Joyk means Joy of geeK