

Parallax Effect with SensorManager using Jetpack Compose
source link: https://proandroiddev.com/parallax-effect-with-sensormanager-using-jetpack-compose-a735a2f5811b
Go to the source link to view the article. You can view the picture content, updated content and better typesetting reading experience. If the link is broken, please click the button below to view the snapshot at that time.


Alessio Soggetti・Unsplash
Parallax Effect with SensorManager using Jetpack Compose
Recently, an implementation of stunning Parallax effect in SwiftUI by
has been making rounds in the Android Community too.
So, I decided to try implementing the same using Jetpack Compose instead. The results turned out pretty decent and also well received by our lovely Android Twitter Community. 😁
Implementation
The following explanation is completely based on this gist.
Fetching Sensor data
The @Composable views will be repositioned according to the orientation of the device. And we’ll be needing the orientation values along the ‘Pitch’ and the ‘Roll’ axes.

I’ve referred to this StackOverflow reply for my implementation of fetching the Pitch and Roll values.
Android phone orientation overview including compass
I've been trying to get my head around the Android orientation sensors for a while. I thought I understood it. Then I…
Listening to sensor changes to obtain Pitch and Roll
Register SensorManager listeners
Using DisposableEffect we’ll be initialising the SensorManager and also register listeners for the GRAVITY & MAGNETIC_FIELD sensors.
Finally the Pitch and Roll are received within the @Composable using Channel.receiveAsFlow().collect().
Initialising SensorManager in a DisposableEffectWrapper for our SensorManager implementation
One may say that we could’ve LaunchedEffect instead since we’re only collecting our sensor’s data Flow. I’ll explain why I went with a DisposableEffect in the end (it has something to do with onDispose{}).
Now, once we have the Pitch and Roll values from our sensor, we’ll now be looking into how we can reposition various @Composable views to achieve the parallax effect.
has himself graciously hinted at his implementation:
- repositioning the Image Card
- repositioning the Glow Shadow (reverse of the Card). I used Philip’s Glow Shadow implementation as reference for this.
- showing a subtle Card edge when tilted, for the pronounced 3D effect
- adding a parallax to Image inside (reverse of the Card)

View repositioning directions based on title direction
Image Card
Image Card implementation
[1] we’re using Modifier.offset to reposition our @Composable views.
[2] Roll is along the y-axis while Pitch is along the x-axis. So, the x-offset will be decided by the roll while y-offset by the pitch.
[3] We bring about the inside Image’s parallax effect by adjusting the horizontalBias of @Composable Image() alignment parameter.

Image Card’s motion along the devices tilted orientation
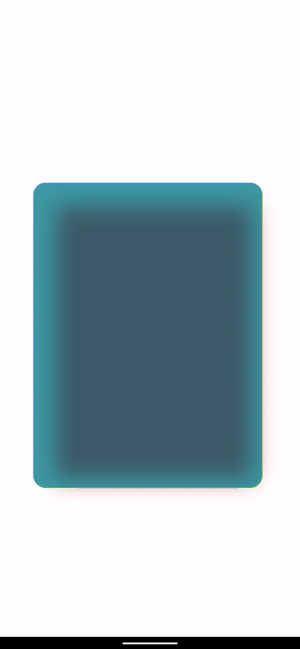
Glow Shadow
Glow Shadow implementation
[1] Glow Shadow’s offset will reposition quicker than the Image Card and in the opposite direction.
[2] It’s size will be smaller than the Image Card.
- When the device is kept on a Flat surface (all orientation values close to 0), the glow shadow should not be visible.
- The darker portion of shadows are generally smaller than the actual object.
[3] Instead of a traditional shadow, use Modifier.blur() to make the Image Card appear translucent which is letting in light onto the surface.

Glow Shadow’s motion along with the Image Card
Card Edge
Card Edge implementation
[1] Card Edge’s offset repositioning will be slightly flower than Image Card.
- The edge shouldn’t be visible when kept on a Flat surface.
- The edge should ‘just’ be visible when the device is tilted to give the impression of a thin 3D card.
[2] It’s size will be same of the Image Card.
Card Edge’s motion along with the Image Card
Points of Caution
Unregister cancel fetching of sensor data in DisposableEffect.onDispose{..}
We must prevent unnecessary leaking of SensorManager when this view is removed from the composition. That is the reason why I used DisposableEffect instead of LaunchedEffect since we get this convenient onDispose{} callback where we can clean up any unnecessary data upon leaving composition.
Use the right Modifier.offset method
Jetpack Compose provides two kinds of Offset modifiers:
.offset(x: Dp = 0.dp, y: Dp = 0.dp).offset(offset: Density.() -> IntOffset)
While these do the same thing i.e., set positional offset to the @Composable view, IF we are going to use dynamic offsets (for example, offsets changed due to certain animation or user action etc.) instead of fixed offsets, we should always use .offset(offset: Density.() -> IntOffseti.e., the lambda version. The reason being, the latter method avoids recomposition when the offset is changing values, thus significantly improving the performance. Even the documentation says,
This modifier is designed to be used for offsets that change, possibly due to user interactions. It avoids recomposition when the offset is changing, and also adds a graphics layer that prevents unnecessary redrawing of the context when the offset is changing.
Concluding
While this isn’t the most performance efficient implementation, hope this can help as a handy reference for the same.
Jetpack Compose and Swift UI are the best tools to realise high quality visual effects in such a short period time. I certainly believe that these two platforms will empower Mobile Developers to create beautiful experiences for the users. 🥳
Recommend
About Joyk
Aggregate valuable and interesting links.
Joyk means Joy of geeK