

Go项目实战之部署到云服务器【开源十年第12次更新】
source link: https://studygolang.com/articles/35657
Go to the source link to view the article. You can view the picture content, updated content and better typesetting reading experience. If the link is broken, please click the button below to view the snapshot at that time.

Go项目实战之部署到云服务器【开源十年第12次更新】
kaiyuan10nian · 大约2小时之前 · 48 次点击 · 预计阅读时间 15 分钟 · 大约8小时之前 开始浏览一个深漂近10年的程序员立志用未来10年时间去维护一个项目,这个项目的功能未定,用到什么就做什么,遇到什么就写什么。其主要目的有二,一为加深自己的技术深度,二为其他学习者提供参考。
感兴趣的可以跟着我一起做这个项目,不收费、不套路、人间自有真情在。
备注:前面项目中用到的代码已经分享到GitHub中去了,并且以后所有项目中会出现的代码都会提交上去,欢迎查阅。
地址:https://github.com/kaiyuan10nian/kaiyuan10nian 感兴趣的可以点个star哦~开源十年项目的更新首发于公众号:计算机自学平台,有兴趣的小伙伴可以持续关注,并欢迎各位加我的微信(kaiyuan10nian)跟我一起完成并推动项目的发展。
上次分享过怎么部署Go项目,今天的内容与上次不同,上次部署的服务器是我自己的一台闲置电脑搭建的服务器,这次直接买了一台云服务器,其实部署方法跟上次的并没有什么大的差别,之所以还要另发一篇文章是为了照顾更多的新入坑玩家的意见。
先简单介绍下今天的主要内容:
1、打包Go项目代码,并上传至云服务器;【上次的内容就不赘述了】
2、安装mysql;
3、设置配置文件;
4、安装nginx;
5、部署前端代码;【目前还没有前端代码】
在开始以下步骤之前,先登录你的云服务器,我用的是finalshell。然后去云供应商的控制台拿到云服务器的IP和root密码(一般第一次都需要重新设置),拿到以后直接在finalshell进行连接。
一、在CentOS安装MySQL并配置
连接并登录后,如下图:
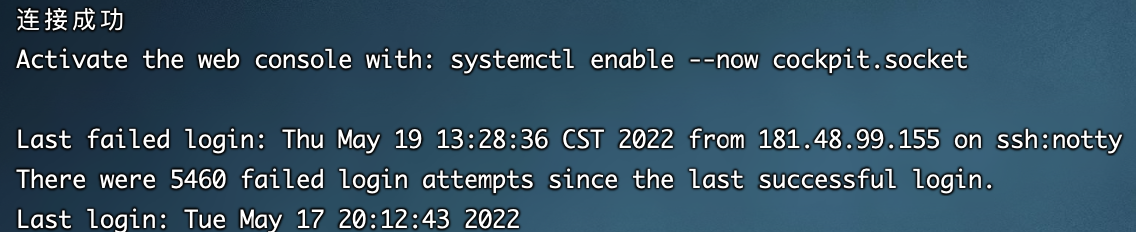
记住是使用root账号登录哦,然后在命令行中输入:
sudo dnf install @mysql
显示如下内容表示你安装成功:
[root@kaiyuanshinian ~]# sudo dnf install @mysql
Failed to set locale, defaulting to C.UTF-8
Last metadata expiration check: 2:31:47 ago on Thu May 19 11:08:56 2022.
Dependencies resolved.
=================================================================================================================================
 Package                              Architecture     Version                                         Repository           Size
=================================================================================================================================
Installing group/module packages:
 mysql-server                         x86_64           8.0.26-1.module_el8.4.0+915+de215114            AppStream            25 M
Installing dependencies:
 mariadb-connector-c-config           noarch           3.1.11-2.el8_3                                  AppStream            15 k
 mecab                                x86_64           0.996-1.module_el8.4.0+589+11e12751.9           AppStream           393 k
 mysql                                x86_64           8.0.26-1.module_el8.4.0+915+de215114            AppStream            12 M
 mysql-common                         x86_64           8.0.26-1.module_el8.4.0+915+de215114            AppStream           134 k
 mysql-errmsg                         x86_64           8.0.26-1.module_el8.4.0+915+de215114            AppStream           598 k
 protobuf-lite                        x86_64           3.5.0-13.el8                                    AppStream           149 k
Installing module profiles:
 mysql/server
Enabling module streams:
 mysql                                                 8.0

Transaction Summary
=================================================================================================================================
Install  7 Packages

Total download size: 38 M
Installed size: 195 M
Is this ok [y/N]: y
Downloading Packages:
(1/7): mariadb-connector-c-config-3.1.11-2.el8_3.noarch.rpm                                      840 kB/s |  15 kB     00:00
(2/7): mecab-0.996-1.module_el8.4.0+589+11e12751.9.x86_64.rpm                                    9.1 MB/s | 393 kB     00:00
(3/7): mysql-common-8.0.26-1.module_el8.4.0+915+de215114.x86_64.rpm                              4.6 MB/s | 134 kB     00:00
(4/7): mysql-errmsg-8.0.26-1.module_el8.4.0+915+de215114.x86_64.rpm                               14 MB/s | 598 kB     00:00
(5/7): protobuf-lite-3.5.0-13.el8.x86_64.rpm                                                     6.6 MB/s | 149 kB     00:00
(6/7): mysql-8.0.26-1.module_el8.4.0+915+de215114.x86_64.rpm                                      31 MB/s |  12 MB     00:00
(7/7): mysql-server-8.0.26-1.module_el8.4.0+915+de215114.x86_64.rpm                               32 MB/s |  25 MB     00:00
---------------------------------------------------------------------------------------------------------------------------------
Total                                                                                             46 MB/s |  38 MB     00:00
...省略
Installed:
  mariadb-connector-c-config-3.1.11-2.el8_3.noarch                mecab-0.996-1.module_el8.4.0+589+11e12751.9.x86_64
  mysql-8.0.26-1.module_el8.4.0+915+de215114.x86_64               mysql-common-8.0.26-1.module_el8.4.0+915+de215114.x86_64
  mysql-errmsg-8.0.26-1.module_el8.4.0+915+de215114.x86_64        mysql-server-8.0.26-1.module_el8.4.0+915+de215114.x86_64
  protobuf-lite-3.5.0-13.el8.x86_64

Complete!
安装完成后,运行以下命令来保持MySQL在每次开机时自动启动:
[root@kaiyuanshinian ~]# sudo systemctl enable --now mysqld
然后执行以下命令看下当前mysql的运行状态:
[root@kaiyuanshinian ~]# sudo systemctl status mysqld
运行后你将看到如下内容:
● mysqld.service - MySQL 8.0 database server
   Loaded: loaded (/usr/lib/systemd/system/mysqld.service; enabled; vendor preset: disabled)
   Active: active (running) since Thu 2022-05-19 13:42:00 CST; 10s ago
  Process: 99934 ExecStartPost=/usr/libexec/mysql-check-upgrade (code=exited, status=0/SUCCESS)
  Process: 95613 ExecStartPre=/usr/libexec/mysql-prepare-db-dir mysqld.service (code=exited, status=0/SUCCESS)
  Process: 95578 ExecStartPre=/usr/libexec/mysql-check-socket (code=exited, status=0/SUCCESS)
 Main PID: 99743 (mysqld)
   Status: "Server is operational"
    Tasks: 38 (limit: 12461)
   Memory: 446.3M
   CGroup: /system.slice/mysqld.service
           └─99743 /usr/libexec/mysqld --basedir=/usr

May 19 13:41:50 kaiyuanshinian systemd[1]: Starting MySQL 8.0 database server...
May 19 13:41:50 kaiyuanshinian mysql-prepare-db-dir[95613]: Initializing MySQL database
May 19 13:42:00 kaiyuanshinian systemd[1]: Started MySQL 8.0 database server.
至此MySQL就算安装好了,但是仅仅安装完成并不算工作结束,因为我们的MySQL不可能去公开访问,所以还要对它进行一些保护措施,直接运行以下脚本(自带):
sudo mysql_secure_installation
然后按照以下提醒一步一步选择就好,除了远程访问我选择的都是yes
[root@kaiyuanshinian ~]# sudo mysql_secure_installation

Securing the MySQL server deployment.

Connecting to MySQL using a blank password.

VALIDATE PASSWORD COMPONENT can be used to test passwords
and improve security. It checks the strength of password
and allows the users to set only those passwords which are
secure enough. Would you like to setup VALIDATE PASSWORD component?

Press y|Y for Yes, any other key for No: y

There are three levels of password validation policy:

LOW    Length >= 8
MEDIUM Length >= 8, numeric, mixed case, and special characters
STRONG Length >= 8, numeric, mixed case, special characters and dictionary                  file

Please enter 0 = LOW, 1 = MEDIUM and 2 = STRONG: 2
Please set the password for root here.

New password:

Re-enter new password:

Estimated strength of the password: 100
Do you wish to continue with the password provided?(Press y|Y for Yes, any other key for No) : y
By default, a MySQL installation has an anonymous user,
allowing anyone to log into MySQL without having to have
a user account created for them. This is intended only for
testing, and to make the installation go a bit smoother.
You should remove them before moving into a production
environment.

Remove anonymous users? (Press y|Y for Yes, any other key for No) : y
Success.


Normally, root should only be allowed to connect from
'localhost'. This ensures that someone cannot guess at
the root password from the network.

Disallow root login remotely? (Press y|Y for Yes, any other key for No) : n

 ... skipping.
By default, MySQL comes with a database named 'test' that
anyone can access. This is also intended only for testing,
and should be removed before moving into a production
environment.


Remove test database and access to it? (Press y|Y for Yes, any other key for No) : y
 - Dropping test database...
Success.

 - Removing privileges on test database...
Success.

Reloading the privilege tables will ensure that all changes
made so far will take effect immediately.

Reload privilege tables now? (Press y|Y for Yes, any other key for No) : y
Success.

All done!
直至看到all done表示配置完成,具体每个配置什么意思,我建议大家自己去翻译一下记得比较深。
通过mysql -u root -p命令直接进入MySQL并创建一个database命名为:peoject10nian,MySQL的默认端口是3306我们就用默认的即可。具体命令以及执行结果如下:
[root@kaiyuanshinian ~]# mysql -u root -p
Enter password:
Welcome to the MySQL monitor.  Commands end with ; or \g.
Your MySQL connection id is 10
Server version: 8.0.26 Source distribution

Copyright (c) 2000, 2021, Oracle and/or its affiliates.

Oracle is a registered trademark of Oracle Corporation and/or its
affiliates. Other names may be trademarks of their respective
owners.

Type 'help;' or '\h' for help. Type '\c' to clear the current input statement.

mysql> show databases;
+--------------------+
| Database           |
+--------------------+
| information_schema |
| mysql              |
| performance_schema |
| sys                |
+--------------------+
4 rows in set (0.00 sec)

mysql> create database project10nian;
Query OK, 1 row affected (0.01 sec)

mysql> show databases;
+--------------------+
| Database           |
+--------------------+
| information_schema |
| mysql              |
| performance_schema |
| project10nian      |
| sys                |
+--------------------+
5 rows in set (0.01 sec)

mysql> use project10nian;
Database changed
mysql> show tables;
Empty set (0.01 sec)

mysql> exit;
Bye
好的,到这里关于MySQL的设置就够目前的项目使用了。
二、设置项目的配置文件
还记得我们项目中的config吗?里面有一个application.yml里面保存了我们对MySQL的一些配置信息:
datasource:
  driverName: mysql
  host: 127.0.0.1
  port: 3306
  database: project10nian
  username: <用你自己的账号>
  password: <用你自己设置的密码>
  charset: utf8
  loc: Asia/Shanghai
我们直接通过finalshell上传到云服务器去。
Tips:这里有个小技巧关于本地和服务器之间的文件传输
1、从服务器上下载文件 scp username@servername:/path/filename /var/www/local_dir(本地目录)
例如scp [email protected]:/var/www/test.txt 把192.168.0.101上的/var/www/test.txt 的文件下载到/var/www/local_dir(本地目录) 2、上传本地文件到服务器 scp /path/filename username@servername:/path
例如scp /var/www/test.php [email protected]:/var/www/ 把本机/var/www/目录下的test.php文件上传到192.168.0.101这台服务器上的/var/www/目录中
3、从服务器下载整个目录 scp -r username@servername:/var/www/remote_dir/(远程目录) /var/www/local_dir(本地目录)
例如:scp -r [email protected]:/var/www/test /var/www/
4、上传目录到服务器 scp -r local_dir username@servername:remote_dir 例如:scp -r test [email protected]:/var/www/ 把当前目录下的test目录上传到服务器的/var/www/ 目录
上传上去后在服务器创建一个config文件夹并把application.yml放进去。
[root@kaiyuanshinian ~]# mv application.yml config/
然后通过一下命令确认一下里面的内容与上一步我们设置的内容一致:
[root@kaiyuanshinian ~]# cd config/
[root@kaiyuanshinian config]# ls
application.yml
[root@kaiyuanshinian config]# cat application.yml
datasource:
  driverName: mysql
  host: 127.0.0.1
  port: 3306
  database: project10nian
  username: <用你自己的>
  password: <用你自己的>
  charset: utf8
  loc: Asia/Shanghai
到这里,配置文件也搞定了。
下面我们直接让项目在服务器后台开始运行即可:
[root@kaiyuanshinian ~]# nohup ./main &
nohup和'&'还记得是什么意思吗?不记得就翻翻以前的笔记。
那么我们在本地浏览器中访问一下测试接口看一下:
界面返回Ok表示我们部署工作已经完成了。
三、安装nginx
为什么安装nginx,因为我们的需要一个web容器去承载后面的界面展示工作,Nginx是一个轻量级的Web服务器,有的人会问Gin不是也可以吗?确实~ 但是我们实际开发场景中都是前后端分离的,也算是为了适应当前的大环境。
【具体安装方法请自行百度,这个太多了】
安装完成后你打开IP会看到:
Welcome to nginx!
表示你安装成功了,这里重点说一下nginx的配置,请参考下面配置理解:(路径:ngnix-1.18/conf/nginx.conf)
user  root;
worker_processes  1;

#error_log  logs/error.log;
#error_log  logs/error.log  notice;
#error_log  logs/error.log  info;

#pid        logs/nginx.pid;

events {
    worker_connections  1024;
}

http {
    include       mime.types;
    default_type  application/octet-stream;
    sendfile        on;
    keepalive_timeout  65;
    gzip on;    #开启gzip压缩功能
    gzip_min_length 1k;          #最小压缩文件为1k
    gzip_buffers 4 16k;                #压缩缓存空间大小
    gzip_comp_level 5;                 #压缩级别为2
    gzip_types text/plain application/javascript application/x-javascript text/javascript text/css application/xml;  #压缩文件类型
    gzip_http_version 1.1; #识别http的协议版本。由于早期的一些浏览器或者http客户端,可能不支持gzip自解压,用户就会看到乱码,所以做一些判断还是有必要的
    gzip_vary on;               #开启压缩表示
    #gzip_static on;         #开启(在浏览器不支持解压功能,nginx提前解压)解压功能

    server {
         listen 443 ssl;
         server_name 你的域名;
    ssl_certificate /opt/server/nginx1.18/conf/ssl/你的ssl证书.crt;
        ssl_certificate_key /opt/server/nginx1.18/conf/ssl/你的ssl证书.key;
        ssl_session_timeout 5m;
        ssl_ciphers ECDHE-RSA-AES128-GCM-SHA256:ECDHE:ECDH:AES:HIGH:!NULL:!aNULL:!MD5:!ADH:!RC4;
        ssl_protocols TLSv1 TLSv1.1 TLSv1.2;
        ssl_prefer_server_ciphers on;
         location / {
            root 你的项目路径;
            index  beian.html;
         }
    }
}
这里配置的时候可以把location指向你的前端代码,目前我还没有前端代码,所以这里就不赘述了。
END 、网站的备案和域名解析
域名解析,目前我手头正好有一个闲置域名,就直接解析了过去。具体解析参考以下图片:
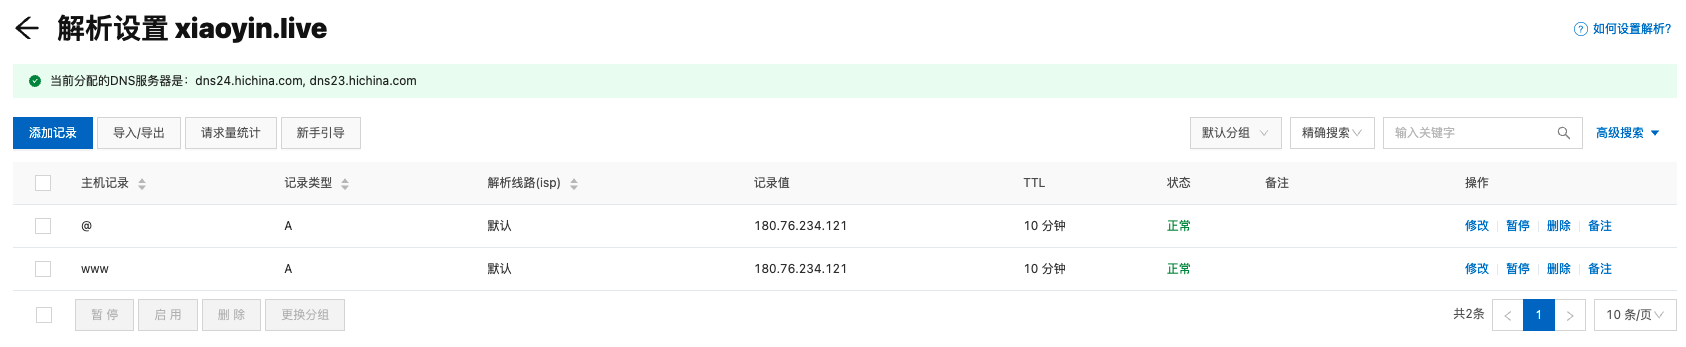
但是由于没有备案,所以我直接收到了短信提示:

我们现在服务器已经有了,域名也有了,也解析过去了,下一步就是去备个案,到时我们的项目就可以呈现在大家面前了。(当然等备好案以后还要进行一番配置的)
ok just this...see you!
Recommend
About Joyk
Aggregate valuable and interesting links.
Joyk means Joy of geeK