

How to Persist Web App Data in the User File System
source link: https://joaomelo.substack.com/p/how-to-persist-web-app-data-in-the?s=r
Go to the source link to view the article. You can view the picture content, updated content and better typesetting reading experience. If the link is broken, please click the button below to view the snapshot at that time.
How to Persist Web App Data in the User File System
We are going to build a text editor to save and open text files from the file system
Most web apps need to persist user data to deliver value. It could be anything from user credentials, to-do list records, or even binary artifacts like videos or pdfs.
A typical solution would use one or a combination of the many flavors of databases and object storage services like Heroku Postgres, MongoDB Atlas, Firebase, and AWS S3. But the local file system could be a liberating alternative for both the business and the user in some cases.
If the data is in the user’s hands, the developer won’t need to pay storage costs. Some security concerns could be relaxed, maybe we won’t need a login for example. Even if the file system would not be the ideal solution for the final product, it may be an accelerating factor during prototyping.
The user could be more comfortable regarding privacy concerns while the data is on their device. On top of that, there will be a lifetime guarantee for portability if the developer chooses an open data format like plain text.
But how is something like this implemented in web apps?
We will explore this challenge by building a rich text editor that runs in the browser and can save and open its content from the disk.
Environment
The first step is to create a project folder to hold the source code. Inside the new folder, run the following command to initialize an npm package.
npm init -yWe need a webserver to run our app. If you want to use Vite as I did, now is a good time to install it.
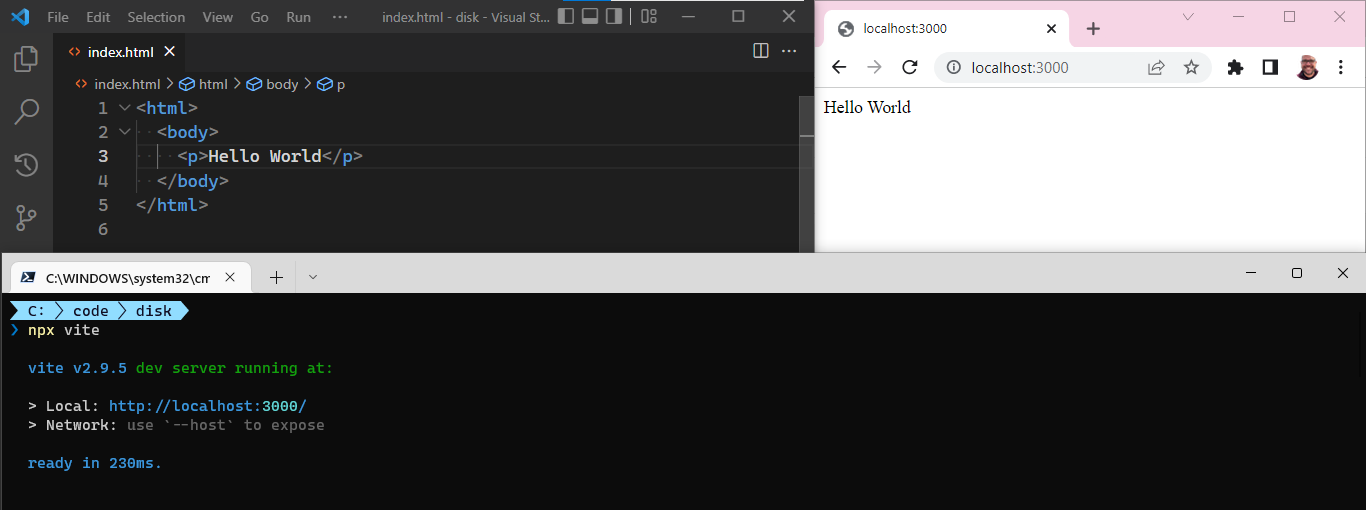
npm i -D viteTo make sure the plumbing is all set, create a index.html file with the following markup. Then run Vite with the npx vite command. Finally, check if the app is online at the address provided by Vite in the terminal.
Time to create our text editor.
Online Text editor
We will use the EasyMDE amazing library to create a rich text editing experience based on the Markdown syntax.
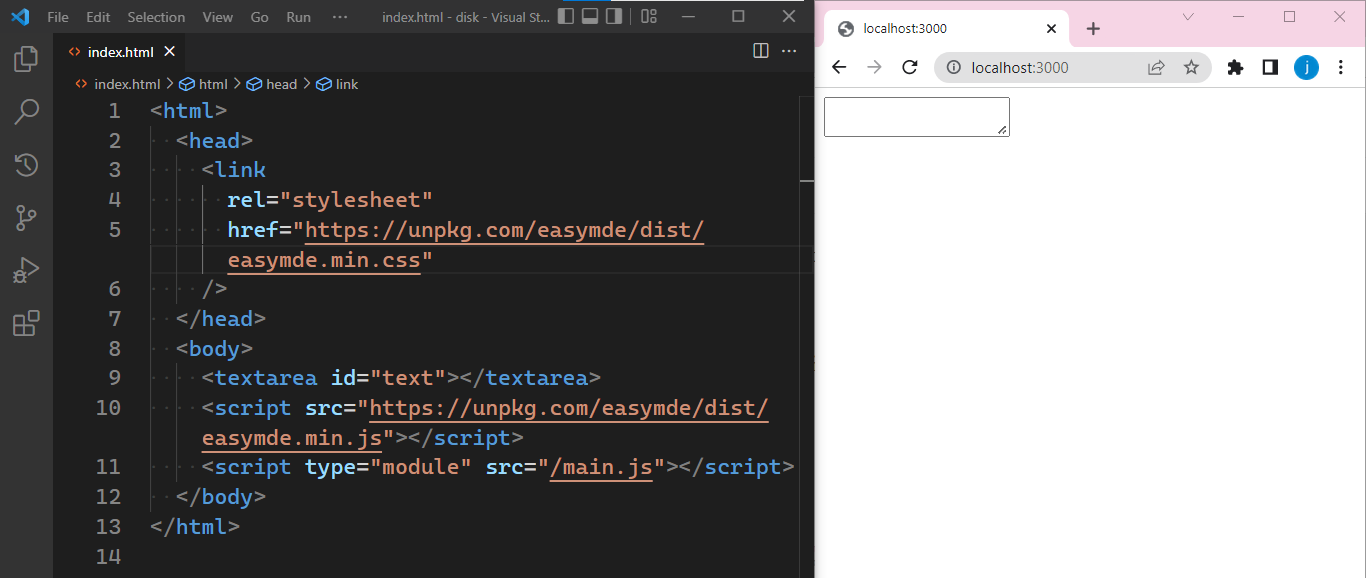
To turn it on in our app we must follow three steps: import the library styles and javascript, provide a textarea element and initialize the UI using javascript in our app code.
Please update the index.html code as follow to achieve the first two steps. Take notice of the id attribute in the textarea tag.
Now we create a main.js file beside index.html to initialize EasyMDE with its default setup.
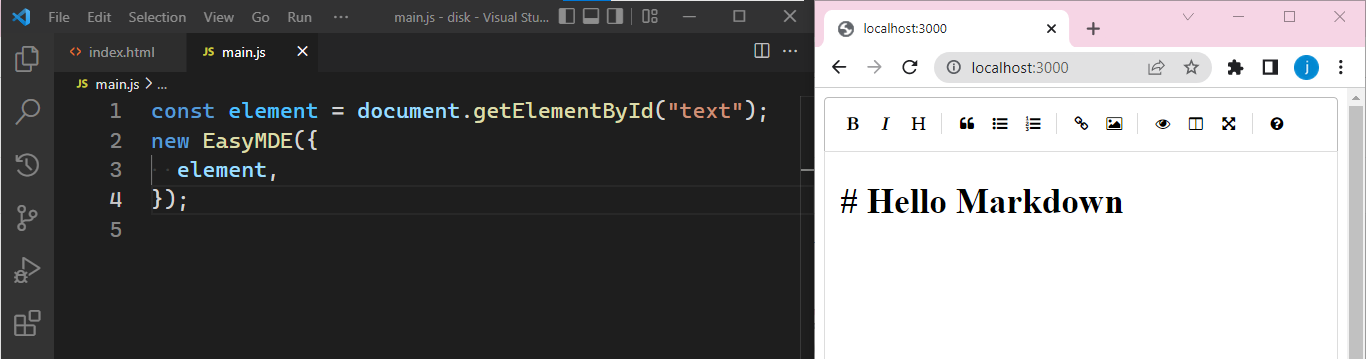
Is so satisfying to accomplish such a set of features with so little code 😊, don’t you think? Nevertheless, we still need a way for the user to save and open files from the disk.
Custom buttons
The editor's default toolbar is an excellent choice but we need to tweak it to present an open and save custom buttons. See the updated main.js code with the new toolbar configuration.
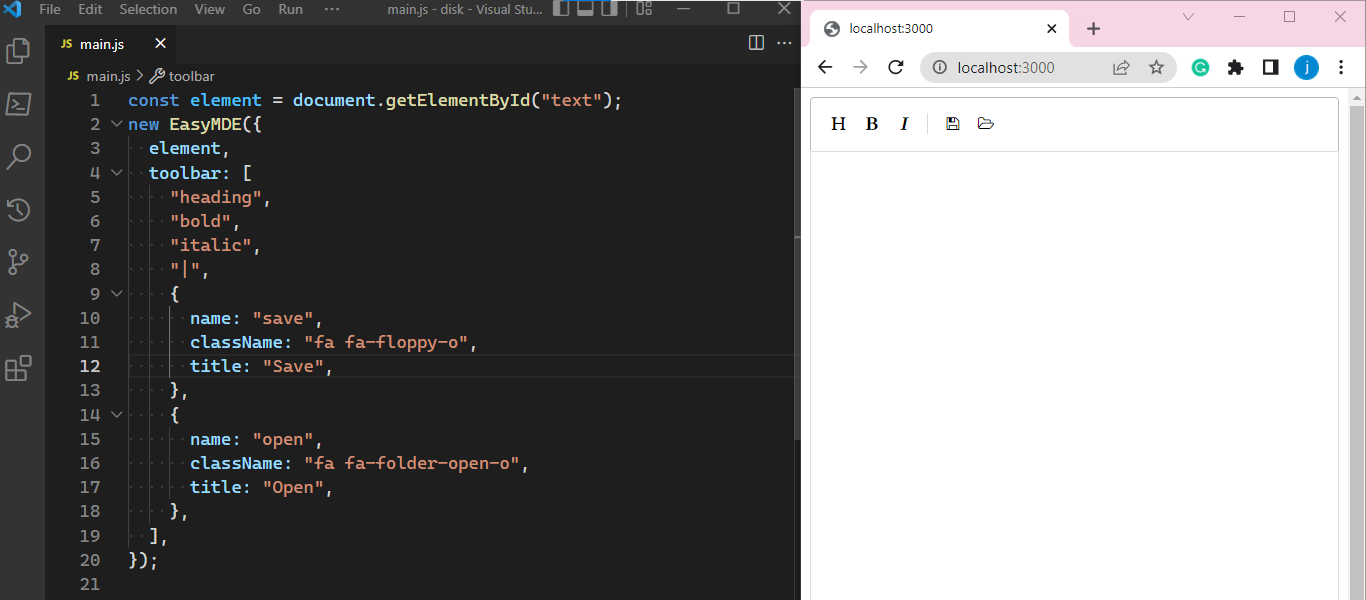
The toolbar property expects an array of strings and objects enumerating buttons to be shown. On one hand, the strings from lines 5 to 7 are references to pre-made buttons — the complete list is in the EasyMDE docs.
On the other hand, the save and open custom buttons have to be fully specified as objects from lines 9 to 18.
Still, these buttons do nothing if clicked. To enable behavior we must provide a function to be called for each of them. The next section will cover the development of these functions. Until then, some boilerplate is enough to encapsulate our challenge.
Let’s first create a new disk.js file, stub the respective functions and import them into the corresponding properties in the main.js toolbar setup. See both files below.
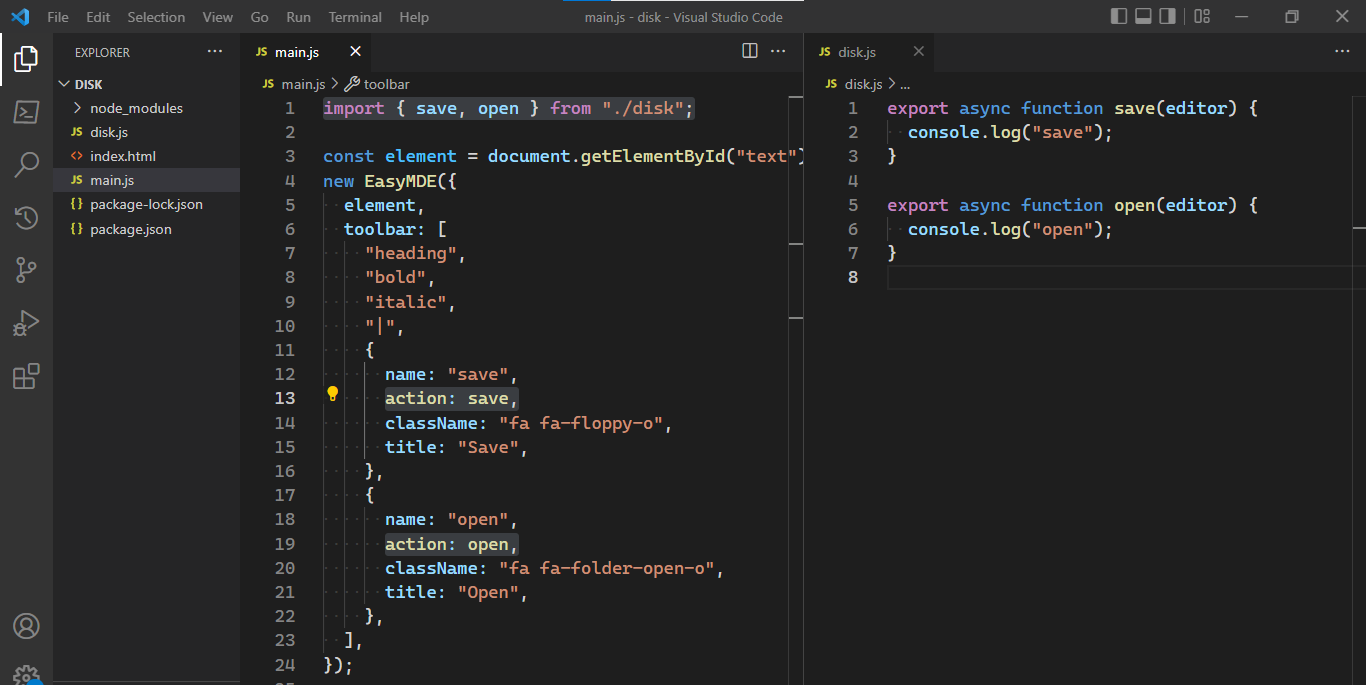
Lines 1, 13, and 19 in the main.js file are the changes needed there. We will be working inside the disk.js file from now on, starting with the save function.
We are going to use functions and objects from the File System Access API to save data to disk. The first step is to call the showSaveFilePicker function. It shows a system save dialog and resolves to a filehandle object after the user completes the interaction.
The function receives an options object as the first parameter. We take advantage of that to filter the files appropriate to text content, like this.
  const handle = await showSaveFilePicker({
    types: [
      {
        description: "Markdown files",
        accept: { "text/plain": [".txt", ".md"] },
      },
    ],
  });
The returned handle has a createWritable method which resolves to a stream object. The stream is the one capable of writing to the user disk.
const stream = await handle.createWritable();But how do we get the content to save? Luckily every function called from an EasyMDE custom button receives a convenient reference to the editor instance. This editor object has a value method that returns the content as a string.
Putting all the pieces together, we access the editor content, write to our new file using the stream object, and finish by closing the stream. See the save function in its final form.

Saving is awesome 😎. But how can we load that saved file next time the computer restarts?
The logic for opening and saving is familiar. The showOpenFilePicker function will show the system open dialog and resolve (not to a handle but) to an array of filehandles.
The returned type is an array because the function can optionally let the user open several files at once. Since that is not our goal here, we call it without arguments and destructure the result directly into a single handle.
const [handle] = await showOpenFilePicker();The handle has a getFile method that returns a reference to a file object. This file object can access the actual content on the disk as a string with its text method. From that, is pretty straightforward to replace the editor content with the file text using the editor value method. See the full implementation below.

Conclusion
We built a rich Markdown text editor that opens and saves text to the user’s disk with less than a hundred lines of code thanks to the diversity and evolution of the web ecosystem 🙏🏻.
The project's source code is available in this Github repository.
I hope you found this post useful, feel free to share it with anyone you know. You can also subscribe for free and receive fresh content in your inbox. I will never send more than one email a week.
Recommend
About Joyk
Aggregate valuable and interesting links.
Joyk means Joy of geeK