

Kubernetes创建普通账号
source link: https://zhangrr.github.io/posts/20211109-k8s_rbac/
Go to the source link to view the article. You can view the picture content, updated content and better typesetting reading experience. If the link is broken, please click the button below to view the snapshot at that time.

kubernetes 装好正常运行一段时间后,会出现要把研发和运维权限分开的场景:
- 给某个用户某一指定名称空间下的管理权限
- 给用户赋予集群的只读权限
非常麻烦,我们这里不讨论过多的概念,从运维的角度出发,简单实用化
我们需要明确三个RBAC最基本的概念
- Role: 角色,它定义了一组规则,定义了一组对Kubernetes API对象的操作权限
- RoleBinding: 定义了"被作用者"和"角色"的绑定关系
- Subject: 被作用者,既可以是"人",也可以是机器,当然也可以是 Kubernetes 中定义的用户(ServiceAccount主要负责kubernetes内置用户)
我们的操作过程流程如下,首先创建客户端证书;其次创建Role角色;再创建RoleBinding,把Subject和Role绑定,就完事了;最后一步是生成 kubectl 的配置文件。
一、创建客户端证书
我们以已建好的阿里 ACK 为例,或者自建好的 Kubernetes 也行;确定已经有了 .kube/config 配置文件,拥有集群最高权限,并且可以正常执行 kubectl 命令。
首先是生成证书,并向集群提出证书请求并签发,脚本如下:
#!/bin/sh

useraccount=reader

openssl req -new -newkey rsa:4096 -nodes -keyout $useraccount-k8s.key -out $useraccount-k8s.csr -subj "/CN=$useraccount/O=devops"
csr=$(cat $useraccount-k8s.csr | base64 | tr -d '\n')
cat << EOF > k8s-csr.yaml
apiVersion: certificates.k8s.io/v1beta1
kind: CertificateSigningRequest
metadata:
  name: $useraccount-k8s-access
spec:
  groups:
  - system:authenticated
  request: $csr
  usages:
  - client auth
EOF


kubectl create -f k8s-csr.yaml
kubectl certificate approve $useraccount-k8s-access

kubectl get csr $useraccount-k8s-access -o jsonpath='{.status.certificate}' | base64 --decode > $useraccount-k8s-access.crt
kubectl config view -o jsonpath='{.clusters[0].cluster.certificate-authority-data}' --raw | base64 --decode - > k8s-ca.crt
解释一下:我们定义了一个用户CN=reader,然后向集群发送了证书请求并签发,最终从集群获得了 reader-k8s-access.crt 的客户端证书和 k8s-ca.crt 的 CA 证书。
k8s-csr.yaml 和 reader-k8s.csr 都是中间产物,最终我们有了客户端私钥 reader-k8s.key ,客户端证书 reader-k8s-access.crt ,CA 证书 k8s-ca.crt 这三个有用的文件。
二、创建 Role 角色
cat << EOF >> role.yaml
apiVersion: rbac.authorization.k8s.io/v1
kind: Role
metadata:
  name: role-pods_reader
  namespace: default
rules:
- apiGroups:
  - ""
  resources:
  - pods
  - pods/log
  verbs:
  - get
  - list
  - watch
EOF

kubectl apply -f role.yaml
解释:我们创建了一个 role 角色,名字叫做 role-pods_reader,所属命名空间是 default ,它对 pods 和 pods/log 有 get 、list、watch的权限,也就是说role-pods_reader 可以查看 default 空间的 pods 和 pods 的日志。
三、创建 Rolebinding
cat << EOF >> rolebinding.yaml
apiVersion: rbac.authorization.k8s.io/v1
kind: RoleBinding
metadata:
  name: rolebinding-default_pods_reader
  namespace: default
roleRef:
  apiGroup: rbac.authorization.k8s.io
  kind: Role
  name: role-pods_reader
subjects:
- apiGroup: rbac.authorization.k8s.io
  kind: User
  name: reader
EOF

kubectl apply -f rolebinding.yaml
解释:我们创建了一个 rolebinding,名字叫做 rolebinding-default_pods_reader,同样所属命名空间是 default,它绑了两个东西,一个是 role,就是上面第二步创建的 role-pods_reader;另一个是 subject,对应了一个用户,就是我们第一步创建的那个 reader。
四、生成 kubectl 配置文件
#!/bin/sh
useraccount=reader
namespace=default

kubectl config set-cluster $(kubectl config view -o jsonpath='{.clusters[0].name}') --server=$(kubectl config view -o jsonpath='{.clusters[0].cluster.server}') --certificate-authority=k8s-ca.crt --embed-certs --kubeconfig=$useraccount-k8s-config

kubectl config set-credentials $useraccount --client-certificate=$useraccount-k8s-access.crt --client-key=$useraccount-k8s.key --embed-certs --kubeconfig=$useraccount-k8s-config

kubectl config set-context $useraccount --cluster=$(kubectl config view -o jsonpath='{.clusters[0].name}') --namespace=$namespace --user=$useraccount --kubeconfig=$useraccount-k8s-config

kubectl config use-context $useraccount --kubeconfig=$useraccount-k8s-config
解释:上面看起来很复杂,其实就是四步,在配置文件里设置 cluster 、设置 credentials 证书、设置 context 上下文、设置当前上下文。
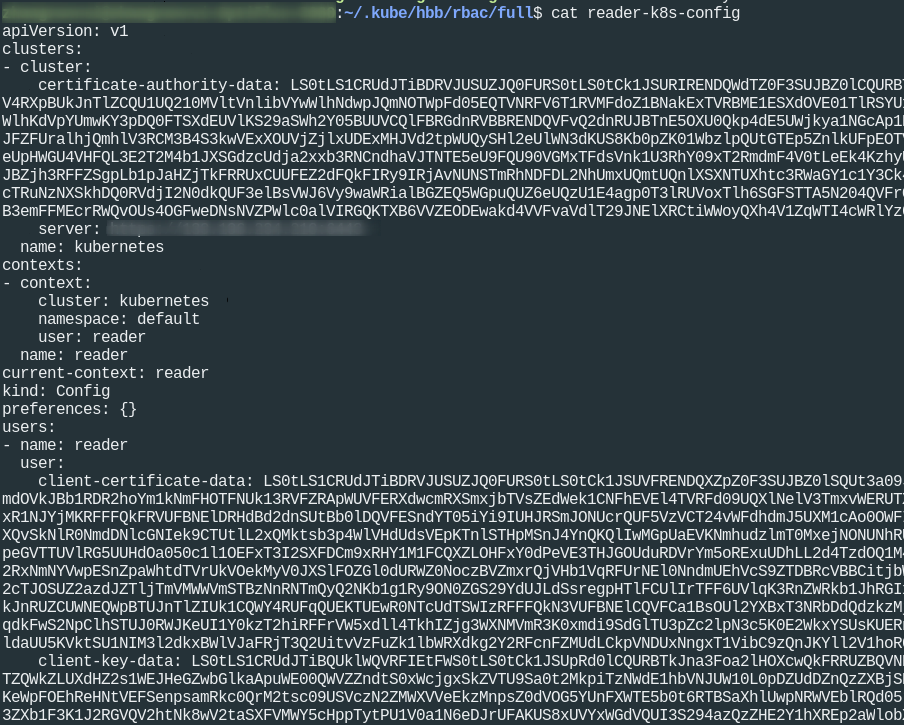
完事后会产生一个完整的 reader-k8s-config 文件,如下:
我们验证一下:
KUBECONFIG=reader-k8s-config kubectl get pods

KUBECONFIG=reader-k8s-config kubectl auth can-i delete pods

KUBECONFIG=reader-k8s-config kubectl auth can-i delete svc
这样一个对 default 空间的只读用户就建立好了
六、集群只读用户
我们这里给出集群只读用户的 role,命名 role-cluster_reader
kubectl apply -f - <<EOF
apiVersion: rbac.authorization.k8s.io/v1
kind: ClusterRole
metadata:
  name: role-cluster_reader
rules:
- apiGroups:
  - ""
  resources:
  - nodes
  - pods
  - pods/exec
  - pods/log
  - services
  - configmaps
  - secrets
  - serviceaccounts
  - endpoints
  verbs:
  - get
  - list
  - watch
- apiGroups:
  - apps
  resources:
  - deployments
  - replicasets
  - daemonsets
  - statefulsets
  verbs:
  - get
  - list
  - watch
- apiGroups:
  - batch
  resources:
  - jobs
  - cronjobs
  verbs:
  - get
  - list
  - watch
EOF
以及 rolebinding,还是绑到第一步的用户 reader 的例子
kubectl apply -f - <<EOF
apiVersion: rbac.authorization.k8s.io/v1
kind: ClusterRoleBinding
metadata:
  name: rolebinding-cluster_reader
roleRef:
  apiGroup: rbac.authorization.k8s.io
  kind: ClusterRole
  name: role-cluster_reader
subjects:
- apiGroup: rbac.authorization.k8s.io
  kind: User
  name: reader
EOF
生成配置文件的步骤跟上一步是一样的。
从上面大家可以看到,其实最主要的就是 role 的 yaml 文件,里面控制着到底有怎么样的权限。
Recommend
-
27
操作起来要简单快速,既要高效又要省钱,这样的Kubernetes集群怎么搭? ------------ Kubernetes是我主要学习的主题之一。我知道不光是...
-
8
如何在Kubernetes中创建一个自定义Controller? 2020-05-18 18:20 约 3763 字 预计阅读 8 分钟 Custom Resource是扩展Kubernetes的一种方式...
-
20
请点击上方 “民生运维人” 添加订阅! 一 引言 Kubernetes部署除了常规手动方式外,还有诸如K...
-
6
配置是程序绕不开的话题,在Kubernetes中使用ConfigMap来配置,它本质其实就是键值对。本文讲解如何通过5种方式创建ConfigMap,通过4种方式使用ConfigMap。 2 创建ConfigMap 按大类可分为...
-
2
是这样的一个事情:服务运行于kubernetes集群(腾讯云tke1.20.6)。日志采集到了elasticsearch集群and腾讯的cls日志服务中。小伙伴看日志觉得还是不太方便,还是想看控制台输出的。给他们分配过一台服务器(加入到集群中,但是有污点标签的节点)。为了方便他们...
-
3
您现在的位置:首页 --> 系统运维 --> Linux Swap -- 创建普通文件作为swap Linux Swap -- 创建普...
-
3
【编者的话】本文带你打开Kubernetes API的探索之旅的正确姿势,快来一睹为快吧!官方的Kubernetes Go客户端装载了高级抽象——Clientset、Informers、Cache、Scheme、Discovery
-
2
如何创建一个完全匿名的EOS、ETH账号所谓完全匿名,也就是说 不管有几方配合,也查不到是你注册的这个账号。需要哪些工具能买到门罗的交易所账号(无所谓是否kyc)—账号1能充值门罗的交易所账号...
-
3
来宾账号 / 普通账号也可以,微软 Windows 10 / Windows 11 系统中可通过命令读取受保护的 Wi-Fi 密码 作者:故渊 2023-02-21 10:18:41 根据用户反馈发现在 Windows 10、Windows 11 系统中,普通账号、来...
-
11
🚀 想要在抖音起飞?用中国虚拟手机号注册! https://www.chenweiliang.com/cwl-31018.html 点击上方链接,教你轻松搞定。
About Joyk
Aggregate valuable and interesting links.
Joyk means Joy of geeK