
3

Centos7安装python3.8
source link: https://3mile.github.io/archives/2019/1106110511/
Go to the source link to view the article. You can view the picture content, updated content and better typesetting reading experience. If the link is broken, please click the button below to view the snapshot at that time.

准备安装Python3、下载Python3
一、安装依赖包,这个具体的作用我也不清楚,感觉好像是在安装的时候会要用到的工具。
yum install zlib-devel bzip2-devel openssl-devel ncurses-devel sqlite-devel readline-devel tk-devel gcc make mysql-devel gcc-devel python-devel -y
二、再执行安装一个工具,不安装会导致pip安装失败,这也是我遇到的最大的一个坑!
yum install libffi-devel wget -y
三、下载python3.7的包,有两种方法,一种是从官网下载,然后上传到CentOS上,另一种可以通过CentOS的wget命令直接下载。两者都可以。
打开python的官方网站:https://www.python.org/ -->Downloads-->Source code-->Latest Python 3 Release - Python 3.7.0-->拉到最下面,选择Gzipped source tarball,下载到本地,然后上传到服务器即可
wget命令
wget -c https://www.python.org/ftp/python/3.8.0/Python-3.8.0.tgz
安装Python3.7.0
依次执行下列代码即可
tar -zxvf Python-3.8.0.tgz
cd Python-3.8.0
./configure ; make && make install
如果出现了“ModuleNotFound:No module named ‘_ctypes’”报错,那就是你漏了第二步!!!
配置环境变量(python和pip的)
mv /usr/bin/python /usr/bin/python.bak
ln -s /usr/local/bin/python3 /usr/bin/python
mv /usr/bin/pip /usr/bin/pip.bak
ln -s /usr/local/bin/pip3 /usr/bin/pip
验证Python3是否安装完成
1、验证python,如果显示的版本号是3.8.0,就代表安装成功了(CentOS会自带一个python2.7)

2、验证pip,看看pip的版本号是不是10.0.1,以及最后括号里是不是3.7

配置yum
但是!!这时候,你输入一下yum,你会发现你的yum用不了了!为什么,刚刚还好使呢?
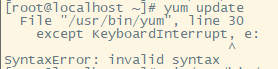
[root@localhost ~]# yum update File “/usr/bin/yum”, line 30 except KeyboardInterrupt, e: ^ SyntaxError: invalid syntax
主要是因为yum是依赖python2.7的,你把python改成了3.7了,自然不好使了。但是不用担心,python2.7还在你的电脑里。只要修改一下yum里的相关依赖即可。
编辑文件/usr/libexec/urlgrabber-ext-down
vi /usr/libexec/urlgrabber-ext-down
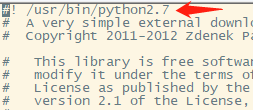
打开以后,找到一个/usr/bin/python的,后面加上2.7就可以了!也就是 /usr/bin/python2.7
编辑文件 /usr/bin/yum
vi /usr/bin/yum
做法和上面的一样,也是改成python2.7就可以了!
然后,你的python开发环境就配置成功了!!!
安装Python模组
安装lxml,依赖有libxml2-devel,libxslt-devel
sudo yum install libxml2-devel libxslt-devel -y
sudo pip3 install lxml
安装requests
sudo pip3 install requests
Recommend
About Joyk
Aggregate valuable and interesting links.
Joyk means Joy of geeK