

使用 GONEList 搭建在线分享网盘
source link: https://blog.cugxuan.cn/2020/04/13/Go/gonelist-serve-public-filesystem/
Go to the source link to view the article. You can view the picture content, updated content and better typesetting reading experience. If the link is broken, please click the button below to view the snapshot at that time.

此文章已不再更新,请查看 GONEList 了解具体安装方法和文档地址
此文章已不再更新,请查看 GONEList 了解具体安装方法和文档地址
此文章已不再更新,请查看 GONEList 了解具体安装方法和文档地址
GONEList,即 Golang Onedrive List,是由 golang+vue 编写的基于 onedrive 的在线网盘,有着跨平台等特性,搭建简单,十多分钟时间即可配置完成
使用 GONEList 搭建在线分享网盘
GONEList 是由 golang+vue 编写的基于 onedrive 的在线网盘,有着跨平台等特性,搭建简单。本次搭建使用的是系统是 64 位 Ubuntu 18.04,Linux 系统一般都可以兼容对应的操作
下载已编译的程序
在 Github-Release 或者 gonelist-release 下载您使用平台对应的二进制文件,并且解压进入
// 下载对应的安装包,也可下载 gonelist-release 中的包 |
创建 MicroSoft 应用
如果您的 整个网盘以及微软账号 里面没有任何隐私资料,可以直接使用我们的默认 client_id 和 client_secret(解压后 config.json 自带默认设置),直接跳转到 修改配置信息,否则请申请自己单独的应用来保护您的隐私安全。
(注:您可以通过 你已授予访问权限的应用和服务 来管理自己许可的应用)
注册应用程序
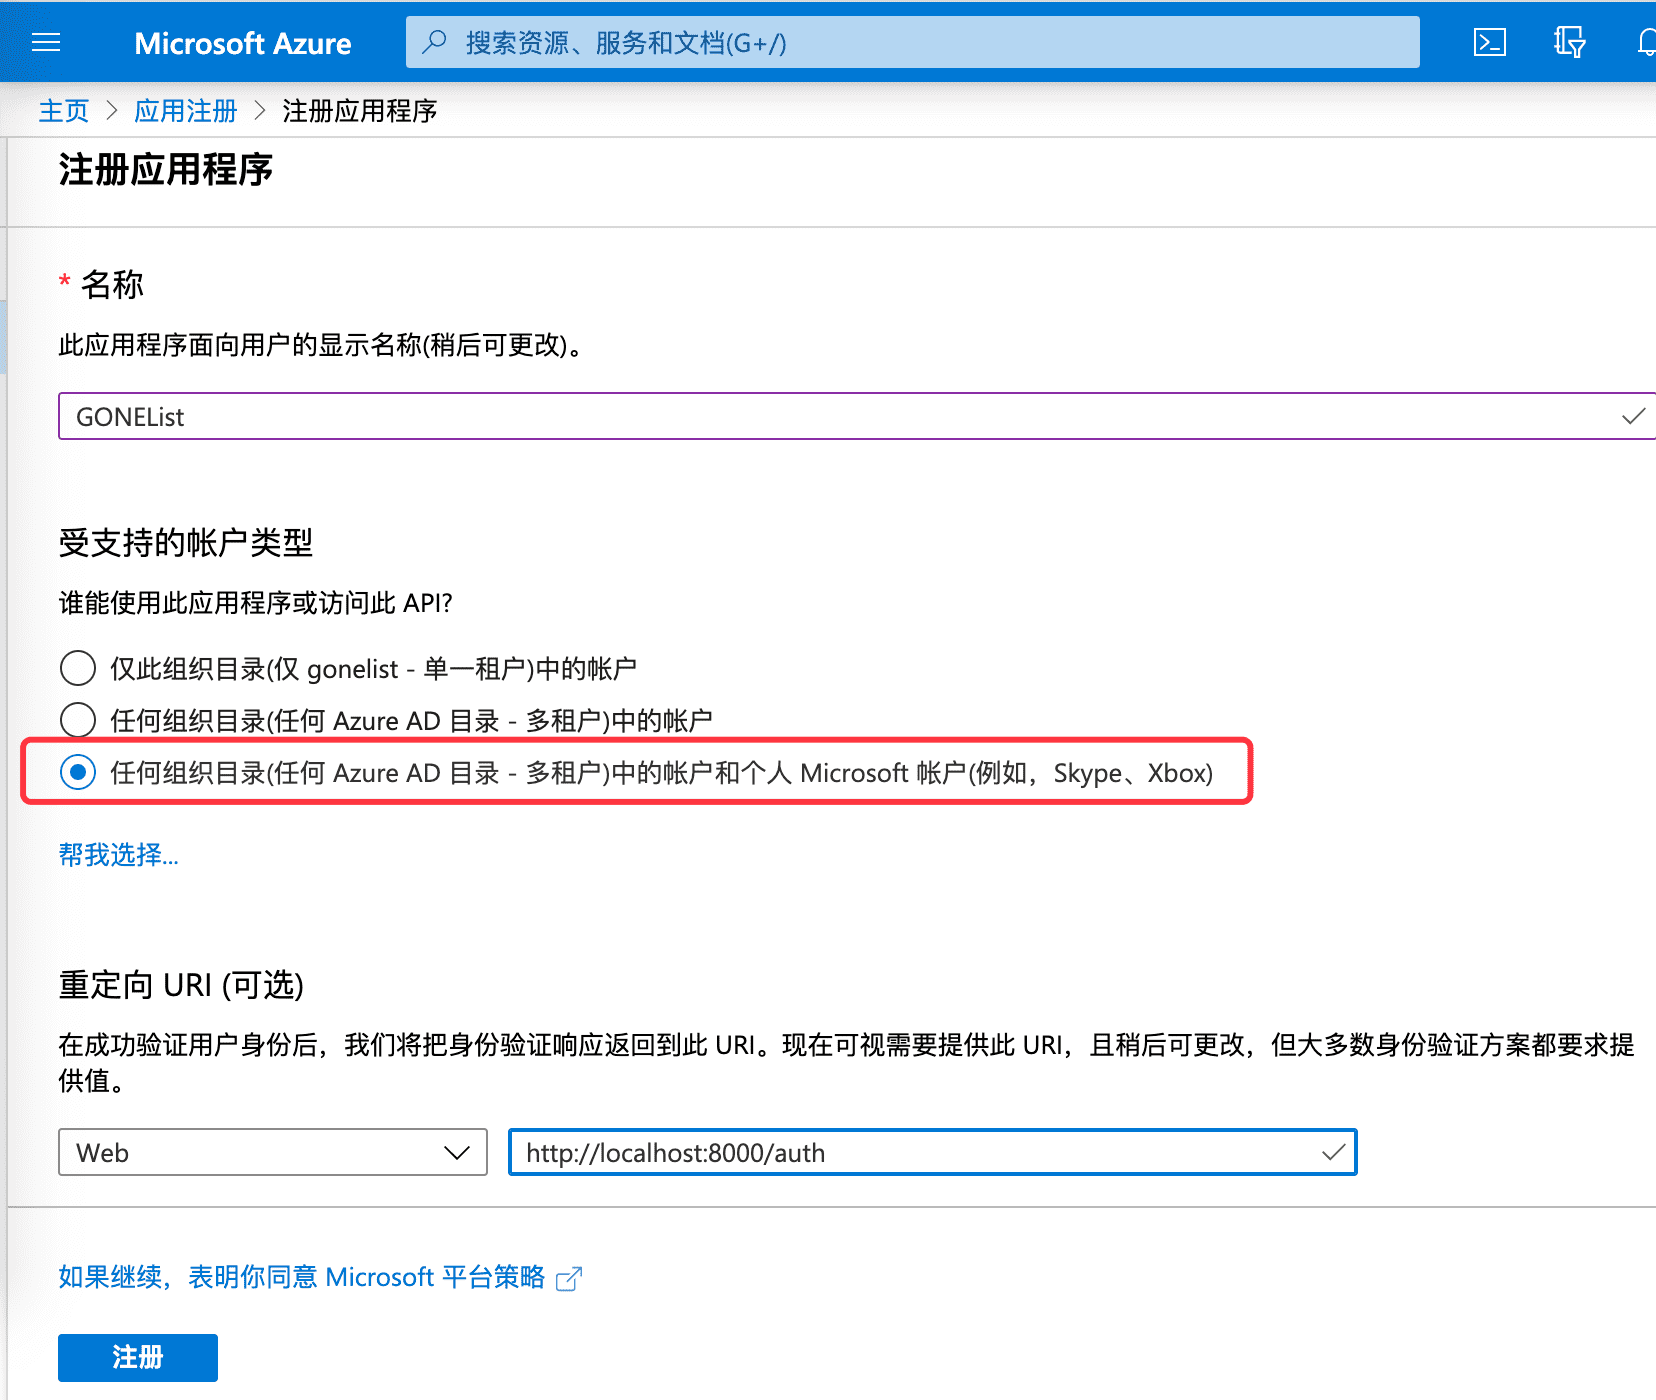
打开 注册应用程序 的链接,登陆后选择「注册应用程序」,输入「名称」,选择「任何组织目录中的账户和个人」(注意这里不要选成单一租户或者其他选项,否则会导致登陆时出现问题),输入重定向 URL 为 http://localhost:8000/auth,「注册」即可
客户端密码
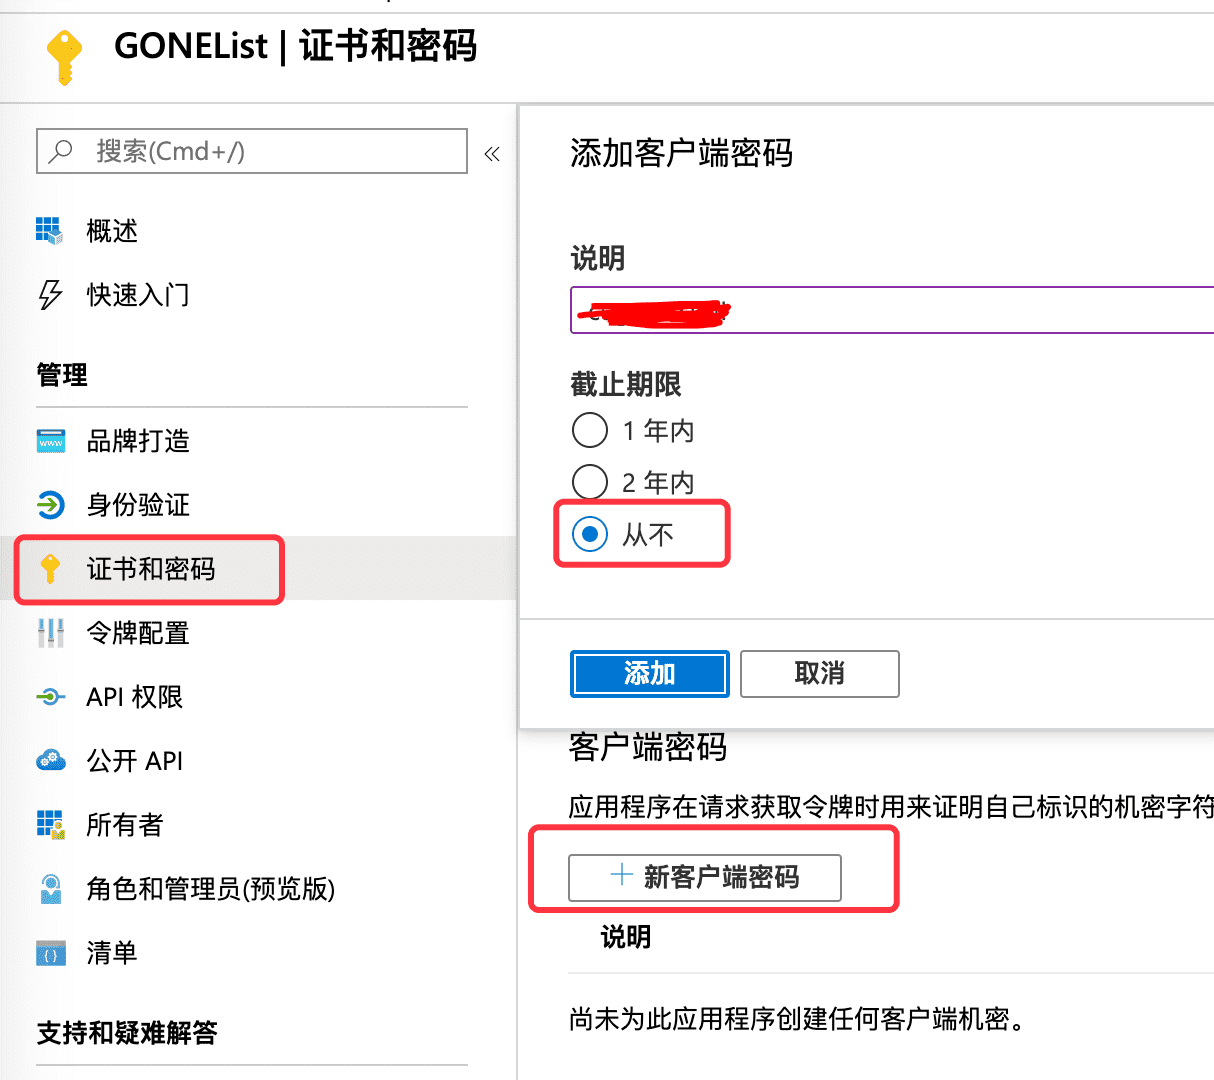
注册好应用程序之后,选择「证书和密码」,点击「新客户端密码」,输入一串密码,选择时间为「永久」,点击「添加」
(注:在添加之后输入的密码之后会消失,请记录下来 client_secret 的值)
API 权限
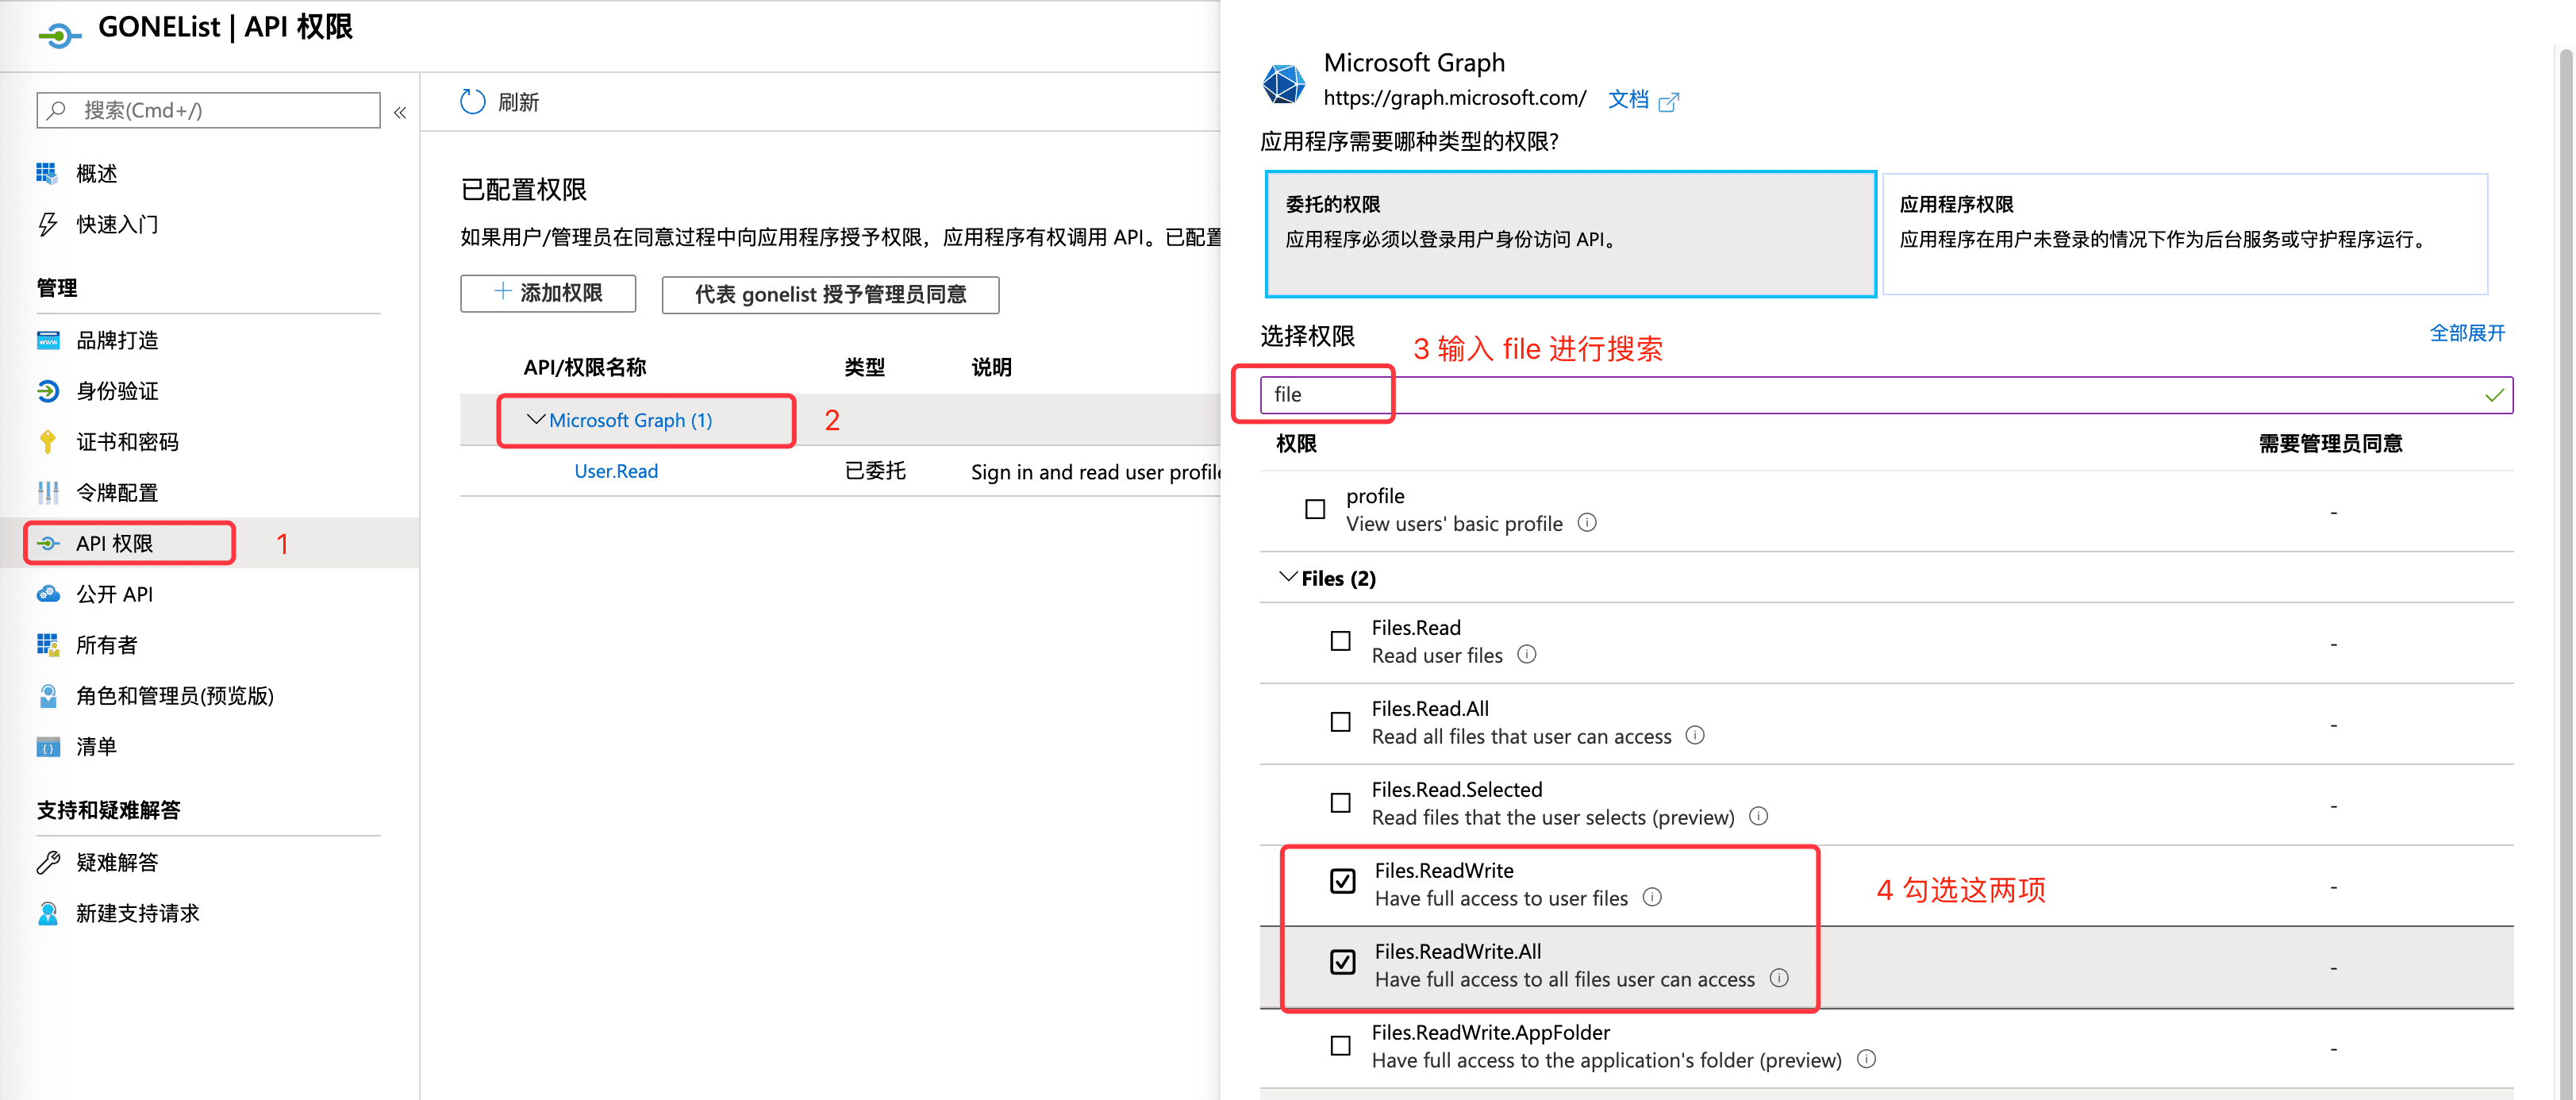
选择「API 权限」,点击 「MicroSoft Graph」,在「选择权限」中输入 file,勾选 「Files.read」(注:Files.read 是只读最小权限,图中权限较大,也同样可以),点击「确定」
客户端 id
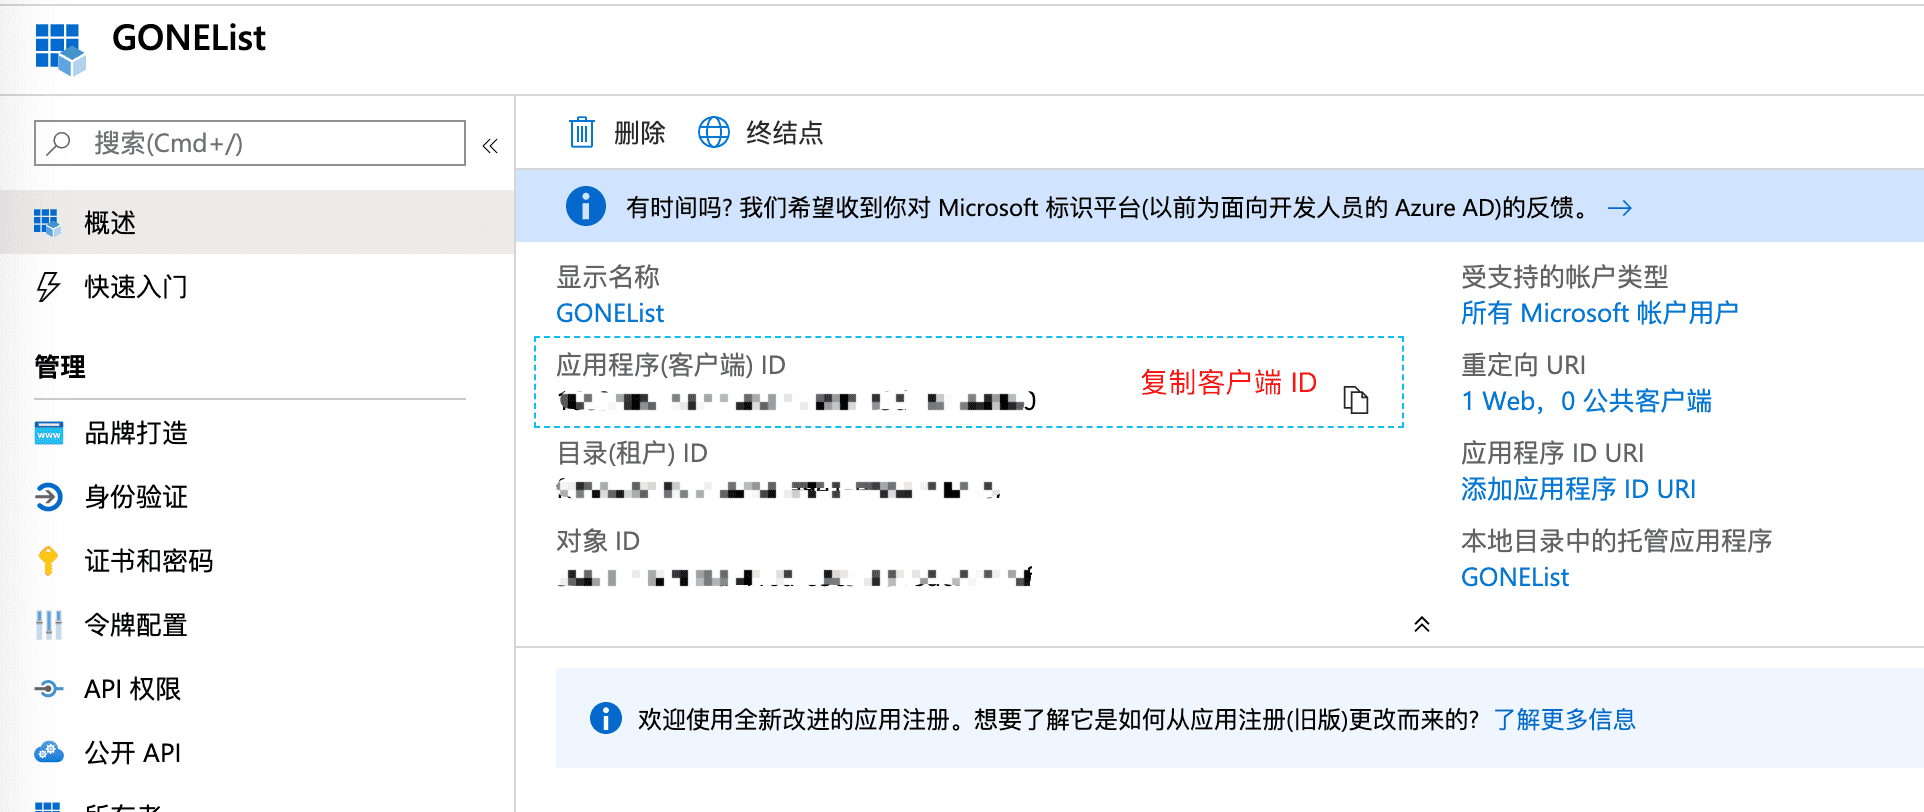
在 config 中还有一项是客户端 id,在概述中记录下即可,至此我们的 client_id 和 client_secret 都已经拿到了
修改配置信息
在第一步完成之后,进入到了 gonelist_linux_amd64 文件夹,在 config.json 文件中有许多可以配置的地方,建议填入自己的 client_id 以及 client_secret,folder_sub 可以设置 GONEList 的根目录是从 onedrive 的什么地方开始
{ |
启动和终止应用
现在就可以直接启动应用了
// 启动应用 |
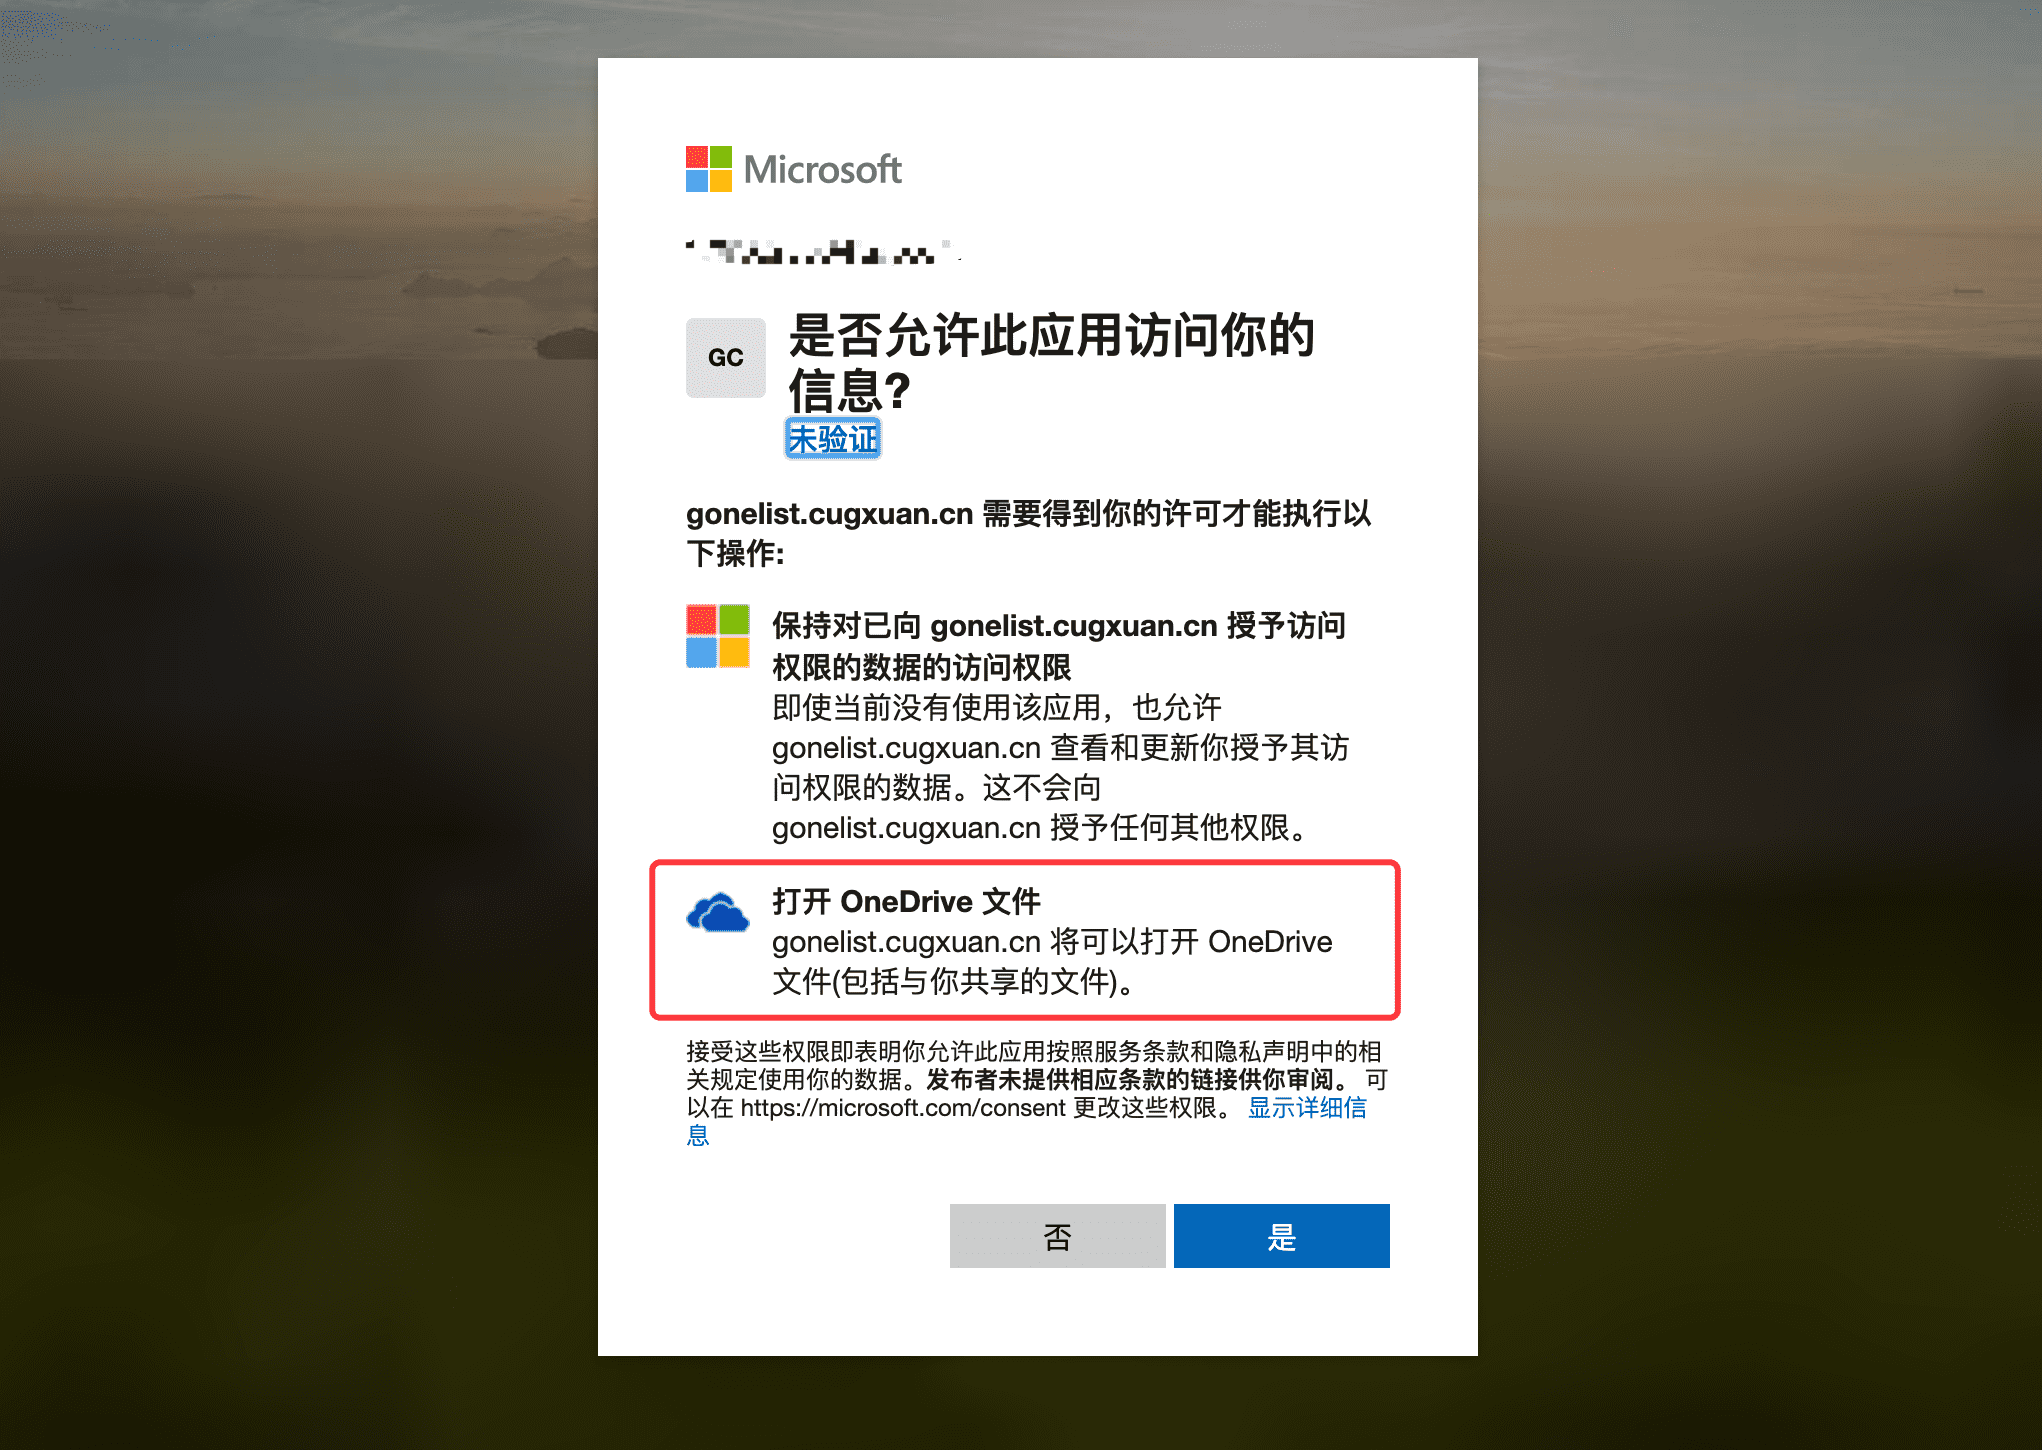
浏览器打开 http://localhost:8000 即可访问,如果你是部署在服务器,可以使用 http://yoursite:8000 访问。打开后会跳转登陆页面,授予权限
如果是在本地部署,登陆成功会跳转到首页,此时已经完成部署。如果登陆后一直没有反应,可能是因为文件夹数量过多导致,建议设置「子文件夹」选项
如果是在服务器部署,登陆成功会跳转到http://localhost:8000/auth?code=xxx,将当前网址改成 http://yoursite:8000/auth?code=xxx 再回车等待文件加载后,会自动跳转你的网站 http://yoursite:8000
HTTPS
如果你的域名申请了 HTTPS 证书,可以通过 nginx 反向代理。建议将 config.json 中的 bind_global 设置为 false(作用就是不会让外部通过 http 访问),然后修改 nginx 设置,以我的 https://gonelist.cugxuan.cn,腾讯云的免费证书为例
$ cd /etc/nginx/sites-enabled |
在 nginx 配置文件中写入下面内容,然后 $ nginx 启动或 $ nginx -s reload 重启即可
server { |
Recommend
About Joyk
Aggregate valuable and interesting links.
Joyk means Joy of geeK