
2

springboot(18)事件监听
source link: https://wakzz.cn/2018/05/29/springboot/(18)%E4%BA%8B%E4%BB%B6%E7%9B%91%E5%90%AC/
Go to the source link to view the article. You can view the picture content, updated content and better typesetting reading experience. If the link is broken, please click the button below to view the snapshot at that time.

springboot(18)事件监听
祈雨的博客
2018-05-29
转载自简书本文链接地址: Springboot事件监听
先看一个demo,加入依赖
<properties>
    <project.build.sourceEncoding>UTF-8</project.build.sourceEncoding>
    <maven.compiler.source>1.8</maven.compiler.source>
    <maven.compiler.target>1.8</maven.compiler.target>
</properties>

<parent>
    <groupId>org.springframework.boot</groupId>
    <artifactId>spring-boot-starter-parent</artifactId>
    <version>1.5.4.RELEASE</version>
</parent>

<dependencies>
     <dependency>
         <groupId>org.springframework.boot</groupId>
         <artifactId>spring-boot-starter</artifactId>
     </dependency>
</dependencies>
定义一个自定义事件,继承ApplicationEvent类
/**
 * 定义事件
 *
 */
public class MyApplicationEvent extends ApplicationEvent {

private static final long serialVersionUID = 1L;

public MyApplicationEvent(Object source) {
        super(source);
    }
}
定义一个事件监听器MyApplicationListener实现ApplicationListener接口,
package com.zhihao.miao;

import org.springframework.context.ApplicationListener;

public class MyApplicationListener implements ApplicationListener<MyApplicationEvent> {

public void onApplicationEvent(MyApplicationEvent event) {
        System.out.println("接收到事件:"+event.getClass());
    }

}
主测试类:
package com.zhihao.miao;


import org.springframework.boot.SpringApplication;
import org.springframework.boot.autoconfigure.SpringBootApplication;
import org.springframework.context.ConfigurableApplicationContext;

@SpringBootApplication
public class Application {
    public static void main(String[] args) {
        SpringApplication application = new SpringApplication(Application.class);
        //配置事件监听器
        application.addListeners(new MyApplicationListener());
        ConfigurableApplicationContext context =application.run(args);
        //发布事件
        context.publishEvent(new MyApplicationEvent(new Object()));
        context.close();
    }
}
打印结果:
总结:
springboot事件监听的流程:
- 自定义事件,一般是继承ApplicationEvent抽象类。
- 定义事件监听器,一般是实现ApplicationListener接口。
- 配置监听器,启动的时候,需要把监听器加入到spring容器中。
- 发布事件。
其中第三步(将监听器纳入到spring容器)除了上面的方法之外,
application.addListeners(new MyApplicationListener());
还有三种方法
第二种方式
直接在MyApplicationListener类上加上@Component注解,纳入spring容器管理
package com.zhihao.miao;

import org.springframework.context.ApplicationListener;
import org.springframework.stereotype.Component;

@Component
public class MyApplicationListener implements ApplicationListener<MyApplicationEvent> {

public void onApplicationEvent(MyApplicationEvent event) {
        System.out.println("接收到事件:"+event.getClass());
    }

}
主类测试:
package com.zhihao.miao;


import org.springframework.boot.SpringApplication;
import org.springframework.boot.autoconfigure.SpringBootApplication;
import org.springframework.context.ConfigurableApplicationContext;

@SpringBootApplication
public class Application {
    public static void main(String[] args) {
        SpringApplication application = new SpringApplication(Application.class);
        ConfigurableApplicationContext context =application.run(args);
        //发布事件
        context.publishEvent(new MyApplicationEvent(new Object()));
        context.close();
    }
}

第三种方式
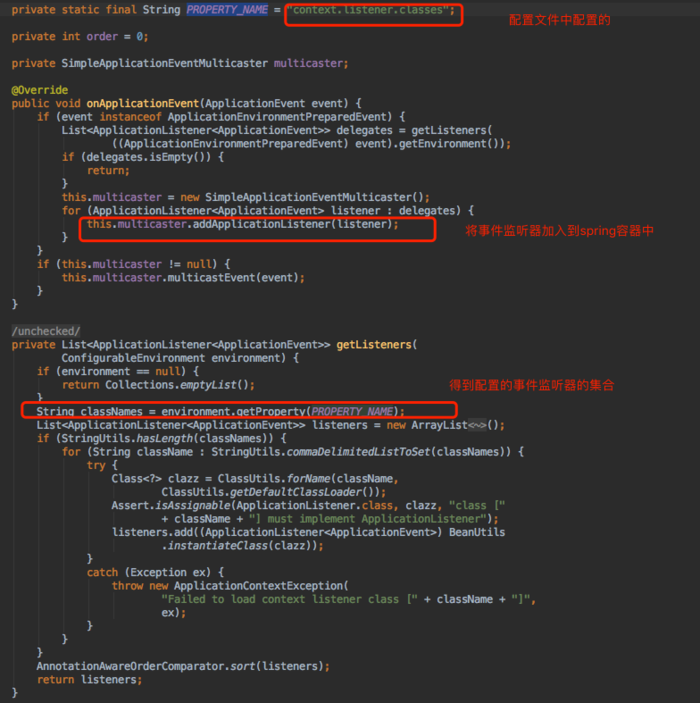
在配置文件中配置
context.listener.classes=com.zhihao.miao.MyApplicationListener
源码分析:
进入DelegatingApplicationListener类中的onApplicationEvent方法,getListeners是获取当前项目中的所有事件监听器。
第四种方式
使用@EventListener注解
package com.zhihao.miao;

import org.springframework.context.event.EventListener;
import org.springframework.stereotype.Component;

@Component
public class MyEventHandle {


    /**
     * 参数任意(为Object)的时候所有事件都会监听到
     * 所有,该参数事件,或者其子事件(子类)都可以接收到
     */
    @EventListener
    public void event(Object event){
        System.out.println("MyEventHandle 接收到事件:" + event.getClass());
    }

}
主类测试:
package com.zhihao.miao;


import org.springframework.boot.SpringApplication;
import org.springframework.boot.autoconfigure.SpringBootApplication;
import org.springframework.context.ConfigurableApplicationContext;

@SpringBootApplication
public class Application {
    public static void main(String[] args) {
        SpringApplication application = new SpringApplication(Application.class);
        ConfigurableApplicationContext context =application.run(args);
        //发布事件
        context.publishEvent(new MyApplicationEvent(new Object()));
        context.close();
    }
}
打印结果:
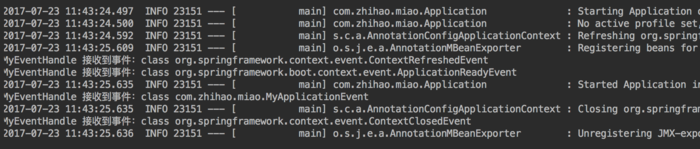
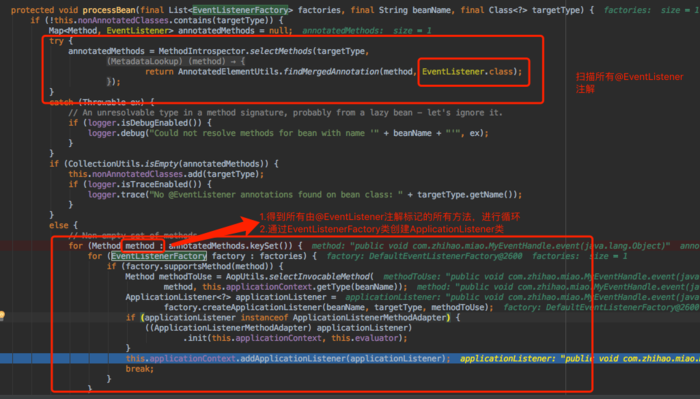
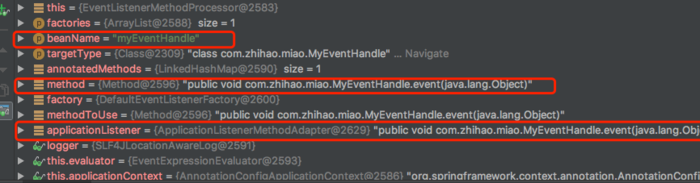
源码分析:
进入@EventListener注解,文档说明中处理@EventListener是依靠EventListenerMethodProcessorbean,然后进入EventListenerMethodProcessorbean中,我们大概看一下流程,可以自己调试
总结:
配置事件监听器的四种方法
- SpringApplication.addListeners 添加监听器
- 把监听器纳入到spring容器中管理
- 使用context.listener.classes配置项配置(详细内容参照:DelegatingApplicationListener)
- 使用@EventListener注解,在方法上面加入@EventListener注解,且该类需要纳入到spring容器中管理(详细内容参照:EventListenerMethodProcessor,EventListenerFactory)
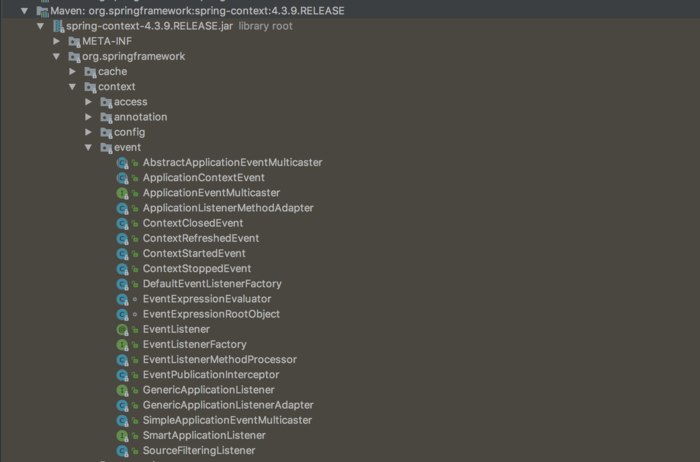
spring及springboot已经定义好的事件
spring的事件
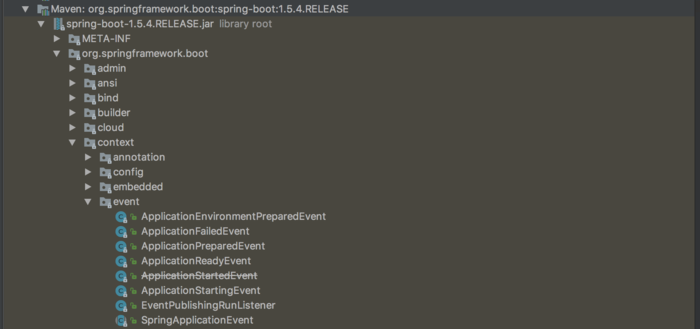
springboot的事件
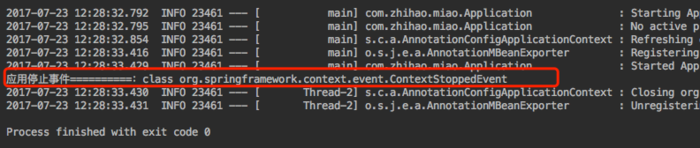
测试一下spring自带的事件:
@Component
public class MyEventHandle {

/**
     * 监听spring的事件(运用停止事件,Application.stop()方法时候监听到。
     *
     */
    @EventListener
    public void eventStop(ContextStoppedEvent event){
        System.out.println("应用停止事件==========:"+event.getClass());
    }
}
主类测试:
@SpringBootApplication
public class Application {
    public static void main(String[] args) {
        ConfigurableApplicationContext context = SpringApplication.run(Application.class,args);
        context.stop();
    }
}
作者:二月_春风
链接:https://www.jianshu.com/p/5f57f2aa5e2c
來源:简书
著作权归作者所有。商业转载请联系作者获得授权,非商业转载请注明出处。
Recommend
About Joyk
Aggregate valuable and interesting links.
Joyk means Joy of geeK