

【Flutter 专题】89 图解基本 Overlay 悬浮新手引导 #yyds干货盘点#
source link: https://blog.51cto.com/xace/5235376
Go to the source link to view the article. You can view the picture content, updated content and better typesetting reading experience. If the link is broken, please click the button below to view the snapshot at that time.

【Flutter 专题】89 图解基本 Overlay 悬浮新手引导 #yyds干货盘点#
推荐 原创随着业务的扩展和延伸,需要的功能也是多种多样,而同一种效果可以有多种实现方案;小菜今天学习一下通过 Overlay 实现基本的悬浮引导效果;
Overlay 以浮层的方式管理单独的 item 存储在栈中(后进先出);Overlay 其源码也是采用的 Stack 浮层,将 OverEntry 逐个加入到 Overlay 中进行展示,OverEntry 可以使用 Positioned 或 AnimatedPositioned 在 Overlay 中定义自身的位置;
当创建 MaterialApp 时,它会自动创建一个 Navigator,之后创建一个 Overlay,然后利用这个 Navigator 来管理路由中的界面;
const Overlay({
    Key key,
    this.initialEntries = const <OverlayEntry>[],
})

class OverlayEntry
  OverlayEntry({
    @required this.builder,
    bool opaque = false,
    bool maintainState = false,
  })
}
分析源码可知,Overlay 主要是由 OverlayEntry 浮层元素组成的,并以栈的方式存储;opaque 为当前浮层元素是否遮盖整个 Overlay 浮层;maintainState 一般与 opaque 共同使用,是否将不透明的浮层元素添加到 Widget Tree 中;
Overlay 作为浮层的应用效果很广泛,网上很多老师都通过 Overlay 实现自定义 Toast / Dialog / PopupMenu / List item 等,但小菜尝试通过 Overlay 实现升级过程中的新手引导;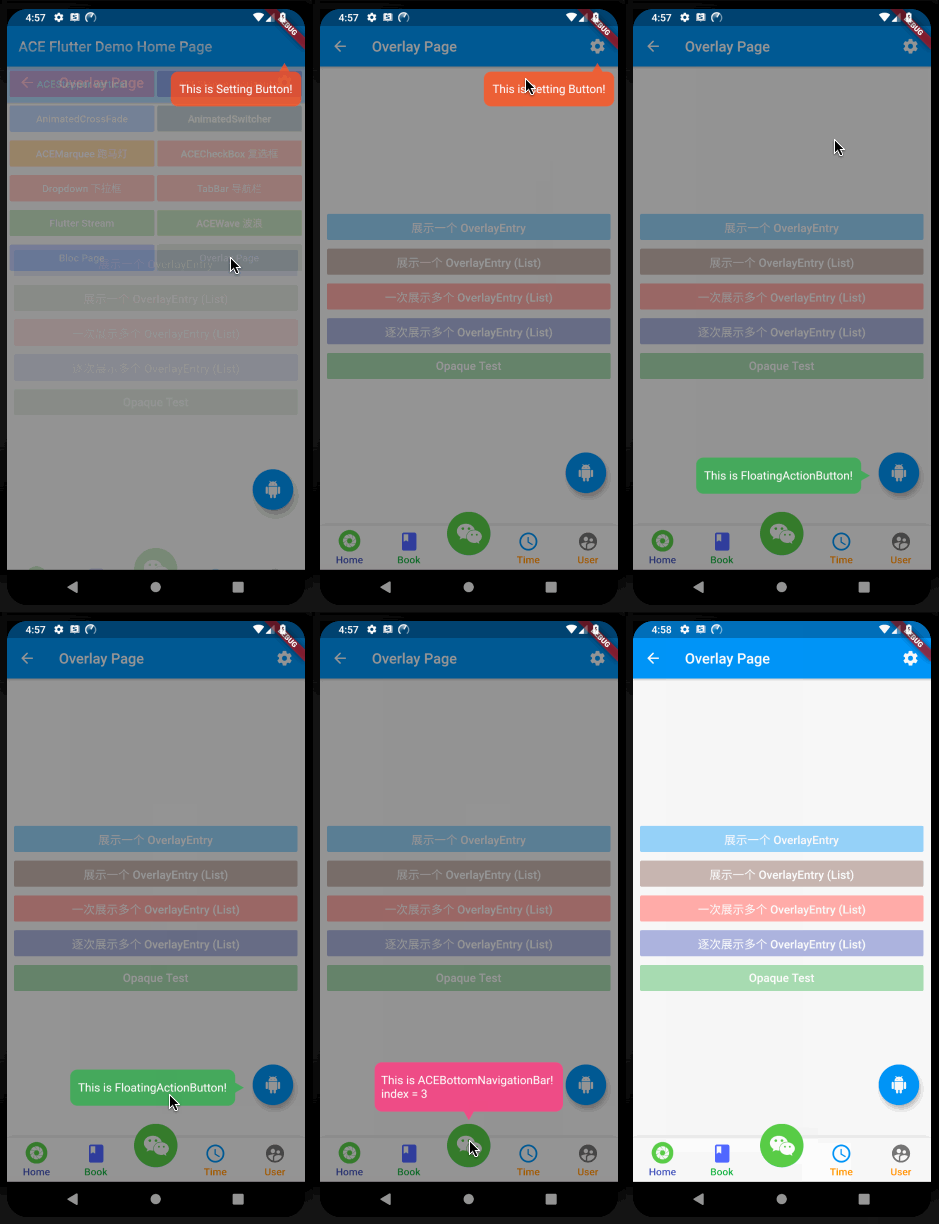
Overlay 主要是通过 insert / insertAll 方式加入 OverEntry 浮层元素,通过 remove 移除浮层元素;
insert One OverEnrty
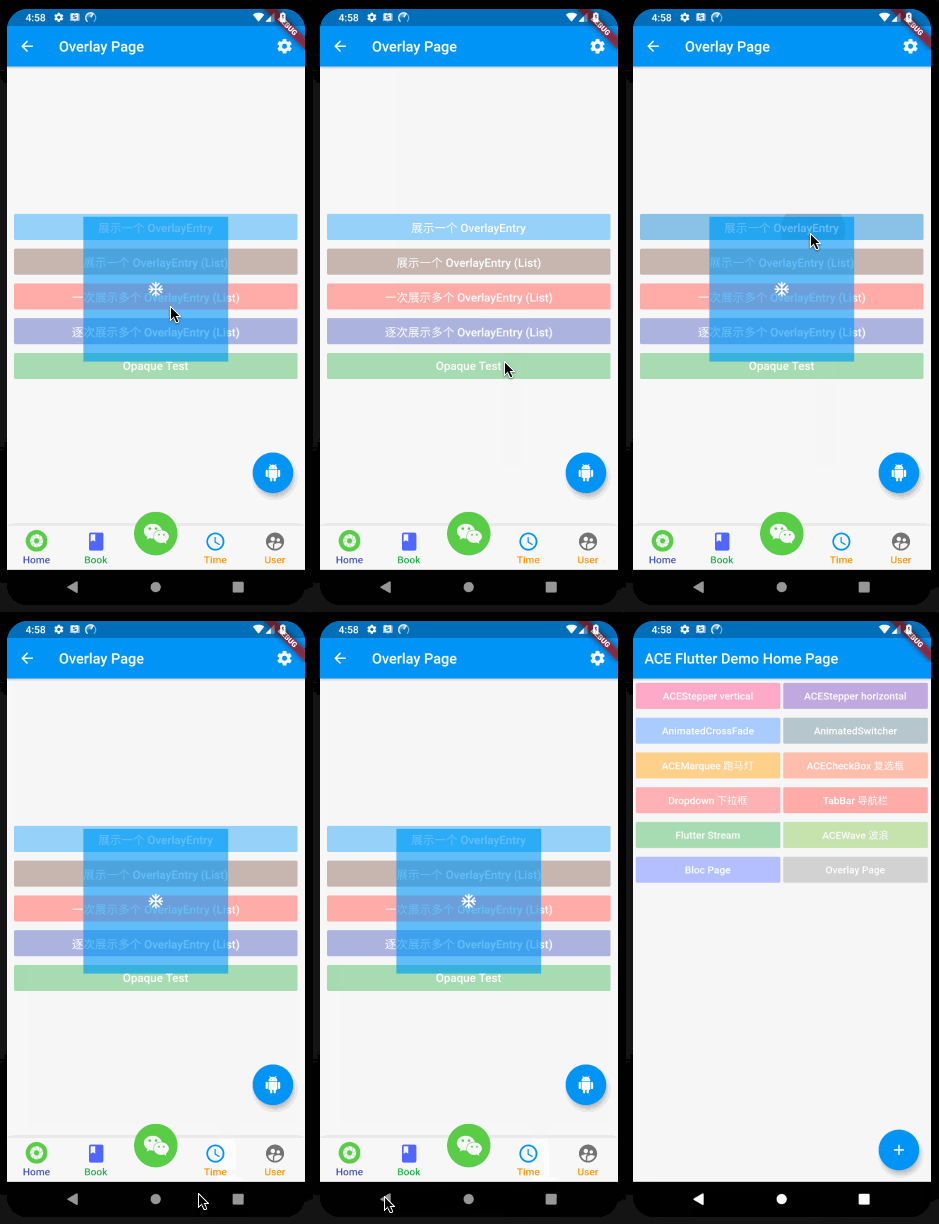
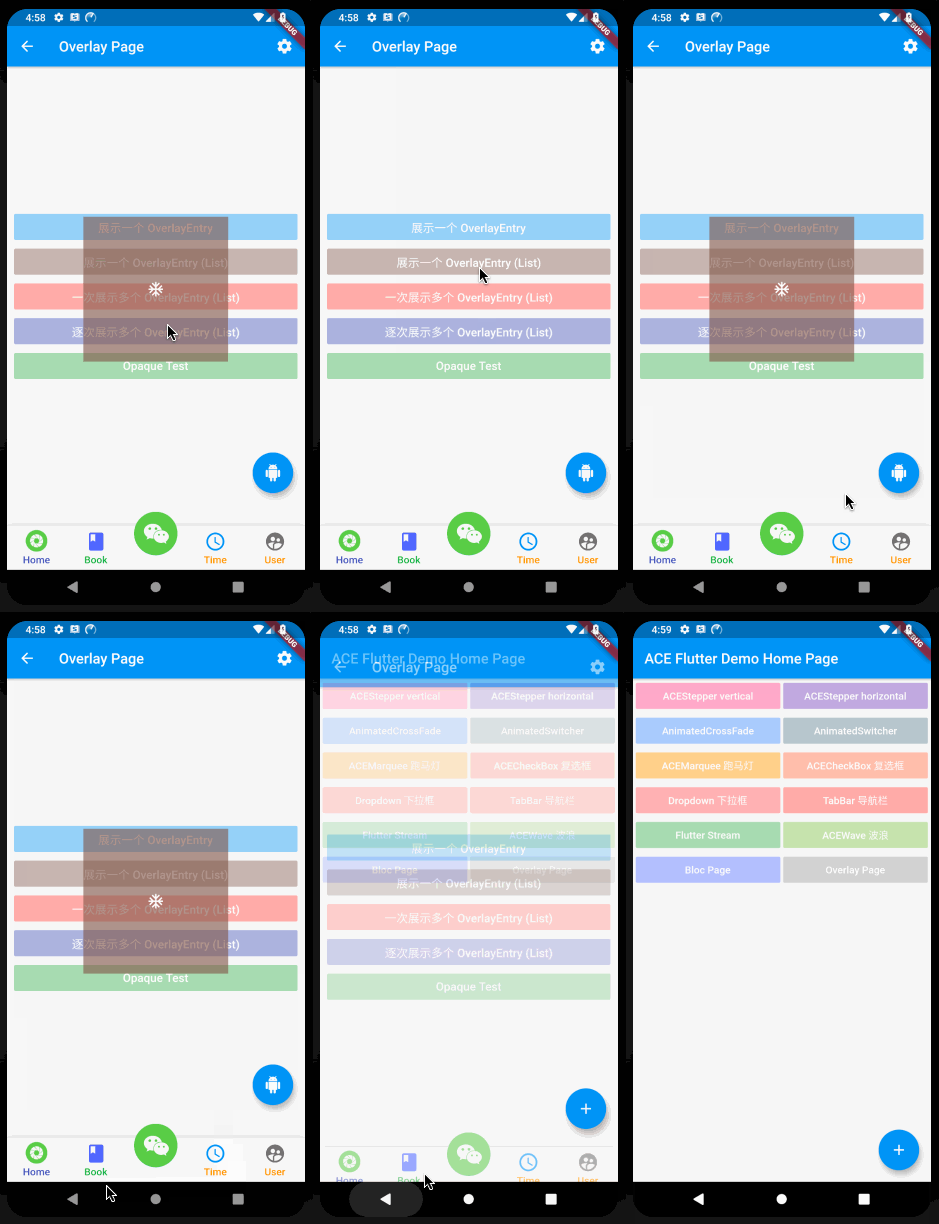
如果仅需展示一个 OverEntry 浮层元素,可以通过 insert 加入到 Overlay 中,也可以通过 insertAll 加入仅有一个 OverEntry 的数组;最终通过 remove 关闭浮层元素,注意数组中的元素要全部 remove;
// insert
overlayEntry = OverlayEntry(builder: (context) {
  return Stack(children: <Widget>[Positioned(
        top: (height - 200) * 0.5, left: (width - 200) * 0.5,
        child: GestureDetector(
            onTap: () => overlayEntry.remove(),
            child: _itemContainer(Colors.blue.withOpacity(0.6))))
  ]);
});
Overlay.of(context).insert(overlayEntry);
// insertAll
overlayEntry = OverlayEntry(builder: (context) {
  return Stack(children: <Widget>[Positioned(
        top: (height - 200) * 0.5, left: (width - 200) * 0.5,
        child: GestureDetector(
            onTap: () { overlayEntry.remove(); overlayEntryList.clear(); },
            child: _itemContainer(Colors.brown.withOpacity(0.6))))
  ]);
});
overlayEntryList.add(overlayEntry);
Overlay.of(context).insertAll(overlayEntryList);
insert Three OverEntrys
如果需要展示多个 OverEntry 浮层元素时,只能用 insertAll 添加到 Overlay 中,其中默认是以栈方式加入的;其中 insertAll 会一次性的把所有 OverEntry 均加入到 Overlay 中;
overlayEntryList.add(OverlayEntry(builder: (context) {
  return Stack(children: <Widget>[
    Positioned(top: (height - 200) * 0.5 - 50, left: (width - 200) * 0.5 - 50,
        child: GestureDetector(
            onTap: () {
              --overIndex;
              overlayEntryList[overIndex].remove();
              overlayEntryList.removeLast();
            },
            child: _itemContainer(Colors.red.withOpacity(0.6))))
  ]);
}));
overlayEntryList.add(OverlayEntry(builder: (context) {
  return Stack(children: <Widget>[
    Positioned(top: (height - 200) * 0.5, left: (width - 200) * 0.5,
        child: GestureDetector(
            onTap: () {
              --overIndex;
              overlayEntryList[overIndex].remove();
              overlayEntryList.removeLast();
            },
            child: _itemContainer(Colors.orange.withOpacity(0.6))))
  ]);
}));
overlayEntryList.add(OverlayEntry(builder: (context) {
  return Stack(children: <Widget>[
    Positioned(top: (height - 200) * 0.5 + 50, left: (width - 200) * 0.5 + 50,
        child: GestureDetector(
            onTap: () {
              --overIndex;
              overlayEntryList[overIndex].remove();
              overlayEntryList.removeLast();
            },
            child: _itemContainer(Colors.blue.withOpacity(0.6))))
  ]);
}));
overIndex = overlayEntryList.length;
Overlay.of(context).insertAll(overlayEntryList);
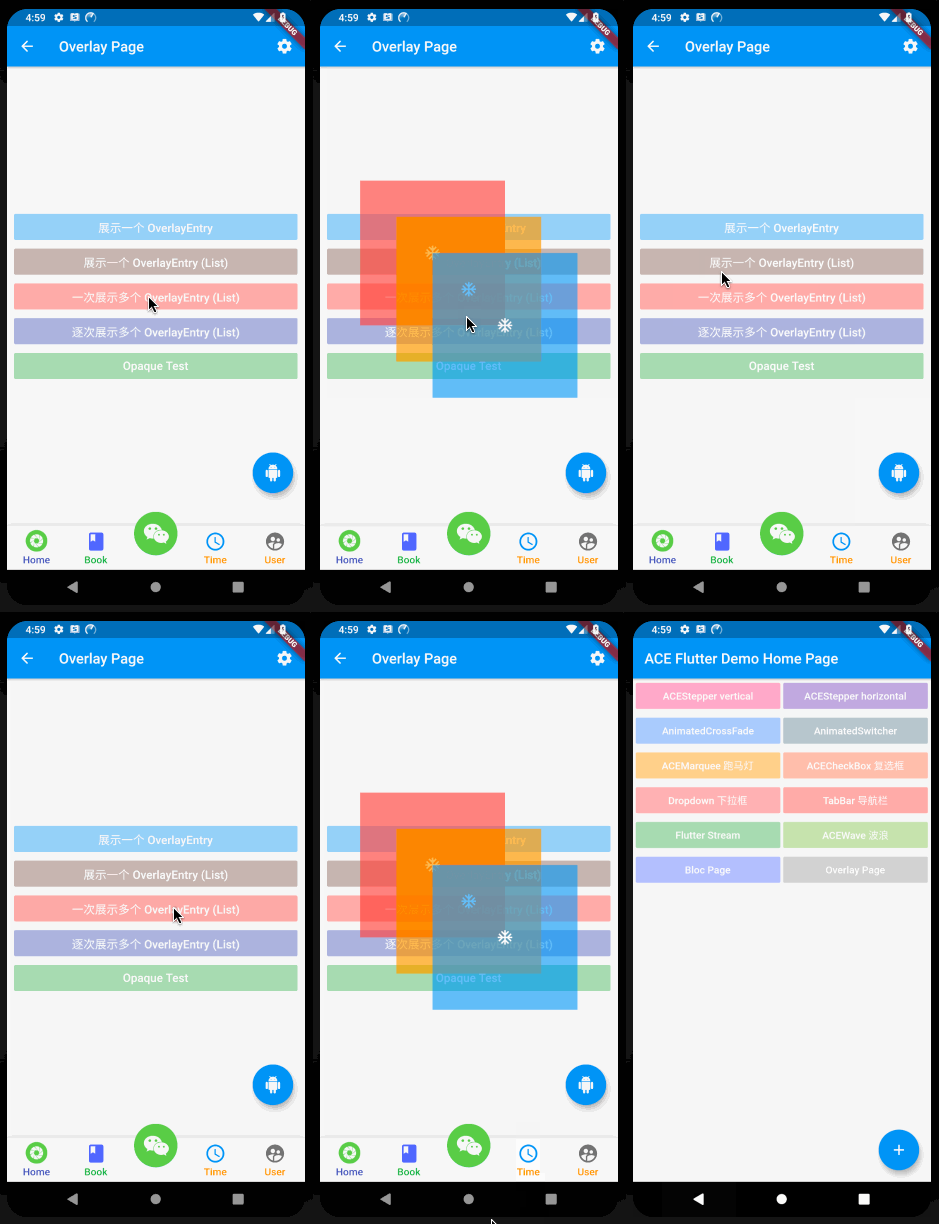
若需要逐次展示多个 OverlayEntry 可以在点击事件中单独加入新的 OverlayEntry;
overlayEntry = OverlayEntry(builder: (context) {
  return Stack(children: <Widget>[
    Positioned(top: (height - 200) * 0.5 - 50, left: (width - 200) * 0.5 - 50,
        child: GestureDetector(
            onTap: () {
              overlayEntry.remove();
              Overlay.of(this.context).insert(overlayEntry2);
            },
            child: _itemContainer(Colors.red.withOpacity(0.6))))
  ]);
});
overlayEntry2 = OverlayEntry(builder: (context) {
  return Stack(children: <Widget>[
    Positioned(top: (height - 200) * 0.5, left: (width - 200) * 0.5,
        child: GestureDetector(
            onTap: () {
              overlayEntry2.remove();
              Overlay.of(this.context).insert(overlayEntry3);
            },
            child: _itemContainer(Colors.orange.withOpacity(0.6))))
  ]);
});
overlayEntry3 = OverlayEntry(builder: (context) {
  return Stack(children: <Widget>[
    Positioned(top: (height - 200) * 0.5 + 50, left: (width - 200) * 0.5 + 50,
        child: GestureDetector(onTap: () => overlayEntry3.remove(), child: _itemContainer(Colors.blue.withOpacity(0.6))))
  ]);
});
Overlay.of(context).insert(overlayEntry);
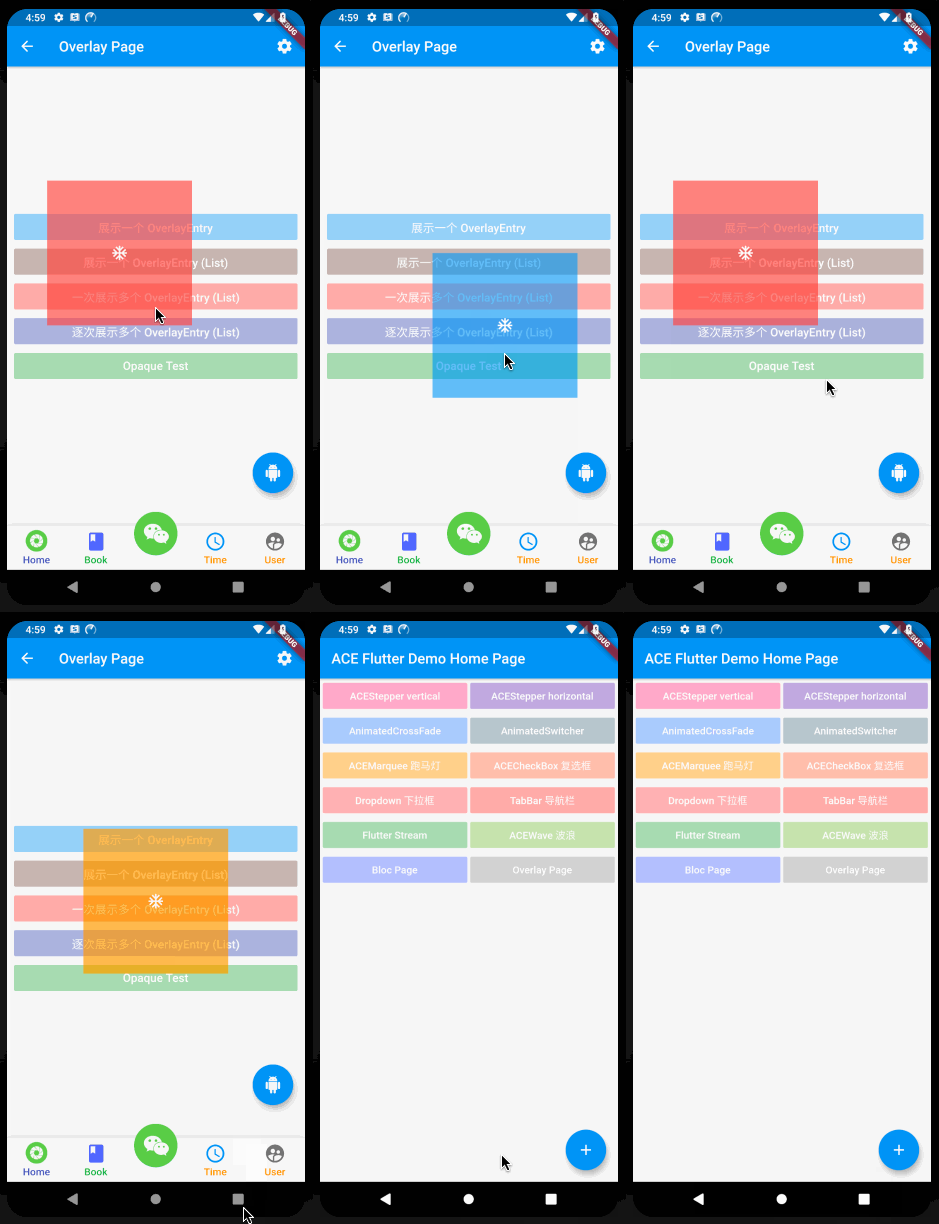
1. Overlay 为全局覆盖,并非当前 Page,需要重新定义返回按键等;若没有 remove 则返回上一个页面依然展示浮层元素;若 remove 其他未加入浮层的元素会返回失败;
return WillPopScope(
    onWillPop: () async {
      if (overListIndex == 6) {
        for (int i = overlayEntryList.length; i > 0; i--) {
          overlayEntryList[i - 1].remove();
        }
        overlayEntryList.clear();
        overIndex = 0;
      } else if (overListIndex == 7) {
        overlayEntry.remove();
      } else if (overListIndex == 8) {
        overlayEntry2.remove();
      } else if (overListIndex == 9) {
        overlayEntry3.remove();
      }
      if (overIndex == 4) {
        overlayEntry.remove();
        overlayEntry0.remove();
      } else if (overIndex == 3) {
        overlayEntry2.remove();
        overlayEntry0.remove();
      } else if (overIndex == 2) {
        overlayEntry3.remove();
        overlayEntry0.remove();
      } else if (overIndex == 5) {
        overlayEntry.remove();
      }
      overIndex = 0;
      return true;
    },
    child: Container(...)
);
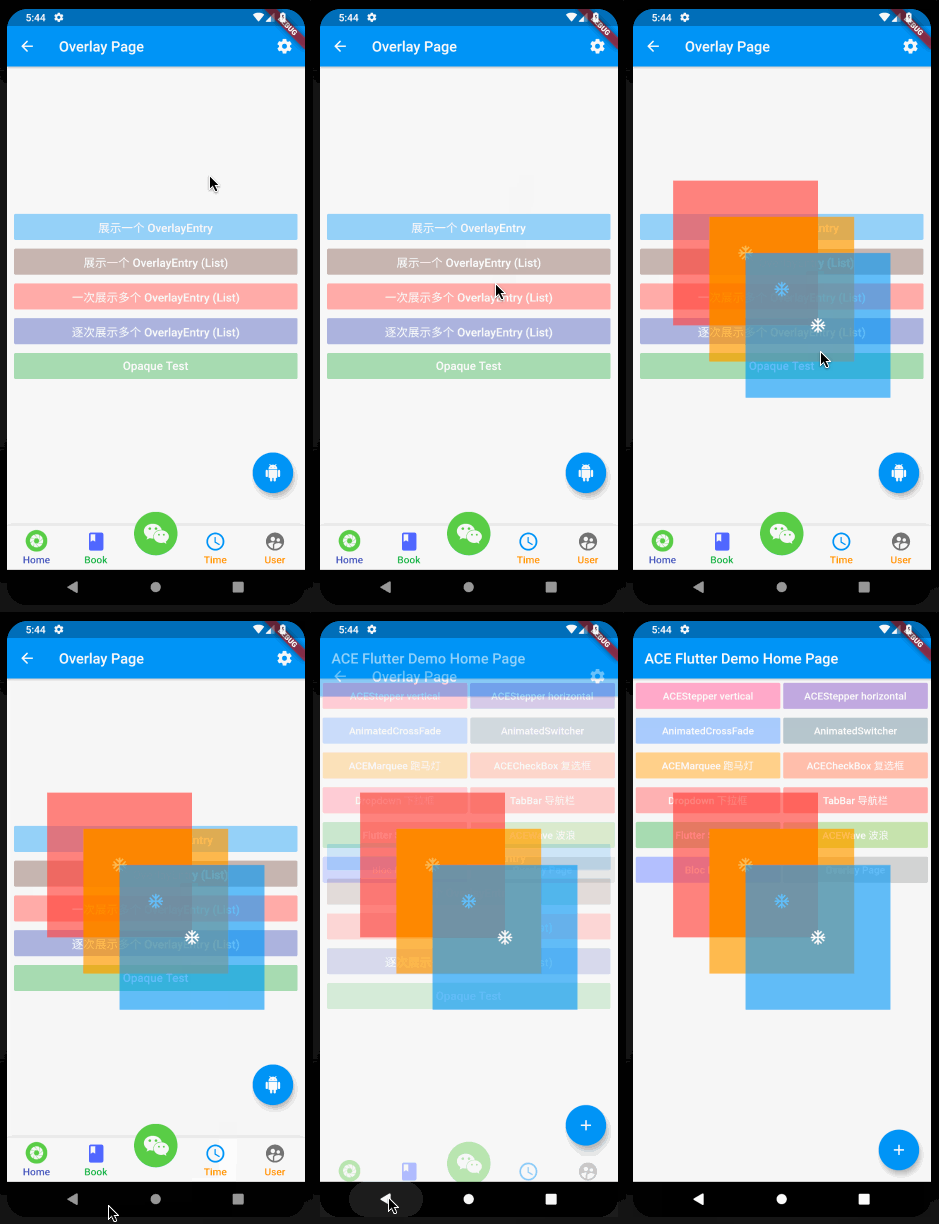
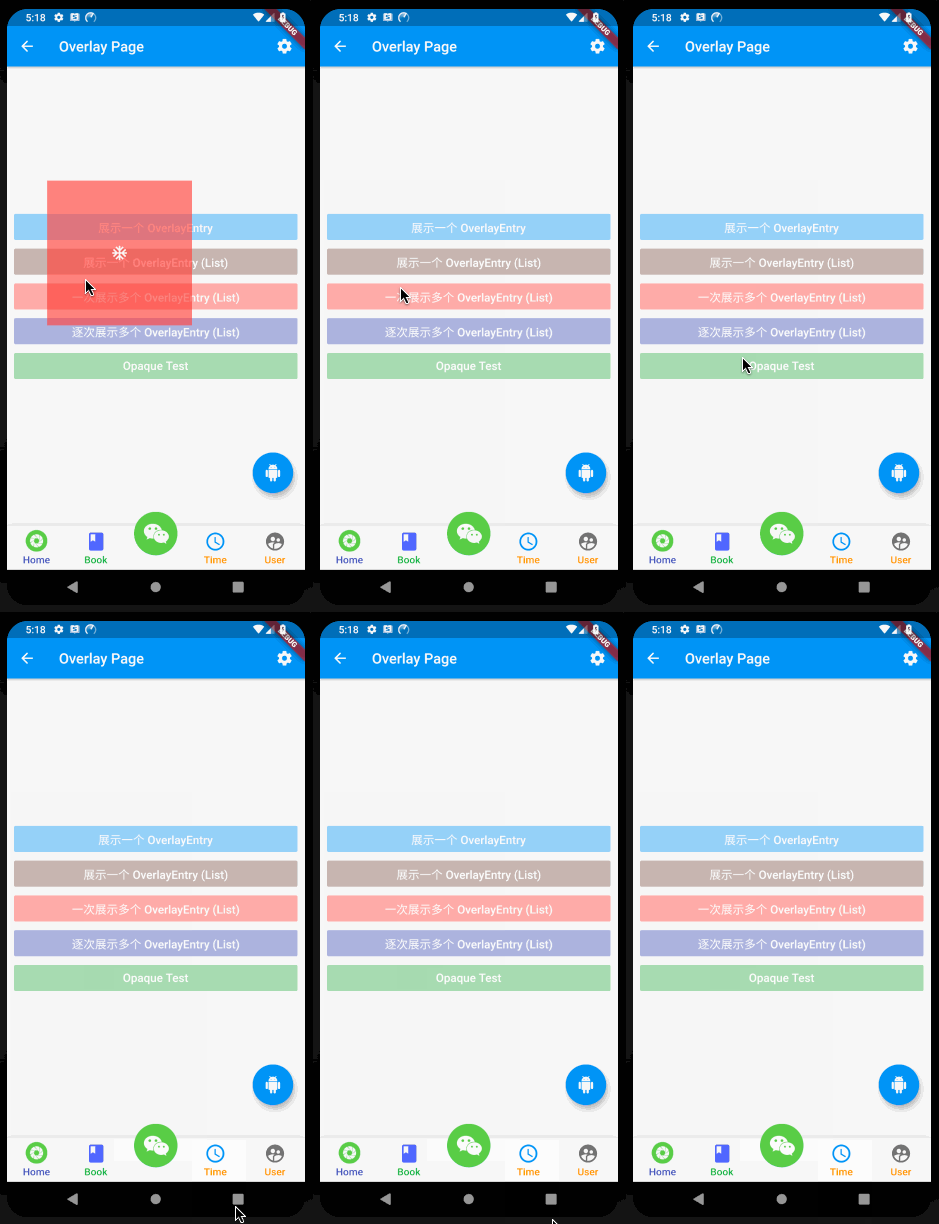
2. 使用 insertAll 添加浮层元素时,不要同时加入多次同一个 OverlayEntry;
overlayEntry = OverlayEntry(builder: (context) {
  return Stack(children: <Widget>[
    Positioned(top: (height - 200) * 0.5 - 50, left: (width - 200) * 0.5 - 50,
        child: GestureDetector(
            onTap: () => overlayEntry.remove(),
            child: _itemContainer(Colors.red.withOpacity(0.6))))
  ]);
});
// 错误写法,加入多次同一个 OverlayEntry
overlayEntryList.add(overlayEntry);
overlayEntryList.add(overlayEntry);
overlayEntryList.add(overlayEntry);

Overlay.of(this.context).insertAll(overlayEntryList);
3. opaque = true 时会完全覆盖之前的浮层元素,为不透明的,且不可透过当前浮层点击下一个浮层元素;maintainState 为在上层元素 opaque = true,即不透明的完全覆盖下层元素时,被覆盖的这个元素设置的 maintainState 是否提前构建;
overlayEntryList.add(OverlayEntry(builder: (context) {
  return Stack(children: <Widget>[
    Positioned( top: (height - 200) * 0.5 - 50, left: (width - 200) * 0.5 - 50,
        child: GestureDetector(
            onTap: () { --overIndex; overlayEntryList[overIndex].remove(); },
            child: _itemContainer(Colors.red.withOpacity(0.6))))
  ]);
}));
overlayEntryList.add(OverlayEntry(
    opaque: true, maintainState: true,
    builder: (context) {
      return Material(
          color: Colors.amber.withOpacity(0.4),
          child: Stack(children: <Widget>[
            Positioned( top: (height - 200) * 0.5, left: (width - 200) * 0.5,
                child: GestureDetector(
                    onTap: () { --overIndex; overlayEntryList[overIndex].remove(); },
                    child: _itemContainer(Colors.orange.withOpacity(0.6))))
          ]));
    }));
overlayEntryList.add(OverlayEntry(
    opaque: true, maintainState: false,
    builder: (context) {
      return Material(
          color: Colors.lightBlueAccent.withOpacity(0.4),
          child: Stack(children: <Widget>[
            Positioned( top: (height - 200) * 0.5 + 50, left: (width - 200) * 0.5 + 50,
                child: GestureDetector(
                    onTap: () { --overIndex; overlayEntryList[overIndex].remove(); },
                    child: _itemContainer(Colors.blue.withOpacity(0.6))))
          ]));
    }));
overIndex = overlayEntryList.length;
Overlay.of(context).insertAll(overlayEntryList);
小菜对 Overlay 的尝试还比较基础,使用场景也比较小,如有错误,请多多指导!
阿策小和尚
Recommend
About Joyk
Aggregate valuable and interesting links.
Joyk means Joy of geeK