

The Front-End Developer's Guide to the Terminal
source link: https://www.joshwcomeau.com/javascript/terminal-for-js-devs/
Go to the source link to view the article. You can view the picture content, updated content and better typesetting reading experience. If the link is broken, please click the button below to view the snapshot at that time.

Modern front-end frameworks like React, Angular, and Vue rely heavily on the terminal. If you're not comfortable with command line interfaces, you'll struggle to run a local development server or build your application!
There's something deeply ironic about this. Our whole job is to build graphical user interfaces, but the tools we use in our development are mostly command-line based!
Unless you have a Computer Science background, or grew up using a computer in the 80s, you probably won't have very much terminal experience. And yet, most online resources assume that you're already proficient!
It takes years of practice to become a terminal guru, but here's the good news: we can take a shortcut. We don't really need to know 98% of the stuff you can do with a terminal. If we focus on the most-important critical fundamentals, we should be able to become comfortable with the command line in a remarkably short amount of time. ✨
That's what this blog post is all about. It's the missing manual of terminal fundamentals needed to work with modern JS frameworks like React, so you can move onto the fun stuff: building user interfaces!
I'll also share all of my favourite tips and tricks for getting the most out of the terminal, the stuff I wish someone had shown me when I was first getting started.
Alright, so there's two things we need to do before anything else.
First, we need some terminal software. This is the application that runs the command-line environment.
Just about every operating system will come with a built-in terminal, like MacOS' Terminal.app, or Windows' Command Prompt. These applications work, but they're pretty underwhelming. Most developers opt to use something else.
The choice of terminal application isn't super important, as long as you're using something modern. That said, I have two main recommendations:
- Hyper. Hyper is a modern, multi-platform terminal application. It's beautiful, and comes with some handy modern features, like the ability to split into multiple panes.
- If you use VS Code as your code editor, VS Code comes with a powerful, modern terminal built in. This is nice, since it means your code and terminal can run side-by-side in the same application. You can pop open the terminal in VS Code by selecting View → Terminal.
I'll be using Hyper for all the examples in this blog post.
Now, the terminal application is only half of the equation. We also need to make sure we're running the right shell language.
When we type a command into the terminal and press “enter”, that command will be interpreted by the shell language. It's essentially the environment running within the terminal application.
The most popular shell language is Bash. When you see command-line instructions online, it's likely that the instructions are assuming Bash. This is the default shell language used by most Linux distributions.
Modern MacOS versions ship with Zsh instead of Bash, but Zsh is very similar: it's part of the same "family", and shares almost all of the same commands. For our purposes, they can be used interchangeably.
If you're using either Linux or MacOS, you're good to go. Your computer is already using an "industry standard" shell language. If you're using Windows, however, we have a bit of work to do.
A helpful analogyHave you ever popped open the developer console in your web browser to run some arbitrary JavaScript code?
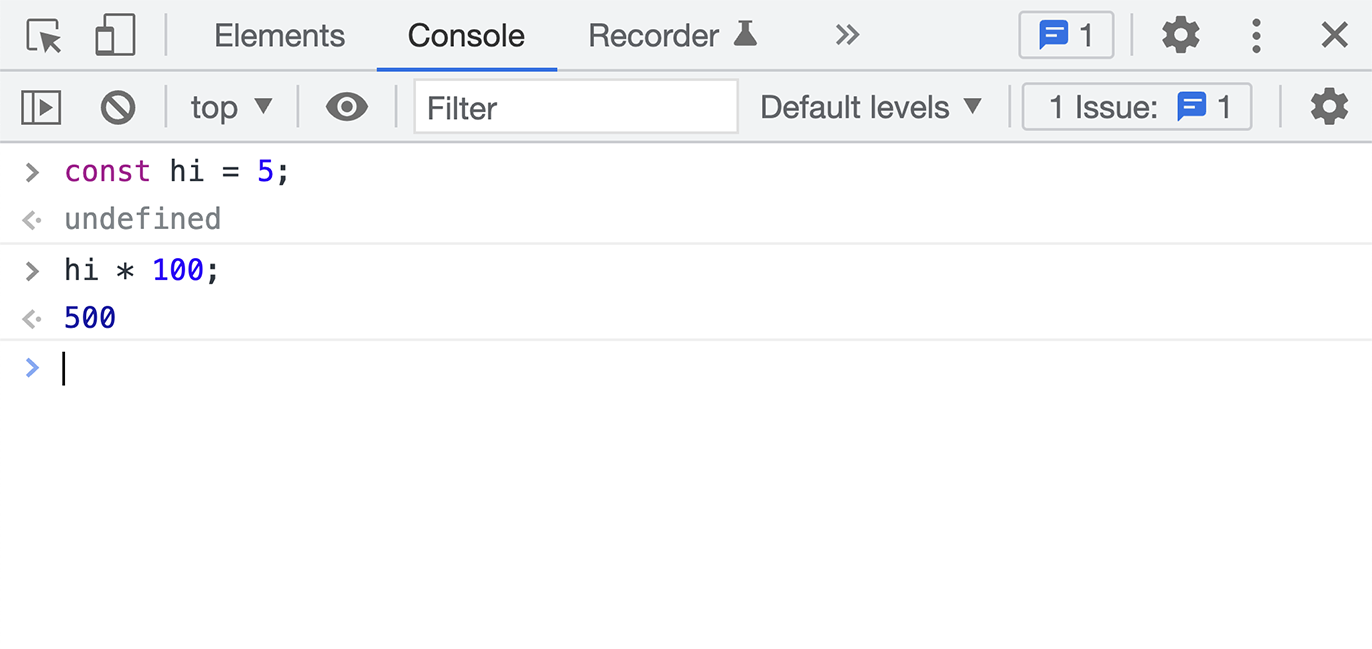
In this case, the application is Chrome, and the language is JavaScript. Chrome provides the command-line interface, but when we run commands, those commands are interpreted using JavaScript.
It's the same setup when it comes to the terminal. A terminal application like Hyper might be running the Bash shell language. Unlike web browsers, however, terminal applications can switch between multiple shell languages!
Alright, first, let me preface this by emphatically admitting that I am not an expert when it comes to Windows development. Please take everything I'm about to say with a grain of salt. 😅
Bash is a Linux-based shell language, and it won't run natively in Windows. Fortunately, newer versions Windows come with the ability to install and run Linux as if it were any other application. This is known as Windows Subsystem for Linux, commonly abbreviated to WSL.
Here's a tutorial that runs through the steps required: How to install and use Zsh in Windows 10.
I ran through these steps myself, and while it's definitely a bit tedious, it does the job!
Once it's set up, you'll be able to configure your terminal application to use Bash or Zsh. Here are some instructions for configuring Hyper to use Zsh.
If you have trouble with any of these steps, there are other solutions you can try. A popular method is Git Bash, which allows you to run Bash within Windows using emulation.
Ultimately, it doesn't matter how you get there. The important thing is for you to be able to use either Bash or Zsh within Windows.
When you first open the terminal application, you're met with this rather unhelpful interface:
Your terminal will likely look a bit different, based on your operating system / terminal application / shell language. Ultimately, however, you'll probably be looking at a single line of text, and a bunch of empty space.
The single line of text is known as a prompt. It's called a “prompt” because it's waiting for you to provide some sort of instruction.
For our first command, enter the text echo "hello world" and press enter:
The syntax is a bit different, but you can think of commands like built-in JavaScript functions. The echo command is very similar to the console.log function in JavaScript.
Like functions, commands take arguments. In this case, echo takes a single argument, the string to output.
When we press “enter”, the command is immediately executed, and our value is logged. A fresh prompt is rendered below, to let us know that it's ready to receive the next instruction.
And just like that, you've run your first terminal command!
Skip the “$”!When reading installation instructions for an NPM package, you'll often see things like this:
If you try and run this entire bit of text, you'll get an error. This is because the dollar sign ($) isn't meant to be included. You're meant to type everything after the dollar sign.
Why would the installation instructions include a random symbol that isn't actually part of the command!? Well, in the Bash shell language, $ is the "prompt character", shown at the end of the prompt.
It's essentially a symbol that says "Hey, this stuff over here is meant to be run in the terminal!"
Even though $ isn't actually used as the prompt character in many modern shell languages like Zsh, the symbolism lives on, like how the “save” icon is a floppy disk () even though we haven't used floppy disks in decades.
The main purpose of a terminal is to enable you to move around the file system and open/run things. It's essentially a text-based version of the GUI file explorers we use every day (eg. Finder, Windows Explorer).
To help us navigate around, there are lots of terminal commands we can use. Let's explore some of them.
The pwd command stands for “Print Working Directory”, and it's sorta like the "You are here" arrow on shopping mall directories. It tells you where you are right now:
When you open the terminal application, you're generally tossed into the "home" directory, the one that contains the Documents and Desktop directories. On my particular machine, this directory is located at /Users/joshu.
You can see the contents of the current directory using the ls command (short for “List”):
In my particular terminal, directories are bold and written in a light aqua color, while single files are regular weight and written in white.
We can move around the file system with the cd (“Change Directory”) command:
This is equivalent to double-clicking the “stuff” directory in a GUI file explorer.
Notice that the prompt changes from the tilde character (~) to “stuff”. In the Zsh shell language, the default prompt consists of an arrow and the name of the current directory, like “→ Documents”.
But wait, why was it a tilde character before, instead of the name of the parent directory? On MacOS and Linux, the tilde character is shorthand for the user's home directory. On my machine, “~” is equivalent to “/Users/joshu”.
It's very easy to mistakenly assume that “~” is a prompt character, like “$” is in Bash.
What if I want to go up one level, back to the home directory? I can use the cd command for this as well, with two dots (..).
The dot character (.) has a special meaning in most shell languages:
- A single dot (
.) refers to the current directory. - Two dots (
..) refer to the parent directory.
If you've worked with module systems in JavaScript, you're probably already familiar with this convention. It uses the same notation, using two dots to refer to the parent directory:
One important thing to know about cd is that it can take complex paths. Terminal beginners will often go one step at a time, like they would in a GUI file explorer:
This works, but it's a lot of extra work. We can make the same jump in a single step like this:
One of the most intimidating things about the terminal is that it doesn't give you any clues or hints. With a GUI file explorer, you can see a full list of files and folders, to refresh your memory and help you find what you're looking for.
If you want to use cd as I propose, leaping from 1 spot to another in a single bound, it might seem like you'd need a photographic memory. You can't do it unless you remember the exact name of every directory in the chain, right?
Fortunately, an incredibly-handy trick makes this much easier: tab autocompletion.
It'll be easier for me to show you how this works in a short video:
The Tab key is critically important when it comes to using the terminal effectively. In addition to the navigation tricks shown here, we can also use Tab to auto-complete Git branches, or fill in the rest of a command.
Try pressing Tab in different circumstances, and see what happens!
Earlier, I said that commands in Bash/Zsh are like functions in JavaScript. The analogy breaks down a bit when it comes to flags.
Flags are modifiers that tweak the behaviour of commands in predefined ways.
For example, let's look at the rm command. This command allows us to delete individual files:
We don't get any sort of confirmation, but if we check, the theme-song.mp3 file has indeed been deleted.
Before we go any further, I should warn you: terminals can be pretty unforgiving.
The rm command doesn't have an "Are you sure?" confirmation prompt. And there's no undo. When you delete a file with rm, it doesn't go to the recycle bin / trash can. It's permanently and irrevocably deleted.
This is a common theme with the terminal. There aren't many safety mechanisms. So please, be very careful when using commands like “rm”!
If you try and use the rm command on a directory, you'll get an error:
By default, rm can only remove individual files, but we can change this rule with the r flag:
The r flag stands for “recursive”. It will delete everything inside the stuff directory, anything inside the directories inside the stuff directory, anything inside directories inside the directories inside the stuff directory, and so on.
You might also run into some file permission issues. For that reason, the f flag (Force) is commonly used as well. We can group multiple flags with a single dash, like this:
Flags take many shapes and sizes. By convention, it's common for flags to have a short form (eg. -f) and a long form (--force). The long form typically uses two dashes, and uses whole words instead of individual letters.
Let's look at one more example. the ls command we saw earlier is commonly called with two flags:
- The
lflag, “long”, which prints the directory contents in a detailed list with metadata. - The
aflag, "all", which'll include hidden files and directories.
This changes the output considerably:
There's a lot of noise here, including the ridiculously-obfuscated permission glyphs. But some of the metadata, like the dates that show when a file was last updated, can be useful!
The manualIn order to learn more about commands, you can use the man command (short for “manual”) to pull up the built-in documentation for it:
I'll warn you now, the man documentation is dense and often hard to parse. But it can still be useful to learn what flags are available for certain commands.
In some cases, the file will open in your default text editor, but often it'll open “in-terminal”, as shown in this image. This uses a program known as less.
To scroll the document in less, use the up/down arrow keys. On modern versions of MacOS, you can also use the mousewheel to scroll, though this may lead to buggy behaviour on other platforms.
When you're finished, press q to quit. It should restore the typical terminal view.
Some processes are long-running, and will need to be interrupted.
For example, open your terminal application and try running the following command: ping 8.8.8.8.
The ping command will check the latency against a given IP address. It's useful for checking whether a given server is online or not. 8.8.8.8 is the IP address for Google's DNS server.
Unlike the commands we've seen so far, ping is a long-running process. It never stops; by default, it'll keep pinging Google's DNS server until the end of time.
When we're satisfied with the results, we can interrupt it by holding ctrl and pressing c. Even on MacOS, where most shortcuts use the ⌘ modifier, we use ctrl.
Another helpful command is ctrl + d. This will end the current session. If ctrl + c isn't working for some reason, ctrl + d may work instead.
Finally, if all else fails, you can close the current tab/window. The shortcut depends on the OS and terminal application. Using Hyper on MacOS, this is done with ⌘ + w.
Occasionally, you might find yourself editing a file using either Vi or Vim. These editors are notoriously difficult to quit; ctrl + c won't help you here!
To quit without saving, follow these steps:
- Press
Escape. - Press
:. This should add a prompt at the bottom of the terminal. - Type
q!and press Enter.
So far, we've seen lots of general-computing examples of how to do stuff with the terminal. Let's look at how we'd accomplish some typical development tasks!
These examples assume that you have Node.js installed. If you haven't installed it yet, you can download a copy from the Node homepage.
Let's imagine it's your first day on the job. The team has given you access to the source code, and you've downloaded it onto your machine. Now what?
Well, the first step is to download the project's third-party dependencies!
Here are the steps to follow:
npm stands for Node Package Manager. It's installed automatically when you install Node.js.
Running this command will download all of the third-party code that the project depends on from the NPM repository. This code will live in a local node_modules directory.
Alright, so you've got the third-party code downloaded. Now what?
If you check out the project's package.json, you'll likely see a section that looks like this:
These “scripts” are tasks that can be run with the NPM utility. They can be executed by running npm run [name]. For example, to boot up a local development server, we'd run:
Running this command starts a long-running process. It launches a Node server that allows us to work on our application, watching for changes to the files and re-bundling when we edit them.
When we're done, we can kill the server with ctrl + c.
The beautiful thing about NPM scripts is that they standardize things. start, build, and test are conventional names for these standard tasks. As a result, we don't have to memorize bespoke commands for each project, even if the projects use radically different tools.
(We can also create our own NPM scripts! This is something I do extensively in my projects. I'll be publishing a blog post all about this at some point, subscribe so you don't miss it!)
When I want to start working on a project, I start by navigating to the project's root directory in the terminal. Then I run the following command:
As discussed, . refers to the current working directory. code is a command added by my code editor, VS Code. Running this command opens the entire project in my code editor, making it easy for me to jump between files as-needed.
Note that the command will vary depending on your editor. And, for folks on MacOS who use VS Code, you'll need to do a bit of work to enable the code command.
You know how the standard advice for any computer problem is to turn it off and on again?
The JavaScript version of that is to reinstall the NPM dependencies. Sometimes, they just need to be erased and re-downloaded. This is especially true if you occasionally pop into your node_modules and edit the files to help with debugging.
Here's how we can do this:
Once we're in the correct directory, we delete all third-party code with the rm command, and then re-install it with npm install.
While there are GUI applications for working with Git and Github, many developers prefer to use the command line for Git-related tasks.
A full command-line Git tutorial is well beyond the scope of this blog post, but here's a quick cheat-sheet of the commands I use often:
Over the years, I've picked up some nifty little terminal tips. They aren't critical, but they help improve the developer experience of using the terminal.
Many terminal applications will keep a log of every command you've run in a given session. You can cycle through previous commands using the "up" arrow.
If I know I've run a command recently, it's usually faster to hit "up" a couple times rather than typing it out from scratch!
Here's one more amazing little trick I learned a while back: the - character.
Suppose we want to bounce back and forth between two directories with cd. We can do that by typing out the whole path, over and over and over:
Like a clear desk, a clear terminal can lead to a clear mind.
On MacOS, across just about every terminal I've tried, the ⌘ + k shortcut will wipe away all previous commands from view, leaving you with a single prompt at the top.
If you have a long-running process active, this command will erase previously-logged output without interrupting the process. It's a great way to acknowledge that you've seen some stuff, clearing the way for new output.
Unfortunately, I don't believe there's a global convention for clearing the terminal; if you're on Windows, you'll need to do some research to learn how to do this with your particular terminal. Let me know on Twitter if you figure it out. I'd be happy to update this post, and credit you with the discovery!
Every now and then, I'll find myself typing out the same command over and over. If this command is long or complex, it's annoying to have to type it out every time, and to remember it verbatim.
Bash and Zsh support aliases, a way of creating custom shortcuts. For example, I can set it up so that whenever I enter hi, it automatically runs echo "Hello World!":
Setting up aliases is a bit beyond the scope of this tutorial, and the instructions are a bit different depending on your shell language. Here are some helpful tutorials that go into more depth:
Unless you've reached black-belt status with the terminal, there will be times when you want to open the working directory in a GUI file explorer.
On MacOS, the open . command will do this:
The open command is generally used to open a file, the same way double-clicking a file opens it in a GUI file explorer.
When we try to open a directory, however, it'll choose to pop open a new Finder window, showing the contents of that directory.
And since the dot character (.) refers to the current directory, open . allows us to switch from the terminal to Finder, to continue our work outside of the terminal.
Unfortunately, this one is also Mac-specific. Please reach out if you know how to do this on other platforms!
Whenever I clone a new project from Github, I generally want to do two things in a row:
npm install, to fetch third-party dependenciesnpm run start, to boot up a local development server
The npm install command typically takes a few minutes. I don't have the attention span to sit and watch dependencies download, and so I'll often distract myself with Twitter. The next thing I know, 20 minutes have passed, and I totally forgot I was going to start a dev server. 😬
We can solve this problem using chaining. Here's how it works:
The && operator allows us to chain multiple comamnds together. The first command will be executed, npm install. The moment it finishes, the second command will be run automatically.
This is a particularly neat trick because npm run start generally opens a browser window, capturing my attention and letting me know that everything's ready for me. npm install, by contrast, finishes silently.
Once I got the hang of chaining, I started using it everywhere. I'll often queue up a bunch of Git commands:
Alright, so let's talk about how to keep our workspace organized.
Running a dev server with npm run start is a long-running process. I often have dev servers run uninterrupted for weeks at a time!
When a terminal session is busy on a task, it isn't able to accept additional commands. Remember, the prompt is used to show that the terminal is waiting for a command; if we don't see a prompt, we can't run anything in that given session!
Fortunately, modern terminal applications make it easy to run many terminal sessions in the same application.
In Hyper, we can split the window into multiple vertical panes by selecting Shell -> Split down. On MacOS, the shortcut is Shift + ⌘ + d. This creates two independent sessions:
By splitting the window into multiple sessions, the top session can focus on running the dev server, and highlighting errors and other important information. The bottom session can be used to run shorter tasks.
Sometimes, projects will require multiple long-running tasks; maybe we have a dev server and a test watcher. In that case, we'd split the window into 3 sessions.
In Hyper, we can also create multiple tabs. New tabs can be created with Shell -> New Tab. On MacOS, the shortcut is the same as it is to create new tabs in a web browser: ⌘ + t.
When do we use tabs vs. tiles? I like to have 1 tab per project. Each tab can be split into as many sessions are required for that specific project.
Editor + Terminal arrangementsHere's how I arrange my code editor and terminal application:
I use a 27" monitor, and this size is just large enough to support two full-height code views and a terminal application with up to 3 split panes. The code editor takes up 2/3rds of the available horizontal space.
I use Rectangle to manage the window positions. Using keyboard shortcuts, I can quickly snap my editor and terminal application into place.
This stuff is super subjective, and there's no right/wrong way to do it, but this has been my go-to layout for years now, and it's helped me a ton!
Phew! We covered a lot of ground in this one. Hopefully, you aren't feeling too overwhelmed!
The terminal has a well-earned reputation for being intimidating and tricky for beginners. It's totally normal if you struggle with it!
Hopefully, though, this blog post has at least cut down the scope of what you need to learn. There is a lot you can do with the terminal, but we can get by just fine focusing on a (relatively) narrow sliver.
If you found this blog post helpful, please share it with someone!
Also: I have a bunch of other blog posts planned, all about JavaScript and React. If you'd like to follow along, the best way is to sign up for my newsletter! 😄
I'll let you know whenever I publish new content, about once or twice a month. I also send occasional subscriber-only goodies. 🍬
I hate spam as much as you do. If you decide you don't want to receive my newsletter anymore, you can unsubscribe in a single click. 💨
Last Updated
April 19th, 2022
Recommend
-
9
I asked on Twitter about what CSS topics I should write about? One of the suggestions that caught my eyes is about how to think about implementing a layout in CSS. That inc...
-
7
This is the prose version of a talk I delivered for Manchester FRED (FRont-End Developers) event on the 27th February 2014. If you’re curious, you can also
-
8
6 things you should learn in 2021 Framework In 2021, we'll probably see a duel between Facebook's ReactJS and the community-driven VueJS. React currently has 159,000 stars on GitHub, while Vue has been starred even mo...
-
8
Resources To Level Up Your Front-End Developer SkillsResources To Level Up Your Front-End Developer Skills by@techieabhishek
-
4
How to create a better front-end developer experience Skip to main content Who are the first user...
-
7
Tips for a beginner Front-end Developer Aug 3 ・1 min read
-
11
With so many languages, frameworks, and libraries to choose from, often beginners find themselves scratching their heads on how to start off their development journey. This article aims to d...
-
8
10 VSCODE Lighters For Every Front-end Developer Aug 27 ・2 min read ...
-
41
Hiring a Front-end Developer?Hire front-end developers from our network of top talent. Vetted by experts and hand-selected to match exactly what you need.Hire a Front-end...
-
6
Critical Path Rendering It is the sequence of steps a browser undergoes to convert HTML,CSS and JS into pixels Why do you need to understand it ? By optimizing the critical...
About Joyk
Aggregate valuable and interesting links.
Joyk means Joy of geeK