

【Network】Shadowsocks Server - 西维蜀黍的博客 | 西维蜀黍 Blog
source link: https://swsmile.info/post/shadowsocks-server/
Go to the source link to view the article. You can view the picture content, updated content and better typesetting reading experience. If the link is broken, please click the button below to view the snapshot at that time.

Shadowsocks Server 的实现
Shadowsocks Server 分为 Python、Go、C++ with Qt、C with libevb 和 Perl 版本。
- shadowsocks: The original Python implementation.
- shadowsocks-libev: Lightweight C implementation for embedded devices and low end boxes. Very small footprint (several megabytes) for thousands of connections.
- go-shadowsocks2: Another Go implementation focusing on core features and code reusability.
- shadowsocks-rust: A rust port of shadowsocks.
shadowsocks-libev
shadowsocks-libev,是一个基于 libev 库开发的 shadowsocks 代理套件。包含 ss-local,ss-redir,ss-tunnel,ss-server 四部分。
- ss-server 是 shadowsocks 的服务端程序。
- ss-local 是 shadowsocks 客户端程序。
- ss-redir 是透明代理工具。
- ss-tunnel 是本地端口转发工具,通常用于解决 dns 污染问题。
go-shadowsocks2
https://github.com/shadowsocks/go-shadowsocks2
Shadowsocks Server 的搭建
Debian / Ubuntu:
apt-get install python-pip
pip install shadowsocks
CentOS:
yum install python-setuptools && easy_install pip
pip install shadowsocks
操作系统选择
建议选择 Ubuntu 14.04 LTS 作为服务器以便使用 TCP Fast Open。除非有明确理由,不建议用对新手不友好的 CentOS。
VPS 选择
为了更好的性能,VPS 尽量选择 XEN 或 KVM,不要使用 OpenVZ。推荐使用以下 VPS:
- Digital Ocean 自带的内核无需自己编译模块即可使用 hybla 算法
- Linode 功能强大,机房较多
Shadowsocks Server 的运行
ssserver -p 443 -k password -m rc4-md5
# 使用配置文件
ssserver -c /etc/shadowsocks.json
sudo ssserver -p 443 -k password -m rc4-md5 --user nobody -d start
如果要停止:
sudo ssserver -d stop
如果要检查日志:
sudo less /var/log/shadowsocks.log
You can use a configuration file instead of command line arguments.
Create a config file /etc/shadowsocks.json. Example:
{
    "server":"my_server_ip",
    "server_port":8388,
    "local_address": "127.0.0.1",
    "local_port":1080,
    "password":"mypassword",
    "timeout":300,
    "method":"aes-256-cfb",
    "fast_open": false
}
Explanation of the fields:
Name Explanation
server the address your server listens
server_port server port
local_address the address your local listens
local_port local port
password password used for encryption
timeout in seconds
method default: “aes-256-cfb”
fast_open use TCP_FASTOPEN, true / false
workers number of workers, available on Unix/Linux
The default cipher is chacha20-ietf-poly1305.
The strongest option is an AEAD cipher. The recommended choice is “chacha20-ietf-poly1305” or “aes-256-gcm”.
salsa20 and chacha20 are fast stream ciphers. Optimized salsa20 implementation on x86_64 is even 2x faster than rc4 (but slightly slower on ARM).
These legacy ciphers are either slow or not safe. Do not use them:
- des-cfb
- table
- salsa20-ctr
For a detailed and complete list of all supported arguments, you may refer to the man pages of the applications, respectively.
ss-[local|redir|server|tunnel|manager]

   -s <server_host>           Host name or IP address of your remote server.

   -p <server_port>           Port number of your remote server.

   -l <local_port>            Port number of your local server.

   -k <password>              Password of your remote server.

   -m <encrypt_method>        Encrypt method: rc4-md5,
                              aes-128-gcm, aes-192-gcm, aes-256-gcm,
                              aes-128-cfb, aes-192-cfb, aes-256-cfb,
                              aes-128-ctr, aes-192-ctr, aes-256-ctr,
                              camellia-128-cfb, camellia-192-cfb,
                              camellia-256-cfb, bf-cfb,
                              chacha20-ietf-poly1305,
                              xchacha20-ietf-poly1305,
                              salsa20, chacha20 and chacha20-ietf.
                              The default cipher is chacha20-ietf-poly1305.

   [-a <user>]                Run as another user.

   [-f <pid_file>]            The file path to store pid.

   [-t <timeout>]             Socket timeout in seconds.

   [-c <config_file>]         The path to config file.

   [-n <number>]              Max number of open files.

   [-i <interface>]           Network interface to bind.
                              (not available in redir mode)

   [-b <local_address>]       Local address to bind.
                              For servers: Specify the local address to use
                              while this server is making outbound
                              connections to remote servers on behalf of the
                              clients.
                              For clients: Specify the local address to use
                              while this client is making outbound
                              connections to the server.

   [-u]                       Enable UDP relay.
                              (TPROXY is required in redir mode)

   [-U]                       Enable UDP relay and disable TCP relay.
                              (not available in local mode)

   [-L <addr>:<port>]         Destination server address and port
                              for local port forwarding.
                              (only available in tunnel mode)

   [-6]                       Resolve hostname to IPv6 address first.

   [-d <addr>]                Name servers for internal DNS resolver.
                              (only available in server mode)

   [--reuse-port]             Enable port reuse.

   [--fast-open]              Enable TCP fast open.
                              with Linux kernel > 3.7.0.
                              (only available in local and server mode)

   [--acl <acl_file>]         Path to ACL (Access Control List).
                              (only available in local and server mode)

   [--manager-address <addr>] UNIX domain socket address.
                              (only available in server and manager mode)

   [--mtu <MTU>]              MTU of your network interface.

   [--mptcp]                  Enable Multipath TCP on MPTCP Kernel.

   [--no-delay]               Enable TCP_NODELAY.

   [--executable <path>]      Path to the executable of ss-server.
                              (only available in manager mode)

   [-D <path>]                Path to the working directory of ss-manager.
                              (only available in manager mode)

   [--key <key_in_base64>]    Key of your remote server.

   [--plugin <name>]          Enable SIP003 plugin. (Experimental)

   [--plugin-opts <options>]  Set SIP003 plugin options. (Experimental)

   [-v]                       Verbose mode.
Shadowsocks Server 的配置优化
TCP Fast Open
If both of your server and client are deployed on Linux 3.7.1 or higher, you can turn on fast_open for lower latency.
First set fast_open to true in your config.json.
Then turn on fast open on your OS temporarily:
echo 3 > /proc/sys/net/ipv4/tcp_fastopen
BBR(一种 TCP 拥塞控制算法)
使用 BBR 加速需要服务器端主机完整的内核版本为 4.9 + 的支持,下面一 Linode 主机为例进行设置。
首先 Linode 主机提供的内核版本虽然大于 4.9,但是内核却不完整,并不包含 BBR 组件,无法直接开启。所以我们要先安装完整内核(64 位)。
升级 Linux 内核
BBR 在 Linux kernel 4.9 引入。首先检查服务器 kernel 版本:
uname -r
如果其显示版本在 4.9.0 之下,则需要升级 Linux 内核,否则请忽略下文。
更新包管理器:
sudo apt update
查看可用的 Linux 内核版本:
sudo apt-cache showpkg linux-image
找到一个你想要升级的 Linux 内核版本,如 “linux-image-4.10.0-22-generic”:
sudo apt install linux-image-4.10.0-22-generic
等待安装完成后重启服务器:
sudo reboot
删除老的 Linux 内核:
sudo purge-old-kernels
开启 BBR
运行 lsmod | grep bbr,如果结果中没有 tcp_bbr,则先运行:
modprobe tcp_bbr
echo "tcp_bbr" >> /etc/modules-load.d/modules.conf
echo "net.core.default_qdisc=fq" >> /etc/sysctl.conf
echo "net.ipv4.tcp_congestion_control=bbr" >> /etc/sysctl.conf
sysctl -p
保存生效。运行:
sysctl net.ipv4.tcp_available_congestion_control
sysctl net.ipv4.tcp_congestion_control
若均有 bbr,则开启 BBR 成功。
hybla 算法
Maximum Number of Open File Descriptors and Kernel Parameters
First of all, upgrade your Linux kernel to 3.5 or later.
Step 1, increase the maximum number of open file descriptors
To handle thousands of concurrent TCP connections, we should increase the limit of file descriptors opened.
Edit the limits.conf
vi /etc/security/limits.conf
Add these two lines
* soft nofile 51200
* hard nofile 51200
Then, before you start the shadowsocks server, set the ulimit first
ulimit -n 51200
Step 2, Tune the kernel parameters
The priciples of tuning parameters for shadowsocks are
- Reuse ports and conections as soon as possible.
- Enlarge the queues and buffers as large as possible.
- Choose the TCP congestion algorithm for large latency and high throughput.
Here is an example /etc/sysctl.conf of our production servers:
fs.file-max = 51200

net.core.rmem_max = 67108864
net.core.wmem_max = 67108864
net.core.netdev_max_backlog = 250000
net.core.somaxconn = 4096

net.ipv4.tcp_syncookies = 1
net.ipv4.tcp_tw_reuse = 1
net.ipv4.tcp_tw_recycle = 0
net.ipv4.tcp_fin_timeout = 30
net.ipv4.tcp_keepalive_time = 1200
net.ipv4.ip_local_port_range = 10000 65000
net.ipv4.tcp_max_syn_backlog = 8192
net.ipv4.tcp_max_tw_buckets = 5000
net.ipv4.tcp_fastopen = 3
net.ipv4.tcp_mem = 25600 51200 102400
net.ipv4.tcp_rmem = 4096 87380 67108864
net.ipv4.tcp_wmem = 4096 65536 67108864
net.ipv4.tcp_mtu_probing = 1
net.ipv4.tcp_congestion_control = hybla
Of course, remember to execute sysctl -p to reload the config at runtime.
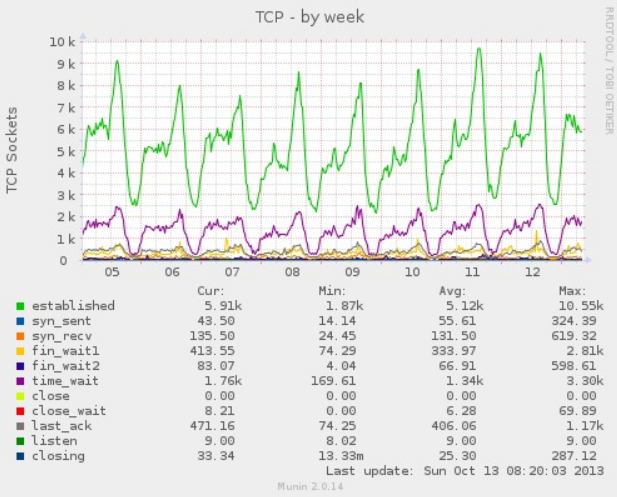
How to verify your optimizations work
Use munin or any server monitor tools to generate the graph of your TCP connections. A well tuned server should look like this
Shadowsocks 中继(relay)
If you want your client connected to a Japan VPS, but you want a US IP.
Client <--> Japan VPS <--> US VPS
Reference
Recommend
About Joyk
Aggregate valuable and interesting links.
Joyk means Joy of geeK