

在 VMWare Tanzu Community Edition 架設 Argo CD 服務的安裝筆記
source link: https://blog.miniasp.com/post/2022/03/20/Install-Argo-CD-on-VMWare-Tanzu-Community-Edition-Kubernetes
Go to the source link to view the article. You can view the picture content, updated content and better typesetting reading experience. If the link is broken, please click the button below to view the snapshot at that time.

昨天有人推薦我 Argo CD 這套 Kubernetes 的持續部署神器,今天我在 Tanzu 嘗試架設 Argo CD 起來,確實非常容易上手,相當不錯!這套 Argo CD 除了可以輕鬆的幫你實現 GitOps 流程,其 Web UI 的視覺化設計是個亮點,他可以幫助你更清晰的看懂應用程式的部署狀態,我覺得介面非常友善。這篇文章我特別記錄一下安裝與設定步驟。
架設一套 Tanzu 的 Unmanaged Clusters 非受控叢集
詳細安裝過程請參見 用 Docker 架設 VMware Tanzu Community Edition 的安裝筆記 文章。
-
建立 Unmanaged Clusters 非受控叢集
Windows
tanzu uc create beepboop --cni=calicoLinux
tanzu uc create beepboop -
切換 KUBECONFIG 過去
kubectl config use-context kind-beepboop
安裝 NGINX Ingress controller using Helm
-
安裝 Helm
Windows
# Install
choco install kubernetes-helm -y

# Upgrade
choco upgrade kubernetes-helm -y
Ubuntu Linux
sudo snap install helm --classic -
安裝
ingress-nginx套件加入
ingress-nginxRepohelm repo add ingress-nginx https://kubernetes.github.io/ingress-nginx安裝
ingress-nginxReleasehelm install ingress-nginx ingress-nginx/ingress-nginx --set "controller.service.type=ClusterIP" kubectl get services kubectl get pods kubectl port-forward svc/ingress-nginx-controller 80:80因為 TCE 預設跑在 Docker 底下,不支援
LoadBalancer服務類型,所以我直接用ClusterIP並搭配 Port Forwarding 進行連線!
安裝 Argo CD 服務
-
建立
argocd命名空間kubectl create namespace argocd -
建立服務資源
kubectl apply -n argocd -f https://raw.githubusercontent.com/argoproj/argo-cd/stable/manifests/install.yaml -
建立 Ingress 連接 Argo CD 服務
PowerShell
@'
apiVersion:  networking.k8s.io/v1
kind: Ingress
metadata:
  name: ingress-argocd
  namespace: argocd
  annotations:
    kubernetes.io/ingress.class: "nginx"
    nginx.ingress.kubernetes.io/backend-protocol: "HTTPS"
spec:
  rules:
  - host: "argocd.localhost"
    http:
      paths:
      - path: /
        pathType: ImplementationSpecific
        backend:
          service:
            name: argocd-server
            port:
              number: 443
'@ | Out-File 'ingress-argocd.yaml' -Encoding UTF8
cat > ingress-argocd.yaml <<EOF apiVersion: networking.k8s.io/v1 kind: Ingress metadata: name: ingress-argocd namespace: argocd annotations: kubernetes.io/ingress.class: "nginx" nginx.ingress.kubernetes.io/backend-protocol: "HTTPS" spec: rules: - host: "argocd.localhost" http: paths: - path: / pathType: ImplementationSpecific backend: service: name: argocd-server port: number: 443 EOF套用 YAML 進行安裝
kubectl apply -f ingress-argocd.yaml kubectl get ingress -
取得 Argo CD 預設密碼
kubectl -n argocd get secret argocd-initial-admin-secret -o jsonpath="{.data.password}" | base64 -d若用 Windows 請先用
choco install base64 -y安裝 Base64 encoder/decoder 命令列工具! -
連接 Argo CD 服務
預設帳號為
admin,而預設密碼請透過上個步驟取得。

-
透過 Argo CD 部署第一個應用程式
Settings > Repositories > Connect repo using HTTPS
Project: default
Repository: https://github.com/doggy8088/vote-argo.git
Applications > NEW APP
Application Name: vote-argo
Project: default
SYNC POLICY: Manual
勾選 AUTO-CREATE NAMESPACE 核取項目

SOURCE

Repository URL: https://github.com/doggy8088/vote-argo.git
Revision: master
Path: manifests

DESTINATION

Cluster URL: https://kubernetes.default.svc

Destination: in-cluster
Namespace: vote-argo
按下 CREATE 即可建立應用程式!
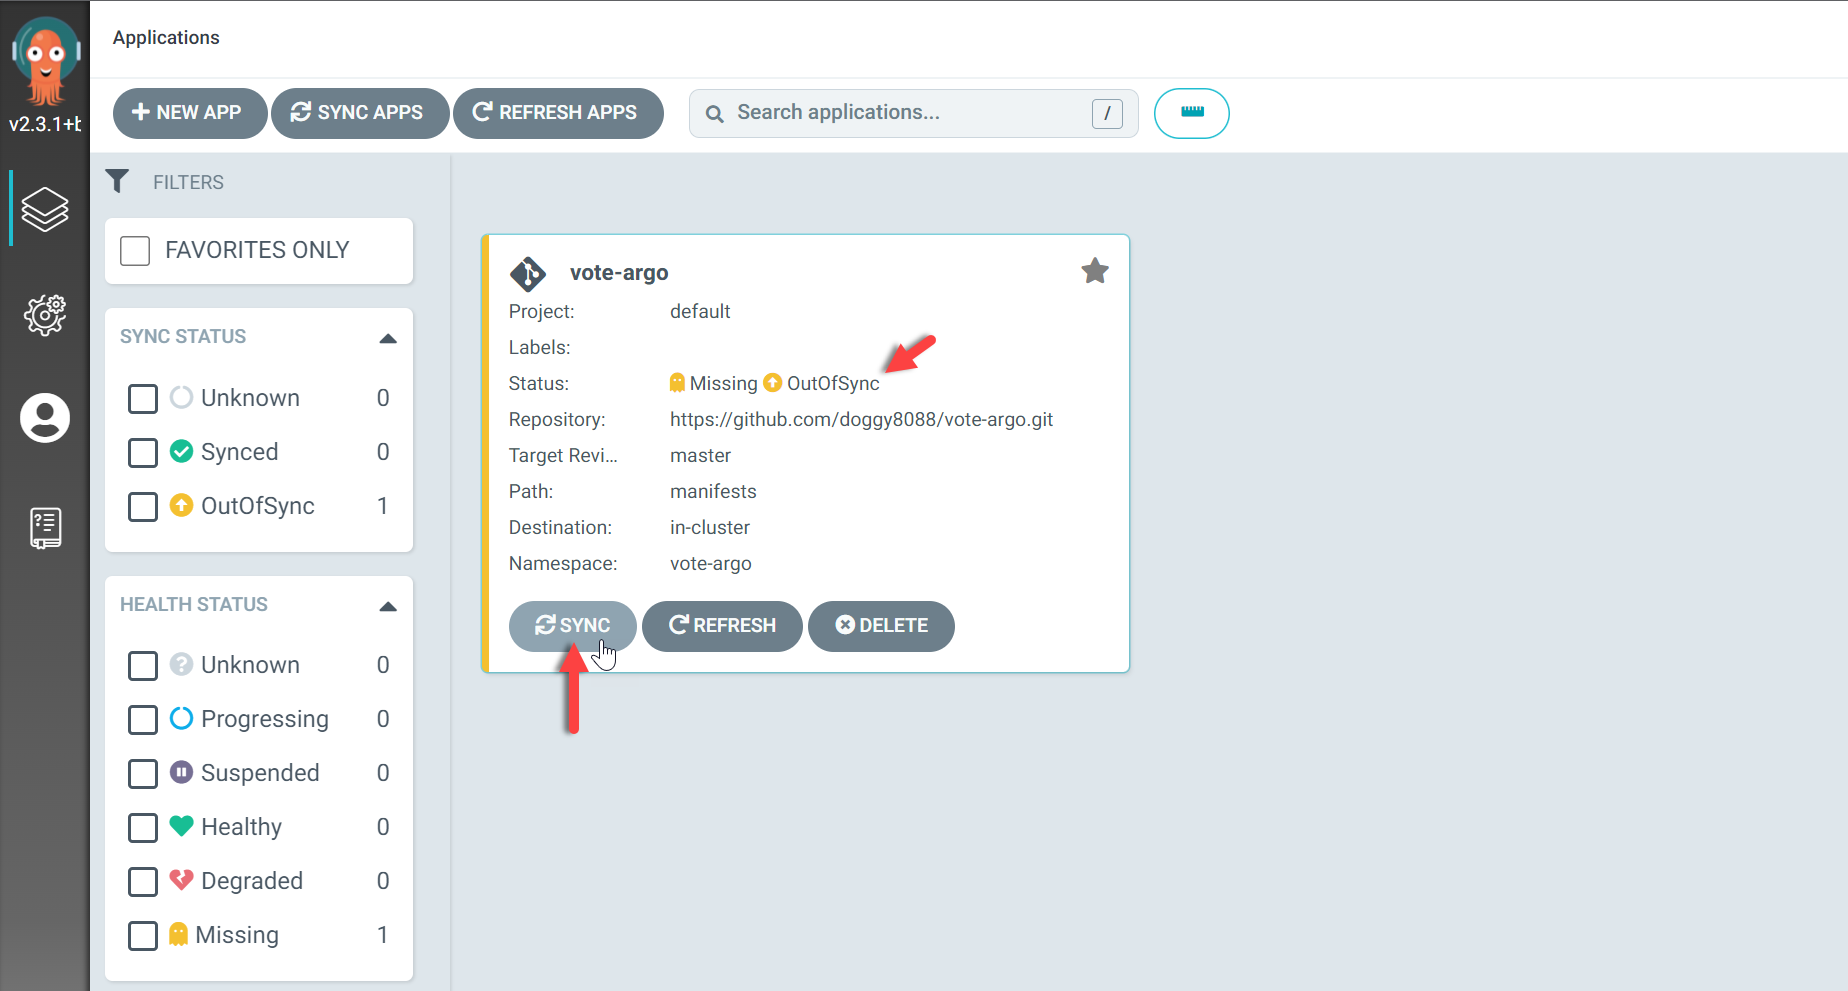
目前應用程式的狀態是
OutOfSync,這代表我們的 Git Repo 與 Argo CD 要部署的目標叢集之間是不一致的。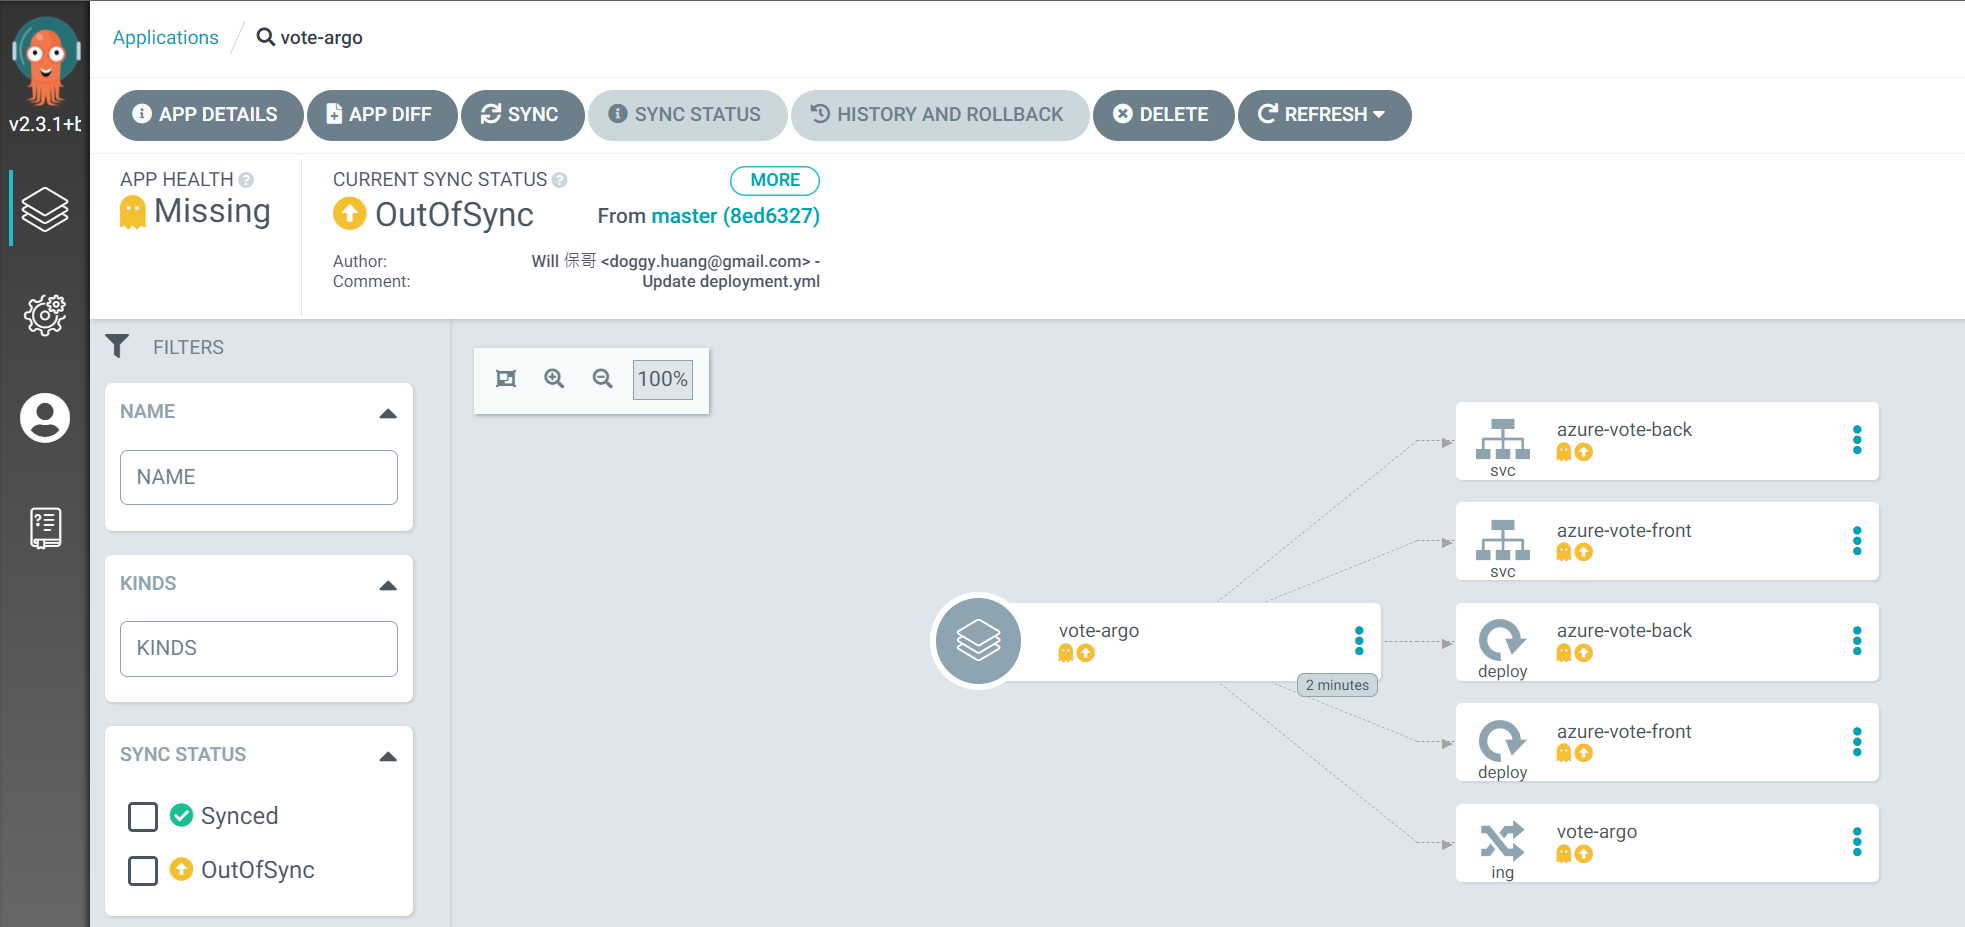
-
按下 SYNC 按鈕進行同步
按下 Sync 之後會先讓你確定設定,再按下 SYNCHORIZE 按鈕就會開始同步 Git 與 Kubernetes 之間的狀態,這意味著應用程式將會開始部署!

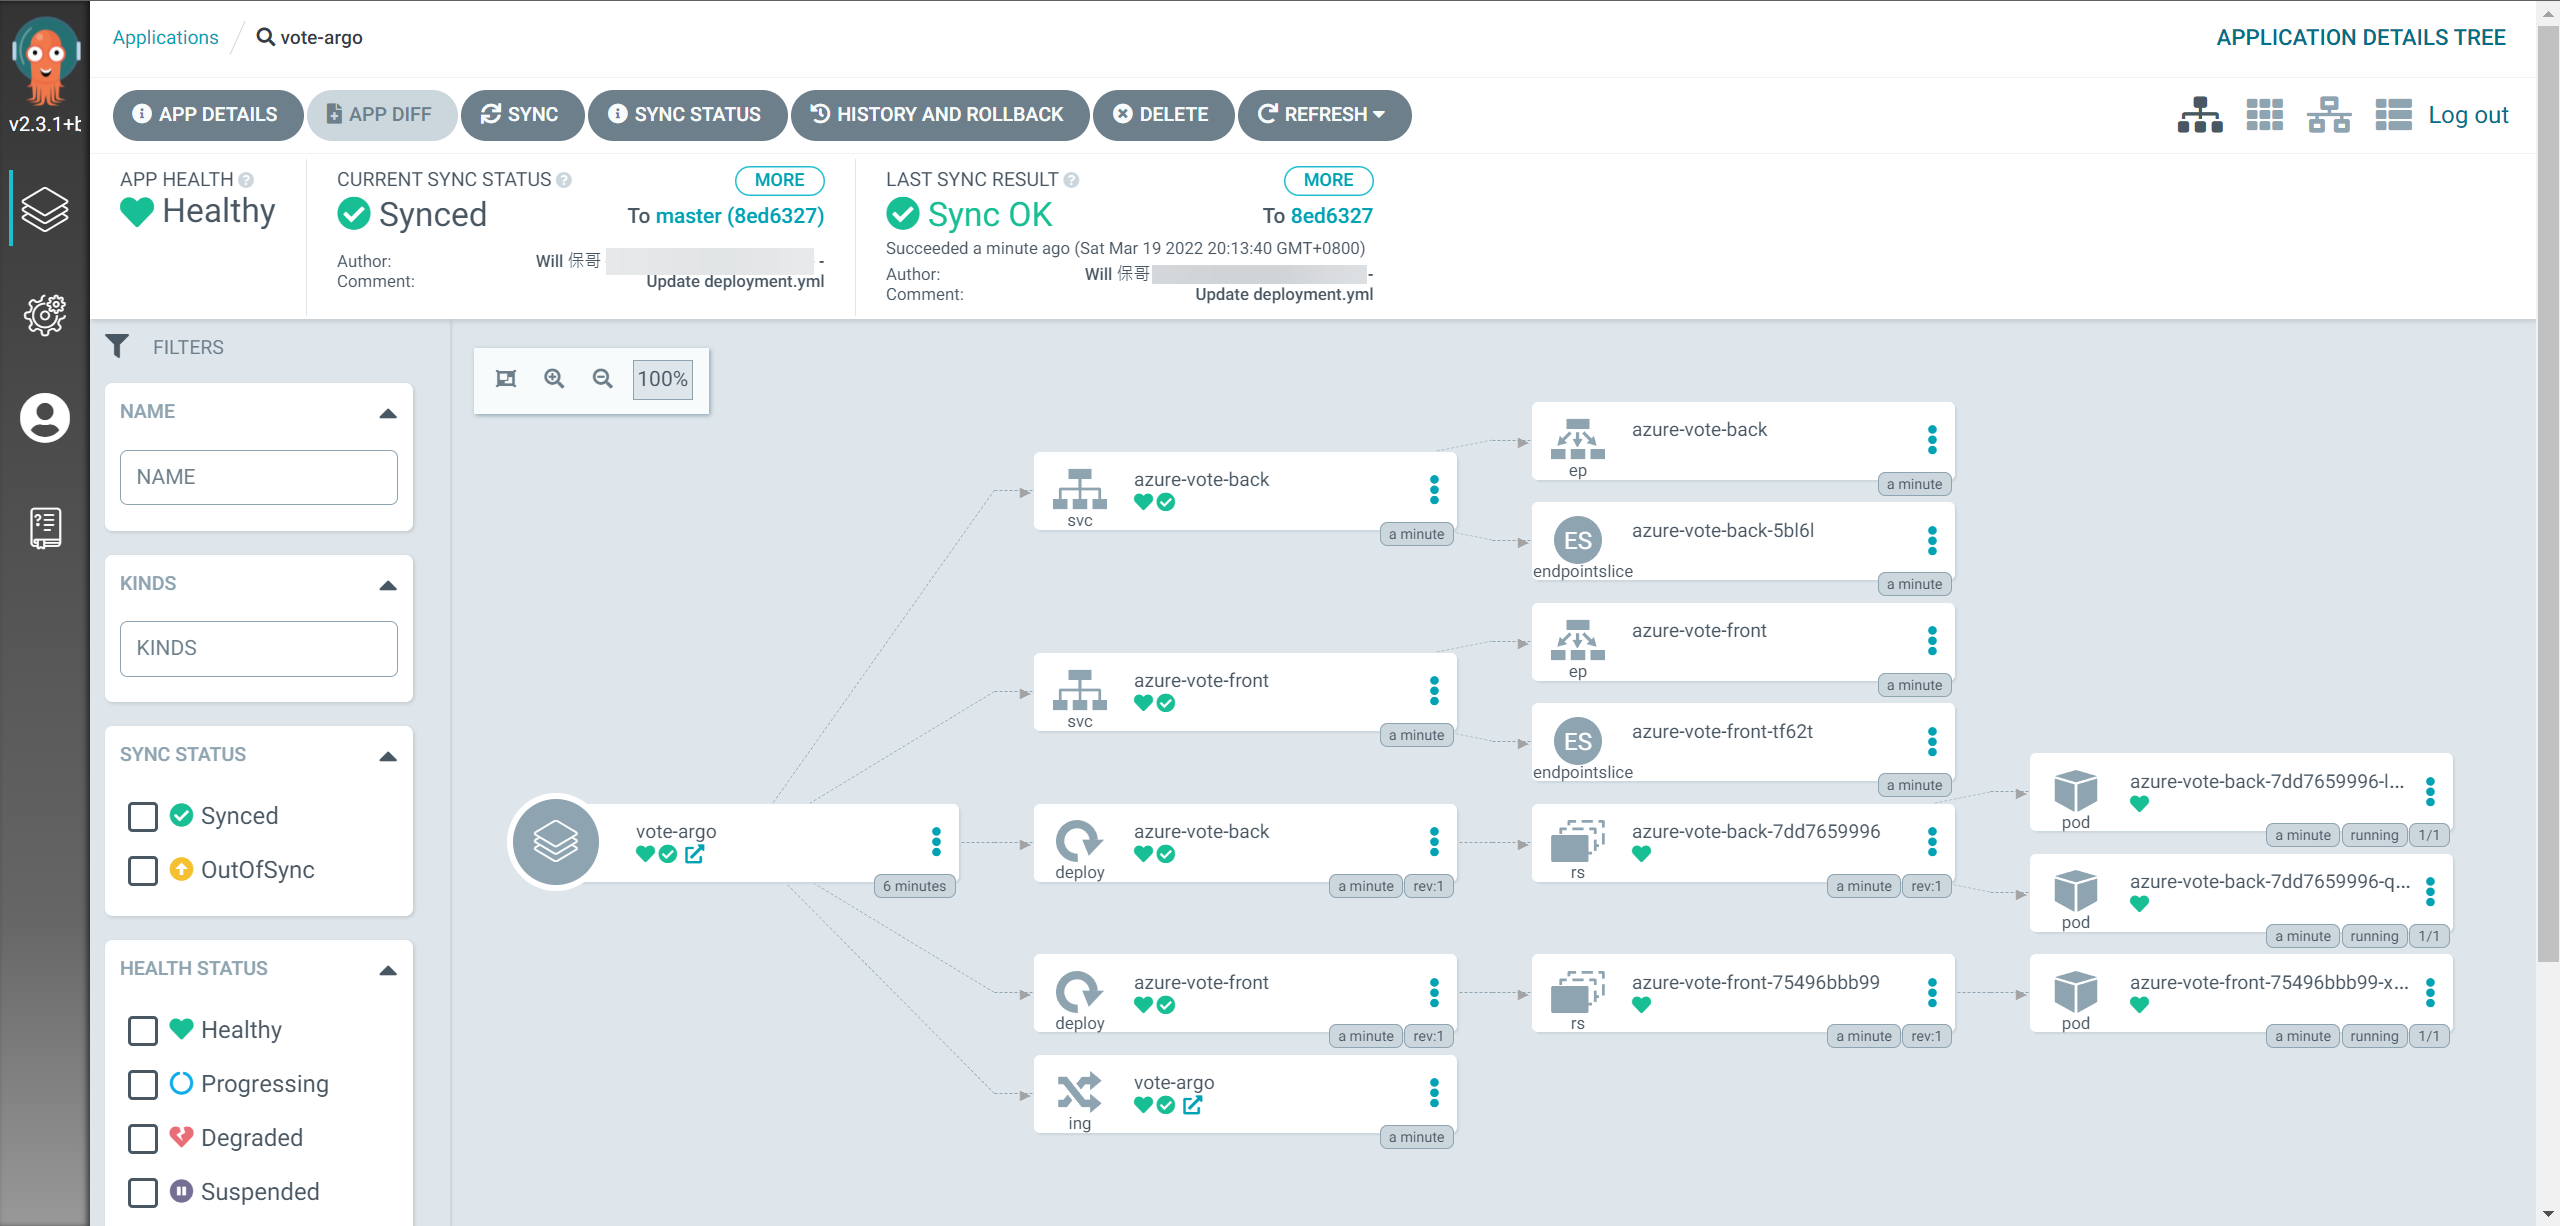
同步進行中可以看到完整且即時的狀態
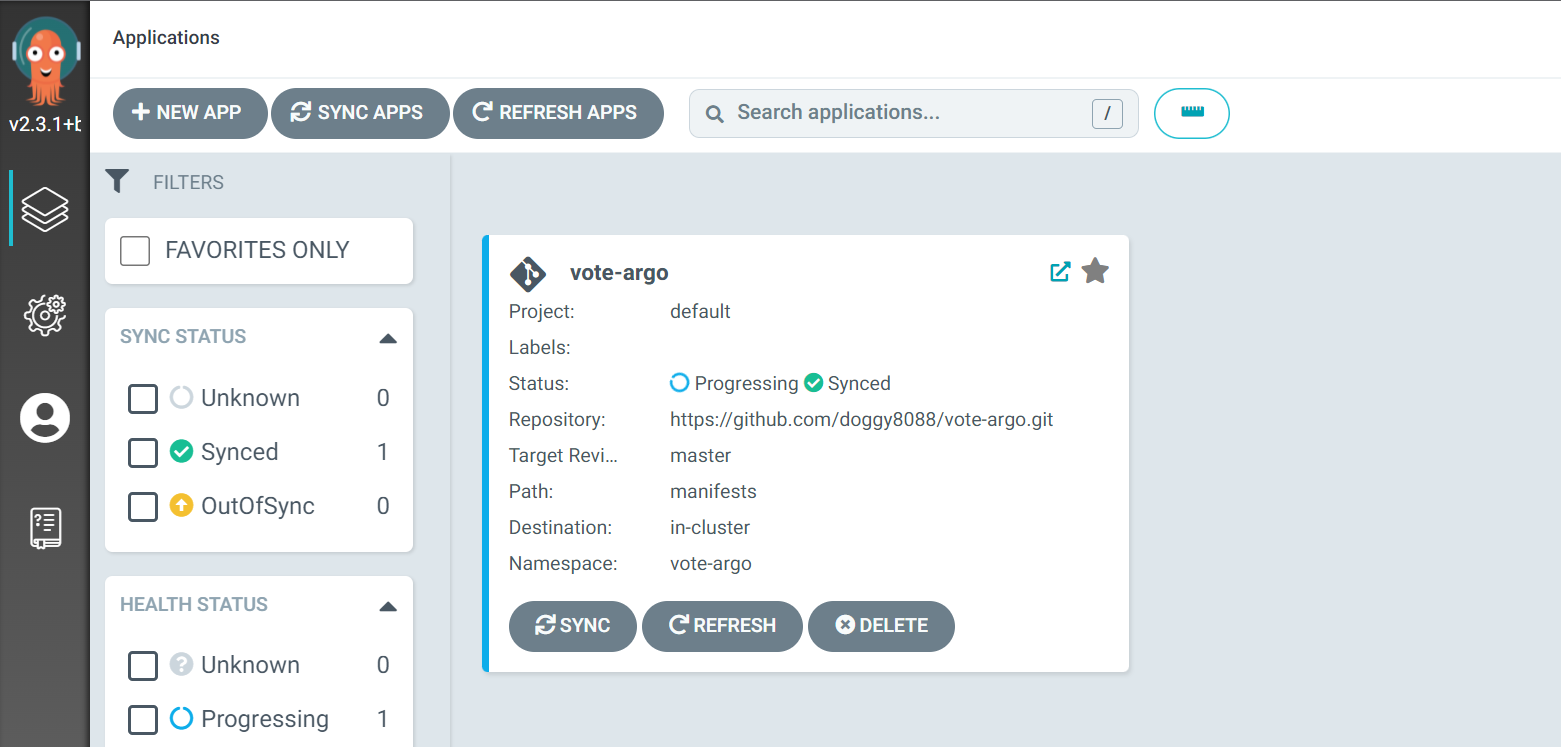
部署完成就可以看到相當視覺化的部署結果! 👍
-
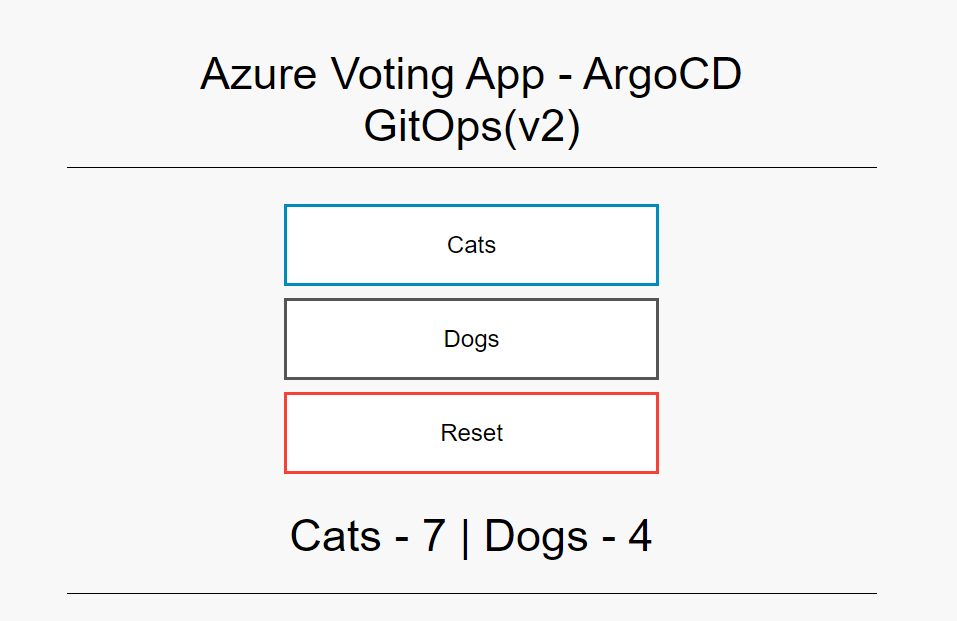
連接
vote-argo服務如果一切都很順利的運作,應該會在瀏覽器看到以下畫面:
-
啟用
AUTO-SYNC特性並透過修改 Git Repo 中的內容觸發 Argo CD 自動部署點擊進
vote-argo應用程式,點擊 APP DETAILS 按鈕,點擊 ENABLE AUTO-SYNC 按鈕即可啟用自動同步!修改 https://github.com/doggy8088/vote-argo/blob/master/manifests/deployment.yml 內容,調整
replicas數量。接著 Argo CD 會每 3 分鐘自動檢查一次 Repo 是否有新的 Commit 出現,如果有 不同步 (
OutOfSync) 的狀態發生,就會自動進行同步,將變更同步到 Kubernetes 叢集中。
Recommend
About Joyk
Aggregate valuable and interesting links.
Joyk means Joy of geeK