

OpenHarmony-JS封装Canvas组件饼状图
source link: https://os.51cto.com/article/703771.html
Go to the source link to view the article. You can view the picture content, updated content and better typesetting reading experience. If the link is broken, please click the button below to view the snapshot at that time.


鸿蒙已经提供了chart组件来实现数据可视化的需求,那么,我们该如何自定义一个chart组件来实现数据可视化呢?本文将运用canvas来自定义一个简单的饼状图组件。
<div style="flex-direction: column;align-items: center;">
    <canvas ref="canvas1" class="canvas1" style="width: 360px; height: 400px;             background-color: #fff;margin-bottom: 30px;"                                   @touchstart="select"></canvas>
    <input type="button" style="width: 180px; height: 60px;" value="画图"
           onclick="draw" />
</div>
首先我们需要创建一个画布,接下来我们所有操作都将在画布上进行。
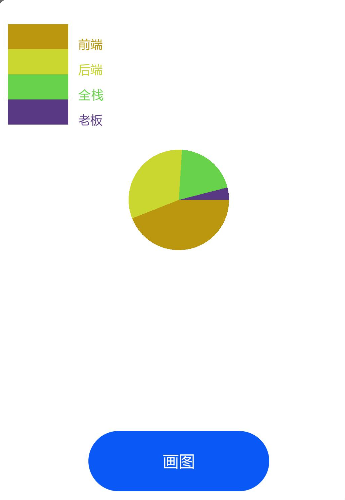
饼状图主要由两部分组成,矩形阵来表示数据,饼图进行操作。饼状图由下面画图按钮点击同时生成。
用到的数据很简单。
ary:[   {title:'前端', num: 11},
        {title:'后端', num: 8},
        {title:'全栈', num: 5},
        {title:'老板', num: 1},
    ]
计算总数,转换弧度
drawAngle() {
    this.ary.map((item, index) => {
        this.total += item.num;
    });
    let total = this.total
    this.ary.map(function (item, index) {
    let angle = (item.num / total) * Math.PI * 2; //计算在饼状图中每一块对应的弧度        item.angle = angle;
    });
        return this.ary
},
将拿到的数据,算出总数,然后算出各自对应的弧度,为在饼图上显示做铺垫。
randomColor() {
  // Math.floor(x) 返回小于等于x的最大整数
  // Math.random() 返回介于 0(包含) ~ 256(不包含) 之间的一个随机数
  let r = Math.floor(Math.random() * 256);
  let g = Math.floor(Math.random() * 256);
  let b = Math.floor(Math.random() * 256);
  return "rgb(" + r + "," + g + "," + b + ")";
}, 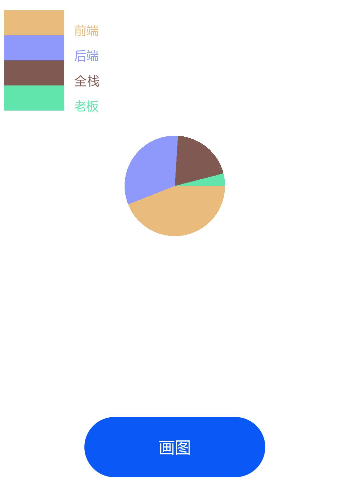
饼图上是需要颜色填充的,不然就是一块白板,我在这使用的随机颜色,只要刷新代码,点击画图按钮,重新生成的饼图的颜色就会不一样,如果大家有更好的想法,欢迎随时交流。
draw() {
    if(this.flag == false) {
        this.flag = true;
        this.el = this.$refs.canvas1;
        this.ctx = this.el.getContext('2d');
        // 获取画布中心
        this.xCenter = JSON.parse(JSON.stringify(this.el.style.width).replace('px','')) / 2;
        this.yCenter = JSON.parse(JSON.stringify(this.el.style.height).replace('px','')) / 2;
        let angleList = this.drawAngle();
        let start = 0; //起始弧度
        angleList.map((item, index) => {
            let end = item.angle + start; //终止弧度
            this.end.push(end);
            this.ctx.beginPath();
            this.ctx.moveTo(this.xCenter,this.yCenter);
            this.ctx.arc(this.xCenter, this.yCenter, ARC_RADIUS, start, end);
            this.ctx.fillStyle = this.randomColor();  //填充颜色
            this.color.push(this.ctx.fillStyle);
            this.ctx.fill();
            start = end;
                // 画小矩形
            this.drawInfo(index, item.title, this.ctx.fillStyle);
        })
    }else {
        return
    }
},
在画饼图之前,首先要确定的就是饼图的中心位置,目的是以这个中心位置为圆心画一个圆。
由于在canvas标签上的宽高自带px(像素),在进行计算之前,需要先处理一下,我这里是用空格替代px,处理好数据后除以2,就得到了圆心的坐标。
将之前计算好的弧度列表遍历,各自定义一个起始弧度和终止弧度,我在最后写了一行start=end,是为了确定每一个扇形各自的起始弧度和终止弧度。选好填充的颜色,然后画一个圆。
drawInfo(index,text,color) {
    this.ctx.beginPath();    // 画小矩形
    this.ctx.fillRect(SPACEX, SPACEY * index + SMALL_H, SMALL_W, SMALL_H);
    this.ctx.font = "12px 微软雅黑";
    this.ctx.fillStyle = color;
    this.ctx.textAlign="left";
    this.ctx.fillText(text, SPACEX * 2 + SMALL_W, SPACEY * index + SMALL_H * 2);
},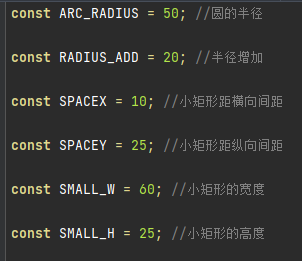
上图是用到的一些常量值。
矩形阵在画圆的方法里面调用的,所以在点击画圆按钮的时候,同时会出现。
选择扇形图
select(e) {
    let globalX = e.touches[0].globalX; //鼠标点击X坐标
    let globalY = e.touches[0].globalY; //鼠标点击Y坐标
    this.mouseRadio = Math.sqrt(Math.pow(globalX-this.xCenter,                  2)+Math.pow(globalY-this.yCenter, 2));
    // 鼠标点击位置的向量坐标
    let vecX = globalX - this.xCenter;
    let vecY = globalY - this.yCenter;
    if(this.flagTwo == false) {
        this.flagTwo = true;
        this.end.splice(0, 0, 0); // 给该数组第一个位置加一个0
    }
    // 通过向量的点积来计算cos
    let cos =  (vecX * ARC_RADIUS + 0 * vecY) / (Math.sqrt(vecX * vecX + vecY *      vecY)  * ARC_RADIUS);
    let cliAngel = 0; // 当前点击点的弧度值
    // 以圆心为坐标轴,通过判断y的正负值,来取当前点击的弧度值
    if (globalY > this.yCenter) {
        cliAngel = Math.acos(cos);
    }else{
        cliAngel = Math.PI * 2 - Math.acos(cos);
    }
    let angelI = this.countRange(this.end,cliAngel) // 当前点击点的弧度值在数组中对应的下标
    console.log("angel:" + angelI);
    // 判断点击是否在半径为ARC_RADIUS的圆内
    if(this.mouseRadio < ARC_RADIUS) {
        console.info('在圈内' + this.mouseRadio);
        this.ctx.beginPath();
        this.ctx.moveTo(this.xCenter,this.yCenter);
        this.ctx.arc(this.xCenter, this.yCenter, ARC_RADIUS + RADIUS_ADD,this.end[angelI-1], this.end[angelI]);
        this.ctx.fillStyle = this.color[angelI-1];
        this.ctx.fill();
    } else {
        console.info('在圈外' + this.mouseRadio);
        this.ctx.beginPath();
        this.ctx.moveTo(this.xCenter,this.yCenter);
        this.ctx.arc(this.xCenter, this.yCenter, ARC_RADIUS + RADIUS_ADD,this.end[angelI-1], this.end[angelI]);
        this.ctx.fillStyle = '#fff';
        this.ctx.fill();
        this.ctx.beginPath();
        this.ctx.moveTo(this.xCenter,this.yCenter);
        this.ctx.arc(this.xCenter, this.yCenter, ARC_RADIUS ,this.end[angelI-1], this.end[angelI]);
        this.ctx.fillStyle = this.color[angelI-1];
        this.ctx.fill();
    }
}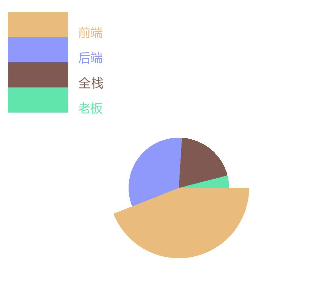
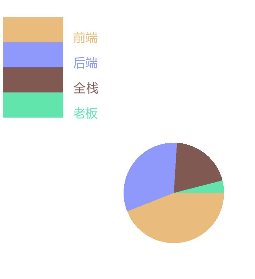
我在选择扇形图事件里加入了点击选择扇形图后,扇形图会有样式变化,如上图。
首先得知道鼠标点击的X、Y坐标,通过坐标算出当前点击坐标离圆心的距离,用来判断当前点击的坐标是否在圆内。
然后我们需要算出鼠标点击位置的向量坐标,在通过向量的点积来计算cos,以圆心为坐标轴,通过判断Y的正负值,取到当前点击的弧度值。通过计算出来的当前点击点的弧度值在数组中对应的下标,知道点击是哪一块扇形,并匹配相应的背景颜色,点击后,当前被点击的扇形样式就会发生变化。
最后通过判断点击的坐标是否在圆内,来决定扇形的样式。逻辑是,点击在圆内,放大,点击在在圆外,缩小。
注:其实在这里,并没有去修改扇形的样式,只是通过画新的圆,从视觉上达到所要实现的效果。
本文仅仅实现了饼状图的基本功能(一部分功能因为影响功能展示并未放上来)。

Recommend
About Joyk
Aggregate valuable and interesting links.
Joyk means Joy of geeK