

Evaluating TX Text Control .NET Server for ASP.NET using Trial Tokens
source link: https://www.textcontrol.com/blog/2022/02/22/evaluating-tx-text-control-net-server-for-aspnet-using-trial-tokens/
Go to the source link to view the article. You can view the picture content, updated content and better typesetting reading experience. If the link is broken, please click the button below to view the snapshot at that time.

Evaluating TX Text Control .NET Server for ASP.NET using Trial Tokens
In order to evaluate TX Text Control .NET Server for ASP.NET, it is possible to download the trial version for a local installation of all requirements or to create a trial token to use our trial backend server. In case you are using the trial backend, no trial download or local installation is required to evaluate specific components of TX Text Control.
This tutorial shows how to use the trial token to evaluate the document editor of TX Text Control .NET Server for ASP.NET in an ASP.NET Core web application.
Create a Trial Token
-
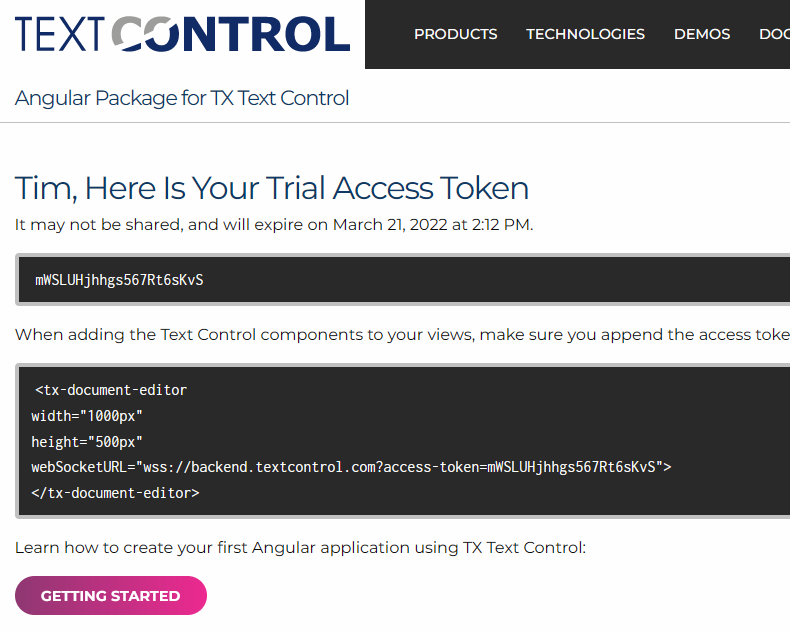
In a first step, a trial token must be created on our website.
After following the steps to create the token, you should see the following page that displays information about your trial token.
Creating the Application
Make sure that you downloaded the latest version of Visual Studio 2022 that comes with the .NET 6 SDK.
-
In Visual Studio 2022, create a new project by choosing Create a new project.
-
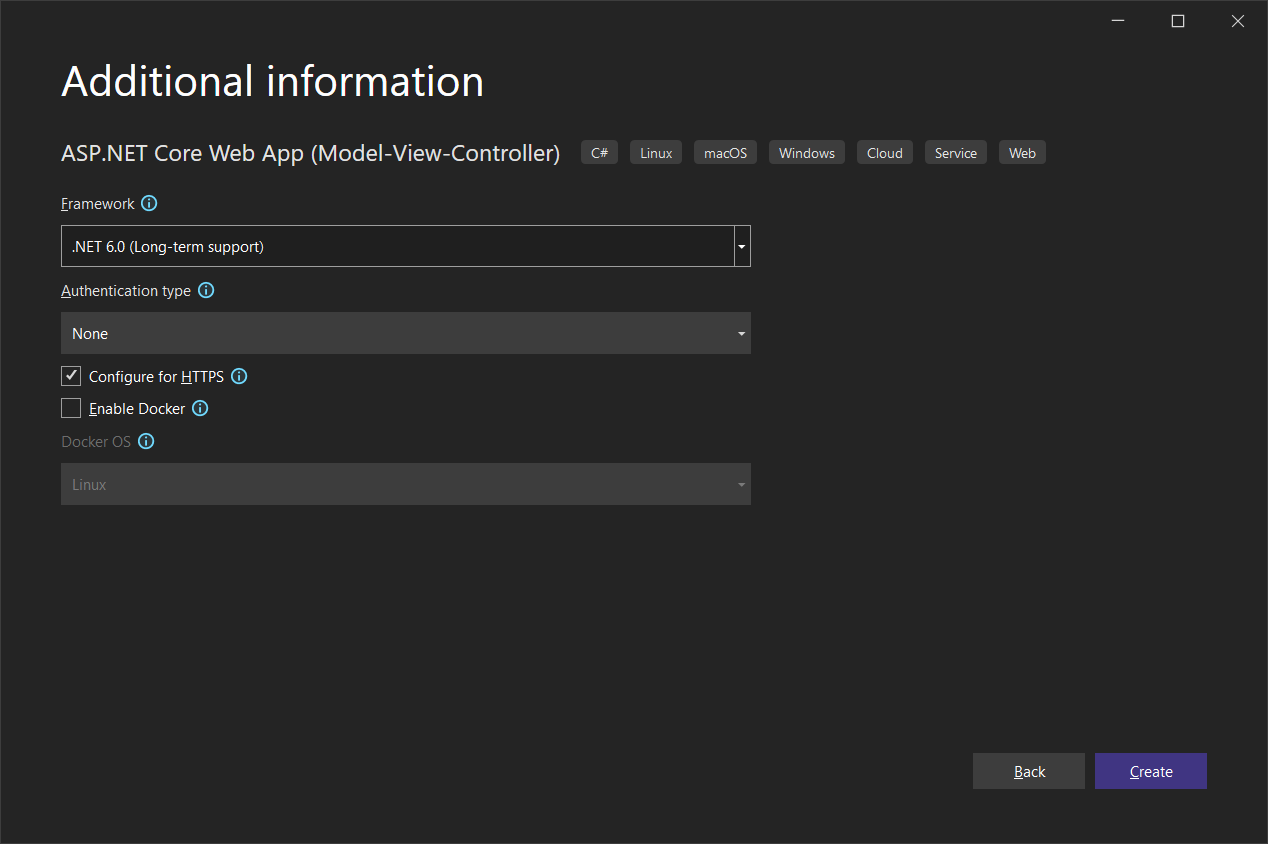
Select ASP.NET Core Web App (Model-View-Controller) as the project template and confirm with Next.
-
Choose a name for your project and confirm with Next.
-
In the next dialog, choose .NET 6 (Long-term support) as the Framework and confirm with Create.
Adding the NuGet Package
-
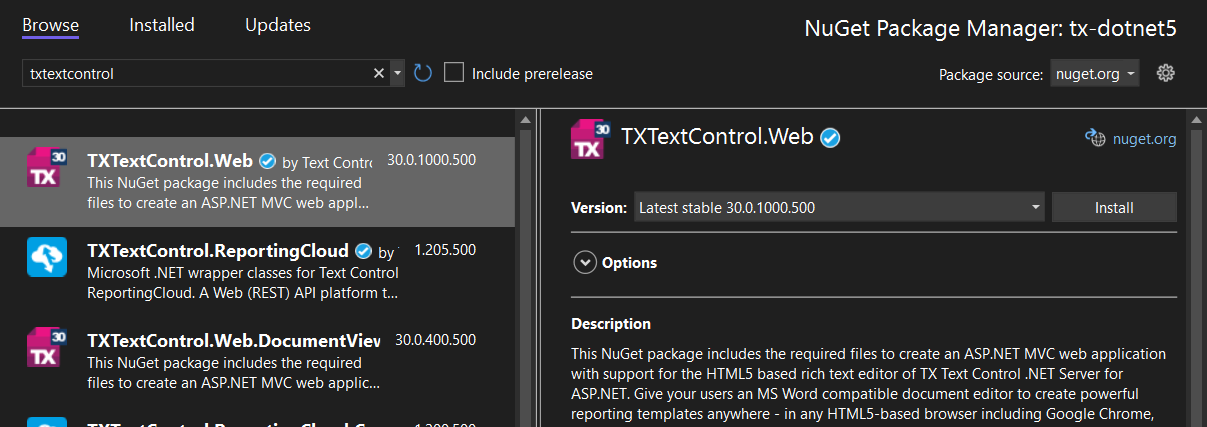
In the Solution Explorer, select your created project and choose Manage NuGet Packages... from the Project main menu.
Browse for txtextcontrol.web and Install the latest version of the TXTextControl.Web package.
Configure the Application
-
Open the Program.cs file located in the project's root folder. Add the following code after the entry
app.UseStaticFiles();:// serve static linked files (JavaScript and CSS for the editor) app.UseStaticFiles(new StaticFileOptions { FileProvider = new Microsoft.Extensions.FileProviders.PhysicalFileProvider( System.IO.Path.Combine(System.IO.Path.GetDirectoryName( System.Reflection.Assembly.GetEntryAssembly().Location), "TXTextControl.Web")), RequestPath = "/TXTextControl.Web" });
// enable Web Sockets app.UseWebSockets();
// attach the Text Control WebSocketHandler middleware app.UseMiddleware<TXTextControl.Web.WebSocketMiddleware>();
Adding the Control to the View
-
Find the Index.cshtml file in the Views -> Home folder. Replace the complete content with the following code:
@using TXTextControl.Web.MVC
@Html.TXTextControl().TextControl(settings => { settings.WebSocketURL = "wss://backend.textcontrol.com?access-token=mWSLUHjhhgs567Rt6sKvS"; }).Render()
-
Replace the trial token (line 5: mWSLUHjhhgs567Rt6sKvS) with your generated trial token from step 1.
This code adds the Text Control document editor to the view and uses the WebSocketURL property to connect to the trial backend.
-
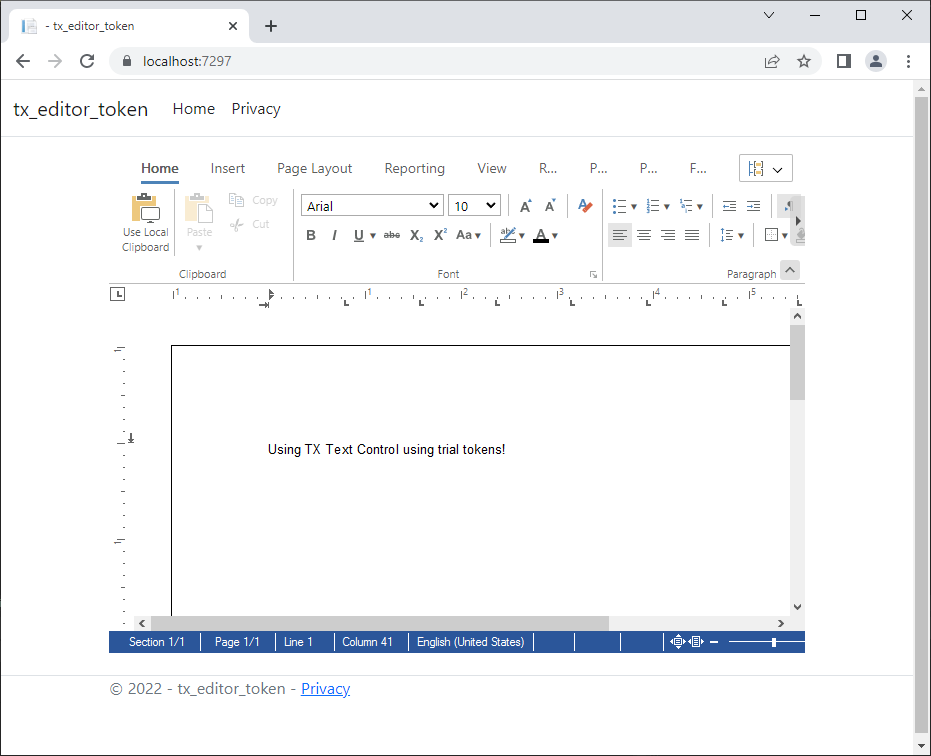
Compile and start the application to see the document editor in your web application.
Recommend
About Joyk
Aggregate valuable and interesting links.
Joyk means Joy of geeK