

Nintendo DS Architecture
source link: https://www.copetti.org/writings/consoles/nintendo-ds/
Go to the source link to view the article. You can view the picture content, updated content and better typesetting reading experience. If the link is broken, please click the button below to view the snapshot at that time.

Supporting imagery
The original Nintendo DS (Blue edition)
Released on 21/11/2004 in America, 02/12/2004 in Japan and 11/03/2005 in Europe
The Nintendo DS Lite (Black edition)
Released on 02/03/2006 in Japan, 11/06/2006 in America and 23/06/2006 in Europe
Main architecture diagram
If you have trouble following the components: Top is only accessed by ARM9, bottom section is ARM7-only, middle section is shared
A quick introduction
This console is an interesting answer to many needs that weren’t possible to fulfil in the handheld ecosystem. There will be some innovation and a few compromises, but this combination may pave the way for new and ingenious content.
As with Nintendo’s previous portable console, the system revolves around a big chip named CPU NTR. ‘NTR’ is shorthand for ‘Nitro’, the codename of the original Nintendo DS.
Now, CPU NTR implements an interesting multi-processor architecture using two different ARM CPUs, this design was done before ARM Holdings officially released multi-processor solutions. So, their functioning may be considered a bit unorthodox taking into account the present technology available.
Design
While this is not the first parallel system analysed for this series, its design is very different from the rest. For instance, we are not talking about the ‘experimental’ master-slave configuration that the Saturn debuted or the ‘co-processor’ approach found on the PS1 or N64. The Nintendo DS includes two very independent computers that will perform exclusive operations, each one having a dedicated bus. This design methodology is called Asymmetric multiprocessing and the resulting CPUs' co-dependency will condition the overall performance of this console.
That being said, let’s take a look now at the two CPUs:
ARM7 structure and components
Starting with the more familiar one, the ARM7TDMI is the same CPU found on the GameBoy Advance but now running at ~34 MHz (double its original speed). It still includes all its original features (especially Thumb).
Now for the changes: Because Nintendo’s engineers placed the ARM7 next to most of the I/O ports, this CPU will be tasked with arbitrating and assisting I/O operations. In fact, no other processor can directly connect to the I/O. As you can see, this is not the ‘main’ processor that will be in charge of the system, but rather the ‘sub-processor’ offloading the main CPU by passing data around many components.
I guess with hardware like this, it’s easy to figure out the real reason kids loved this console, eh?
Interconnection
So far I’ve talked about how the two CPUs work individually. But to work as a whole, they require to co-operate constantly. To accomplish this, both CPUs directly ‘talk’ to each other using a dedicated FIFO unit, this block of data holds two 64-byte queues (up to 16 elements) for bi-directional communication.
Representation of FIFO unit
This works as follows: The ‘sender’ CPU (that effectively needs to send the other a message) places a 32-bit block of data in the queue, the CPU acting as a ‘receiver’ can then pull that block from the queue and perform the required operations with it.
Whenever there’s a value written on the queue, either CPU can fetch it manually (polling) however, this requires to constantly check for new values (which can be expensive). Alternatively, an interrupt unit can be activated to notify the receiver whenever there’s a new value in the queue.
Main memory
Just like its predecessor, RAM is spread around many different locations, enabling to prioritise data placement by speed of access. In summary, we have the following general-purpose memory available:
RAM model of this console
- 32 KB of WRAM (Work RAM) using a 32-bit bus: To hold fast data shared between the ARM7 and ARM9.
- Bear in mind that only one CPU can access the same address at a time.
- 64 KB of WRAM using a 32-bit bus: For fast data as well, but only accessible from the ARM7, like the GBA had.
- 4 MB of PSRAM using a 16-bit bus: A slower type, available from either CPU and it’s controlled by a memory interface unit.
- Pseudo SRAM or ‘PSRAM’ is a variant of DRAM which, by contrast, performs refreshes from within the chip. Therefore, behaving like SRAM (the faster, but more expensive alternative to DRAM). This design reminds me of 1T‑SRAM.
Backwards compatibility
Even though the architecture is significantly different from its predecessor, it still managed to maintain the critical bits that would grant it native compatibility with GameBoy Advance games.
But for the DS to revert to an ‘internal’ GBA, the former includes a set of software routines that set the console in AGB Compatibility Mode. In doing so, it effectively halts the ARM9, disables most of the ‘special’ hardware, redirects the buses, puts the ARM7 in charge and slows it down at 16.78 MHz. Finally, the ARM7 proceeds to boot the original AGB BIOS which bootstraps the GamePak cartridge (just like an original GameBoy Advance). This mode still exhibits some features not found in the original console, such as displaying the game with black margins (we’ll see in the next section that the new screen resolution happens to be bigger). Moreover, since the DS has two screens, users can set which screen will be used to display the GBA game.
Once in GBA mode there’s no going back, the console must be reset to re-activate the rest of the hardware.
Secrets and limitations
With so many sophisticated components fitted in a single and inexpensive chip, it’s no mystery that some issues emerged due to the way they were forced to work with each other.
Sometimes I wonder how Nintendo planned the way the two CPU’s would be used, and if they already assumed some performance would be hit by the design they chose.
Let me start with the ARM9, this CPU runs at twice the speed of the ARM7, but most (if not all) of the I/O depends on the ARM7, so the ARM9 is vulnerable to excessive stalling until the ARM7 answers. If that wasn’t enough, ARM9’s external bus runs at half the speed, so there are a few bottlenecks identified.
Additionally, the Main Memory bus is only 16-bit wide. Thus, whenever any CPU needs to fetch a word (32-bit wide) from memory, the interface stalls the CPU, using up to 3 ‘wait’ cycles, until a full world is reconstructed. The worst impact happens when memory access is not sequential, which makes it stall for every single access. This issue will also arise when instructions are fetched (unfortunately, ARM didn’t support sequential opcode fetching back then) which, to my dismay, also affects Thumb code (since every 16-bit fetch is done as a 32-bit block). On the other hand, this ‘penalty’, as some sources call it, can be alleviated by making full use of cache and TCM.
All in all, this means that in the worst case, the ‘whooping’ ARM9’s 66 MHz horsepower is practically reduced to a mere ~8 MHz. That is if the program makes an abysmal use of cache/TCM.
For a detailed report, I recommend checking out Martin Korth’s document (see the ‘Sources’ at the end of the article), specifically, the ‘DS Memory Timings’ section.
Graphics
This section is a bit unusual because not only this console has multiple screens to draw, but also a combination of traditional tile engines working alongside a modern renderer.
Let’s begin with the physical attributes: The Nintendo DS contains two LCD screens, each one being 256x192 pixels wide, which is ~20% more pixels than the GBA. They can display 262,144 colours (18-bit) and refresh at ~60 Hz.
Architecture
The graphics subsystem can draw 2D and 3D objects. The former is composed of two-dimensional geometry that is filled with bitmaps of 8x8 pixels wide (called ‘tiles’), while the latter draws three-dimensional objects (polygons) using vertices.
Diving into the internal chip that operates those screens, we can observe this console has distinctive hardware for 2D and 3D geometry. The 2D data is operated by a familiar engine, the PPU (now just called 2D engine), while 3D data is handled by a completely new subsystem. It’s worth mentioning that while this is not the first console to debut 3D graphics, it’s still the first one to include an in-house design to render 3D graphics.
Layout of the different graphic units
Now, these engines must be linked to either screen, this not an issue for 2D-only games since there’s one 2D engine for each screen. However, for those games who want to show off cutting-the-edge features, there’s only one 3D engine available. As a consequence, 3D capabilities are only available on one screen at a time. But what about mixing 2D and 3D objects? Absolutely, let me explain each engine separately so we can discuss this afterwards.
Constructing a frame with 2D graphics
Before we review each stage, I recommend reading a previous article about the GBA’s PPU since here I’ll just mention the changes that construct the ‘next-gen’ of 2D games. Also, since there are two engines, the first one is named Main while the second one is called Sub. This doesn’t necessarily imply which screen is each one connected to. On the other side, ‘Main’ contains a bit more functions than ‘Sub’.
To help the explanations, this time I’m going to borrow the assets of New Super Mario Bros.
Some tiles found in VRAM
For demonstration purposes, a default palette is used
By now we all know how a basic tile system works, but how are tiles particularly managed in this console? Well, there’s a total of 656 KB of VRAM available, and this chunk is split into different banks: Four 128 KB, one 64 KB, one 32 KB and three 16 KB. Programmers are free to fill the banks with drawings and then point the engine where the required data is. Both engines can read from any of these banks, but they can’t access the same one concurrently.
Nonetheless, there are some limitations on how data can be distributed. For instance, the ARM7 can only access two 128 KB banks. At the same time, these two banks can’t store sprites, and ‘sub’ is the only one capable of accessing the last 16 KB bank. The list goes on… but you get the idea.
One last thing, the 3D engine, which we will discuss later on, will access some of these banks to fetch textures.
The 3D accelerator
If you played with a Nintendo DS before, you know by now that this console can display a particular amount of 3D graphics. Unlike some GBA games, these aren’t processed by the CPU. Instead, CPU-NTR includes two components that compose the 3D engine. Curiously enough, the design Nintendo applied reminds me to SGI’s RCP.
Revisiting the ‘Background modes’ section, you’ll notice every mode has at least one static background, this is because you can fill that layer with graphics produced by the 3D engine. The only caveat is that only the ‘Main’ can do this, hence one of the reasons Mode 6 is only available for ‘Main’.
Architecture of the Geometry Engine
If you read any of the articles from the 4th or 5th generation, you may be wondering… Where’s the SIMD processor? That’s a good question because the ARM9 is not particularly good at vector operations and I don’t think the dedicated divider is enough. That’s why Nintendo embedded a component called Geometry Engine that takes care of vertex transformations, projection, lighting, clipping, culling and polygon sorting, the latter one is essential to properly use the transparency features.
This engine has some strict limitations, specifically the count of polygons it can process: There’s an extra 248 KB of RAM available used to store processed geometry, this amount accounts for up to 2048 triangles or 1706 quadrilaterals, although this limit is reduced by using polygon strips (as opposed to individual polys). To get a sense of this number, I suggest to check out the ‘interactive models’ sections at previous articles, you’ll see that it’s a concerning constraint, but don’t forget that the screen resolution of this console is also much smaller… so that compensates a bit.
Anyway, this engine is commanded using a Command FIFO which is filled with data from the CPU or DMA. The FIFO stores 256 entries, yet it’s complemented by another buffer called PIPE that stores four more commands (giving a total of 260).
Famous comparisons
Some of the first games released for this console attempt to resemble the ones from another console (namely, the Nintendo 64). So I wanted to give a quick summary of why players may see some substantial differences between the two versions:
Super Mario 64 (1996)
Rendered at 320×240 pixels
Super Mario 64 DS (2004)
Rendered at 256x192 pixels
So, to explain what’s happening here, I’ve organised the different explanations based on what some people said on forums:
- NDS' textures look more blocky → The rendering engine does not employ any filter, so textures are interpolated using ‘nearest neighbour’ approach.
- NDS' textures look richer → The rendering engine is not limited by a 4 KB TMEM, there’s instead up to 512 KB of VRAM available (apart from compression mechanisms provided) so naturally more data can be loaded.
- NDS' models contain pixelated edges → NDS models are rendered at a lower resolution compared to the N64.
- NDS' textures look distorted when seen from a distance → The rasterizer operates fixed-point coordinates. Low resolution and lack of mip-mapping also attribute to aliasing.
That’s pretty much in a nutshell, for more specialised cases, you’ll have to dive deeper at both engines and possibly disassemble both games to investigate which functions are being used and how.
Interactive models
I’ve updated the wee model viewer to apply ‘nearest neighbour’, allowing to visualise Nintendo DS models using your GPU.
Wireframe Surface Textured
Tap to enable interaction
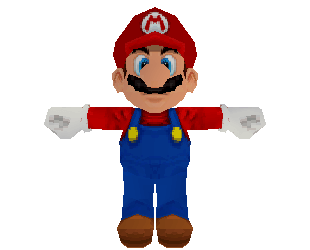
New Super Mario Bros (2004)
636 triangles
Wireframe Surface Textured
Tap to enable interaction
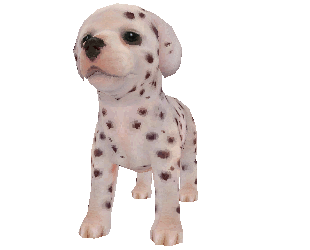
Nintendogs (2005)
750 triangles
Despite the fact we talked about a lot of limitations of the graphics subsystem, lots of games did make really good use of it.
Audio
Most of the audio improvements focus on enhancing those PCM channels that the GBA featured. We’ve seen before that GBA games ultimately prioritised software sequencing over the PSG, and the result was quite impressive.
No support for video.
Last Window: The Secret of Cape West (2010)
Showing mixed stereo output
Consequently, the new audio system features a total of 16 PCM channels, allowing to shift the mixing task to the hardware. PCM samples can either be 8-bit (GBA-style), 16-bit (optimal resolution) or ACPCM (compressed form). In any case, the mixer produces a stereo signal that can be played through the speaker (now stereo) or headphones. It can also write the resulting stereo data to WRAM, enabling the sub-processor (ARM7) to apply some effects such as reverb.
With all being said, does this mean that the Nintendo DS can finally play encoded music (i.e. MP3)? It’s possible (in fact, a lot of homebrew programs implemented some form of it), but audio decoding takes up a lot of bandwidth and processing power. So audio sequencing still retains its place as the most feasible option.
An eccentric PSG (or two)
Since this console runs GBA games, it should then have something that reassembles the predecessor’s PSG (whether through hardware or software). Well, it so happens the last 6 channels contain a ‘PSG mode’ allowing any of them to synthesise either a pulse or a custom wave; and only two of them can create noise. But GBA games don’t use any of these!
You see, the mixer’s output frequency rate is 32 kHz with a resolution of 10-bit (considerably lower than the quality of the samples fed). Furthermore, it does not perform any form of interpolation to smooth out the loss of precision. These restrictions are not ideal for samples, as it adds noise. Though the actual perception of this phenomenon depends on your auditory capacity (I don’t notice the ‘hiss’ unless I boost the volume and compare it with a 16-bit version side-by-side), besides, it’s still a step forward coming from software-mixed samples with 8-bit resolution. Conversely, the aliasing effect is more problematic with PSG sounds, as downsampling the signal may introduce erroneous harmonics which distorts the original PSG tone. Nevertheless, games like New Super Mario Bros. happily makes use of pulse waves for accompaniment, so I wouldn’t consider the PSG completely useless.
Back on topic, how does a GBA game handle all of this? It doesn’t, Nintendo fitted a separate sound system (within the same enclosure) for GBA mode that includes its own channels and mixer that follows the specifications of the predecessor. This way, GBA games won’t be affected by the new mixer’s limitations. Unfortunately, since this subsystem is segregated from the DS one (in other words, it’s doesn’t output to the DS’s mixer), DS games aren’t able to use it.
Interactive comparison
I’ve constructed this interactive widget that will allow you to compare by yourself how the new audio system affected the new generation of soundtracks. Each widget plays the same score but allows you to alternate between the old and new arrangements (I suggest wearing headphones to really notice the difference). Give it a whirl!
No support for audio.
Tap to enable interaction
GBA: Gyakuten Saiban (2001, JAP only)
NDS: Phoenix Wright: Ace Attorney (2005)
No support for audio.
Tap to enable interaction
GBA: Mario Kart: Super Circuit (2001)
NDS: Mario Kart DS (2005)
(If you have trouble listening to it, please drop me a mail mentioning the browser and device you are using)
Be as it may, I had to boost the gain of the GBA soundtrack a little bit to normalise the loudness, which tends to affect the signal-to-noise ratio (just something to bear in mind while you switch between the two). Anyway, I hope you got a sense of how the sound subsystem has evolved.
Some struggles
Let me show you some tricky cases now, where the original console had some unique audio features that weren’t straightforward to recreate for this console, but I’ll let you be the judge of that:
No support for audio.
Tap to enable interaction
SNES: Super Mario Kart (1992)
NDS: Mario Kart DS (2005)
No support for audio.
Tap to enable interaction
Mega Drive: Sonic 3D Blast (1996)
NDS: Sonic Chronicles (2008)
As you can hear from the first example (especially in the last 10 seconds), it’s a bit hard to compete with the features that the SNES' S-SMP provided.
I must confess the second one was put on purpose, I mean, what the freck happened there right? As if the new arrangement were initially done for an Atari console instead. If you ask me, I think the Nintendo DS could have handled some sort of FM to PCM re-sampling, so the new minimalistic arrangement may just be a creative approach.
To make a long story short, I/O is strictly handled by the ARM7. In fact, you won’t see much going on with that CPU apart from passing data around… which is too bad really.
Accessing cartridges and memory
There’s an external memory interface connecting three endpoints: Slot-1 (where Nintendo DS cards go), Slot-2 (where GBA cartridges or accessories go) and the 4 MB of PSRAM (Main memory). The interface can be accessed by both CPUs, but it contains registers that can be modified to prioritise one CPU over the other in case there are two request from the same bus at the same time.
External memory model with labelled data bus width
Now, here’s the important bit: DS cards are not memory-mapped, so for either CPU to read game data, the content must be copied to RAM first. This is done by sending to the cartridge blocks of 8-bit commands referencing 32-bit addresses. Afterwards, the data can be manually retrieved by pulling it from a 32-bit register or through DMA. The data bus is 8-bit wide but can reach speeds of up to 5.96 MB/sec (as claimed by Nintendo).
The ‘backup’ chip used for saves (i.e. EEPROM, FLASH or FRAM) is accessed through an SPI bus (serial) which uses its own set of commands and it’s connected to a 24-bit address bus.
The Slot-2 cartridge is memory-mapped using the original pinout, but the addresses are shifted in DS mode to accommodate the hardware that provides expansion functionality (extra RAM, rumble, etc). Just like the GBA, the ROM bus is 16-bit wide and the RAM bus is 8-bit wide.
Peripherals
The ARM7 is also connected to another SPI node interfacing the TouchScreen controller, which operates the bottom screen’s (it’s the resistive type, requiring the use of a stylus); and the flash memory (which is where the firmware is stored, more details later on).
A curious thing about this touchscreen is that apart from detecting the X/Y positions, it can also return the diagonal position (used to calculate the ‘pressure value’, which represents the area where pressure is being applied). Unfortunately, this was never exposed in the official SDK, so as far as I know, no game ended up using this undocumented feature (except homebrew).
Many have pointed out that ‘Hotel Dusk: Room 215’ relied on this feature for one of its puzzles, which required users to use two fingers at the same time. This is not the case however: After experimenting with the no$gba debugger, the puzzle does not make use of pressure data. Instead, it checks whether the x/y values alternate drastically. The game interprets this effect as if the user had pressed the screen with two fingers.
Finally, in the same stack we find the real-time clock or ‘RTC’.
Wireless network
Last but not least, the console contains a Wireless controller operating in the 2.4 GHz band that provides some innovative features:
- Internet Play: Enables any game to connect to a LAN network using a standard Wi-Fi connection.
- Multi-card Play: Up to 16 consoles communicate with each other using a proprietary protocol.
- Single-card Play: The game can upload a program to another DS which doesn’t contain the game card.
Operating System
I guess it’s safe to say that by this generation every console now comes bundled with some sort of interactive interface. The NDS still inherits the previous operating system model consisting in lightweight APIs to simplify I/O access, but also provides a minimal user interface to tweak some settings and fiddle with some of its ‘apps’.
Having said that, its operating system is diversified into multiple chips, so let’s start with the ones that are read upon boot.
Entry point
At some point, the ARM7 and ARM9 will need to initialise the hardware and to do this, NTR-CPU includes two different small ROM chips:
- A 4 KB BIOS connected to the ARM9’s bus.
- A 16 KB BIOS connected to the ARM7’s bus.
When the console starts up, each CPU boots from its respective ROM. This is because their reset vector points to each chip (for reference, ARM9’s vector is at 0xFFFF0000 while ARM7’s one is 0x00000000).
Moving forward, each BIOS stores two sets of routines: Boot code and interrupt calls. The latter is no stranger giving the history of the previous console, however the former has increased in complexity: Apart from initialising the hardware, ARM7’s code will also handle security by running some checks on the DS cartridge (if there is one inserted).
After running the boot code, both CPUs will synchronise so they can start acting as a ‘single machine’: It turns out the ARM9 finishes loading way before the ARM7, so the ARM9 sends a 4-bit value to the ARM7, stalls on a semi-endless loop waiting for the ARM7 to respond and once it does, both ‘cross the finish line’ at the same time, that is to say, they are now in-sync.
Window of opportunity
If you have or had a DS, you probably noticed you can only play games if the cartridge was inserted before turning on the console. This is because the ARM7’s BIOS carries out some checks on the cartridge during boot (more details on the last section) and if all the tests pass, ARM7’s game executable is copied to WRAM and ARM9’s one is copied to Main Memory.
If for some reason the executables are not copied (due to the cartridge not being valid or not found during boot), then the game can’t be started and the user will have to reset the console to play one.
Interactive shell
Whether there’s a game or not, the system will finish booting by loading an interactive shell. This is just a program that resides on an external 256 KB Flash memory.
The same chip stores the firmware along with some user settings (language, nickname, birthday, alarm and a welcome message) and some system settings (touchscreen calibration, first startup flag, firmware version and wifi settings).
The shell is more-or-less the same as the rest of its contemporaries. Users rely on it to start their game, change settings, download a game (using ‘Download Play’) or fiddle with Pictochat: an open chat room that talks with nearby Nintendo DSes.
It’s worth emphasising that both read-only and writable data reside in the same re-writable chip, so it’s theoretically possible to write over the firmware! Luckily (or for obvious reasons), Nintendo protected the upper quarter of the chip (64 KB) from being written by requiring a jumper placed on a point in the motherboard called SL1, which is exposed by removing the battery compartment. Nonetheless, over-writing the rest of the flash memory can still produces catastrophic results!
Updatability
Lastly, this firmware ended up being updated by Nintendo a couple of times (5 to be precise) in an effort to patch some security vulnerabilities. The updates weren’t installable by the user (recall the SL1 protection). Instead, Nintendo embedded the updated firmware in the next lot manufactured.
Games
Oh, there’s a lot to talk about here, primarily because the capabilities of this console did inspire a lot of programmers and artists to come up with really innovative designs. Let’s see…
Medium
This console runs games from three sources, where only two of them can make ‘full’ utilisation of the hardware:
Example of retail game
- NDS or ‘Slot-1’ cartridge: This is the main medium used to load native DS games. It’s the only medium used for distribution.
- GBA or ‘Slot-2’ cartridge: This slot enables the console to play GameBoy Advance games natively and, since Slot-1 games can also access this origin, expansion cartridges can be plugged in to enhance NDS games. These provide things like more RAM, more input controls or feedback devices (i.e. rumble pack).
- Download Play or ‘Wireless MultiBoot’: This is an evolved version of the original Multi-Boot which enables another console with an NDS game to upload a program using Wireless communication. The downloaded content is stored in WRAM and booted after the transfer finishes. Since WRAM is volatile, the data will be lost on shut down.
- Authorised retail stores used this function to deploy Download Stations, where users were invited to download game demos as part of their visit to the store.
Program structure
You’ve seen that the BIOS requires to be split up with separate code for ARM9 and ARM7, this is pretty much what also happens with games. Thus, NDS cards are structured with the following areas:
- Header (4 KB): Contains the metadata (location of each executable, serial numbers, etc).
- Secure Area (16 KB): Used for copy protection purposes. We’ll get into more details in the last section of this article.
- Main content (variable size): The rest of the card just contains the executables and game data (graphics, sound, etc). Retail games using Nintendo’s SDK contain their data organised hierarchically with files and directories thanks to a built-in filesystem.
Development ecosystem
For game studios interested in developing games for this console, Nintendo distributed both hardware kits and SDKs with lots of utilities.
The devkit, called IS-NITRO-EMULATOR, consisted of a medium-size blue box containing most of the DS’s internal hardware and I/O. This is followed by a thick cable connected to a dummy Nintendo DS case, serving as a ‘controller’ and display. At request, the devkit was enhanced with optional capabilities like audio/video out, Wifi (by default it was emulated using Ethernet) and debugger. I was expecting the latter to be already included but I realised these units could also be used by test teams.
The kit reads DS cards, but a different type with a larger case and swappable backup chips. These cards are flashed using another unit called IS-NITRO-WRITER.
Freedom of interaction
Dr Kawashima’s Brain Training (2005)
New categories of games attracted audiences beyond the youth circle
With all the new forms of interaction available, studios had the opportunity to prioritise gameplay experience over graphics.
For the first time in consumer electronics, there was a touchscreen, microphone, wifi and a real-time clock packaged in the same console. Nevertheless, some games even presented new forms of interaction, such as instructing the user to hold the console sideways.
Network service
After the success of a previous competitor, Nintendo joined the club of online multiplayer and deployed their centralised infrastructure. Games using the ‘Internet Play’ could connect to Nintendo’s servers (called Nintendo Wi-Fi Connection) to enjoy some online gaming.
Anti-Piracy and Homebrew
Even though DS cards weren’t affected by the curse of the compact disc, Nintendo implemented some protection systems to keep control of game distribution.
Security Mechanisms
Let’s take a look at each area:
The Nintendo DS mainly uses a symmetric encryption system to encrypt the communication between the Memory Interface and the Slot-1 card. Before we discuss how encryption is performed, let’s talk about the algorithms used and how the keys (which will be used to perform encryption) are generated.
The ‘Header’ area of the card contains a value called Gamecode (the unique identifier of the game), the memory interface grabs this block to generate the KEY1 and uses it to encrypt further commands sent to the card. KEY1 encryption is based on the Blowfish algorithm.
Afterwards, KEY1 is mixed with the internal clock and some other values of the cartridge header to generate a new key called KEY2. The fundamental difference with KEY1 is that the former uses random values to make it unpredictable. KEY2 encryption relies on multiple XOR and Shift operations to obfuscate the data.
Defeat
If you were a homebrew user back then you probably ran across tons of options available to run this software. The truth is, before all the current cracks were discovered, hackers had a hard time circumventing Nintendo’s complex anti-piracy system.
Because the GBA subsystem still executes cartridges without any protection implemented (aside from trademark tricks), existing GBA flashcarts were still compatible with the NDS. This enabled to run GBA homebrew, which worked fine if you didn’t mind missing out all the new functionality exclusive to DS games.
As always, flash cartridges also enabled to run pirated ROMs, but since Nintendo couldn’t change the protection system of the GBA (as it could potentially render existing games unusable), the company just had to deal with it.
This is my personal opinion, but it’s really striking how simple are flashcards compared to other homebrew methods from previous consoles. In older articles, I’ve described that if users ultimately wanted to run homebrew programs or pirated games, they would have to get down in the rabbit hole and follow some sort of complicated method.
In the case of the DS, flashcards were literally sold just like retail games, and I bet it was truly concerning for game studios to see how painless was to resort to piracy.
Another thing, it’s also surprising the amount of branded flashcards (ignoring all knock-offs) that appeared on the market. If you look it from a technical perspective, flashcards are just SD adapters. The only thing that differentiates one card from another is the boot code and SD reader. Some manufacturers also took more effort to design a better file browser (referred to as kernel/firmware) and include some additional hardware.
That’s all folks
My current DS used for this study I actually sold my first one long time ago… I wonder where it’s now
Alrighty! I think I covered 99% of what I wanted to talk about…
I hope I didn’t sound too harsh when criticising some sections. Don’t get me wrong, I still think this console is a good piece of engineering! But there are some defects which make me wonder if it’s really a cost-effective compromise, or part of a design flaw. Truth to be told, that didn’t stop 11-year old me from wanting one back then. So I guess that’s pretty much ‘mission accomplished’ for the company!
I would also like to thank friends and the MelonDS community for taking the time to check out the draft and pointing out lots of corrections. The Nintendo DS allowed me to mention many topics I’ve been interested in writing about for a while and I was afraid I would end up biting off more than I could chew, but hopefully you’ve enjoyed this article.
Until next time!
Rodrigo
Recommend
About Joyk
Aggregate valuable and interesting links.
Joyk means Joy of geeK