
1

SpringBoot简介、@SpringBootApplication、SpringBoot配置文件的使用
source link: https://blog.csdn.net/qq_45401910/article/details/122728315
Go to the source link to view the article. You can view the picture content, updated content and better typesetting reading experience. If the link is broken, please click the button below to view the snapshot at that time.

SpringBoot简介、@SpringBootApplication、SpringBoot配置文件的使用
SpringBoot是Spring中的一个成员, 可以简化Spring,SpringMVC的使用。 他的核心还是IOC容器。
内嵌的tomcat, jetty , Undertow 服务器

能够帮助我们简化开发:
		提供了starter起步依赖,简化应用的配置。
		  比如使用MyBatis框架 , 需要在Spring项目中,配置MyBatis的对象 SqlSessionFactory , Dao的代理对象
		  在SpringBoot项目中,在pom.xml里面, 加入一个 mybatis-spring-boot-starter依赖

		尽可能去配置spring和第三方库。叫做自动配置(就是把spring中的,第三方库中的对象都创建好,放到容器中, 开发人员可以直接使用)
快速创建一个SpringBoot项目[https://start.spring.io/](https://start.spring.io/)
使用IDEA创建:
主启动类:
package com.dongmu;

import org.springframework.boot.SpringApplication;
import org.springframework.boot.autoconfigure.SpringBootApplication;

@SpringBootApplication
public class Springboot02Application {

    public static void main(String[] args) {
        SpringApplication.run(Springboot02Application.class, args);
    }

}
几个注解的作用:
@SpringBootApplication包含下面三个注解
	@SpringBootConfiguration:它又包含@Configuraction,所以被它注解的类可以当作配置文件使用。
	@EnableAutoConfiguration:启用自动配置, 把java对象配置好,注入到spring容器中。例如可
		以把mybatis的对象创建好,放入到容器中。
	@ComponentScan:扫描器,找到注解,根据注解的功能创建对象,给属性赋值等等。
		默认扫描的包: @ComponentScan所在的类所在的包和子包。
简单使用:创建一个web项目
创建一个controller类
package com.dongmu.controller;

import org.springframework.stereotype.Controller;
import org.springframework.web.bind.annotation.RequestMapping;
import org.springframework.web.bind.annotation.ResponseBody;

@Controller
public class HelloController {
    @RequestMapping("/hello")
    @ResponseBody
    public String doSome(){
        return "SpringBoot项目。";
    }

}
启动主启动类
访问成功
SpringBoot配置文件有两种格式.properties和.yml
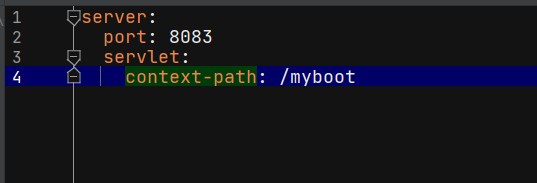
设置application.properties
#设置端口号
server.port=8082

#设置项目的名称
server.servlet.context-path=/boot


重新启动项目

看访问的时候端口号和路径的变化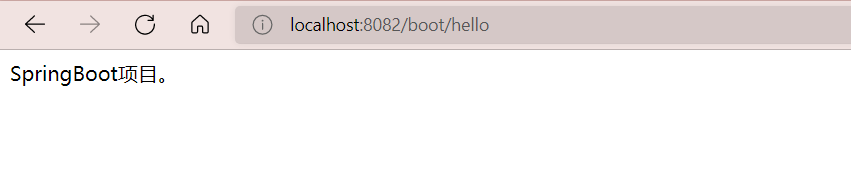
yml 是一种 yaml 格式的配置文件,主要采用一定的空格、换行等格式排版进行配置。
yaml 是一种直观的能够被计算机识别的的数据序列化格式,容易被人类阅读,yaml 类
似于 xml,但是语法比 xml 简洁很多,值与前面的冒号配置项必须要有一个空格, yml
缀也可以使用 yaml 后缀

当两种格式配置文件同时存在 ,在 SpringBoot2.4 开始, 使用的是 yml 配置文件.
修改配置名称都为 application。
多环境配置
我们开发项目使用的是开发环境, 但是一个项目的其他环节还可能需要不同的环境,
	比如:测试环境, 上线的环境。
每个环境有不同的配置信息, 例如端口, 上下文件, 数据库url,用户名,密码等等

使用多环境配置文件,可以方便的切换不同的配置。
使用方式: 创建多个配置文件, 名称规则: application-环境名称.properties(yml)
	创建开发环境的配置文件: application-dev.properties(  application-dev.yml )
	创建测试者使用的配置: application-test.properties


怎么指定使用哪个配置文件?
	在application.yml中使用
	spring:
	  profiles:
	    active: dev

在配置文件中自定义值
进行取值
package com.dongmu.controller;

import org.springframework.beans.factory.annotation.Value;
import org.springframework.stereotype.Controller;
import org.springframework.web.bind.annotation.RequestMapping;
import org.springframework.web.bind.annotation.ResponseBody;

@Controller
public class HelloController {

    @Value("${student.name}")
    private String name;
    @Value("${student.age}")
    private int age;


    @RequestMapping("/hello")
    @ResponseBody
    public String doSome(){
        return "SpringBoot项目。" +
                "姓名:"+name+" 年龄:"+age;
    }

}
访问
上面用的太麻烦了还要一次一次取,我们可以这样使用
配置文件: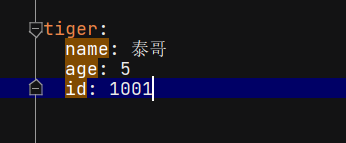
然后创建一个对象
package com.dongmu.pojo;

import org.springframework.boot.context.properties.ConfigurationProperties;
import org.springframework.stereotype.Component;

@Component
@ConfigurationProperties(prefix = "tiger")
public class Tiger {
    int id;
    String name;
    int age;

    @Override
    public String toString() {
        return "Tiger{" +
                "id=" + id +
                ", name='" + name + '\'' +
                ", age=" + age +
                '}';
    }

    public int getId() {
        return id;
    }

    public void setId(int id) {
        this.id = id;
    }

    public String getName() {
        return name;
    }

    public void setName(String name) {
        this.name = name;
    }

    public int getAge() {
        return age;
    }

    public void setAge(int age) {
        this.age = age;
    }

    public Tiger() {
    }

    public Tiger(int id, String name, int age) {
        this.id = id;
        this.name = name;
        this.age = age;
    }
}

prefix 是我们配置文件里的前缀,
 @Resource
    Tiger tiger;
    @RequestMapping("/tiger")
    @ResponseBody
    public String tiger(){
        return tiger.toString();
    }
@Resource:按名称注入,找不到再按照类型注入。

Recommend
About Joyk
Aggregate valuable and interesting links.
Joyk means Joy of geeK