

拥有一个可以debug的JVM
source link: https://zhuanlan.zhihu.com/p/459140281
Go to the source link to view the article. You can view the picture content, updated content and better typesetting reading experience. If the link is broken, please click the button below to view the snapshot at that time.

拥有一个可以debug的JVM
最近在研究跟JVM crash相关的问题,call stack有时跟JVM相关的,比如,
(gdb) bt
#0  0x00007ffff545e3d7 in __GI_raise (sig=sig@entry=6) at ../nptl/sysdeps/unix/sysv/linux/raise.c:55
#1  0x00007ffff545fac8 in __GI_abort () at abort.c:90
#2  0x00007fffede528b5 in os::abort (dump_core=<optimized out>, siginfo=<optimized out>, context=<optimized out>) at ./src/hotspot/os/linux/os_linux.cpp:1529
#3  0x00007fffee12c68f in VMError::report_and_die (id=<optimized out>, message=message@entry=0x0, detail_fmt=0x7fffee1f899b "%s", detail_args=detail_args@entry=0x7fffffffcd58, thread=thread@entry=0x848800, pc=pc@entry=0x405ccb <JavaBridge::Call()+693> "\213",
    siginfo=0x7fffffffd0f0, context=0x7fffffffcfc0, filename=0x0, lineno=0, size=0) at ./src/hotspot/share/utilities/vmError.cpp:1609
#4  0x00007fffee12cf8b in VMError::report_and_die (thread=thread@entry=0x848800, sig=sig@entry=11, pc=pc@entry=0x405ccb <JavaBridge::Call()+693> "\213", siginfo=siginfo@entry=0x7fffffffd0f0, context=context@entry=0x7fffffffcfc0,
    detail_fmt=detail_fmt@entry=0x7fffee1f899b "%s") at ./src/hotspot/share/utilities/vmError.cpp:1270
#5  0x00007fffee12cfbe in VMError::report_and_die (thread=thread@entry=0x848800, sig=sig@entry=11, pc=pc@entry=0x405ccb <JavaBridge::Call()+693> "\213", siginfo=siginfo@entry=0x7fffffffd0f0, context=context@entry=0x7fffffffcfc0)
    at ./src/hotspot/share/utilities/vmError.cpp:1276
#6  0x00007fffede5e6c6 in JVM_handle_linux_signal (sig=sig@entry=11, info=info@entry=0x7fffffffd0f0, ucVoid=ucVoid@entry=0x7fffffffcfc0, abort_if_unrecognized=abort_if_unrecognized@entry=1) at ./src/hotspot/os_cpu/linux_x86/os_linux_x86.cpp:622
#7  0x00007fffede50518 in signalHandler (sig=11, info=0x7fffffffd0f0, uc=0x7fffffffcfc0) at ./src/hotspot/os/linux/os_linux.cpp:4784
#8  <signal handler called>
#9  0x0000000000405ccb in JavaBridge::Call (this=0x63f9c0) at main.cpp:59
#10 0x000000000040540c in main () at main.cpp:68
(gdb)
如果有一个可以debug的JVM多好,这样可以跟踪相应的代码,从而得到更准确的信息。
如果要想JVM可以被Debug,需要JVM的debug symbols。而获取debug symbols有两个途径,
- 自己build一个,这个可以参照JDK的文档,
- 下载对应的symbols。
我摸索了一下,自己build和下载都可以,下载的话,更快一些,少掉环境配置的步骤。
但是找对应的symbols也不容易,所以我就干脆binary和symbols一起下载,所以写了下面这个脚本,用于一键获取对应的binary和symbols,以及源码,这样就可以debug JVM了。
JVM_HOME=/workspace/JVM_HOME
mkdir -p $JVM_HOME
cd $JVM_HOME
#fetch debug info
if [ ! -f OpenJDK11U-debugimage_x64_linux_hotspot_11.0.13_8.tar.gz ]
then
    wget https://github.com/adoptium/temurin11-binaries/releases/download/jdk-11.0.13%2B8/OpenJDK11U-debugimage_x64_linux_hotspot_11.0.13_8.tar.gz
fi
if [ ! -d jdk-11.0.13+8-debug-image ]
then
    tar xzf OpenJDK11U-debugimage_x64_linux_hotspot_11.0.13_8.tar.gz
fi
cp -rLv $JVM_HOME/jdk-11.0.13+8-debug-image/jdk-11.0.13+8/ .
if [ ! -f OpenJDK11U-jdk_x64_linux_hotspot_11.0.13_8.tar.gz ]
then
    wget https://github.com/adoptium/temurin11-binaries/releases/download/jdk-11.0.13%2B8/OpenJDK11U-jdk_x64_linux_hotspot_11.0.13_8.tar.gz
    tar xzf OpenJDK11U-jdk_x64_linux_hotspot_11.0.13_8.tar.gz
fi
if [ ! -d jdk11u ]
then
    git clone https://github.com/adoptium/jdk11u.git
    cd jdk11u
    #   git switch -c <new-branch-name>
fi
echo "export PATH=$PATH:$JVM_HOME/jdk-11.0.13+8/bin" >> ~/.bashrc
echo "export JAVA_HOME=$JVM_HOME/jdk-11.0.13+8/" >> ~/.bashrc
echo "export PATH=$PATH:$JVM_HOME/jdk-11.0.13+8/bin" >> ~/.zshrc
echo "export JAVA_HOME=$JVM_HOME/jdk-11.0.13+8/" >> ~/.zshrc

git checkout cf0dad3c2382
通过debug JVM,我学到了一个知识——JVM的线程种类。
JVM分两类线程:JavaThread和NonJavaThread。
JavaThread
java.lang.Thread对应到JavaThread。
准确地说,这里涉及到四个概念:JavaThread, java.lang.Thead 对象,OSThread 对象,操作系统线程。
JavaThread引用着java.lang.Thread 对象,也引用着OSThread。
OSThread对应着真正的操作系统线程。
java.lang.Thread run()怎么运行在操作系统线程
当一个java.lang.Thread开始的时候,JVM创建与之关联的JavaThread和OSThread对象,以及最终创建操作系统线程(native线程)。
准确好所有的JVM状态以后,操作系统线程开始。
操作系统线程完成初始化,接着执行一个启动方法。这个启动方法会导致java.lang.Thread对象的run()方法被执行。
当run()方法返回的时候,处理没有捕获的异常,接着结束这个线程,并且与JVM交互,检查这个线程的结束,需不需要终止整个JVM。
native代码怎么运行java 代码
native线程通过JNI 调用 AttachCurrentThread挂到JVM上,关联的OSThread和JavaThread实例被创建并完成初始化。
接着,为这个native线程服务的java.lang.Thread对象被创建。
当关联完成以后,线程可以通过JNI方法调用任意的Java代码。
最后当native线程不想被挂到JVM,它会通过调用JNI方法 DetachCurrentThread()来取消跟JVM的关联(释放资源,去掉对java.lang.Thread的引用,析构JavaThread和OSThread等等)。
NonJavaThread
NonJavaThread包含了GC的thread, VMThread等等。
VMThread用于执行VMOperation,比如退出VM的操作。
下面的调用栈,是JVM退出的时候发生的,
23 0x00007f2e8b9a9ce9 in __run_exit_handlers () from /lib64/libc.so.6
#24 0x00007f2e8b9a9d37 in exit () from /lib64/libc.so.6
#25 0x00007f2e6b30b51c in vm_direct_exit(int) () from lib/server/libjvm.so
#26 0x00007f2e6b97ff5a in VM_Exit::doit() () from lib/server/libjvm.so
#27 0x00007f2e6b97fa07 in VM_Operation::evaluate() () from lib/server/libjvm.so
#28 0x00007f2e6b985fbf in VMThread::evaluate_operation(VM_Operation*) [clone .constprop.66] () from lib/server/libjvm.so
#29 0x00007f2e6b986538 in VMThread::loop() () from lib/server/libjvm.so
#30 0x00007f2e6b9869d3 in VMThread::run() () from server/libjvm.so
#31 0x00007f2e6b90b51f in Thread::call_run() () from lib/server/libjvm.so
#32 0x00007f2e6b6ab43e in thread_native_entry(Thread*) () from lib/server/libjvm.so
#33 0x00007f2e8bd45ea5 in start_thread () from /lib64/libpthread.so.0
#34 0x00007f2e8ba6e96d in clone () from /lib64/libc.so.6
跟从代码拷出来的Thread 执行流程介绍对比着看,从中我们可以看到VMThrread会从一个队列取出VMOperation,来执行。
// Class hierarchy
// - Thread
// - JavaThread
// - various subclasses eg CompilerThread, ServiceThread
// - NonJavaThread
// - NamedThread
// - VMThread
// - ConcurrentGCThread
// - WorkerThread
// - GangWorker
// - WatcherThread
// - JfrThreadSampler
// - LogAsyncWriter
//
// All Thread subclasses must be either JavaThread or NonJavaThread.
// This means !t->is_Java_thread() iff t is a NonJavaThread, or t is
// a partially constructed/destroyed Thread.
// Thread execution sequence and actions:
// All threads:
// - thread_native_entry // per-OS native entry point
// - stack initialization
// - other OS-level initialization (signal masks etc)
// - handshake with creating thread (if not started suspended)
// - this->call_run() // common shared entry point
// - shared common initialization
// - this->pre_run() // virtual per-thread-type initialization
// - this->run() // virtual per-thread-type "main" logic
// - shared common tear-down
// - this->post_run() // virtual per-thread-type tear-down
// - // 'this' no longer referenceable
// - OS-level tear-down (minimal)
// - final logging
//
// For JavaThread:
// - this->run() // virtual but not normally overridden
// - this->thread_main_inner() // extra call level to ensure correct stack calculations
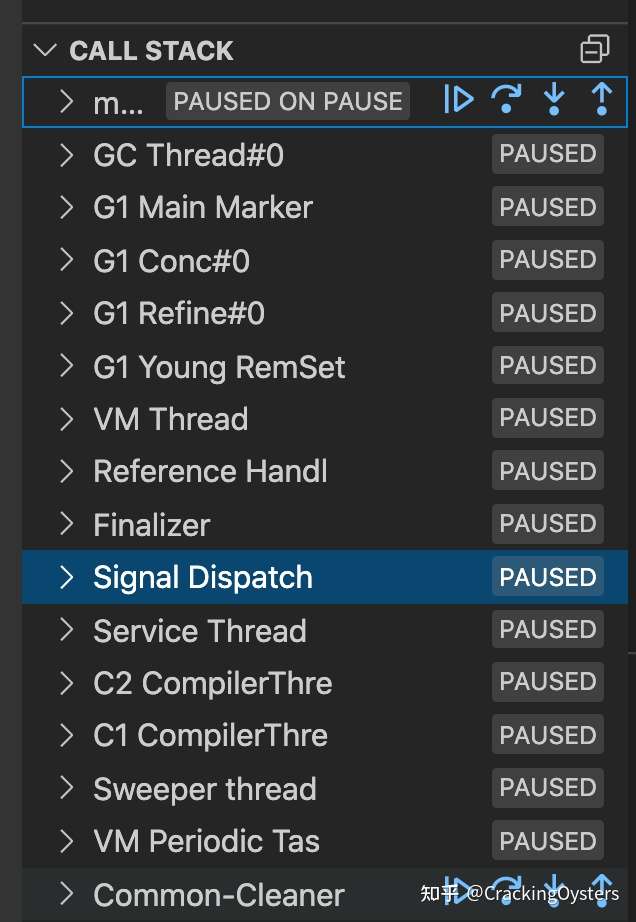
// - this->entry_point() // set differently for each kind of JavaThread下面是一个demo java程序具有的线程
References:
http://openjdk.java.net/groups/hotspot/docs/RuntimeOverview.html#Thread%20Management%7Coutline
Recommend
About Joyk
Aggregate valuable and interesting links.
Joyk means Joy of geeK