

Database Integration in WSO2 EI 7.1.0
source link: https://dzone.com/articles/database-integration-in-wso2-ei-710
Go to the source link to view the article. You can view the picture content, updated content and better typesetting reading experience. If the link is broken, please click the button below to view the snapshot at that time.

Pre-Requisites
- Windows 10 OS.
- MySQL 8.0 server and Command-Line Client.
- JDBC driver for MySQL (http://dev.mysql.com/downloads/connector/j/). Download it to your local machine.
- WSO2 Integration Studio 8.0.0.
Implementation Steps
DB Creation (Run the below commands in MySQL command-line client to create a database and table for this demo)->
- Create Database Students
- Use Students
- CREATE TABLE Students (StudentID int, FirstName varchar(255), LastName varchar(255), Result varchar(255))
Service Implementation in Integration Studio
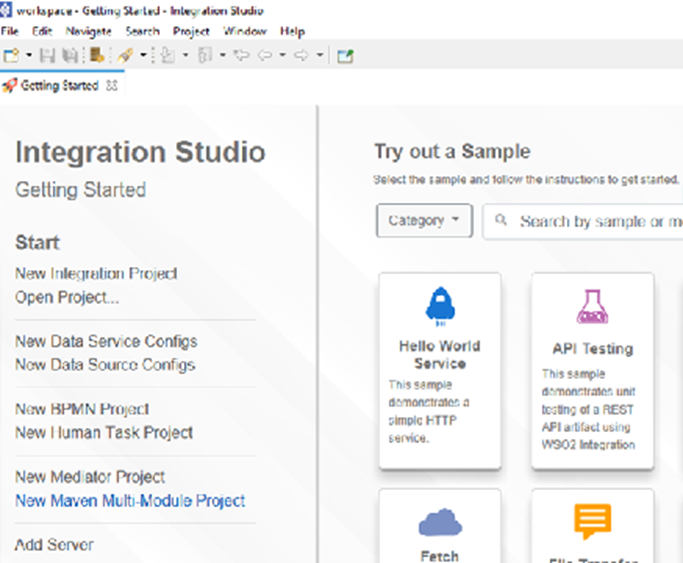
1. Create a new Maven Multi-Module project on Getting Started page.
2. Enter the details as below in Maven Modules Creation Wizard.

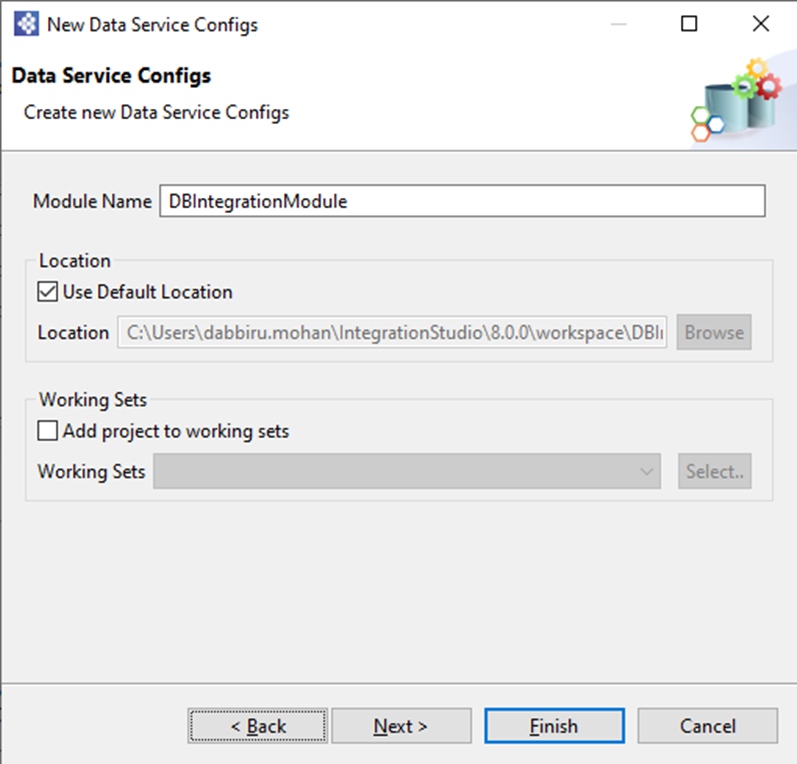
3. Right-click on the new maven project and select New -> Data Service Configs and enter the details as below.
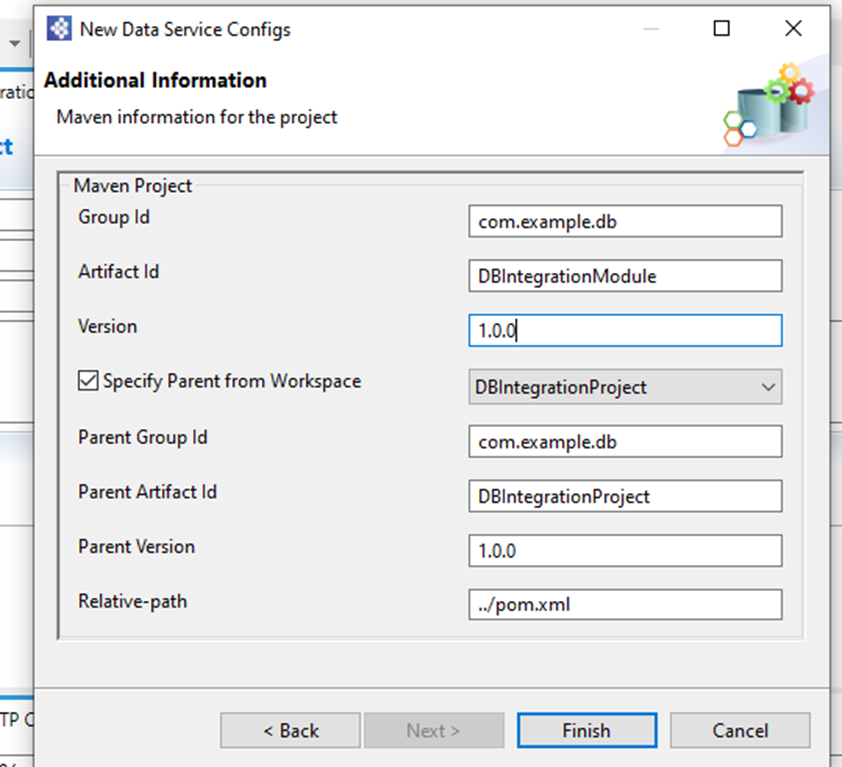
4. Click Next and verify the details are as below and then click on Finish. Details can be edited if needed.
5. Right Click on the maven project and select New -> Composite Exporter and enter Module Name as DBIntegration_CAR. Click Next, then verify details as in Step 4. Specify parent as DBIntegrationProject and click on Finish.
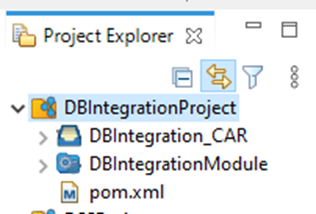
6. The structure of the project will look as below:
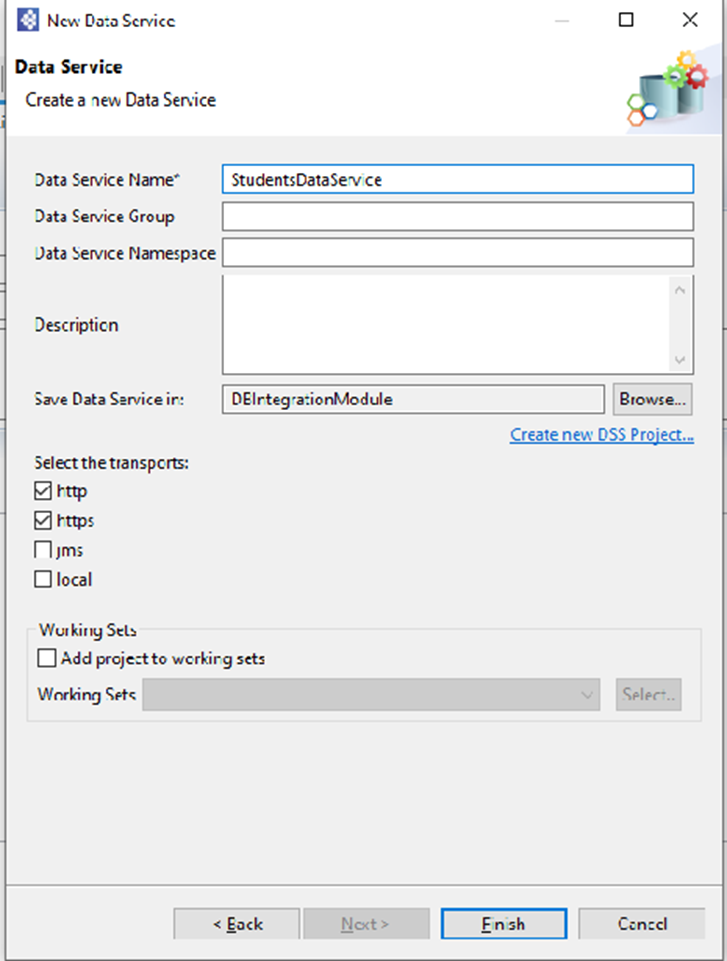
7. Right-click DBIntegrationModule and select New -> Data Service. Then select Create a New Data Service and click Next. Enter Data Service name and click Finish.
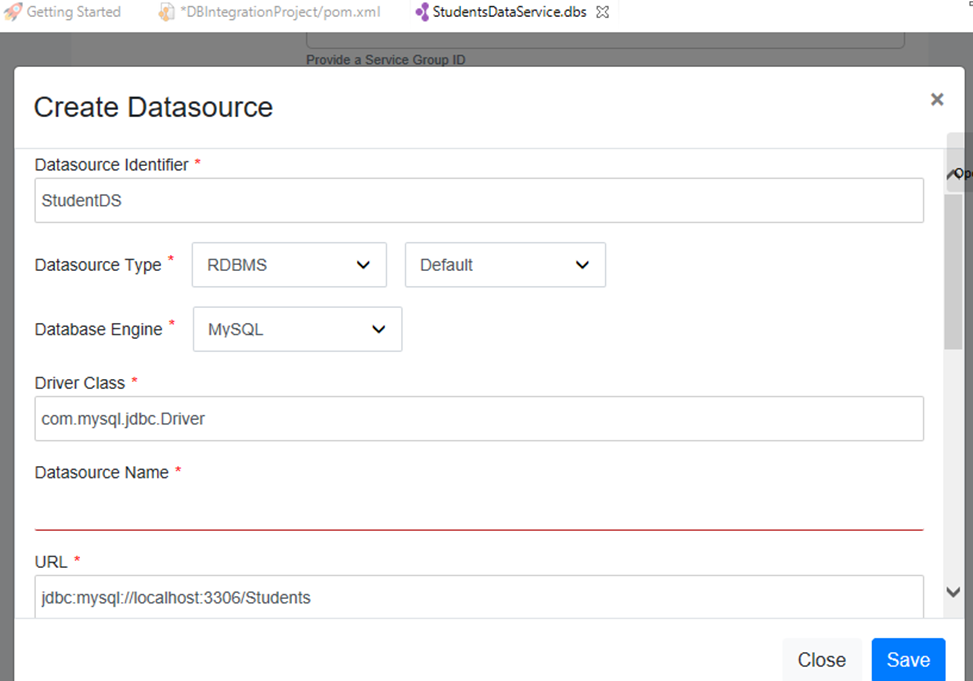
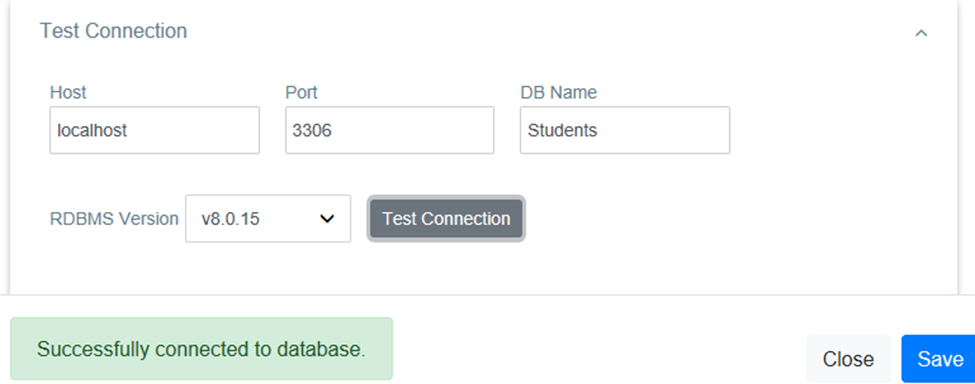
8. A new StudentsDataService.dbs file gets created. Click on Configure Data Sources and then Add New. Enter the details as below. Enter the username and password for your MySQL DB, test the connection, and verify it is successful.
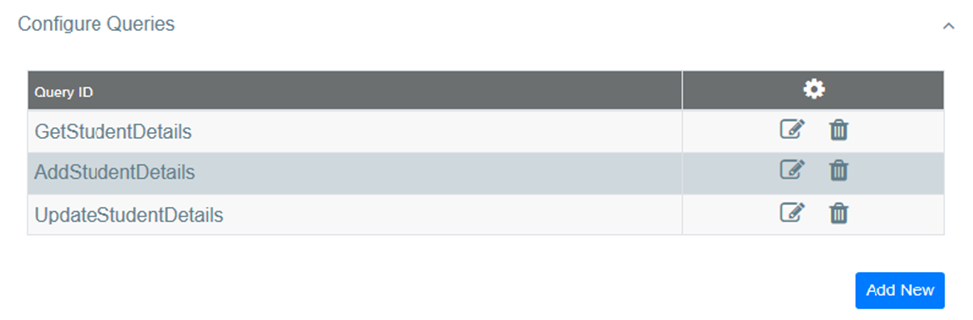
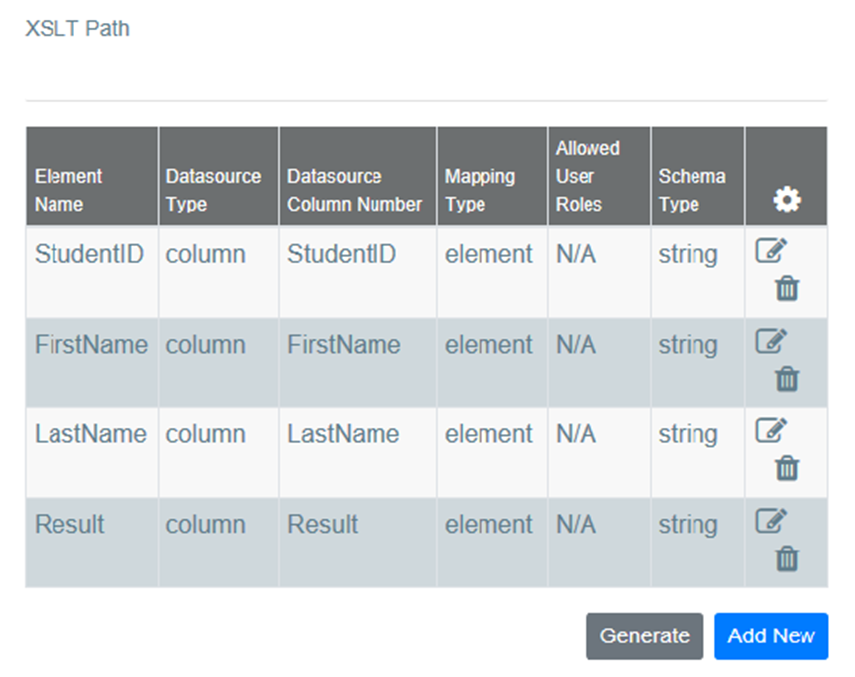
9. Click on Configure Queries and add 3 queries to add, get and update student data in the DB.
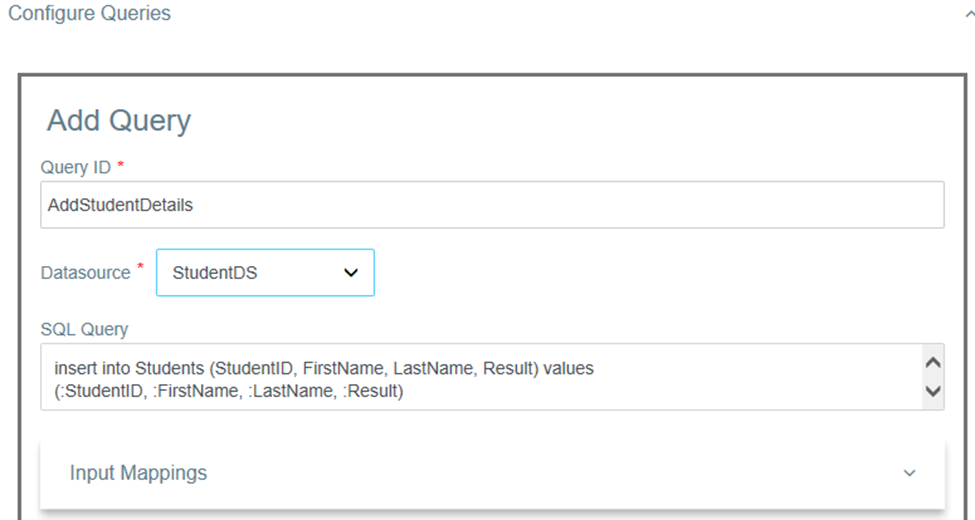
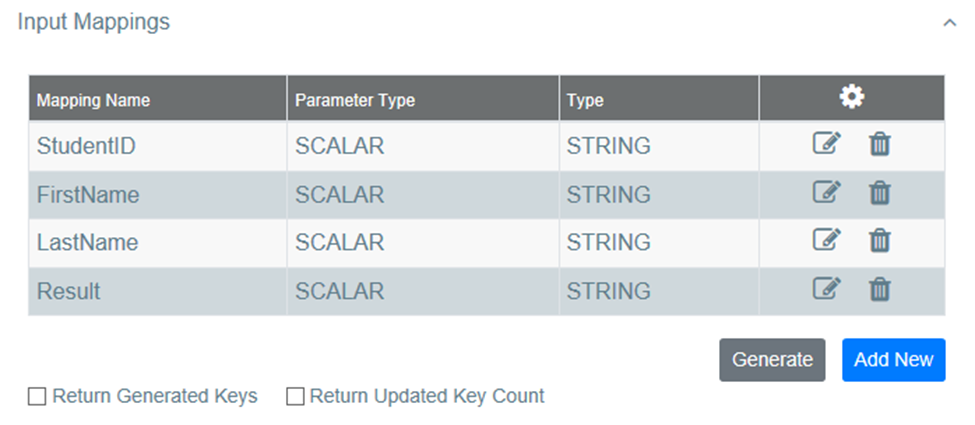
i) Add student data – Enter the query and add input mappings manually by clicking Add New as below.
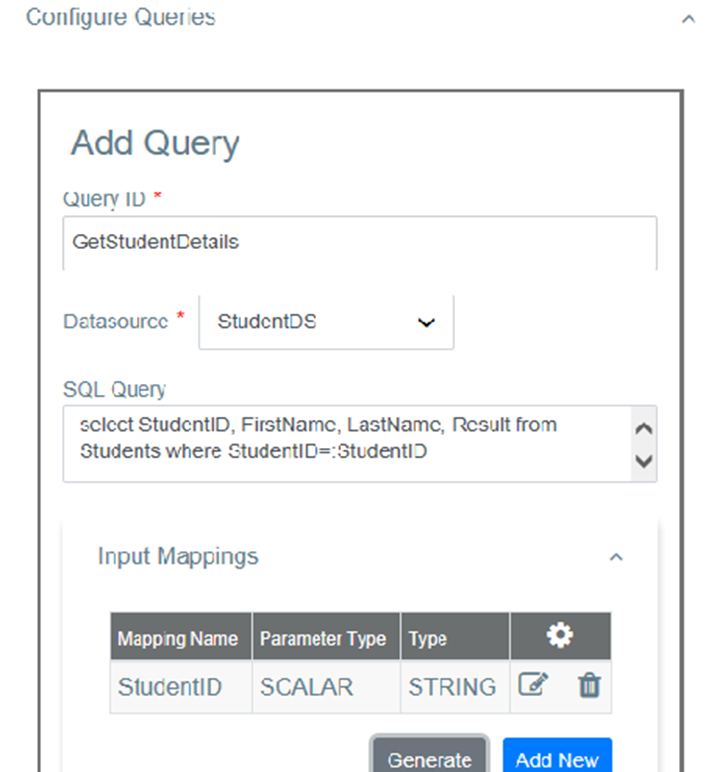
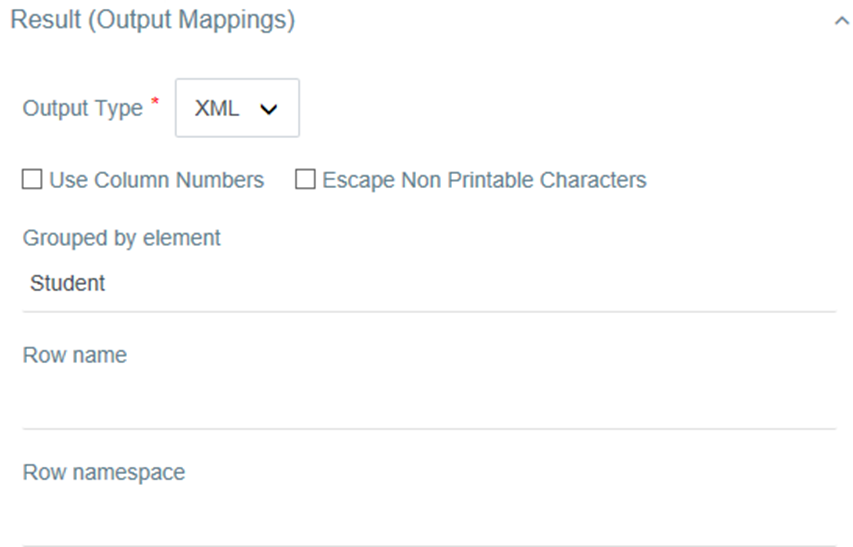
ii) Get student data – Enter the query and add input and output mappings automatically by clicking Generate as below.
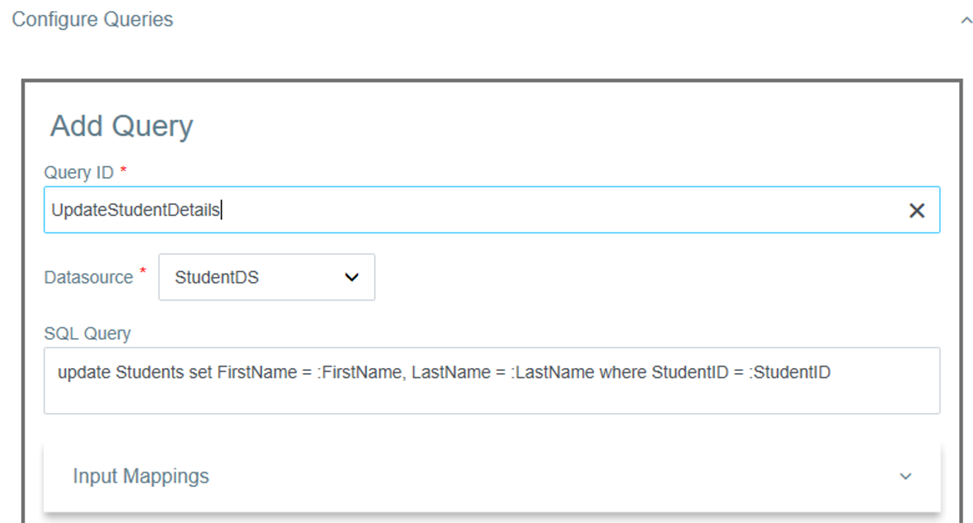
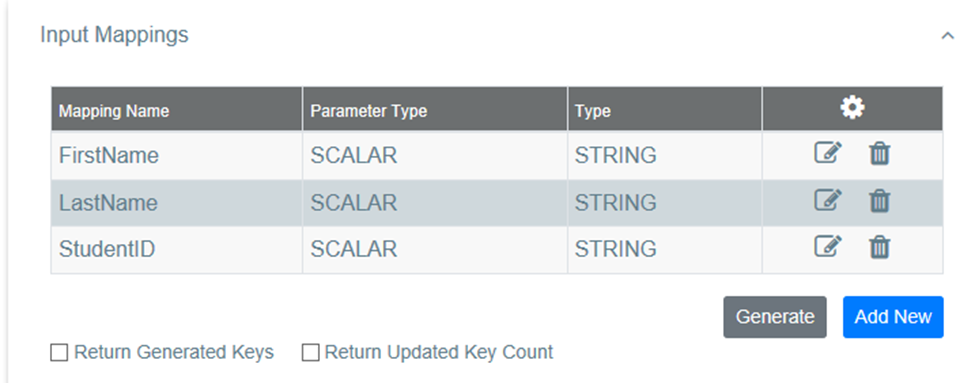
iii) Update student data – Enter the query and add input mappings manually by clicking Add New as below.
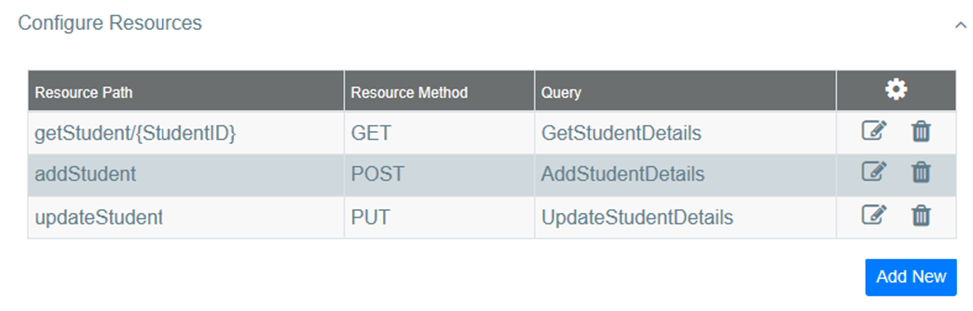
10. Click on Configure Resources and add 3 resources as below.
Deployment: We will be using the embedded Micro Integrator server available in the WSO2 Integration studio to run our service.
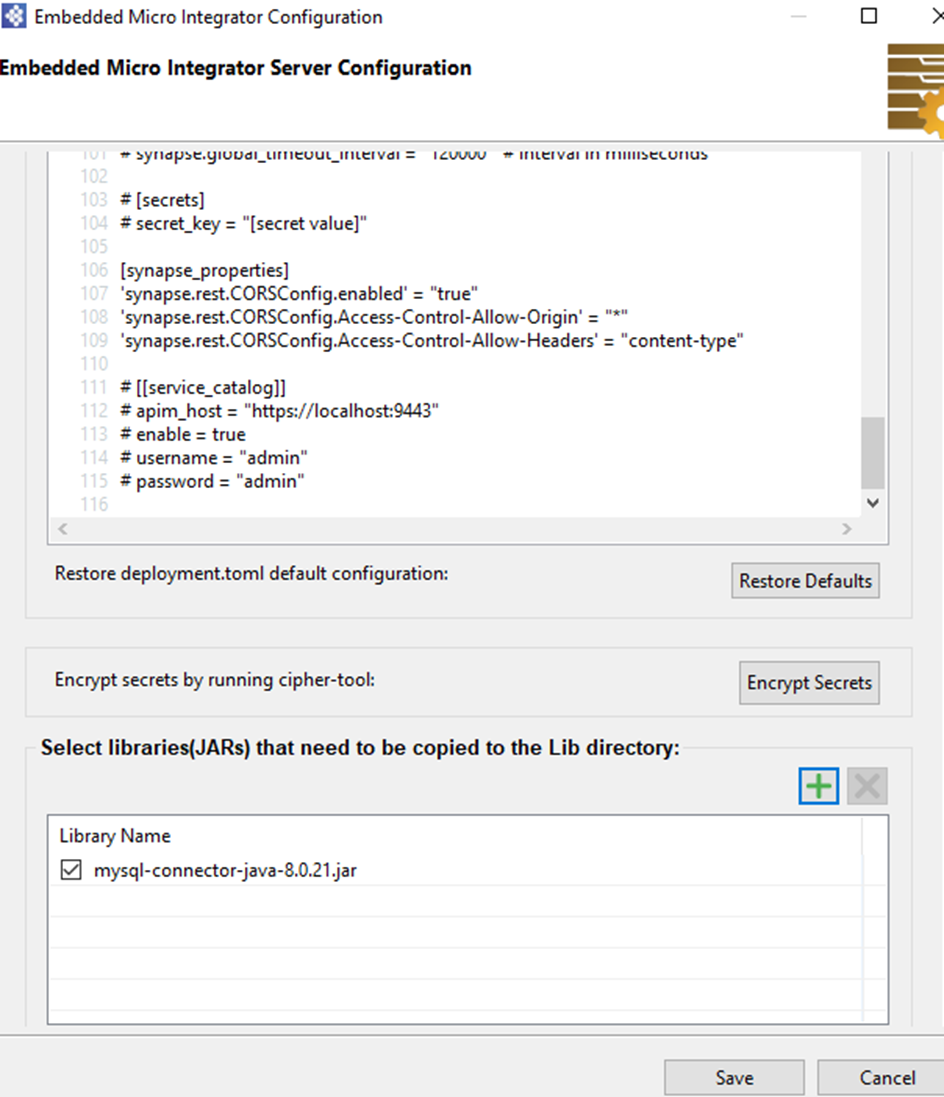
1. Click on the Embedded Micro Integrator server icon found at the top of the Integration Studio. Then click the + icon and add the MySQL driver jar (Step 2 of Prerequisites) to the /lib directory of the embedded Micro Integrator server. Click Save.
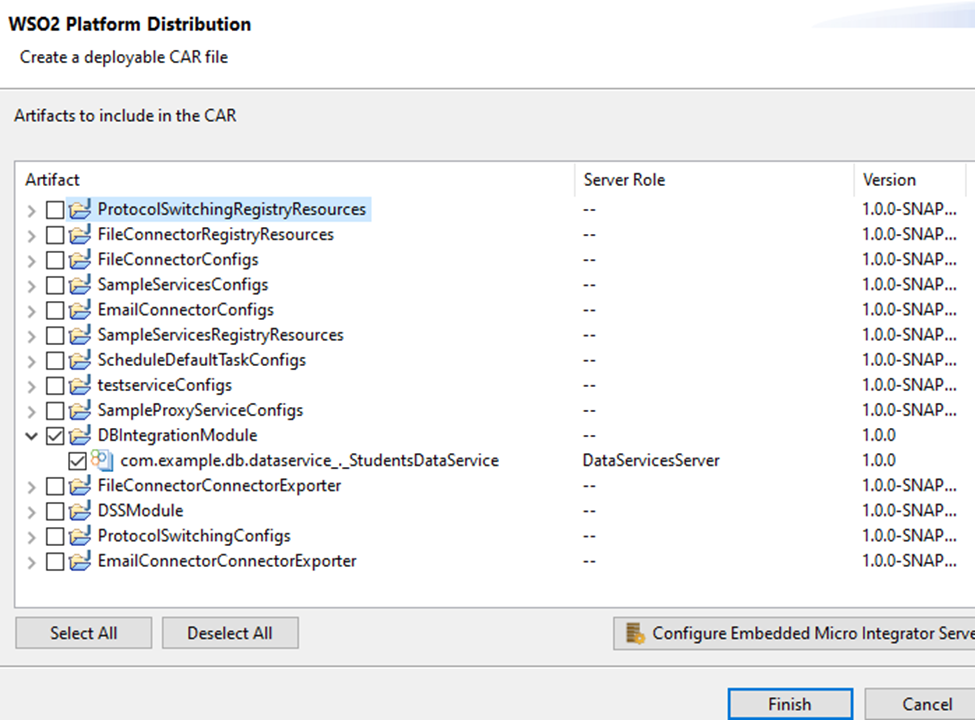
2. Right-click on the DBIntegration_CAR module in the project explorer in Integration Studio and click on Export Project Artifacts and Run.
3. In the dialog box that opens select the required artifacts and click Finish as shown below. In our case, DBIntegrationModule is the required artifact.
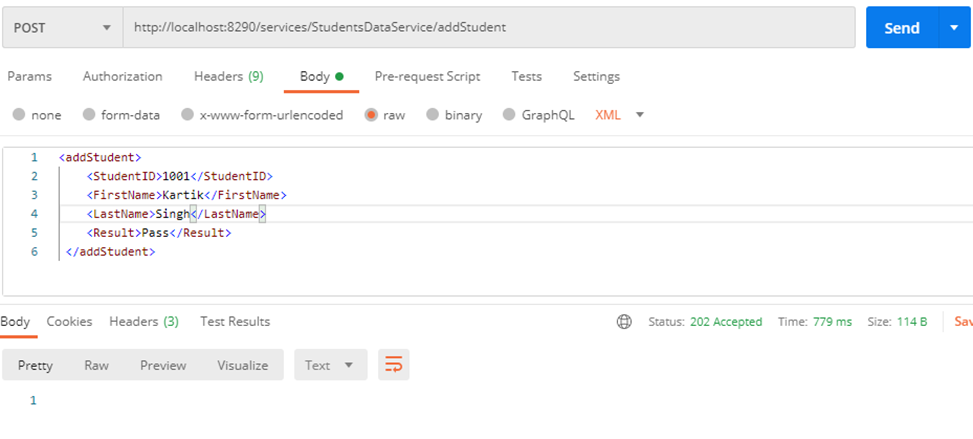
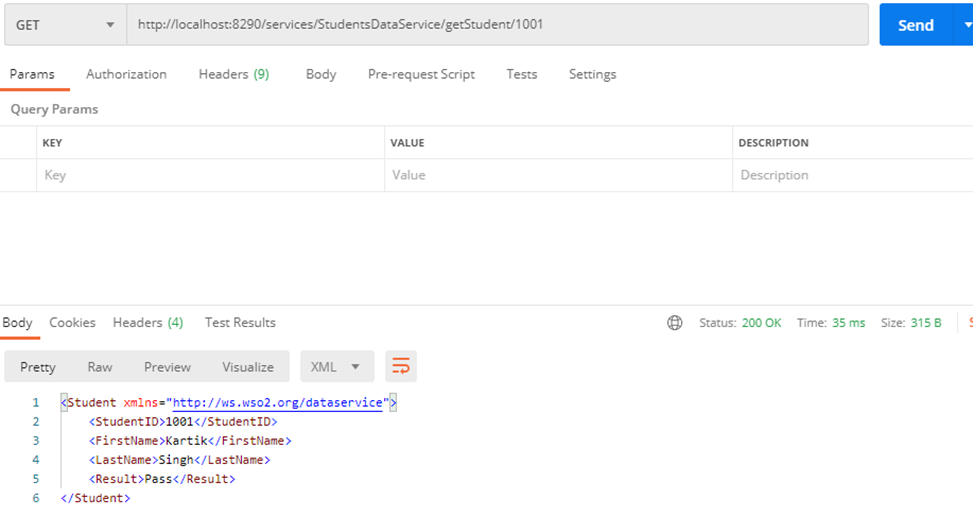
Testing: After the embedded Micro Integrator server starts, we can test this service using Postman as shown in the below images. We can also test using the inbuilt HTTP client present in WSO2 Integration Studio. The HTTP listener port is 8290 by default.
1. Add student data.
2. Get student data.
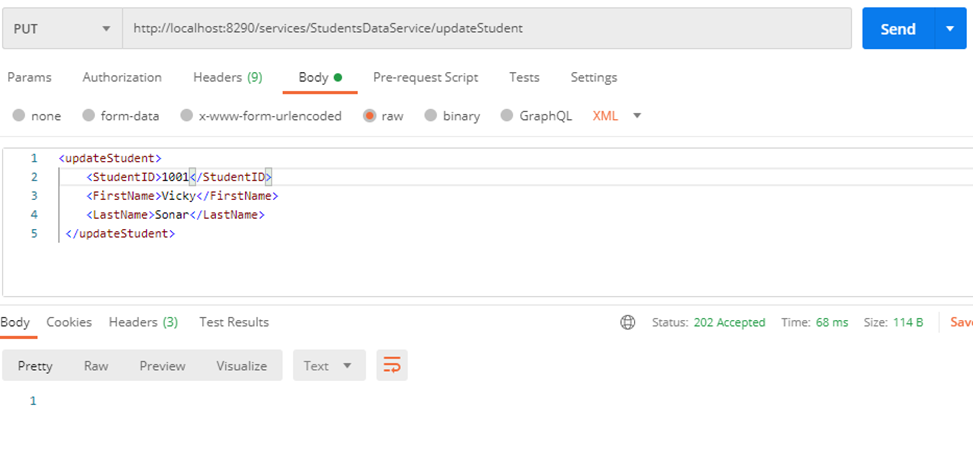
3. Update student data.
4. Get updated student data.
That's it! I hope you enjoyed reading this post.
Recommend
-
50
By:John Miner | Last Updated: 2019-02-06 | | Related Tips:More > Source Control Problem A...
-
13
Did you ever hear about a project where changes were tested on customers that you don’t like or countries that are not profitable? Or even worse – did you work on such project? It’s not enough to say that it’s ju...
-
7
Integration Testing EF6 — aggressively rebuild your database for an integration test Sometimes you need to do a really end-to-end automated test involving your Entity Framework database. In cases like this, it’s important...
-
3
Hi everyone, In this week’s video, Florent Biville builds out an Angular.js frontend for the Spring Data 6 application. Jesús Barrasa computes similarity metrics of a taxonomy, Daniel Heward-Mills...
-
14
Visual Studio Code Integration with Oracle Autonomous DatabaseOracle Developer Tools for VS Code 21.3.0In my last...
-
6
Another way to connect to WSO2 IS advertisements A few days ago, I started to work with WSO2 Identity Server in my project as...
-
55
Nisha Shrivansh October 8, 2021 3 minute read ...
-
10
WSO2 - connectivity to WS02 / ESB data services through the custom user interface advertisements I need to create a custom user interface usin...
-
5
WSO2 API-M 3.2.0: Creation of a New KeyStore With a New Self-Signed Certificate and CN
-
5
Open-source API integration company WSO2 closes $93M in funding
About Joyk
Aggregate valuable and interesting links.
Joyk means Joy of geeK