

UI tests vs. snapshot tests on Android: which one should I write? 🤔
source link: https://sergiosastre.hashnode.dev/ui-tests-vs-snapshot-tests-on-android-which-one-should-i-write
Go to the source link to view the article. You can view the picture content, updated content and better typesetting reading experience. If the link is broken, please click the button below to view the snapshot at that time.

UI tests vs. snapshot tests on Android: which one should I write? 🤔
Subscribe to my newsletter and never miss my upcoming articles
Snapshot tests on Android have become very popular lately. They run much faster and are easier to write than UI tests, if done correctly. For those who've already fought with UI tests and are new to snapshot testing, it's normal to wonder why to still write UI tests after all.
Contrary to what you might think, they do not replace each other. Their focus is different as we'll see shortly. But it might be confusing to understand when to write UI tests rather than screenshot tests and vice versa.
Let's imagine the following screen, which is a RecyclerView

So, what to UI test and what to screenshot test?
What to UI test
An UI test would verify, e.g. that after deleting a row in the RecyclerView, that row is not displayed anymore. It would test WHAT is displayed after interacting with the view
Therefore, write a UI test if you need both:
- to interact with one or more views
- to assert a certain behaviour after such interactions
- Navigation to another screen
- Visibility of some UI elements
You do not mind how pixel perfect every single UI element looks on the screen. You just care about the result of your interactions: WHAT is displayed instead of HOW it is displayed.
What to screenshot test
On the other hand, a snapshot test would verify HOW that row is displayed under numerous states and configurations: e.g. dark/light mode, LTR/RTL languages, different font sizes, wide/narrow screens, etc.
Therefore, write a snapshot test if:
- you've made a visual change in an UI element
- you want to verify HOW that change is displayed under different configurations
In this case you are saving time to yourself and everybody involved in the QA process: nobody needs to play around with numerous settings/states to ensure everything looks pixel perfect. That process is cumbersome and you've automated it. In my opinion, this is the real power of screenshot testing
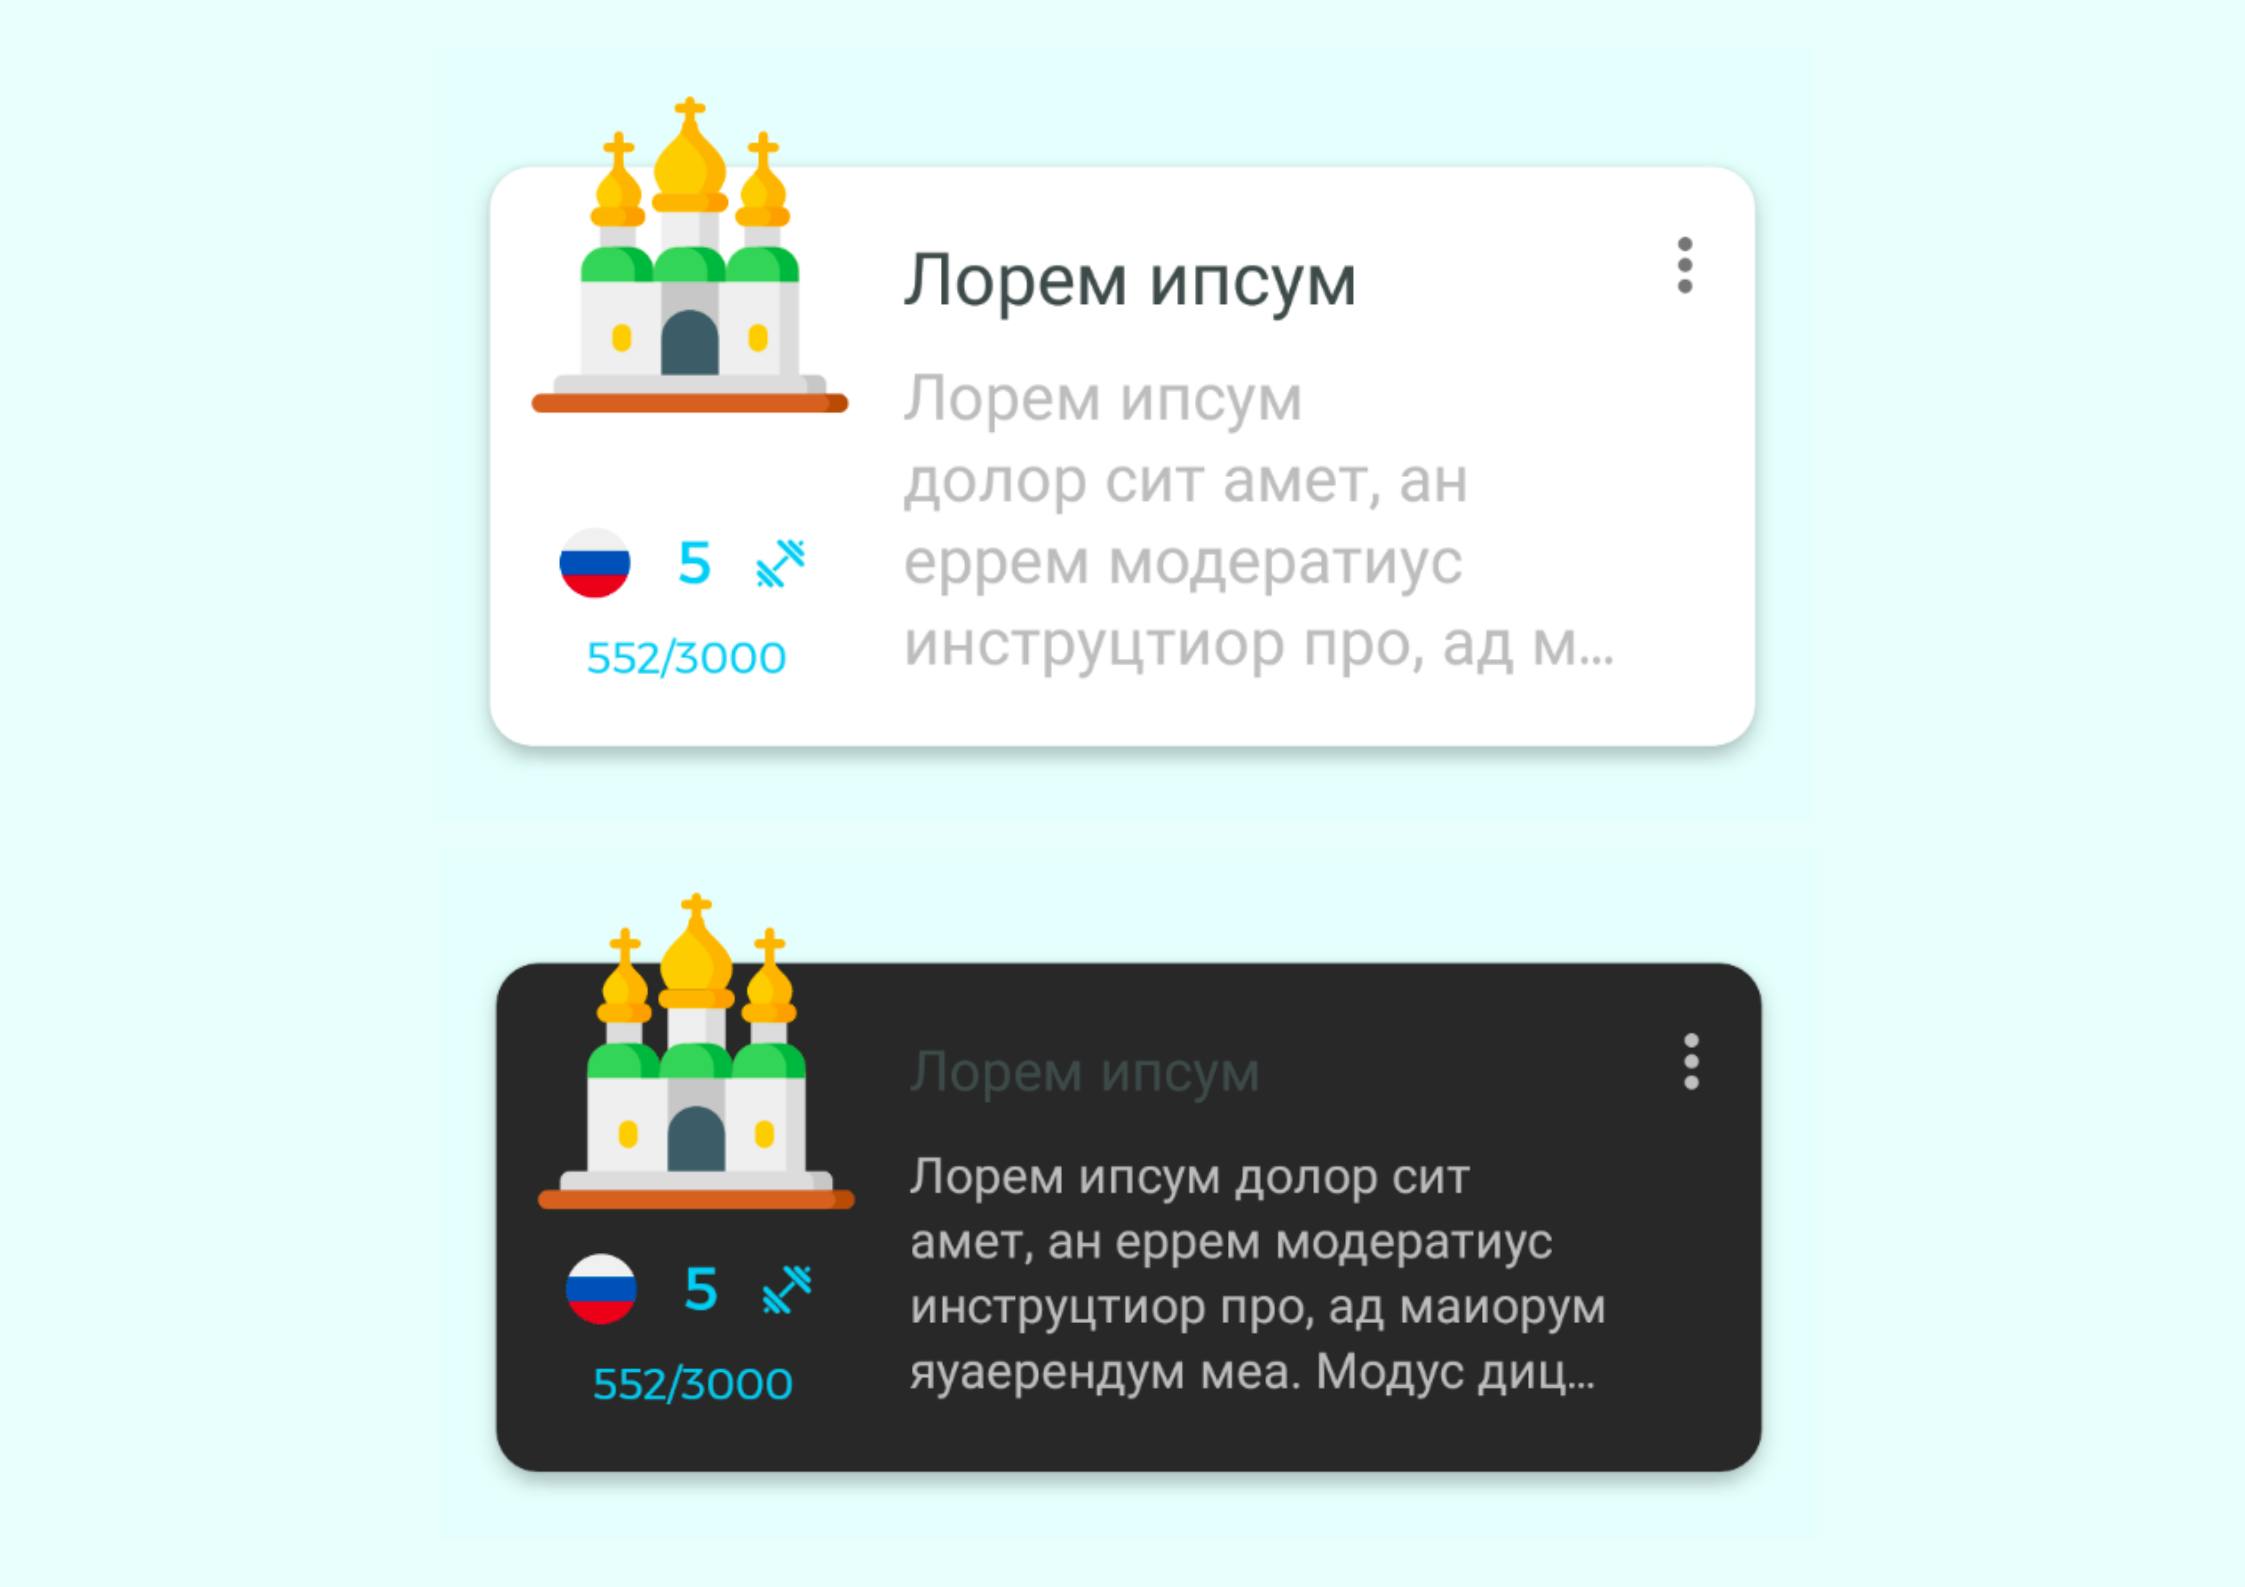
Up: Row when system font size set to huge
Down: Row in dark mode
Use the right tool for the job
If you are new to screenshot testing, don't fall into the trap of thinking that it can fully replace UI testing. Do not convert your UI tests into snapshot tests just because they are visually fancier.
Honestly, converting a UI test into a snapshot test would be simple: replace your view visibility assert with a snapshot one at the end of the test.
However, keep in mind that this does not solve some common problems with UI testing:
Flakiness: Screenshot tests also come with its own flakiness. It is worth knowing what you could face in advance. Eli Hart from Airbnb has already written a very descriptive article about most of the issues you might encounter while screenshot testing. I can say I've even faced some more issues than those mentioned there. Let me state briefly those I consider the most common:
- Hardware rendering issues: This can happen randomly in any screenshot test. Hardware accelerated drawing model might cause issues like wrongly rendered pixels, especially with Composables. See more here
- Image Loading Libraries: Some libraries like Glide and Picasso allow to download images from some urls. This downloads happen asynchronously. This means, the image might not always be there at the time we are recording the snapshot, causing our test to fail.
- Drawable caching: The Android system maintains a cache of drawables. If the bitmap of such drawable is shared in several locations, the result could vary depending on whether the bitmap has already been cached in a previous test or not. This introduces flakiness in pixel by pixel comparisons.
Dates: Those views displaying text based on the current date are doomed to fail on every snapshot test rerun (or e.g. once a year if you show the year, like in a copyright footer)
You could face other issues depending on the Views displayed on the screen, but you got the idea: there are many issues you have not thought about that could make your snapshot test fail.
As with UI tests, those problems can be mitigated though. I'll talk more in detail about all the issues and how to solve some of them in future posts.
Speed:
- Fake snapshot tests: writing screenshot tests that interact with views the same way as UI tests, do not make them any faster. Such a screenshot test is what I call fake screenshot test: a UI test disguised with a snapshot assert.
- Less-scalable test sharding: If you are using a cloud device service like Firebase test lab with test sharding to speed up the execution, it is not that simple. Snapshot file comparisons are done pixel by pixel.
This means, all tests must run on the same device models across all parts involved (i.e. devs and CI) to ensure they create screenshots with identical pixels. For that, the resolution, screen size and API level of all devices must be the same. This restricts a lot the speed wins of test sharding usually gained with such services.
While all UI tests can be distributed among all devices, snapshot tests can only use a portion: those devices with the same config that developers use to record the snapshots. This is depicted below
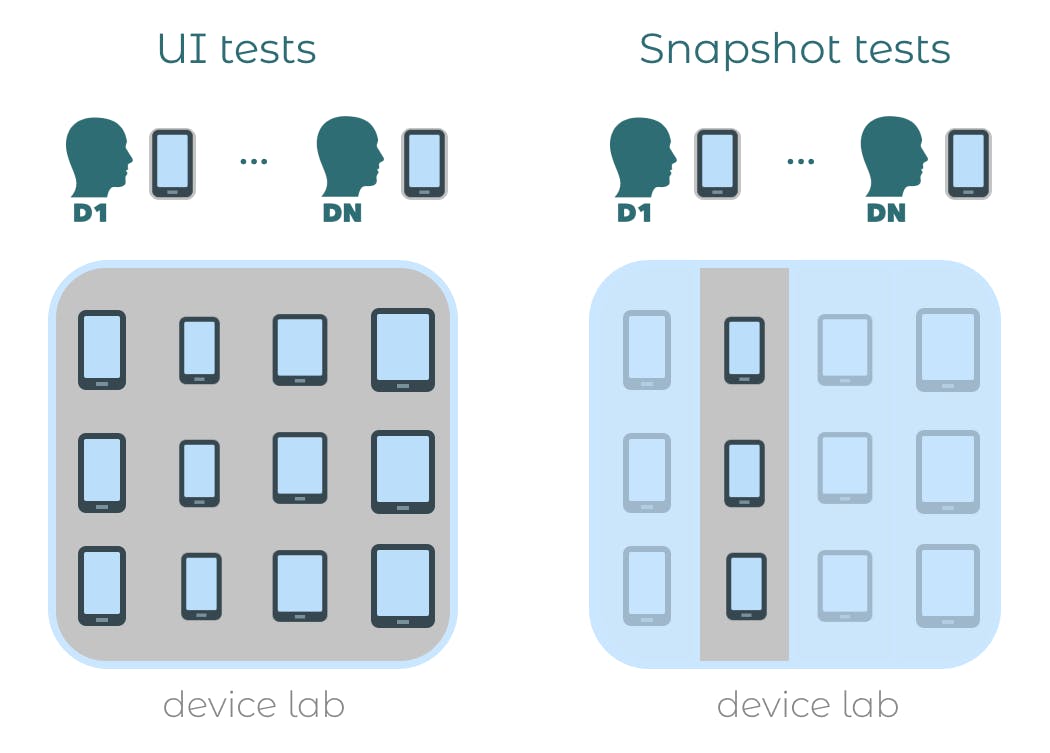
Test sharding allows to evenly split up the test suite into all connected devices. This enables to parallelize your tests. So if you have 300 tests and 30 devices, 10 tests run on every device in parallel, resulting in considerably shorter test execution times.
But that's not all. Apart from flakiness and speed issues, there is more to deal with:
if you are planning to run snapshot tests on devices1, dealing with them does not make things easier.
- ensuring every part involved (i.e. developers and CI) has the same device model/emulator config: snapshot assertions happen pixel by pixel.
insufficient storage errors on the device due to the space taken by the generated snapshot files.
Actually, if you were using physical devices on the CI and move to emulators due to snapshot testing because it is less costly and more scalable, you'll additionally face the following troubles:
- freezing emulators on the CI.
- synchronizing emulators start up before running the tests.
Tests become more brittle: fake snapshot tests fail badly if altered in a seemingly minor way.
Let me explain the second point with an example.
1 It is possible to run screenshot tests that run on the JVM with Paparazzi from cashapp instead.
Brittle (fake) snapshot tests: an example
Let's take the example we previously mentioned: we want to verify that after deleting a row in the RecyclerView, that row is not displayed anymore.
So instead of having an UI test that asserts the visibility of that row once deleted (e.g the first row), we'll use a snapshot assertion. So far, so good.
Now imagine that a new requirement comes in: our designer wants us to change the "training icon" as an outcome of some UX experiments
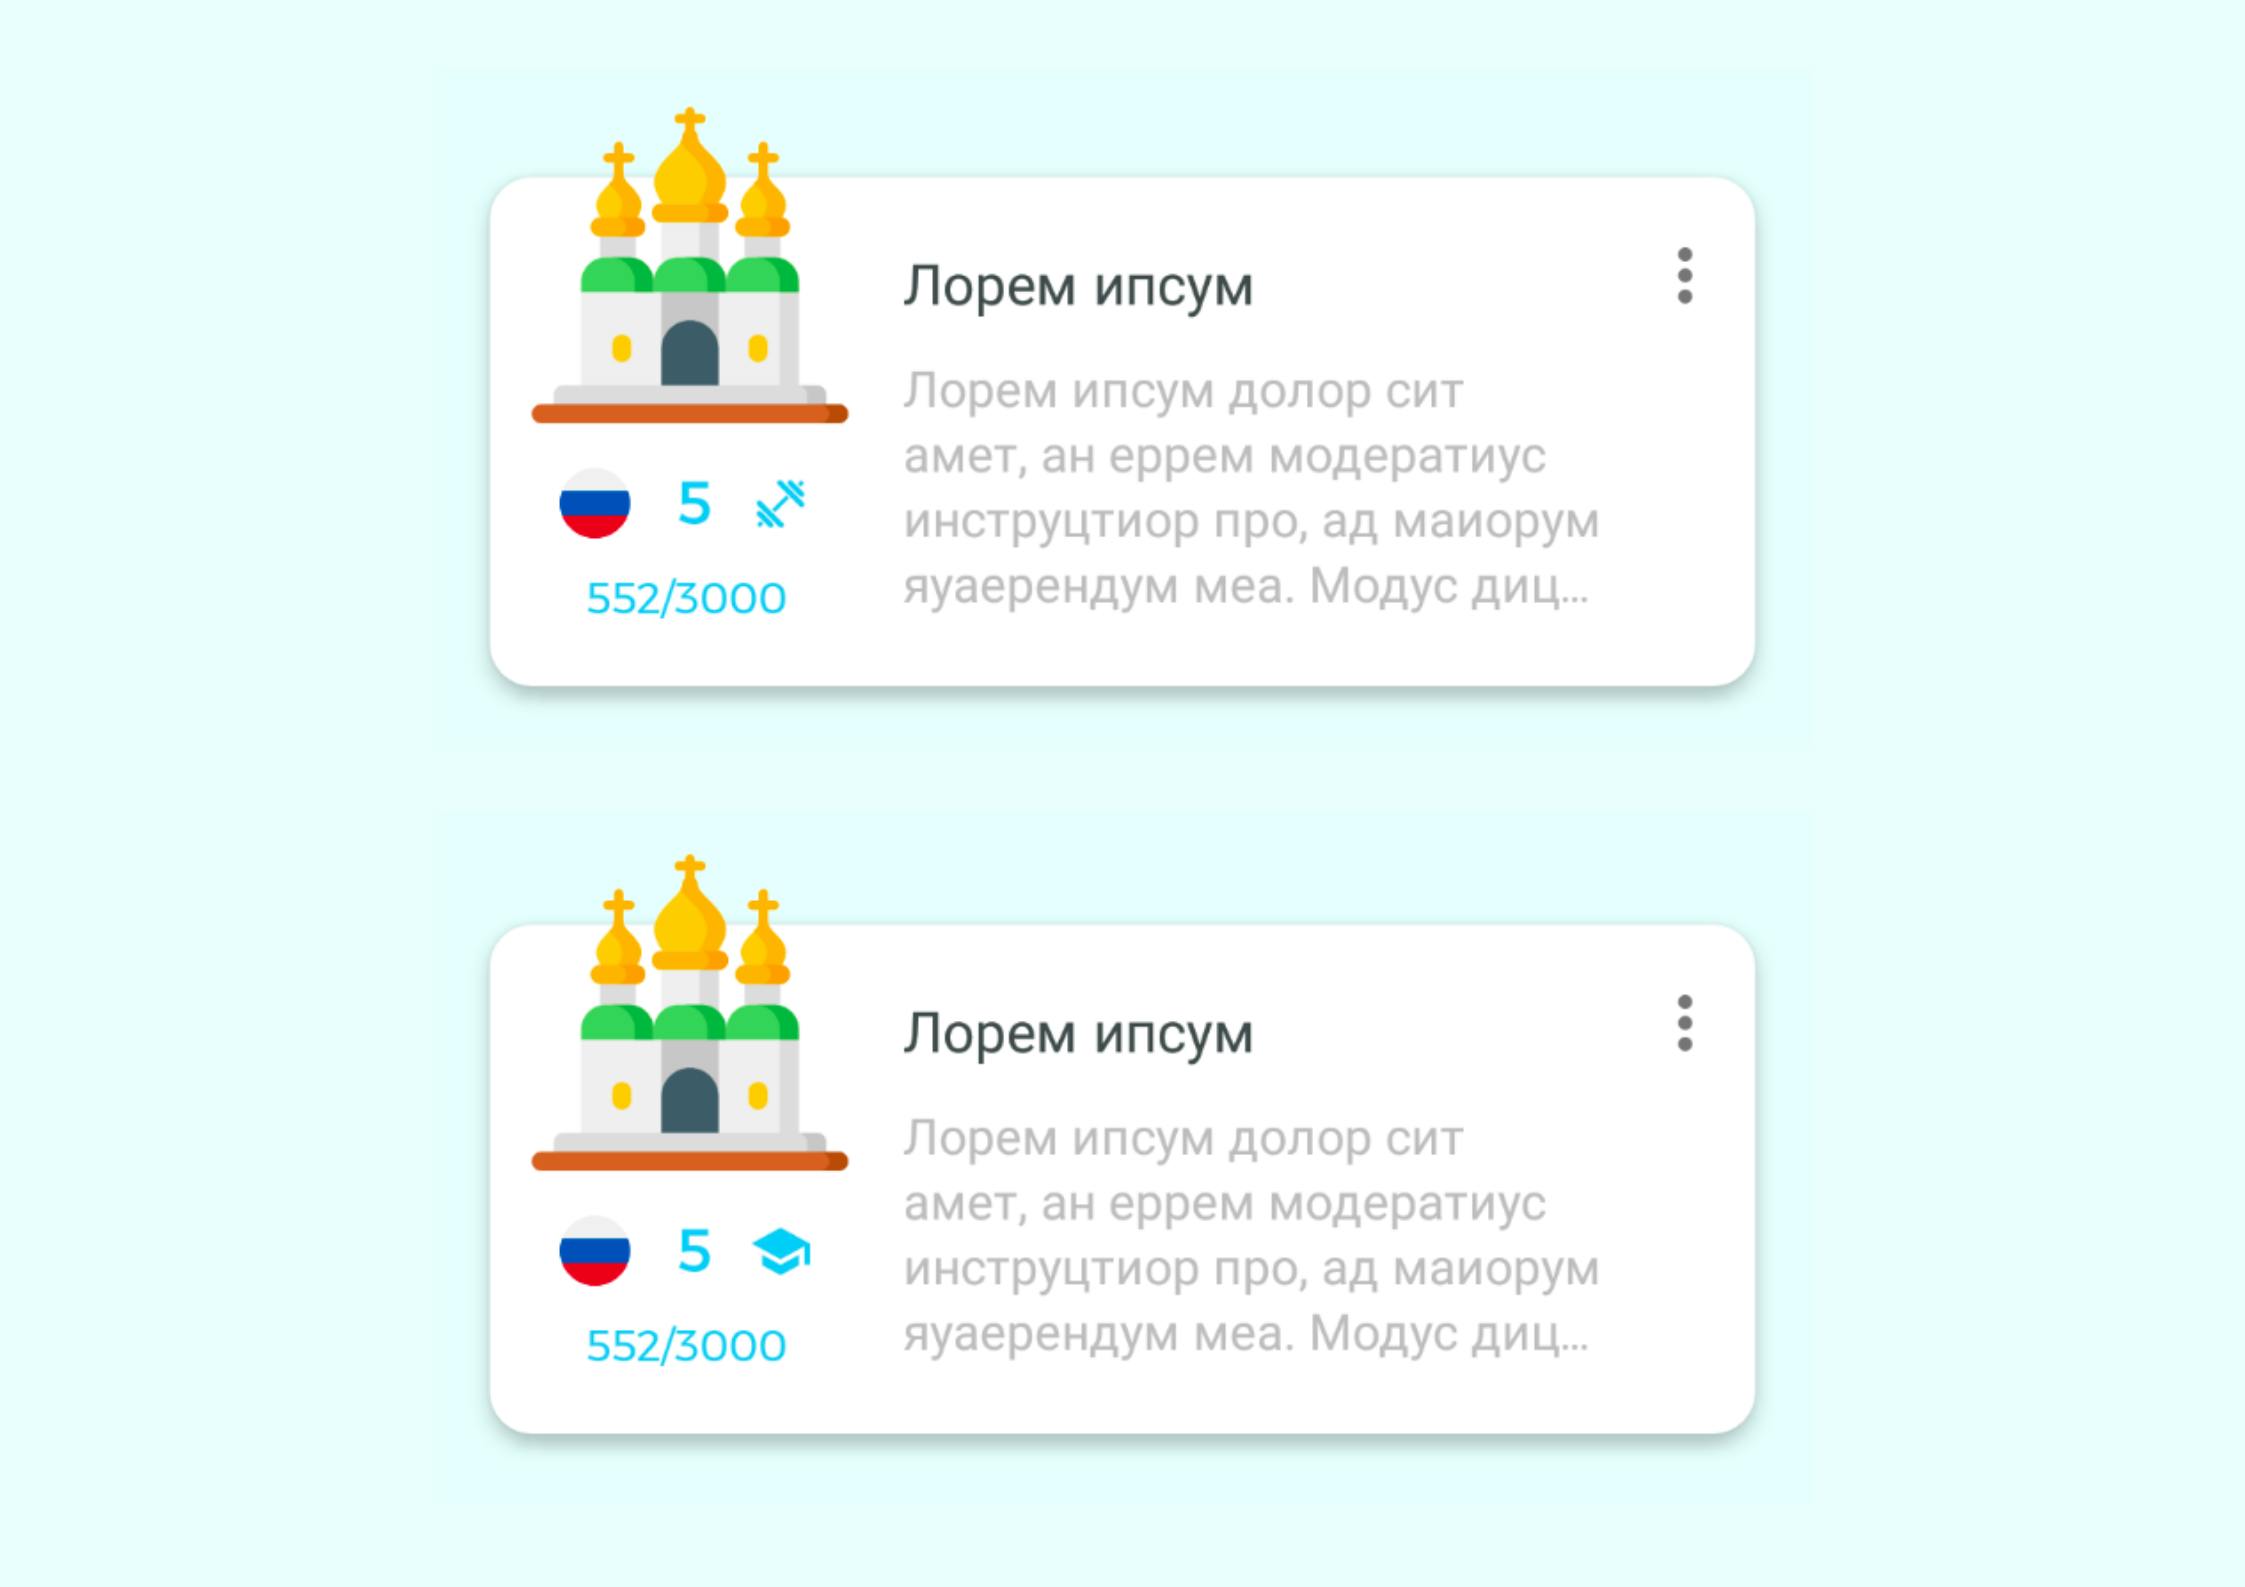
Up: Row with the old training icon
Down: Row with the new training icon
You push your changes and when the full screen snapshot test get verified, it fails with the following output
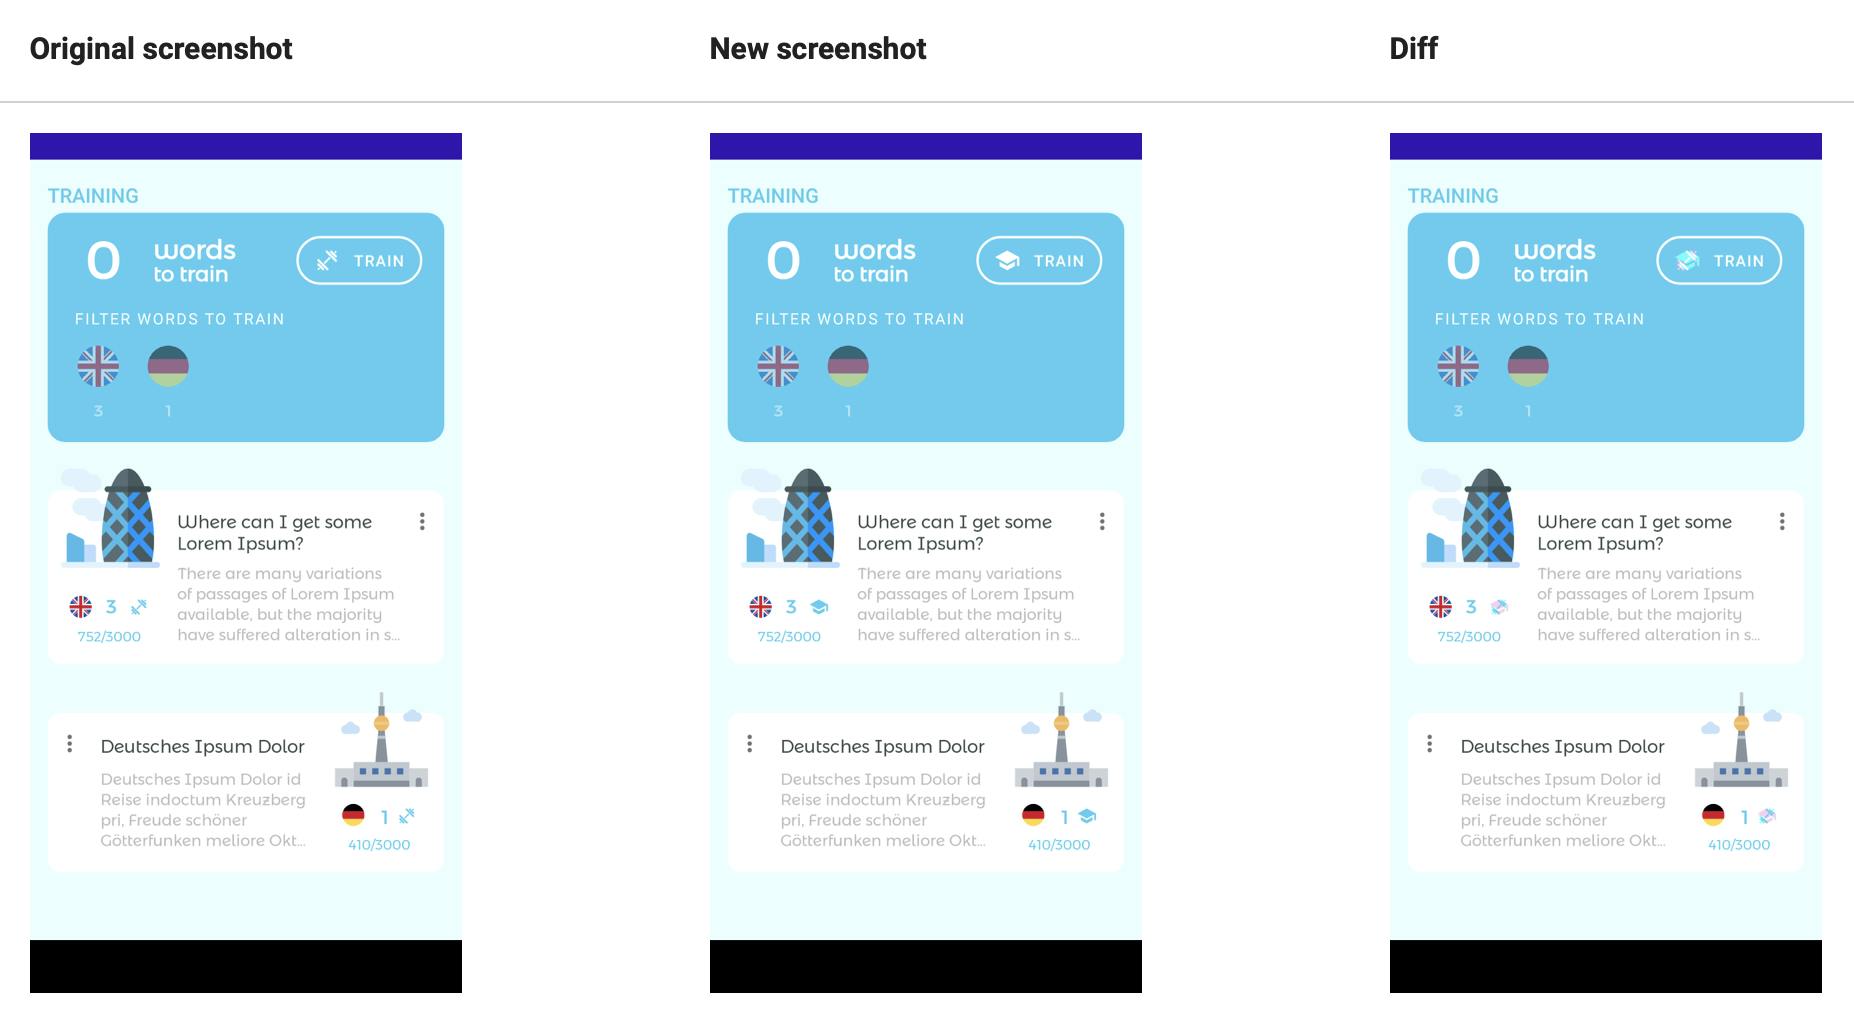
You need to record and push a new full screen snapshot with the new training icon.
But the real issue is, that the focus of your test was to verify that the deleted row is not displayed anymore. What does it have to do with changing the appearance of the row? You guessed it. Nothing. And that's why you forgot to record and update the affected snapshot.
You do not want your tests to fail for the wrong reason. You want them to be meaningful. You want them to have a purpose.
Furthermore, you do not even need to change the appearance of the row intentionally. It's enough that your screen displays info depending on the current time: the date changes on every rerun, likely making your "fake screenshot test" fail. Again, failing for the wrong reason2.
Therefore, every subtle change on the screen will require to record a new snapshot, although that change is completely unrelated to the goal of the test.
On the other hand, a UI test would have not failed since we would be asserting whether the deleted row was displayed or not. No visuals involved.
2 You can workaround this by setting the visibility of those flaky views to INVISIBLE before taking the snapshot. Nonetheless, that defeats the purpose of snapshot testing: asserting visuals. I suggest not to do that unless strictly necessary.
Conclusion
I am not advocating against screenshot tests, rather the opposite.
On one hand, screenshot tests (if used correctlyhelp identify visual issues in your app that UI tests cannot. This is extremely powerful when testing your views under numerous configurations. That's what you should use them for.
On the other hand, they come with their own issues and you should be aware of them. If you are thinking about migrating your UI tests to snapshot tests (a.k.a fake snapshot tests), think twice. Is that what you really need, or you just find convenient to assert the screen state with a single snapshot? Please, mind flakiness in screenshot testing.
Bottom line:
- Use both, UI tests and snapshot tests, they complement each other. They aim to assert different things:
- UI Tests: WHAT is displayed. Use them for testing interactions or navigation by asserting that the expected views are visible/invisible/gone.
- Snapshot Tests: HOW it is displayed. Use them for testing the appearance of a view for a wide range of configurations and/or states.
- Avoid fake snapshot tests: Do not migrate your UI tests to snapshot tests without a good reason. That will not make them faster in comparison to UI tests and adds up more flakiness troubles rather than mitigating them.
- Use the right tool for the job: Snapshot testing the state of the full screen after some view interactions leads to more brittle tests. Every subtle visual change on the view will make the test fail for the wrong reason. For such cases, UI tests are less prone to brittleness.
Further reading
Interested in more articles about best practices for UI testing on Android?
Do you prefer to watch it? Blog posts 2 and 3 are part of my talk "An Introduction to Effective Snapshot Testing on Android" at
If you are interested in the content I publish, follow me on Twitter!
Special thanks to Pablo Gallego for reviewing this blog post!
Recommend
About Joyk
Aggregate valuable and interesting links.
Joyk means Joy of geeK