

Install Home Assistant On Your Embedded Device - DZone IoT
source link: https://dzone.com/articles/install-home-assistant-onto-your-embedded-linux-device
Go to the source link to view the article. You can view the picture content, updated content and better typesetting reading experience. If the link is broken, please click the button below to view the snapshot at that time.

Install Home Assistant Onto Your Embedded Linux Device
Learn how to get some home automation software onto your device.
Join the DZone community and get the full member experience.
Join For FreePantavisor Linux comes installed with Pantabox which provides all of the tools to configure, install and manage your apps and even the kernel. In this guide, you’ll learn how to flash and boot a Raspberry Pi with Pantavisor Linux and then run Pantabox to configure your device and any apps running on it. You’ll then download and install the Home Assistant, an open-source home automation platform from the Pantacor One Marketplace and display it in your browser.
After completing this guide, you may want to try Configuring and Installing Apps from Docker Hub where we dive a little deeper and describe how to use configuration overlays and a number of other features of Pantavisor Linux.
Before you begin, you'll need:
- An Internet connection
- A laptop and a microSD card
Download and Install Pantavisor Linux
1. Download the base Pantavisor image
Select the platform and architecture that matches your device and download the image.
2. Prepare the Embedded Linux Device
Flash the microSD card with the downloaded bootable image. If you haven’t done this before, refer to these instructions:
3. Boot the Device With Pantavisor Linux Image
Insert the microSD card into the device, ensure that it is connected to the network and then boot with the image. This procedure may differ depending on your platform:
4. Connect the Device to the Internet
Devices can be connected to the Internet either through a WiFi captive or directly with an ethernet cable. For details on how to do that for your platform see Setting up an Internet Connection
5. Login With User: root and password: pantabox
After booting the device, if a monitor and keyboard are attached, you will see the Pantavisor Linux logo with some default instructions on how to login.
How to ssh Onto the Device
You can directly log into the device if you have a keyboard and monitor attached to it. But the more convenient way is to ssh on it:
ssh root@[device-ip]
You can find the IP address of your device in the upper right-hand corner after you’ve logged in. Login with the default pantabox password. (Setup your public key with the edit-sshkeys commands.)
If you don’t have a keyboard and monitor attached to log in and view the device’s IP, then please download the Pantavisor command-line interface or pvr cli onto your laptop. Afterward, scan the network with:
pvr device scan
Note the IP address for your device and use that to ssh.
Important! Before going into production, please remember to change the default login with the chpasswd command.
pantabox command.
Install Home Assistant from Pantacor One Marketplace
Now you’re ready to install Home Assistant (an open-source, privacy-first Home Automation platform):
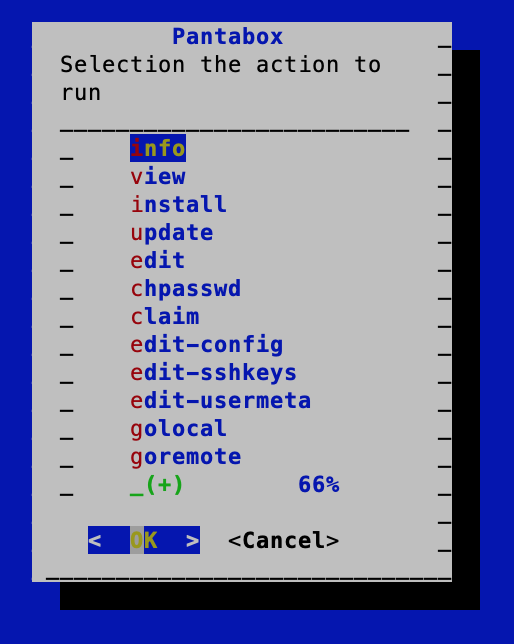
1. Navigate to the Pantacor One Marketplace
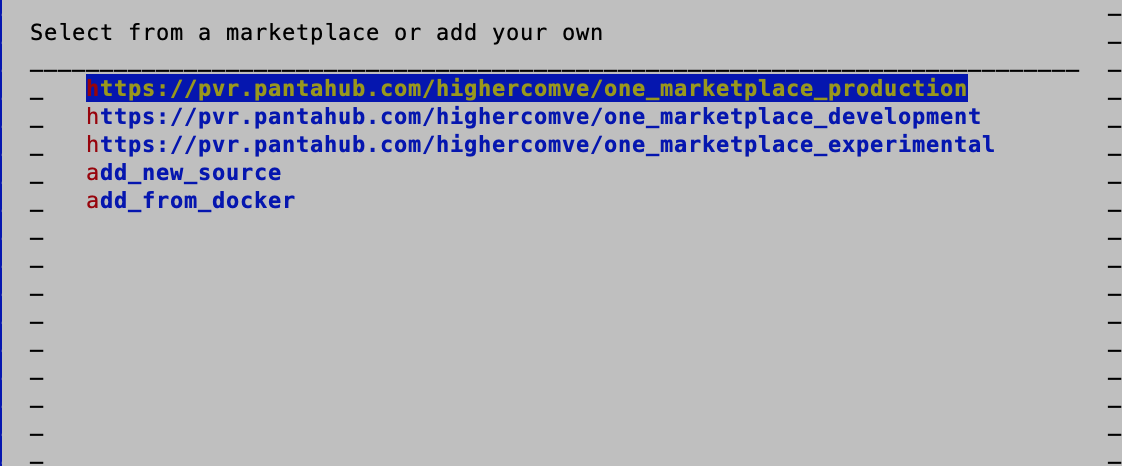
Display the pantabox menu with pantabox and then select install. Choose Pantacor One Marketplace:
2. Select Home Assistant From the List of Available Apps and Press OK
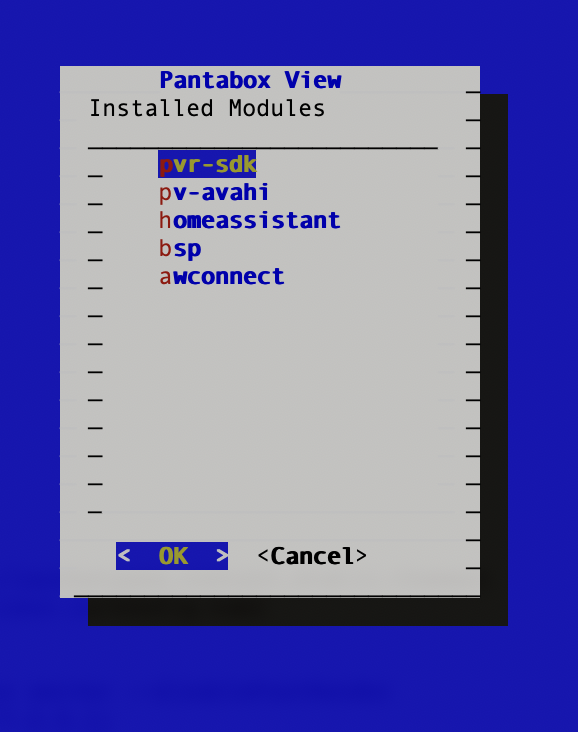
3. View the App
Once the app is finished installing, run pantabox and select View:
4. Locate the Default Port for Home Assistant
To locate the port setting for Home Assistant, type pantabox and then select edit from the menu. The Interactive Shell appear, where you can use vi or nano to view the app manifest:
vi homeassistant/v0alpha.app.manifest.json
5. Add and Commit Your Changes Before Exiting the Shell
This creates a local device revision that includes the newly installed Home Assistant app.
pvr add .
pvr commit
Apply your changes with:
exit 0
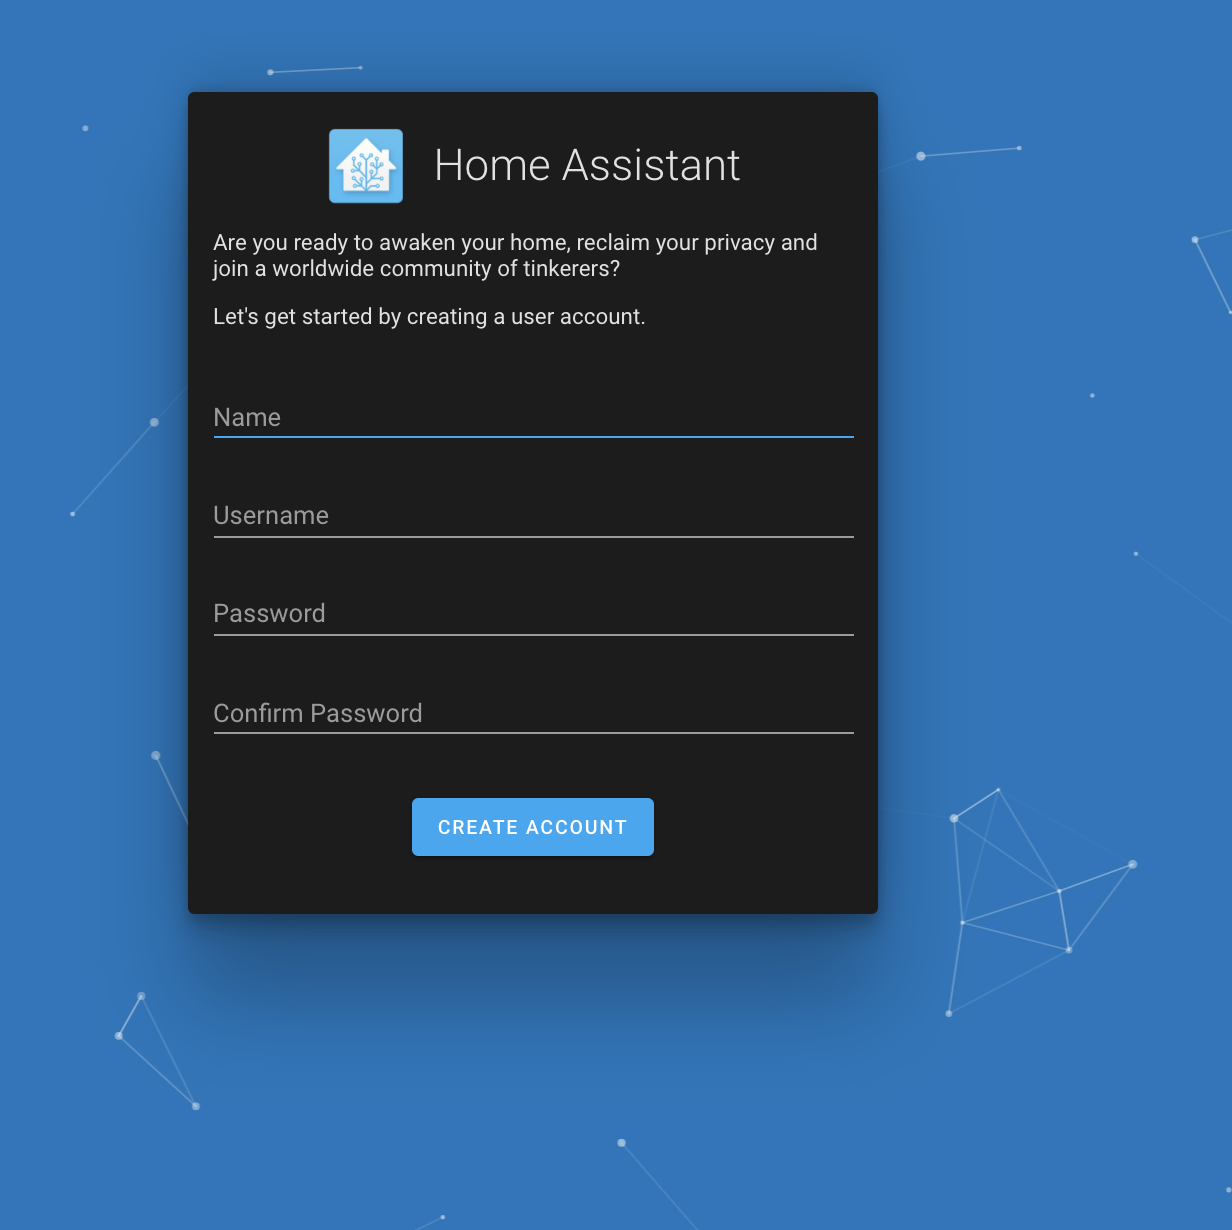
6. Display the Admin Dashboard
Finish setting up Home Assistant by pointing your browser at the IP address of the device (located in the right-hand corner of your screen) with the port specified in the app manifest:
Recommend
About Joyk
Aggregate valuable and interesting links.
Joyk means Joy of geeK