

dotnet OpenXML 文本 BodyProperties 的 FontScale 与文本字号缩放
source link: https://lindexi.gitee.io/post/dotnet-OpenXML-%E6%96%87%E6%9C%AC-BodyProperties-%E7%9A%84-FontScale-%E4%B8%8E%E6%96%87%E6%9C%AC%E5%AD%97%E5%8F%B7%E7%BC%A9%E6%94%BE.html
Go to the source link to view the article. You can view the picture content, updated content and better typesetting reading experience. If the link is broken, please click the button below to view the snapshot at that time.

dotnet OpenXML 文本 BodyProperties 的 FontScale 与文本字号缩放
本文来告诉大家,在 OpenXML 的 BodyProperties 的 NormalAutoFit 的 FontScale 属性缩放文本框的文本字号的方法
通过 ECMA 376 文档可以了解到 BodyProperties 属性是作用在文本框,放在 BodyProperties 的 NormalAutoFit 的 FontScale 属性,能修改文本框的文本字号缩放
更多关于 BodyProperties 属性,请看 dotnet OpenXML 文本 BodyProperties 的属性作用
通过 ECMA 376 的 21.1.2.1.3 章可以了解到使用 NormalAutoFit 的 FontScale 属性是按照百分比缩放文本框
开始之前,先使用 C# dotnet 使用 OpenXml 解析 PPT 文件 的方法读取测试的文档。此测试文件将可以在下文拿到
            var file = new FileInfo("Test.pptx");

            using var presentationDocument = PresentationDocument.Open(file.FullName, false);
获取首页的第一个形状元素,此形状元素包含一个文本,此文本内容里设置了 NormalAutoFit 的 FontScale 属性
            var slide = presentationDocument.PresentationPart!.SlideParts.First().Slide;

            var shape = slide.CommonSlideData!.ShapeTree!.GetFirstChild<Shape>()!;
此形状的 OpenXML 内容如下
 <p:sp>
   <p:nvSpPr>
     <p:cNvPr id="4" name="文本框 3" />
     <p:cNvSpPr txBox="1" />
     <p:nvPr />
   </p:nvSpPr>
   <p:spPr>
     <a:xfrm>
       <a:off x="4168346" y="914401" />
       <a:ext cx="6096000" cy="3170090" />
     </a:xfrm>
     <a:prstGeom prst="rect">
       <a:avLst />
     </a:prstGeom>
     <a:noFill />
   </p:spPr>
   <p:txBody>
     <a:bodyPr wrap="square" rtlCol="0">
       <a:normAutofit fontScale="60000"/>
     </a:bodyPr>
     <a:lstStyle />
     <a:p>
       <a:r>
         <a:rPr lang="zh-CN" altLang="en-US" sz="10000">
         </a:rPr>
         <a:t>一行文本</a:t>
       </a:r>
       <a:endParaRPr lang="en-US" sz="10000" dirty="0" />
     </a:p>
   </p:txBody>
 </p:sp>
在 a:bodyPr 的 a:normAutofit 的文本缩放设置为 60000 的值
从 ECMA 376 文档可以了解 FontScale 属性的单位是千倍百分比,可使用 Office Open XML 的测量单位 提供的 dotnetCampus.OpenXMLUnitConverter 库的 Percentage 类型作为单位
获取文本框属性,可以使用以下代码
            var shapeProperties = shape.ShapeProperties!;
            var textBody = shape.TextBody!;
            Debug.Assert(textBody != null);
            var textBodyProperties = textBody.BodyProperties!;
            Debug.Assert(textBodyProperties != null);
文本框属性里包含 NormalAutoFit 属性,可采用以下代码获取
            var normalAutoFit = textBodyProperties.GetFirstChild<NormalAutoFit>()!;
            Debug.Assert(normalAutoFit != null);
如果文档里的 OpenXML 内容没有存在 NormalAutoFit 或者 FontScale 属性,那就是默认不做文本字号缩放。可以相当于默认的倍数是 1 的值,因为任何值乘以 1 都等于原值,相当于不做缩放
            Percentage fontScale = normalAutoFit.FontScale is null
                ? Percentage.FromDouble(1)
                : new Percentage(normalAutoFit.FontScale);
此 Percentage 类型是 dotnetCampus.OpenXMLUnitConverter 库提供的
获取文本内容,在 WPF 显示代码如下
            foreach (var paragraph in textBody.Elements<DocumentFormat.OpenXml.Drawing.Paragraph>())
            {
                // 一个文本里面有很多段落
                // 段落里面,文本有不同的样式,如一段可以有不同加粗的文本
                // 相同的样式的文本放在一个 TextRun 里面。不同的样式的文本放在不同的 TextRun 里面

                // 这个文本段落是没有属性的,为了方便样式,就不写代码
                //if (paragraph.ParagraphProperties != null)

                foreach (var run in paragraph.Elements<DocumentFormat.OpenXml.Drawing.Run>())
                {
                    var runProperties = run.RunProperties!;
                    var fontSize = new PoundHundredfold(runProperties.FontSize!.Value).ToPound();

                    // 默认字体前景色是黑色
                    var text = run.Text!.Text;

                    var textBlock = new TextBlock()
                    {
                        Text = text,
                        FontSize = fontSize.ToPixel().Value * fontScale.DoubleValue,
                        FontFamily = new FontFamily("宋体"),
                        HorizontalAlignment = HorizontalAlignment.Center,
                        VerticalAlignment = VerticalAlignment.Center,
                    };

                    Root.Children.Add(textBlock);
                }
            }
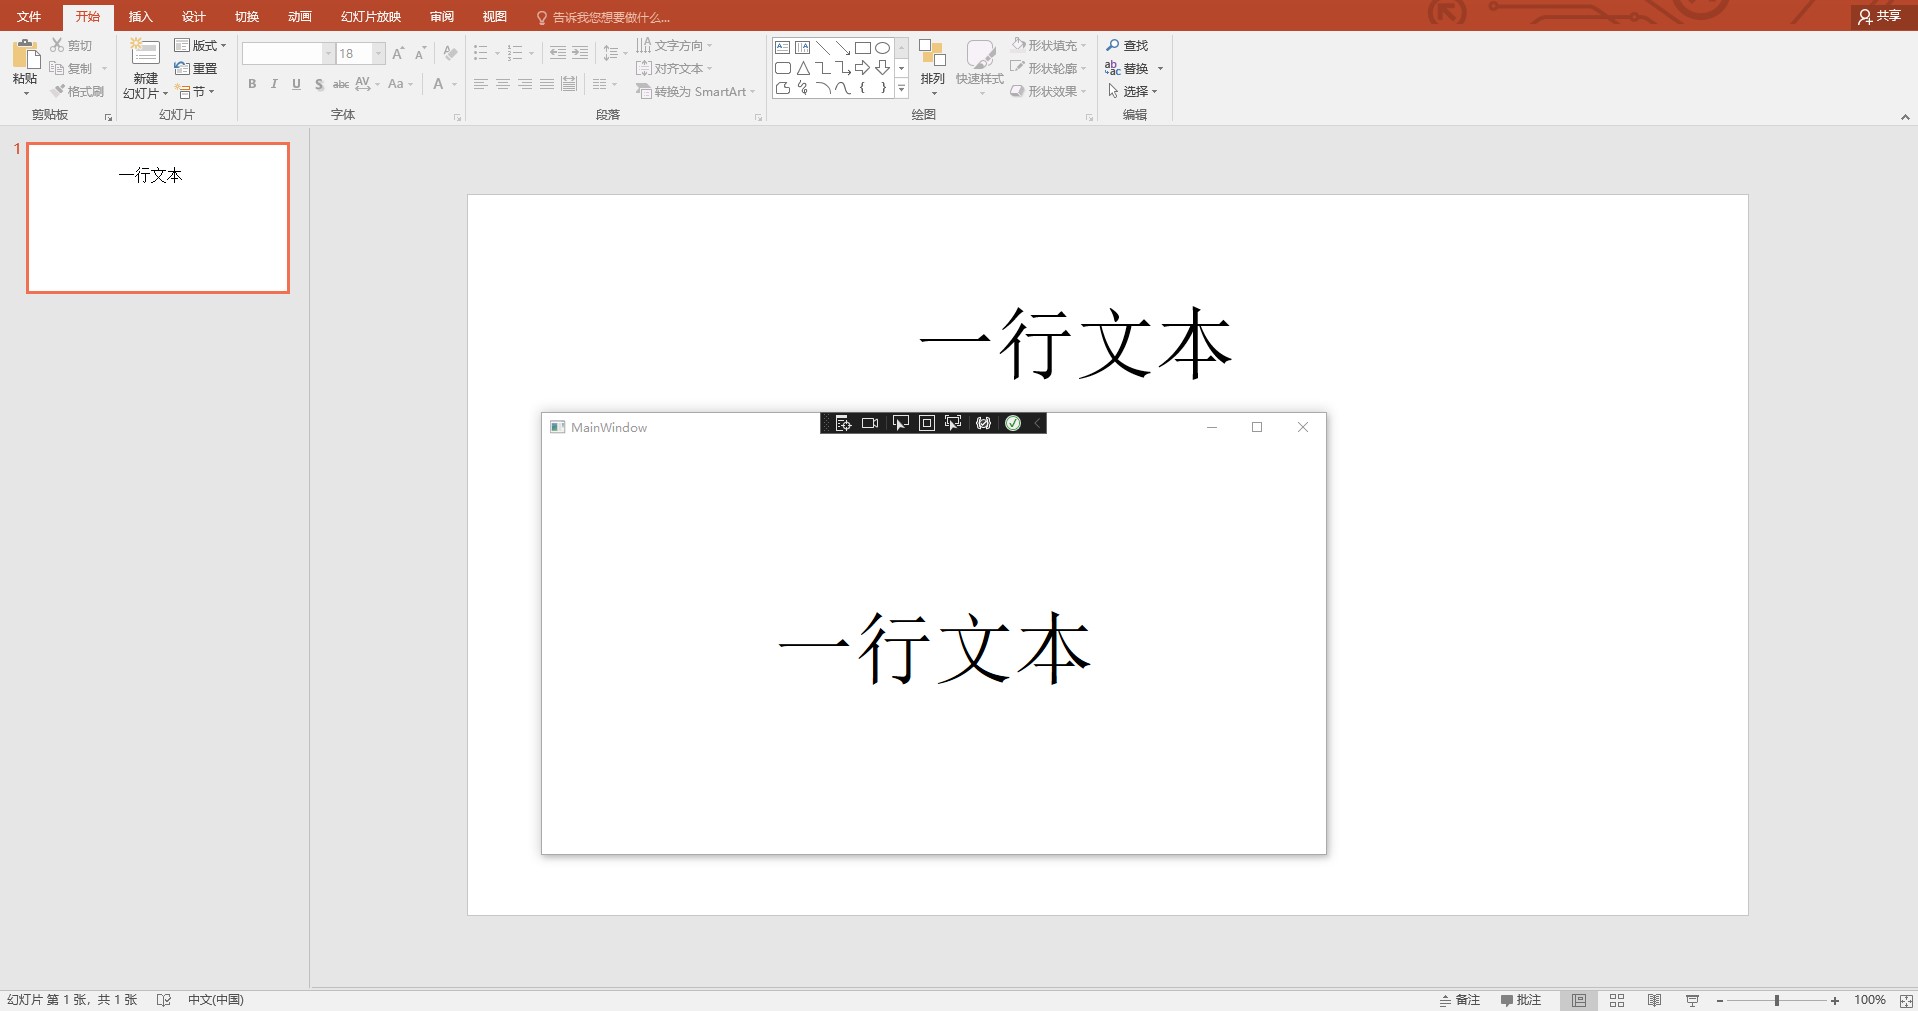
运行以上代码效果如下,可以看到文本大小和 Office 的 PPT 相同
本文所有代码和测试文件放在github 和 gitee 欢迎访问
可以通过如下方式获取本文的源代码,先创建一个空文件夹,接着使用命令行 cd 命令进入此空文件夹,在命令行里面输入以下代码,即可获取到本文的代码
git init
git remote add origin https://gitee.com/lindexi/lindexi_gd.git
git pull origin 24230fc0bb8202c567ccf9ffffb49eebc08be120
以上使用的是 gitee 的源,如果 gitee 不能访问,请替换为 github 的源
git remote remove origin
git remote add origin https://github.com/lindexi/lindexi_gd.git
获取代码之后,进入 Pptx 文件夹
本文会经常更新,请阅读原文: https://blog.lindexi.com/post/dotnet-OpenXML-%E6%96%87%E6%9C%AC-BodyProperties-%E7%9A%84-FontScale-%E4%B8%8E%E6%96%87%E6%9C%AC%E5%AD%97%E5%8F%B7%E7%BC%A9%E6%94%BE.html ,以避免陈旧错误知识的误导,同时有更好的阅读体验。
如果你想持续阅读我的最新博客,请点击 RSS 订阅,推荐使用RSS Stalker订阅博客,或者前往 CSDN 关注我的主页
本作品采用 知识共享署名-非商业性使用-相同方式共享 4.0 国际许可协议 进行许可。欢迎转载、使用、重新发布,但务必保留文章署名林德熙(包含链接: https://blog.lindexi.com ),不得用于商业目的,基于本文修改后的作品务必以相同的许可发布。如有任何疑问,请 与我联系 。
无盈利,不卖课,做纯粹的技术博客
以下是广告时间
推荐关注 Edi.Wang 的公众号

欢迎进入 Eleven 老师组建的 .NET 社区

以上广告全是友情推广,无盈利
Recommend
About Joyk
Aggregate valuable and interesting links.
Joyk means Joy of geeK