

How to Install Wireshark Network Packet Analyzer on Ubuntu 20.04
source link: https://www.howtoforge.com/how-to-install-wireshark-on-ubuntu-20-04/
Go to the source link to view the article. You can view the picture content, updated content and better typesetting reading experience. If the link is broken, please click the button below to view the snapshot at that time.

How to Install Wireshark Network Packet Analyzer on Ubuntu 20.04
Wireshark (formerly Ethereal) is an Open-Source software that is used for capturing and investigating network traffic. It is a very popular packet analyzer among network professionals, security analysts, and research scholars around the world. The good thing is that it is open source and freely available under the GNU General Public License version 2. It can examine data from various network interfaces like: Ethernet (IEEE 802.3 ), FDDI, Token ring, IEEE 802.11 wireless LAN etc. It is available for major OSes like Windows, macOS, Linux, and UNIX.
Wireshark has many features like profound inspection of network traffic, real-time capture, offline analysis, R/W support for different capture file types etc. It also organizes SharkFest, an annual educational conference, around the world for imparting knowledge of their product. These conferences are focused on best practice of using Wireshark.
What will we cover?
In this guide, I will show you how to install the Wireshark network analyzer on Ubuntu 20.04.
Installing Wireshark
In the first method, we will install Wireshark using the default repository of Ubuntu 20.04 and in the second one, we will add a new Personal Package Archives (PPA) or software repository.
Method 1: Installing Wireshark using the default repository of Ubuntu.
Wireshark is shipped with the official package repository of almost every major Linux distribution and Ubuntu 20.04 LTS is not an exception. It is always a good habit to update the APT package repository list:
$ sudo apt update
Step 1. Now, we are all set to install Wireshark, just run the following command:
$ sudo apt install wireshark
Step 2. During the installation process a window will appear asking you to configure Wireshark for non-superusers for capturing packets. In the old version of Wireshark we needed to run it as a root user or with root privileges to be able to capture the traffic. Now we can also allow the non-superusers to capture packets. Although it is a security risk. We also recommend you to use the default way and choose the option to be disabled by hitting ‘No’:
So basically we have denied the non-superusers to capture packets. Now let the installation process complete.
Launching Wireshark
Wireshark is now installed on our system, but wait to see what happens when we run it without ‘sudo’.
$ wireshark
On the first window of Wireshark you will see a list of devices for capturing traffic as shown below:
When we double click the interface ‘enp0s3’, the below screen prompts:
As you can see it has thrown an error “The capture session could not be initiated……………..sufficient permissions” and also provides steps to add the current user to the ‘wireshark’ group to be able to capture packets. This is because we have denied non-superusers to run wireshark. Now let us again run the Wireshark with sudo privileges:
$ sudo wireshark
This time when you send a ping request (for e.g. using a terminal) to some website, you will see the above interfaces are showing random spikes of traffic:Advertisement
Good, so we have now installed the Wireshark on our Ubuntu 20.04, but this may not be the latest version. In order to check the version of the Wireshark, use the command:
$ wireshark -v
So the version of this Wireshark is 3.2.3. To install the latest version we will need to add a repository. Let’s do it now.
Method 2: Installing Wireshark by adding a new PPA or software repository.
Canonical provides a PPA on their official website for installing Wireshark. Open a terminal on your Ubuntu 20.04 and run the below command to add this new PPA:
$ sudo add-apt-repository ppa:wireshark-dev/stable
AdvertisementThis will get us the latest and stable release of Wireshark which is backported from Debian package versions. Now run the below command to update the repository list on your Ubuntu distribution:
$ sudo apt update
We need to simply enter the ‘apt install’ command to install wireshark:
$ sudo apt install wireshark
This will upgrade our existing wireshark installation. See the reference picture below:
Launching Wireshark
Congratulations, Wireshark is now installed/upgraded and we can see it in the Application Menu as shown below:
But to your surprise, it is not going to work if we start it from here. This is because we have not enabled the packet capturing for non-superusers. So to start the Wireshark, we need to run the following command from a terminal:
$ sudo wireshark
Wireshark should start now as illustrated here:
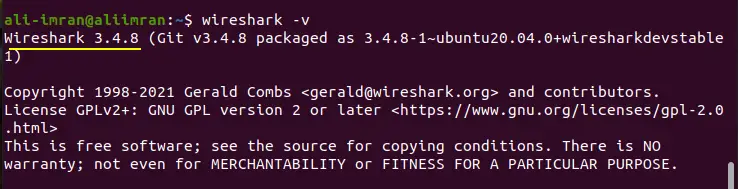
Now again check the Wireshark version. This time it is changed to version 3.4.8.
Conclusion
Wireshark is a very important tool for analyzing what’s going on in your network. It has got wide acceptance among various IT sectors like government agencies, commercial organizations and educational institutions. In this guide we have seen how easy it is to install Wireshark on Ubuntu 20.04. If you are interested, you can explore more about Wireshark by visiting the official website of Wireshark at https://www.wireshark.org.
Recommend
About Joyk
Aggregate valuable and interesting links.
Joyk means Joy of geeK