

How to Grow Sodium Chloride Crystals at Home
source link: https://crystalverse.com/sodium-chloride-crystals/
Go to the source link to view the article. You can view the picture content, updated content and better typesetting reading experience. If the link is broken, please click the button below to view the snapshot at that time.

How to Grow Sodium Chloride Crystals at Home
Sodium chloride, Tutorial / November 10, 2021by Chase / Leave a Comment
I discovered a way to grow transparent sodium chloride crystals at home. Here’s how.

Growing sodium chloride crystals
Sodium chloride, or table salt, has a cubic crystal structure. But the salt we use for cooking normally looks more like sand.
Indeed, table salt is often used in kids’ experiments to demonstrate crystallization. It’s a simple activity, but the results are disappointing. Many tutorials online make it look far easier than it actually is.
This is because sodium chloride crystals are very sensitive. Temperature differences cause imperfections. It also crystallizes easily on dust particles, growing misshapen clusters, hopper crystals and dry crust.
However, being as stubborn as these crystals, I have tried multiple times to grow them over the past 3 years. Eventually, I discovered a technique to grow large, high quality sodium chloride crystals, and I want to share them with you.
 It’s a simple procedure that you can follow at home. This guide might seem long, but the lower half is about how to adjust the steps to grow more interesting and unique salt crystals.
Materials
To start, you’ll need:
- Uniodized table salt
- A large pot for heating water
- A spoon for stirring
- A filter funnel
- Filter papers/tissue paper
- A large jar
- A flat dish
- Some small, flat containers
After that, we need to prepare our solution.
Preparing a saturated salt solution
Sodium chloride has a solubility of 36 g/100 ml of water at room temperature. When you dissolve this much salt into water, it becomes a saturated salt solution.
Once water evaporates, the extra salt has to come out of solution, forming salt crystals. Our goal is to control this process – to make the crystals that grow as beautiful as possible.
But first, we need to make our saturated salt solution.
Prepare a pot of hot water, and add 40 g of salt for every 100 ml of water. Stir until most of the salt has dissolved. It’s okay if some salt is left over at the bottom.
Keep heating until you see small, white salt flakes start to form on the surface of the solution. Let the solution cool, close the lid and leave it for a day.
Keep heating until you see small white flakes appearing on the surface of the solution.
After letting the solution sit for a day, it should have stabilized. There should be some excess salt and bits of yellow impurities inside. We don’t want that.
So, using a filter funnel and some filter papers/coffee filter/tissue paper, filter the solution into a large jar. This will be our stock of clean, perfectly saturated solution, which we’ll use to grow good crystals. Recycle or discard the leftover salt.
Growing a seed crystal
After we have our saturated solution, we still need to grow a seed crystal. A seed crystal is a tiny, perfect sodium chloride crystal that we can then use to grow a bigger crystal.
It’s easy to grow seed crystals. Just pour 50 ml of the solution you recently prepared into a flat dish. You don’t need to fill the dish; the solution just needs to be around 1 cm deep.
I’m using a petri dish, but any non-metal container will do.
Having done that, leave the dish in an undisturbed area for 1-2 days. You can place it in a cool cupboard, on a rack or in the storeroom.
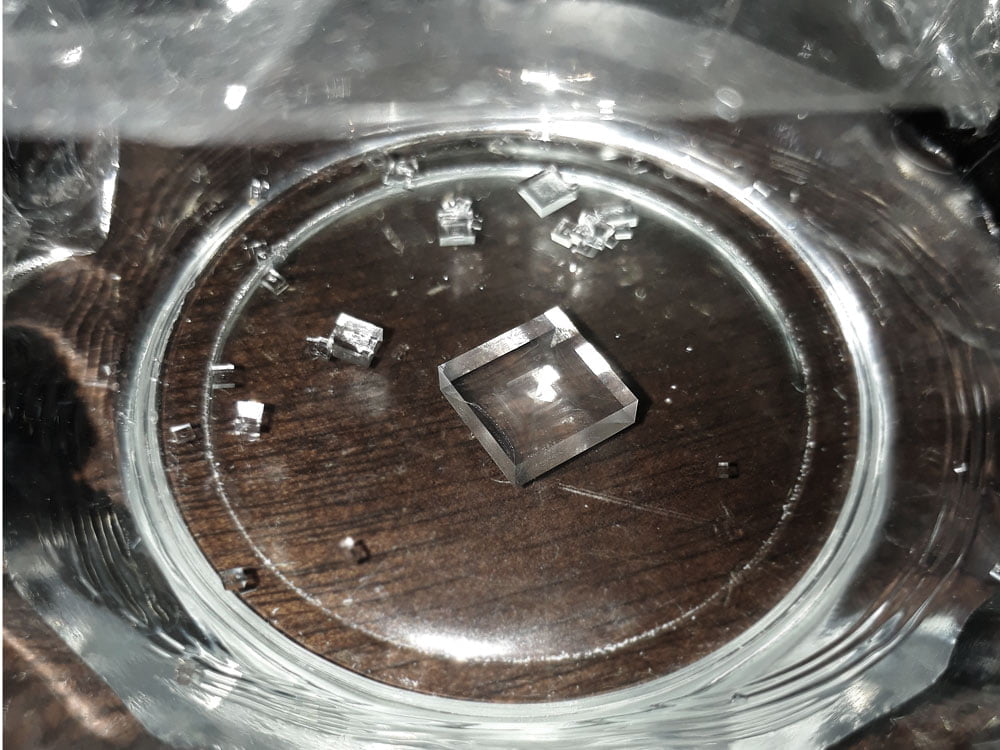
Since the solution inside the dish is saturated, it shouldn’t take long for small sodium chloride crystals to form. They look like tiny, transparent cubes.
After 2 days, this is what my dish looks like.


Great. We now have our seed crystals.
Try to look for a decently sized square crystal that is completely transparent. That will be your seed crystal.
Growing big sodium chloride crystals
Now, we can start growing our main crystal. For most compounds, it’s easier to grow the crystal by tying it to a string and hanging it in solution. But not sodium chloride.
Because sodium chloride crystals are so sensitive, any interruption to its growth (like tying it to a string) will almost certainly cause defects to form.
To minimize interruption, it’s best to grow it at the bottom of a container – one with an extremely low rate of evaporation. Based on my experience, aim for very small containers with flat bottoms.
After trying out teeny beakers, jam jars, plastic sauce containers… I found that makeup jar lids worked best. Of course, it’s entirely up to you.
Now, transfer a little solution to the container of your choice, making sure it is dry beforehand. Select a seed crystal. With a pair of tweezers, very gently transfer the seed crystal from the dish to your new container.

The makeup jar lid is in the middle. I first transferred some solution there, and then moved a small seed crystal from the dish, placing it right in the center of the makeup jar lid.
Move the container to somewhere sheltered. Again, storerooms/basements/cool cupboards are good choices.
This setup is the best I’ve found so far, but it still doesn’t guarantee a perfect crystal.

So, to further provide a stable environment, make sure the surface of the solution is not exposed to air movement. This is an easy fix. Just cover the setup with another container.

This greatly helps the transparency of the final crystal. After that, just leave them there. Within a day or two, the crystal inside the dish should look like one of the following:

- Perfect conditions. The crystal has started growing nicely. Good job!
- Salt dust formed around your main crystal. You likely scratched the crystal by accident while transferring it.
- The crystal grew too quickly, thus turning opaque. Either the weather was too hot or the humidity too low.
- The salt crystal started to dissolve. The solution was not saturated enough. Either the humidity was too high or your container was a little wet when you added the solution.
It’s okay if accidents happen. If the crystal looks like picture 3, it means you have to select another seed crystal and try again.
If it looks like picture 4 or 5, let it grow anyway. The final crystal will not be perfect, but as you’ll see, it can still grow in a very interesting way.
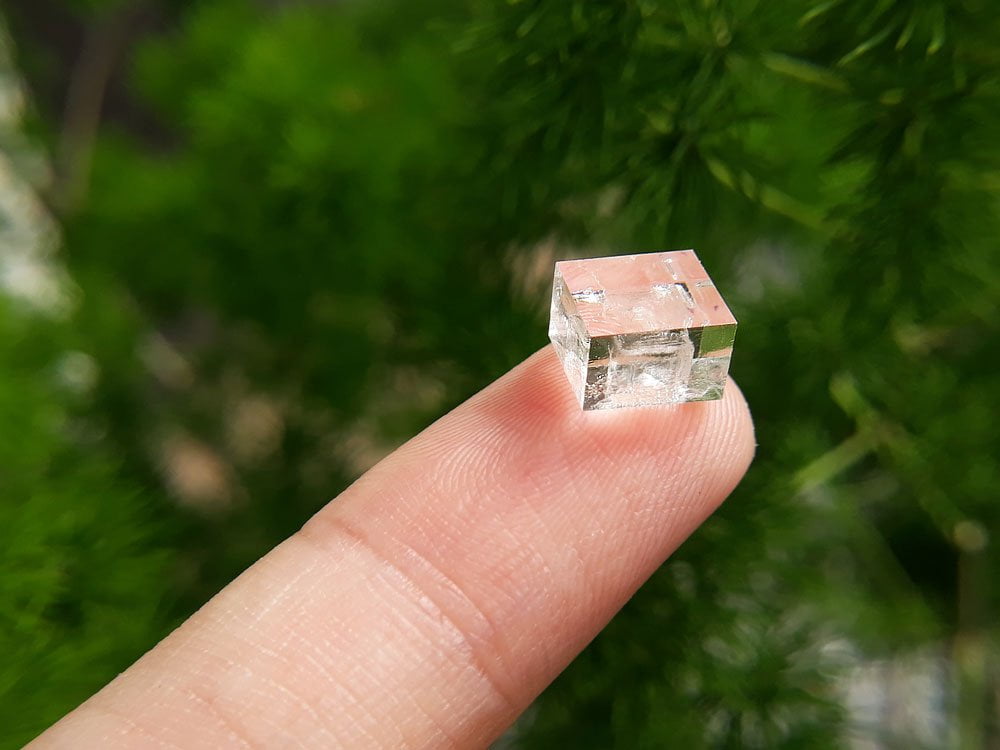
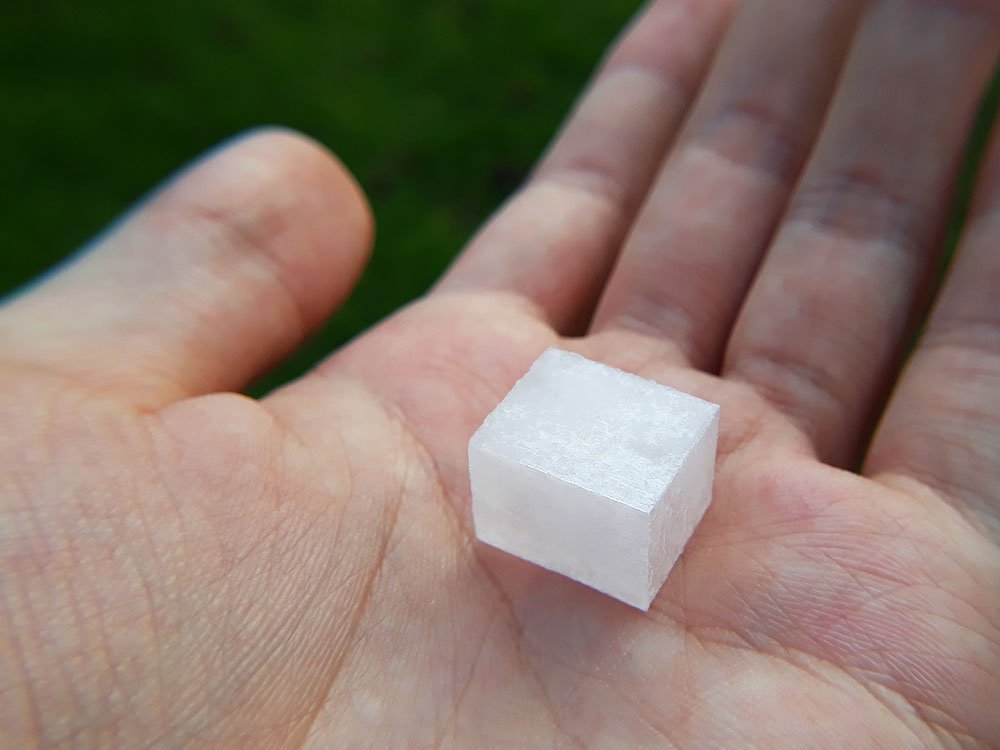
Now, all you need to do is to wait. Depending on the conditions, it will probably double in size in a week and reach 1×1 cm in a month. This might seem like a long time, but to crystal growers and chemists, it is a terrific accomplishment.


And… you’re done!
Take it outside to admire its crisp edges, take some photos and give yourself a pat on the back. Show off your salt cubes to your friends.
Interesting sodium chloride crystals
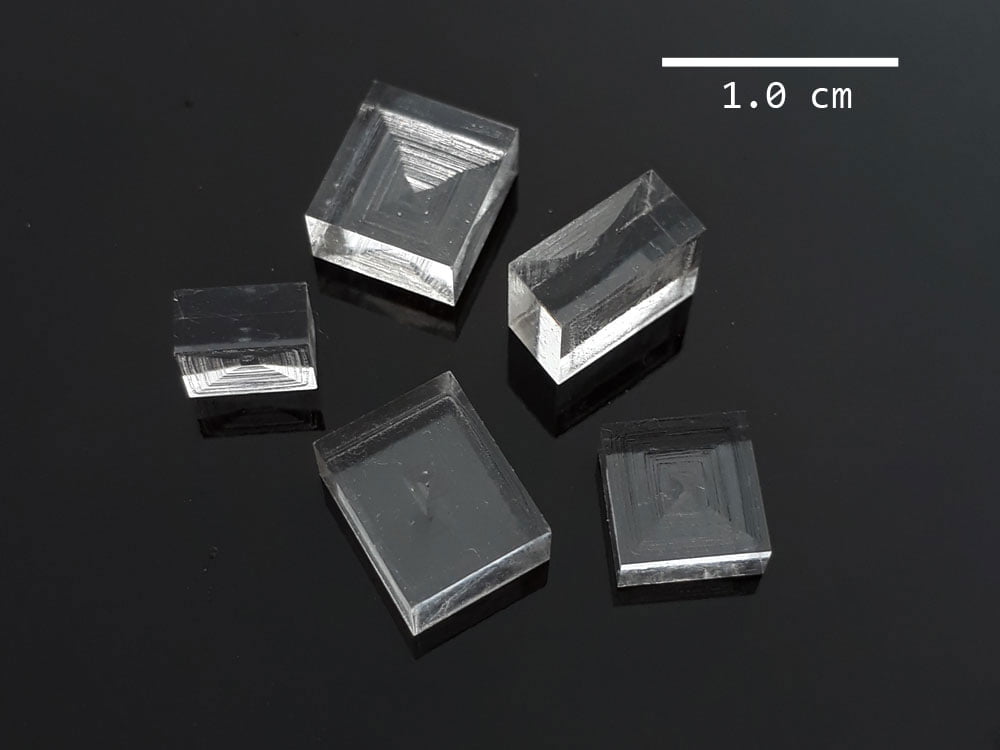
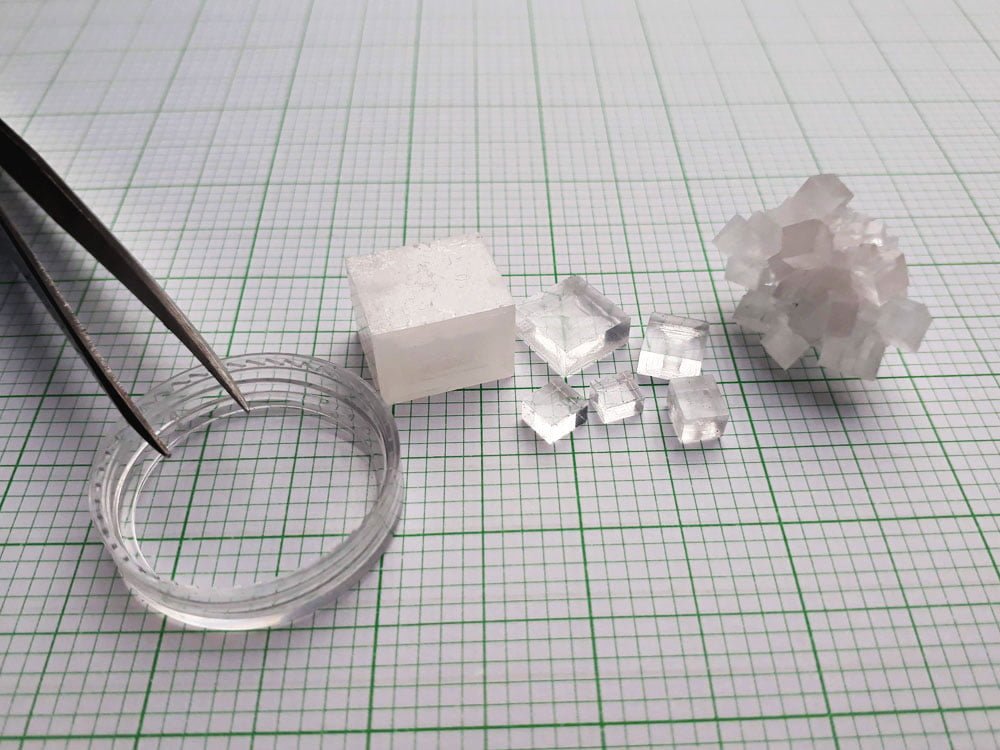
There are many factors affecting sodium chloride crystal growth. The ones you grow might look completely different from mine. Here are some interesting specimens, and how you can achieve them.
Navigation:
Growing slow vs growing fast
Crystal quality depends a lot on the rate of growth. The following pictures show crystals grown with a low, medium and high rate of evaporation respectively.
Crystal stars
Sometimes, a crystal turns cloudy at first, but as it grows, the outer layers become transparent, forming a nice coating. The result looks like this:

Be wary though. The process will become a lot more unpredictable. Tiny crystals like to form and given enough time, they might stick to your main crystal. But with the right conditions and some luck, you’ll get your crystal star.
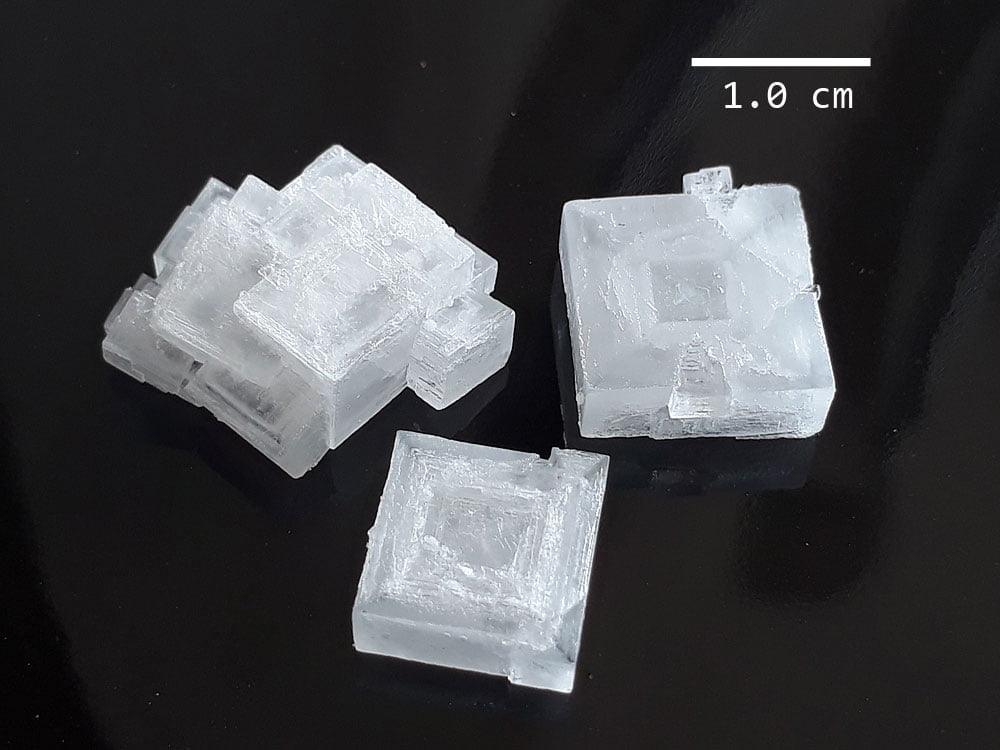
White cubes
White cubes are basically crystal stars grown at an even faster rate. It’s a balancing act – if the evaporation becomes just a bit faster, or some random crystals decide to form on a speck of dust, everything will turn into a white clump.

This particular crystal looks more like a cube because I flipped it on its side when transferring to a new container. Normally, the new side immediately begins to cloud up due to a change in growth rate, but since the crystal was already white to begin with, it turned out looking great.
Ghost crystals
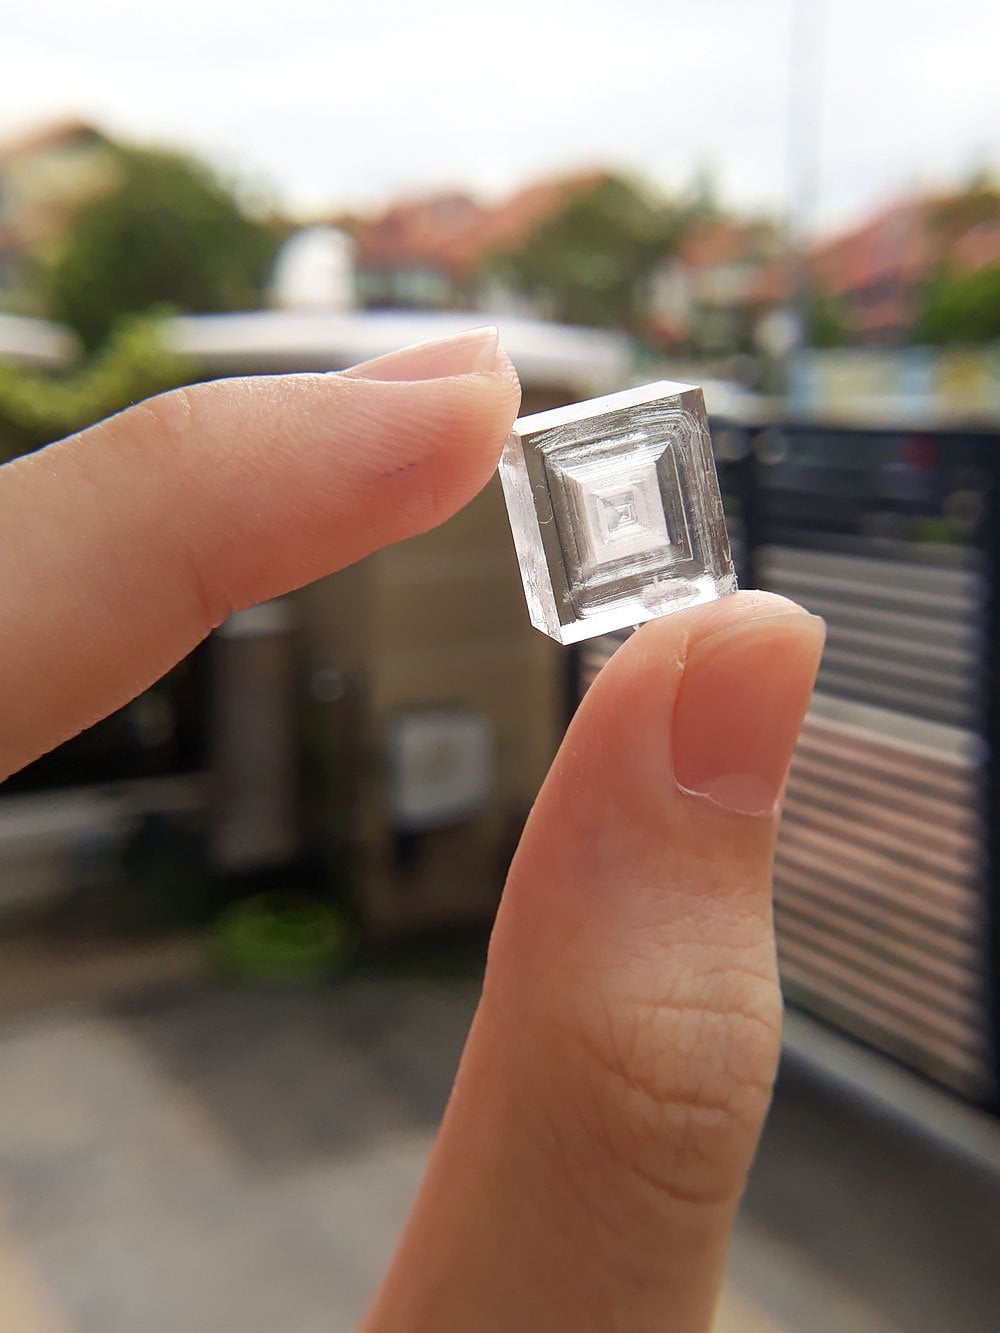
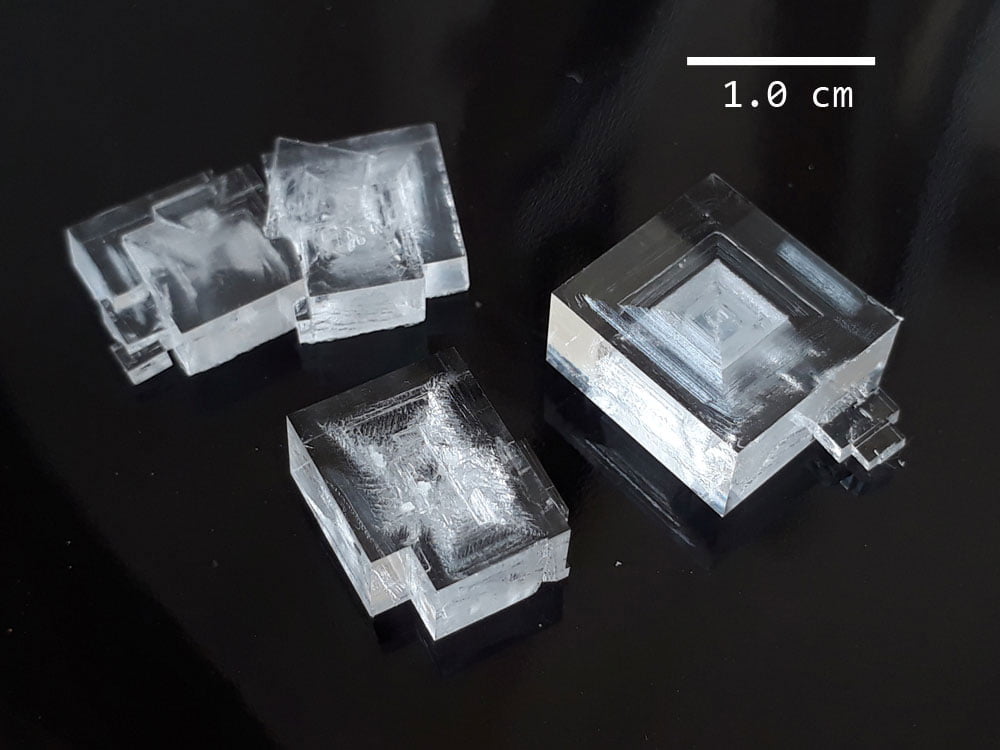
During crystal growth, the weather might suddenly get very hot – or it might rain a lot. These conditions will make the crystal cloud up, or dissolve respectively. Then, if the conditions return to normal after a few days, transparent growth resumes.
But this interruption causes the crystal to contain a flaw in the middle. Sometimes, this flaw can be quite unique, like a hologram trapped in glass.

Salt pyramids
When seed crystals grow, not all of them look like cubes. Sometimes, a seed crystal lands on its vertex, forming what looks like a pyramid.
If you let it grow, this is what you’ll get:

Using iodized salt
Iodized salt is not recommended for growing sodium chloride crystals because it messes up the crystallization process. This makes it hard for single crystals to form.
The crystal below was grown with iodized salt, following the same procedure.

Other impurities
Besides iodized salt, other impurities in solution can also affect crystal growth.
Rock salt and sea salt might give slightly different results, because they contain traces of other minerals. I’m not sure about Kosher salt; it might contain anticaking agents.
Adding urea to the salt solution causes the crystals to grow into octahedrons. Surprisingly, there are no pictures of macroscopic ones online.
Veteran crystal grower Dmishin found that adding ferric chloride to the salt solution makes the crystals behave better and become more transparent, at the cost of yellower crystals. For a more detailed explanation, check out his article here.

Crystal clusters
If you don’t want to grow single transparent crystals, but want a more natural looking cluster of salt crystals instead, good news. It’s much easier. This article explains it all: Learn How to Grow A Beautiful Cluster of Table Salt Crystals

Additional notes
Although sodium chloride theoretically crystallizes as cubes, the crystals grown with my procedure look a little flatter on the side facing up. This is a limitation to growing them on the bottom of the container, because each crystal face grows at a different rate.
To prevent this, we need to suspend the crystal in solution instead, which brings other challenges. The hanging method currently doesn’t give me good crystals, but I look forward to progress there. If you’ve gotten good results, please share them with me.
Conclusion
 In short, sodium chloride crystals can be very tricky to grow. But with the right procedure, anyone can grow salt cubes at home. Some factors affecting growth like the weather might be out of our control, and we might not get a perfect crystal, but what we end up with might be just as beautiful.

That’s all for this guide. If you have any questions, feel free to ask me in the comments below. If you like science and crystals as much as I do, maybe you’d also be interested in growing copper sulfate crystals.
Also, consider subscribing to my mailing list to keep in touch with my latest crystal growing discoveries.
Thank you for reading, and as always, happy growing.
Recommend
About Joyk
Aggregate valuable and interesting links.
Joyk means Joy of geeK