

Providing External Access to Istio Services With Kong
source link: https://dzone.com/articles/providing-external-access-istio-services-with-kong
Go to the source link to view the article. You can view the picture content, updated content and better typesetting reading experience. If the link is broken, please click the button below to view the snapshot at that time.

Providing External Access to Istio Services With Kong
We’ll use Istio service mesh and Kong Istio Gateway to provide external access to the services that run inside the service mesh-enabled Kubernetes cluster.
Join the DZone community and get the full member experience.
Join For FreeHave you ever found yourself in a situation where all your service mesh services are running in Kubernetes, and now you need to expose them to the outside world securely and reliably?
Ingress management is essential for your configuration and operations when exposing services outside of a cluster. You need to take care of the authentication, observability, encryption, and integration with other third-party vendors alongside other policies.
In this tutorial, we’ll use Istio service mesh and Kong Istio Gateway (Kong Gateway + Kong Ingress Controller) to provide external access to the services that run inside the service mesh-enabled Kubernetes cluster.
What You’ll Need
- Kubernetes cluster, v1.19 or later
- kubectl v1.19 or later
- Helm v3.5 or later
- cURL version 7.x.x
- Insomnia
I used Minikube to run a local installation for this tutorial, but everything shown should still apply to any Kubernetes installation. For more information, view our documentation.
For the automated demo scripts, check out the demo-scene project on GitHub.
Download and Configure Istio
We first need to install and download the archive that includes tools Istio provides, including the istioctl tool.
curl -s -L https://istio.io/downloadIstio | ISTIO_VERSION=1.11.2 sh -We’ll enable the istioctl tool by putting it into the folder somewhere in your path to be available.
export PATH="$PATH:/Users/viktor.gamov/tmp/istio+kong/istio-1.11.2/bin"Next, run istioctl x precheck to check if our cluster is able and willing to run the service mesh.
Deploy Istio Service Mesh
Once the Istio control precheck runs successfully, deploy one port that includes IstioD. That's the only thing that we're going to be needing for this application.
istioctl install --set profile=minimal -yNow that IstioD is up and running and our control plane is ready, we’ll dive into some more interesting things.
Create a Namespace for Kubernetes Ingress Controller
Next, we’ll deploy Kong in an environment where Istio can inject data.
kubectl create namespace kong-istioWe’ll create a kong-istio namespace and provide a label to this namespace that enables Istio injection.
kubectl label namespace kong-istio istio-injection=enabledThe label was successfully applied.

Deploy Kong Istio Gateway
To deploy Kong Istio Gateway, we’ll use official Helm Charts. We’ll need to add this Helm Charts repo to our local repo and update the information by running a Helm repo update.
helm repo add kong https://charts.konghq.com && helm repo updateIn the next step, we will install Kong Helm Charts with the name of release kong-istio. We can deploy this in a namespace called kong-istio, and kong/kong is our Helm Chart that we will be installing.
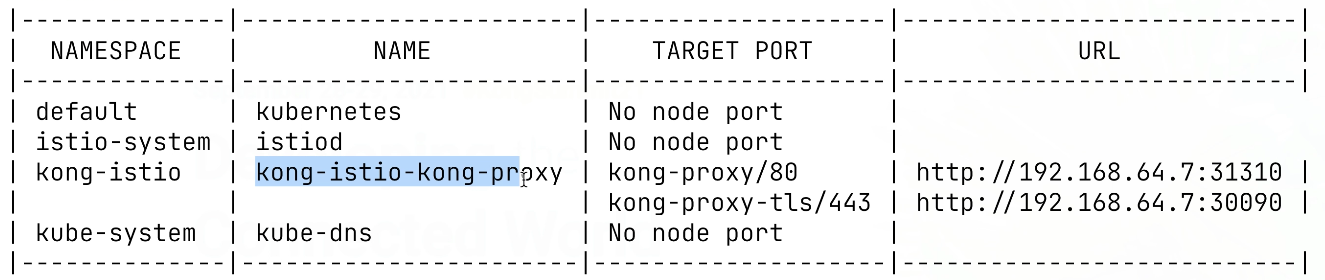
helm install -n kong-istio kong-istio kong/kongAs a next step, we need to figure out the external IP address of our kong-ingress. In real-world applications, you can use a load balancer to expose Kong to the outside world for Minikube. We’re going to run a command called minikube service list that allows us to get the address and port of this Kong service and use Netmagic to expose it.
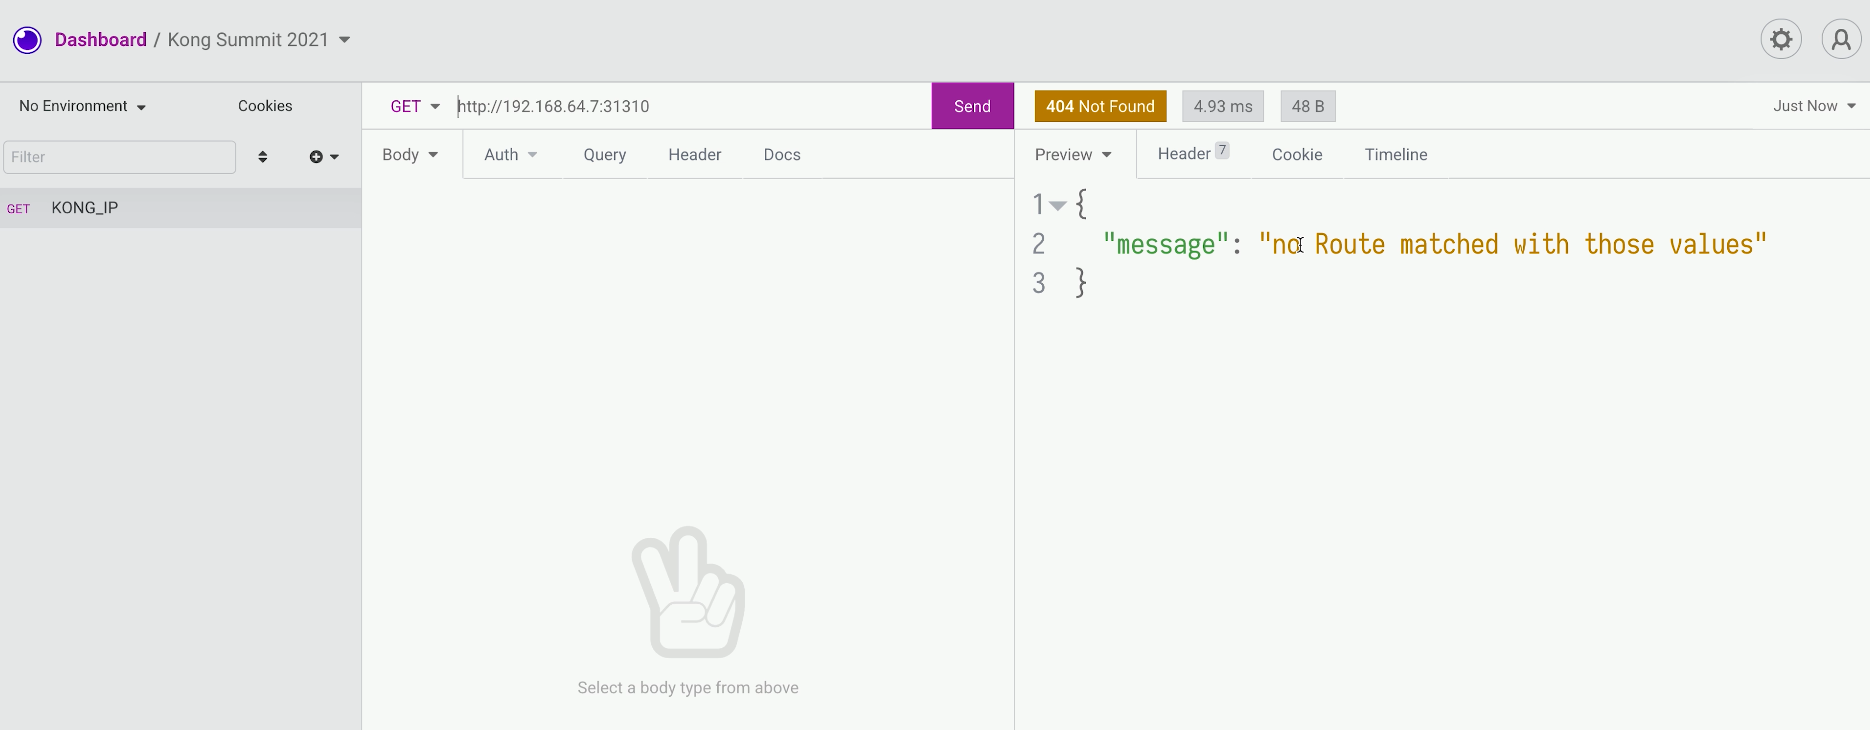
Test Send a Request With Insomnia
Let's test this using Insomnia. We're going to create a simple request for this service. We should see nothing is configured, and there’s no route matching with those values, meaning that nothing was configured.
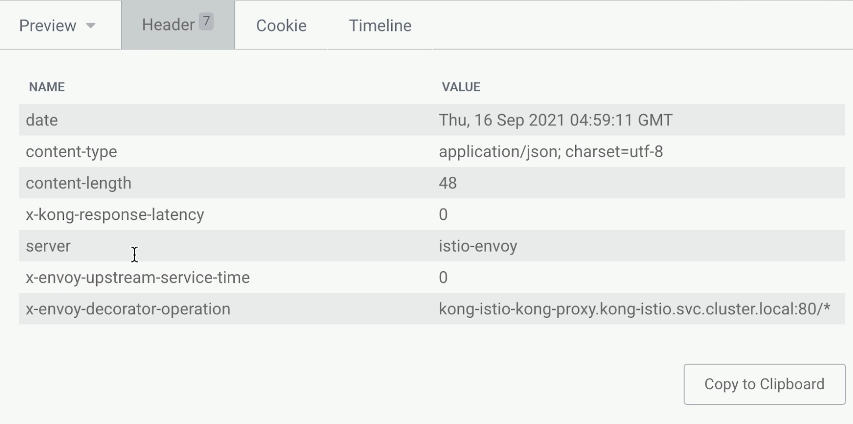
We should see traditional Kong headers and some Envoy headers from our Istio data plane.
Deploy BookInfo Example Application
We'll use this information to trace some of the requests, absorbing this in the future. To play around with this, we’ll use Istio’s BookInfo application.
kubectl create namespace bookinfoAlso, we want to enable istio-injection for this namespace as well. That's why we specify a label for this bookinfo namespace.
label namespace bookinfo istio-injection=enabledWe can see there's a label istio-injection=enabled.

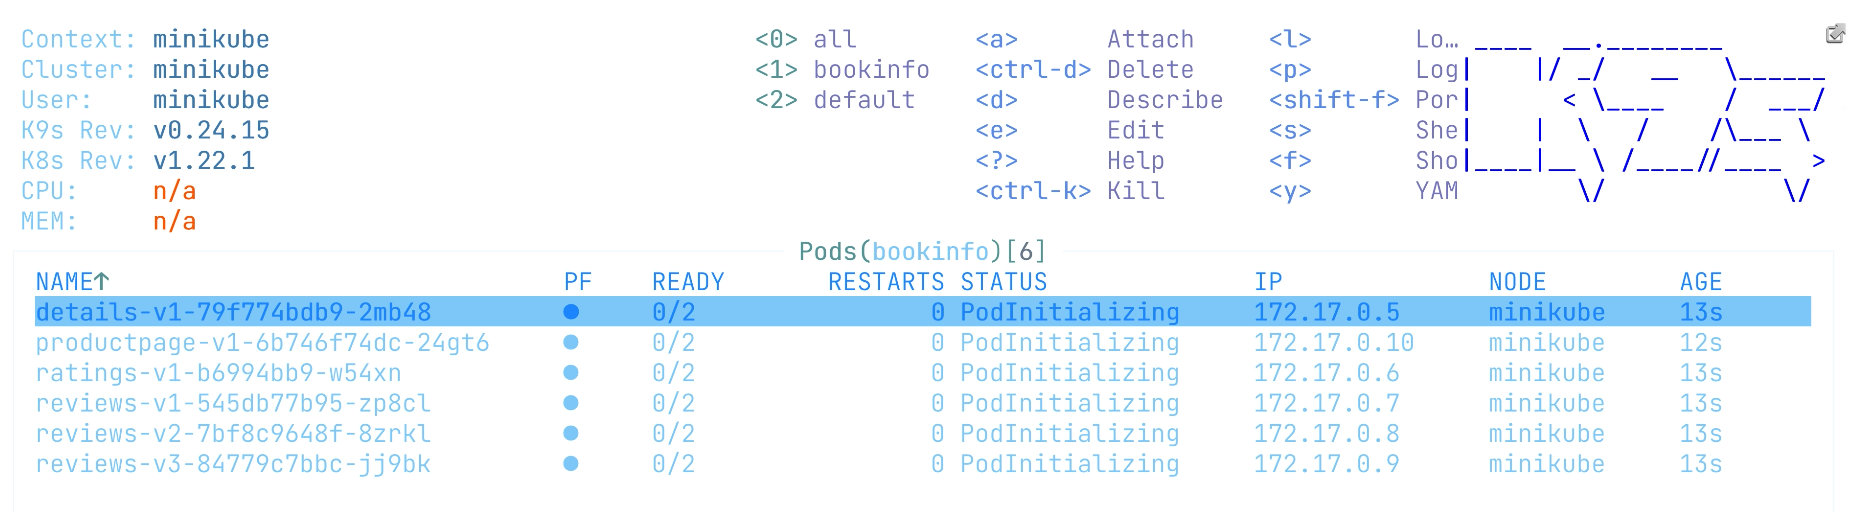
Next, we're going to do kubectl -n bookinfo apply -f istio-1.11.2/samples/bookinfo/platform/kube/bookinfo.yaml.
That will include the manifest for bookinfo that will include multiple components, including deployment services, three different components, and a front-end application. For some of the book’s details and a ratings information service, we’ll deploy three different versions of the review service that we're going to be using in the future to show how we can randomize the traffic and hit different versions of the review service. We need to wait until a product page is up and running because that's our front end, and this is the place where we're going to start our UI.
Access the Demo App Externally Through Kong Gateway
Next, we’ll need to expose the product service using Kubernetes Ingress. Our ingress class mentions Kong, and in this case, Kong Ingress Controller will handle this. And it will route the traffic to the product page service.
apiVersion: networking.k8s.io/v1
kind: Ingress
metadata:
  name: productpage
  namespace: bookinfo
spec:
  ingressClassName: kong
  rules:
  - http:
      paths:
      - path: /
        pathType: ImplementationSpecific
        backend:
          service:
            name: productpage
            port:
              number: 9080
Let's go ahead and apply this file with kubectl apply -f bookinfo-ingress.yaml.
And we will be able to hit the service in our Insomnia tool. We should receive a successful response. We can also preview the UI here.
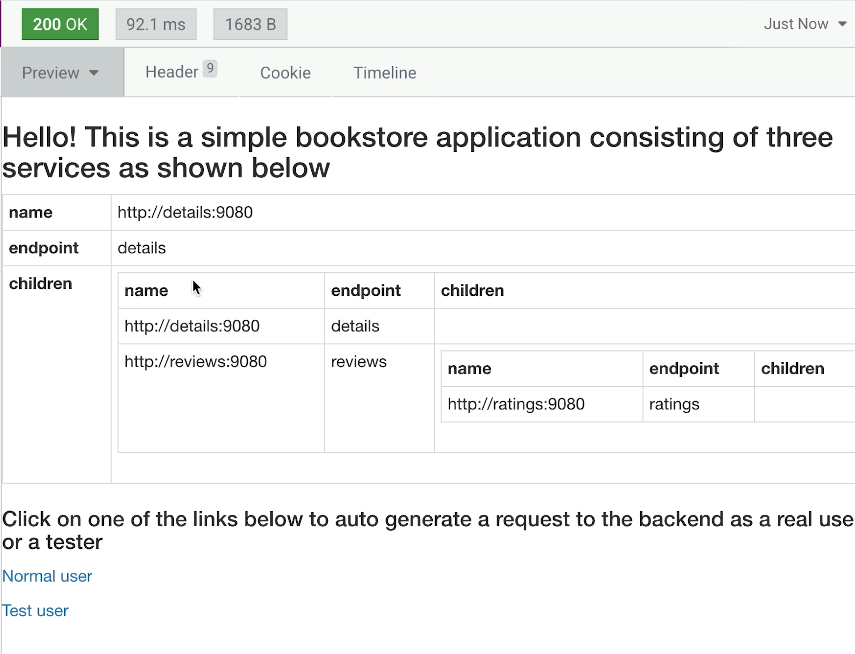
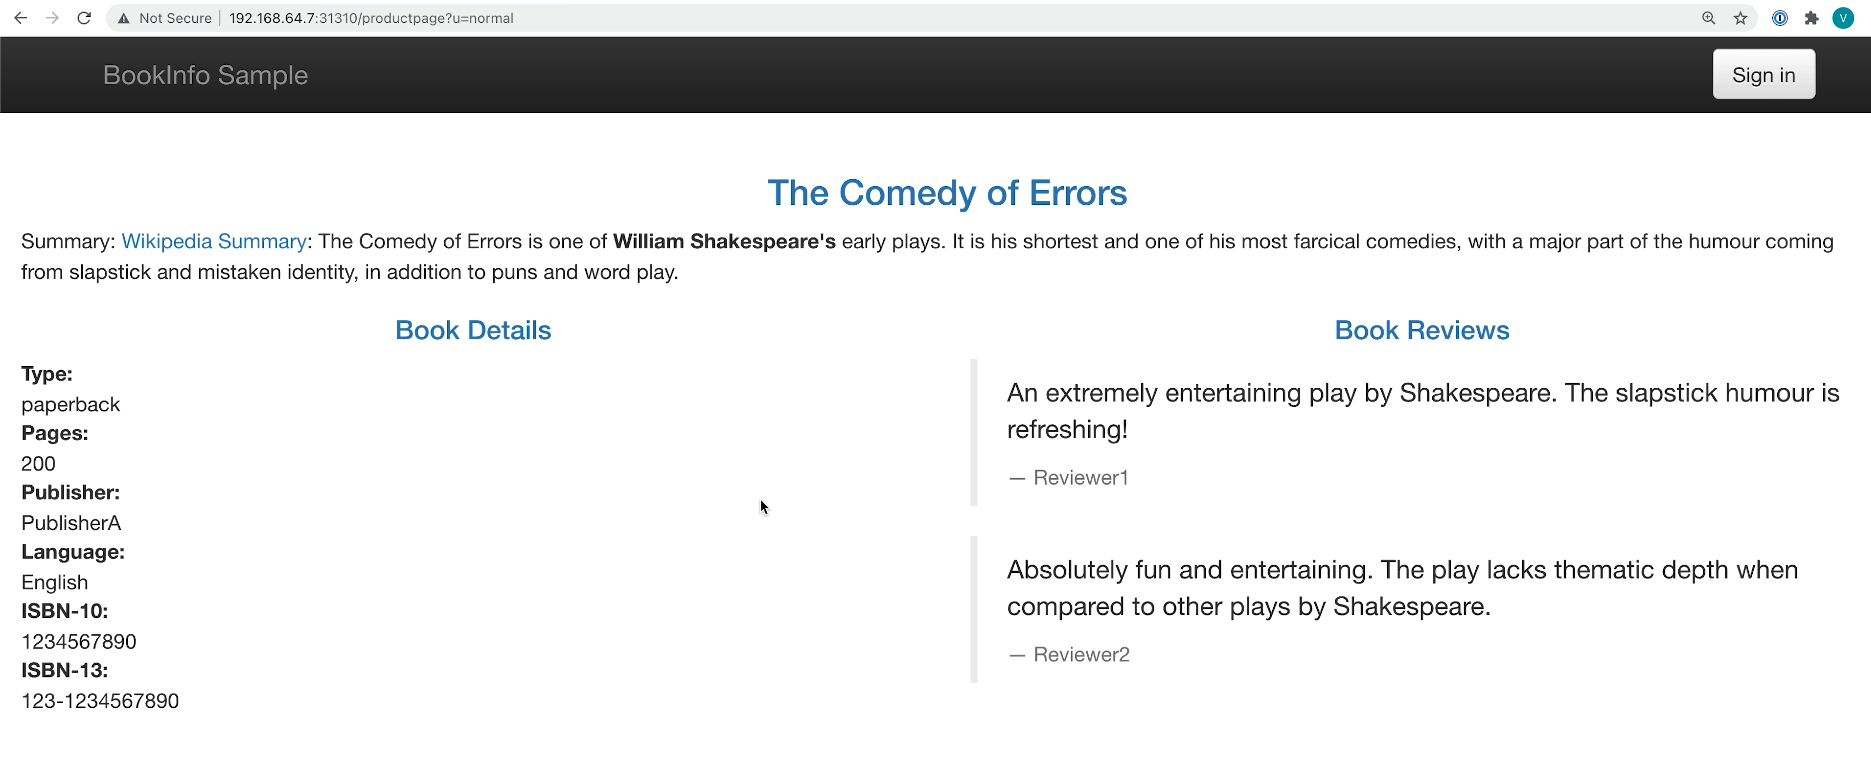
Let's open this in the browser and click around different versions. Here’s what the normal user sees.
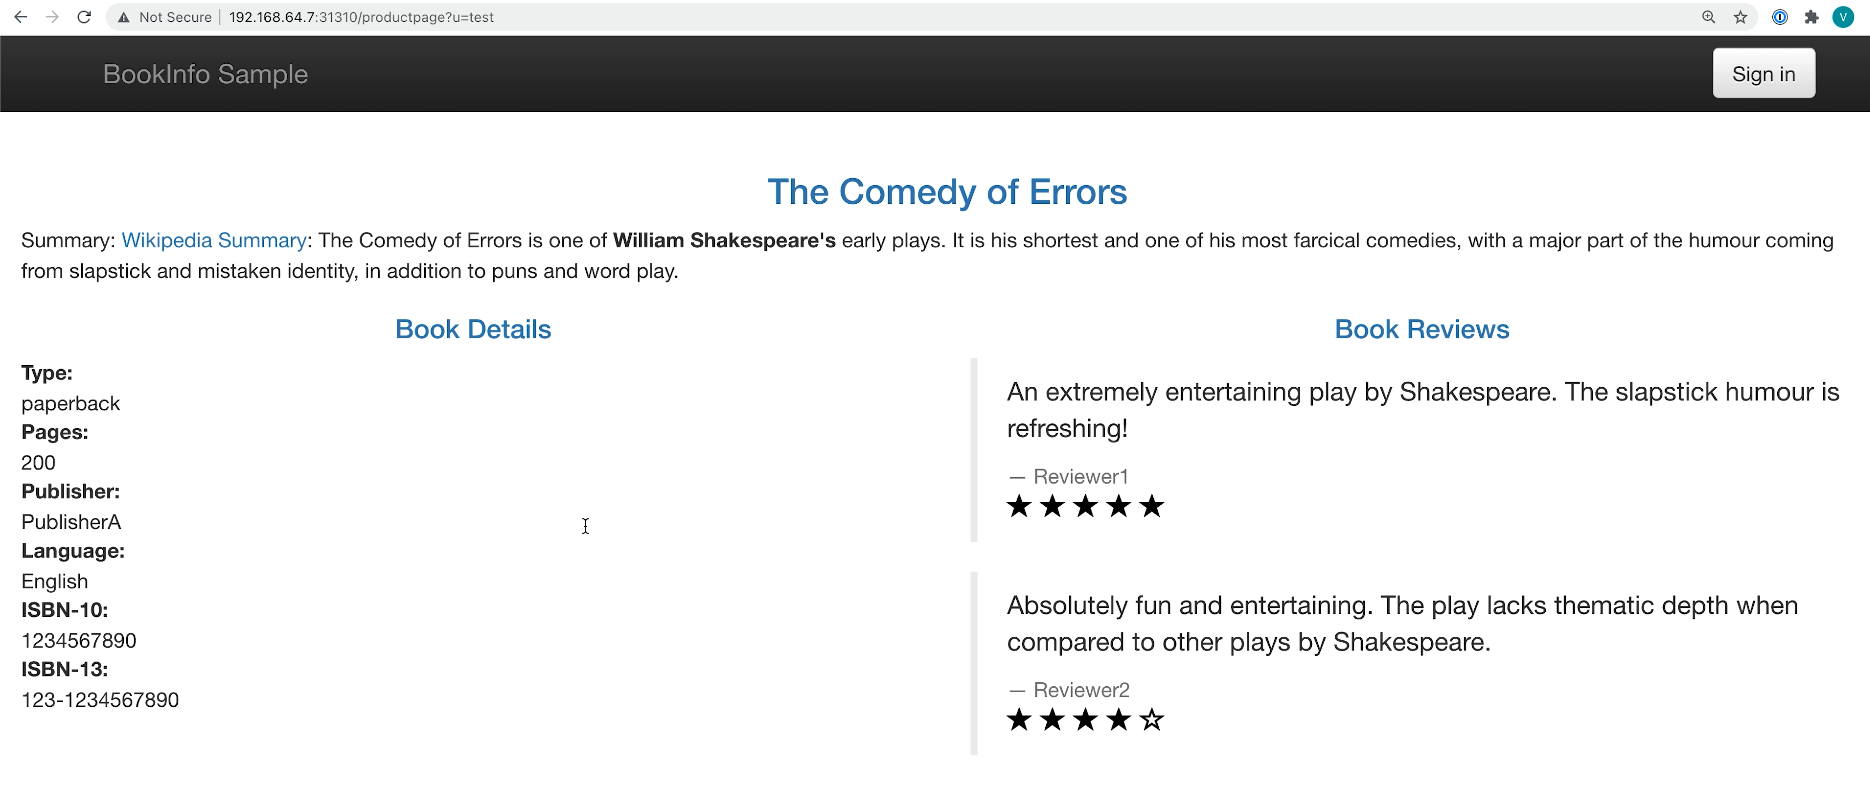
Here’s what the test user sees.
Add Observability Tools
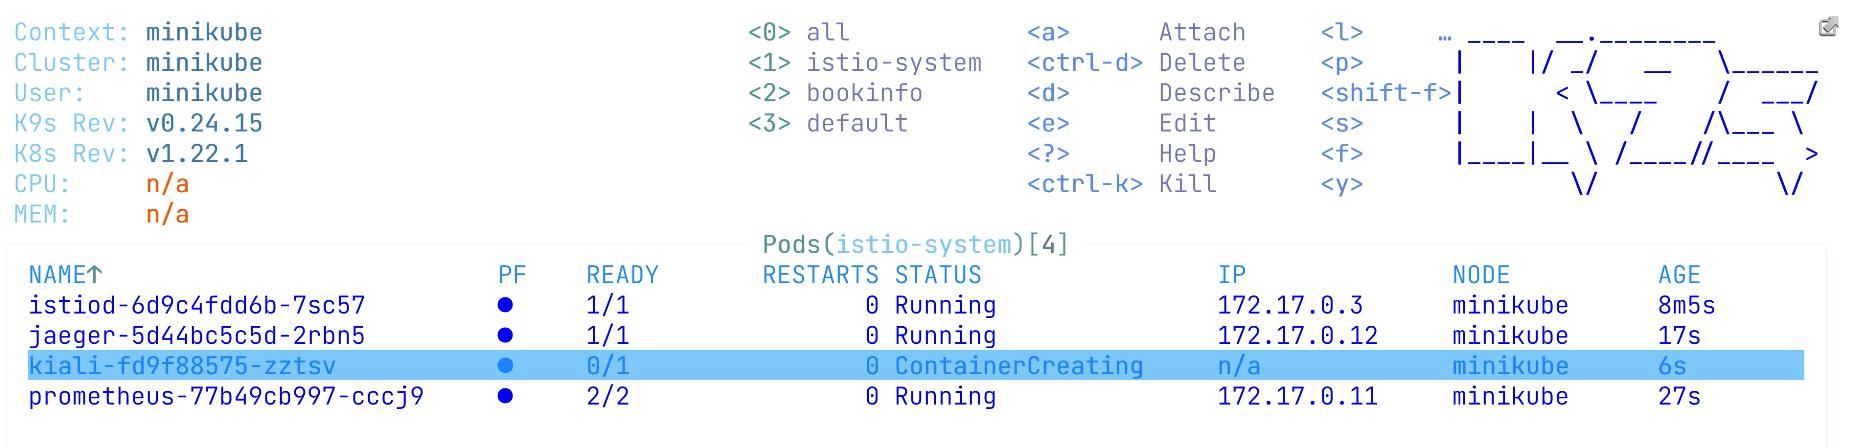
To review the internal beauty of this application, we’ll install some of the visibility tools that come with Istio. We’ll install Prometheus to capture metrics, Jaeger to capture the traces that services might have, and Kiali to observe what is going on with our services. We need to wait a few seconds until Kiali's service will be up and running because this is the place where we're going to be starting.
We need to expose the port where Kiali is deployed. We can go with the browser and see it there. We're interested in a book info namespace. So that's why we will drill down here.
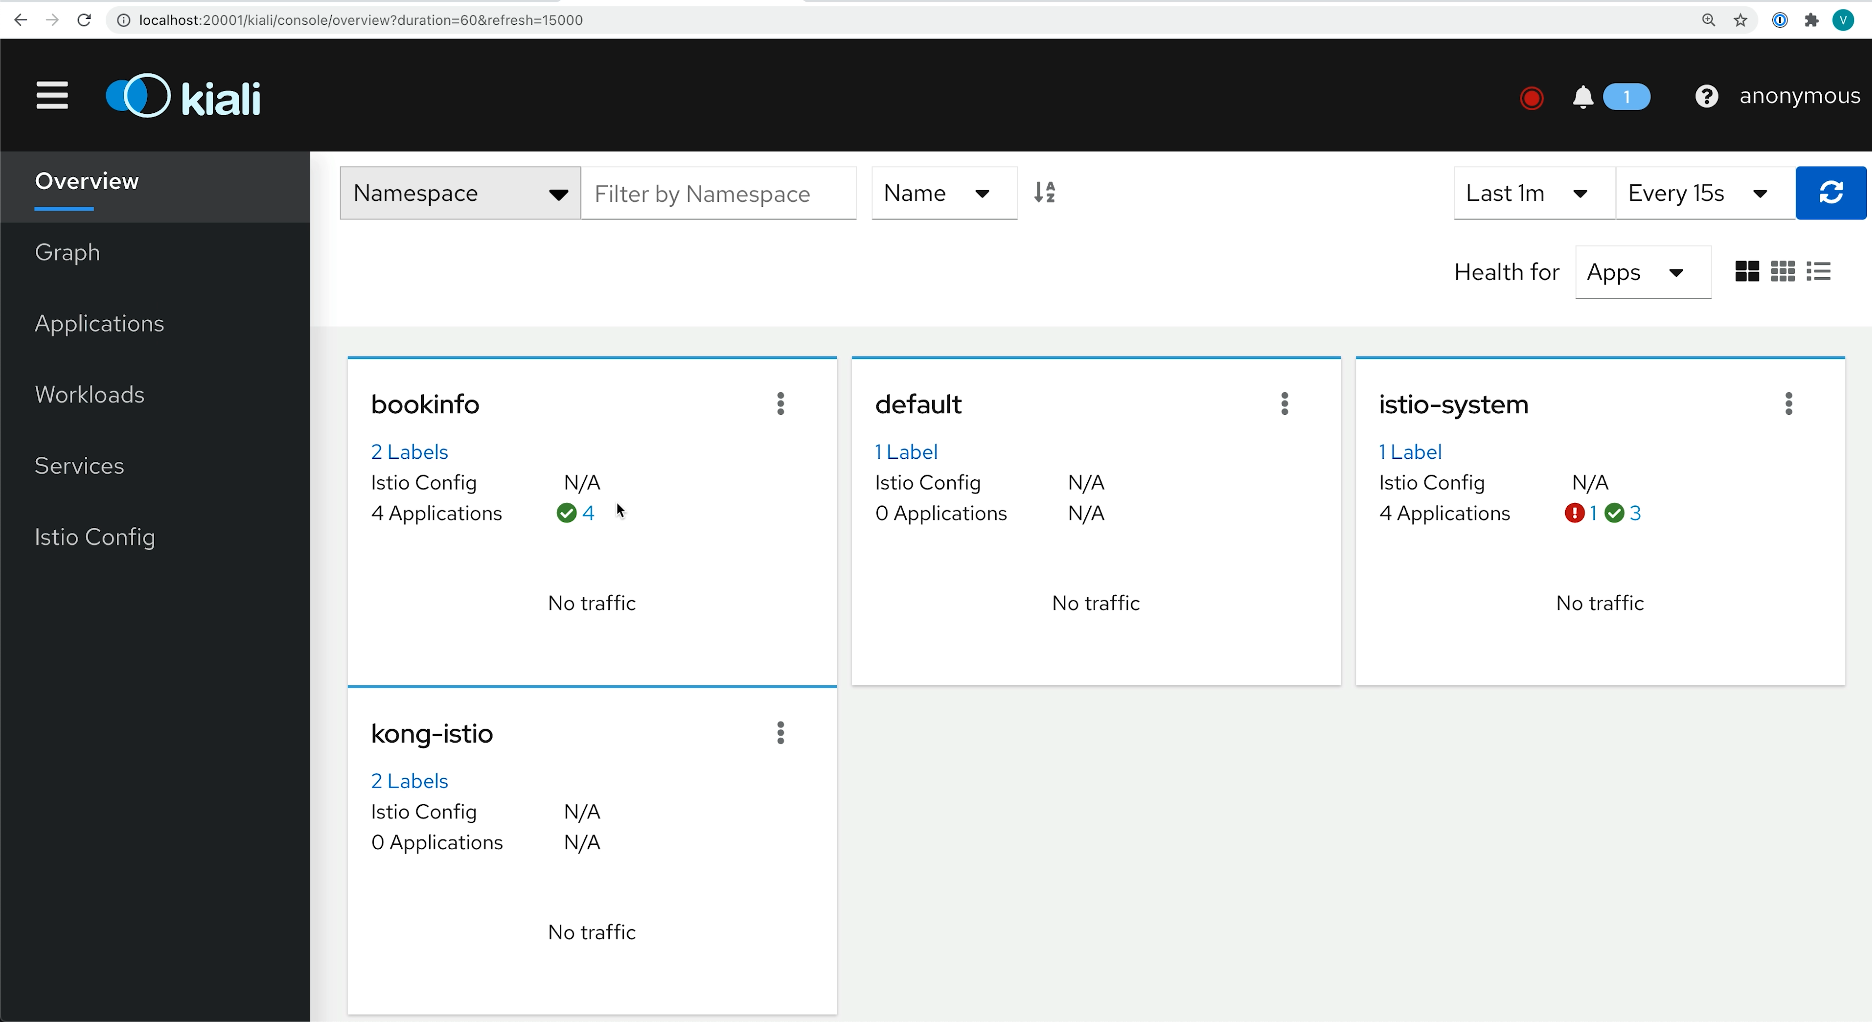
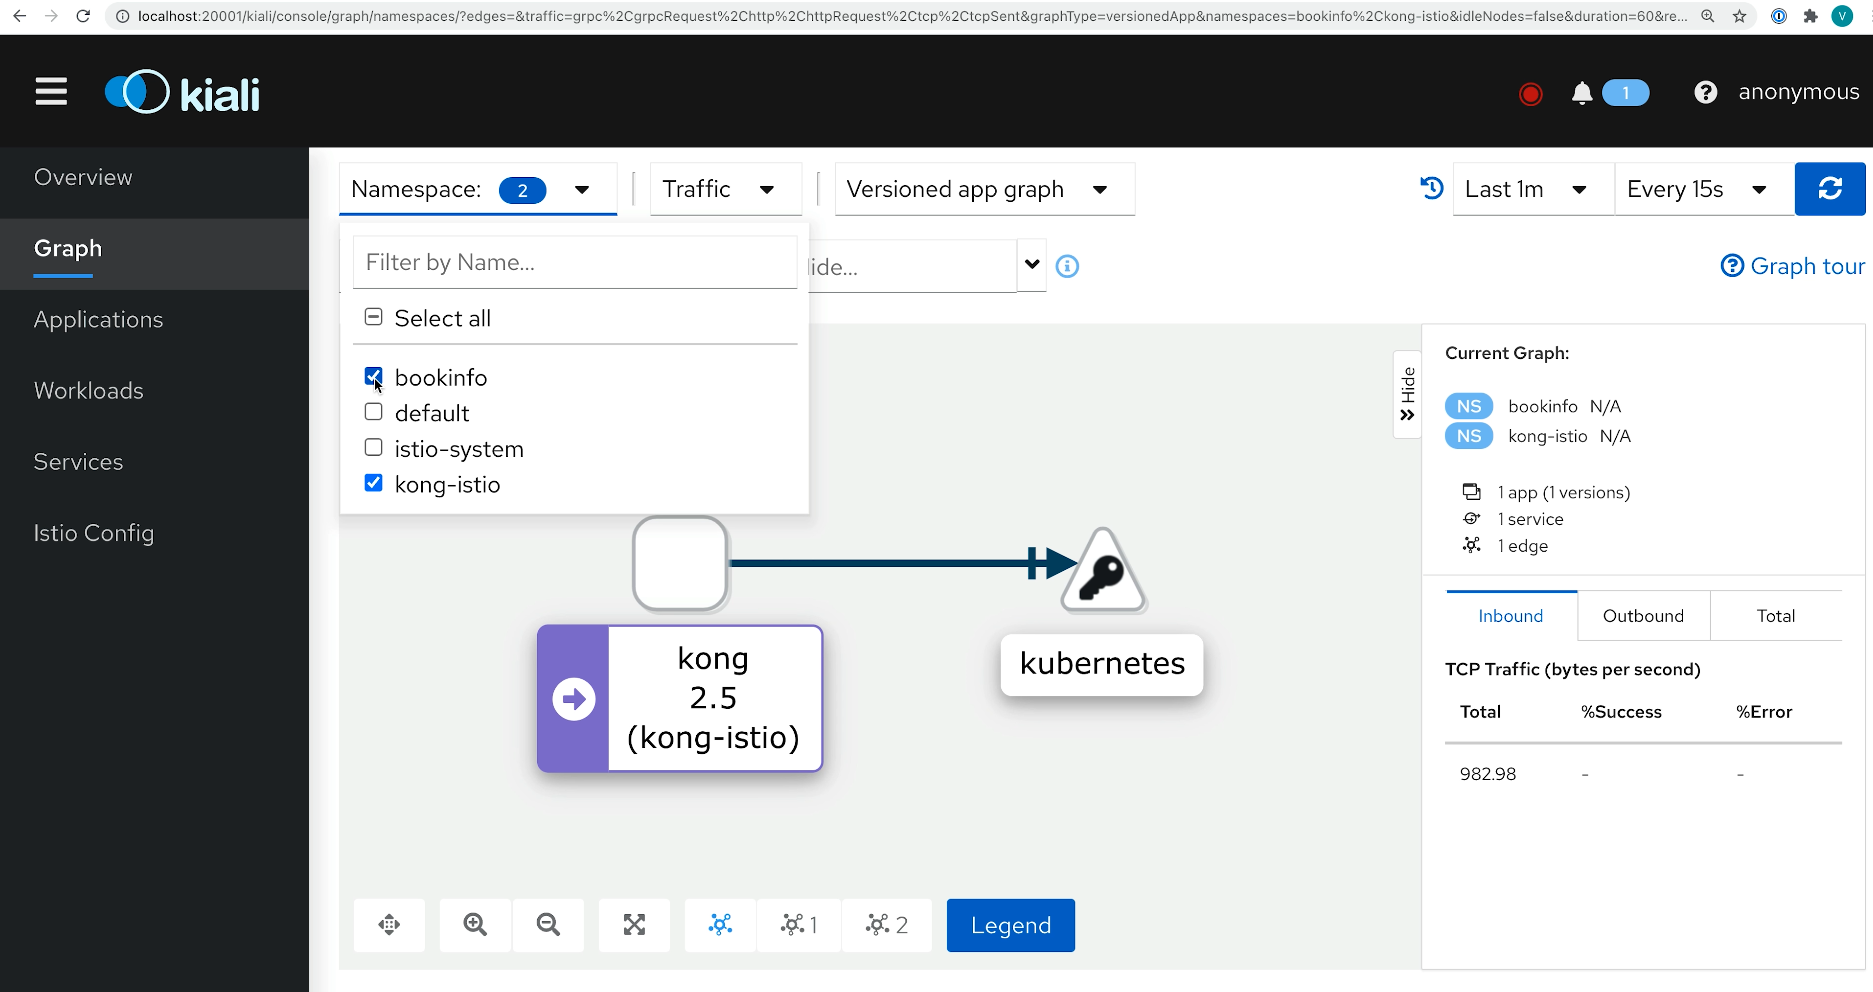
And let's see the graph of our application. We have the bookinfo and kong-istio namespaces enabled. Not much else is going on because we didn't send traffic yet through the ingress. So let's do this.
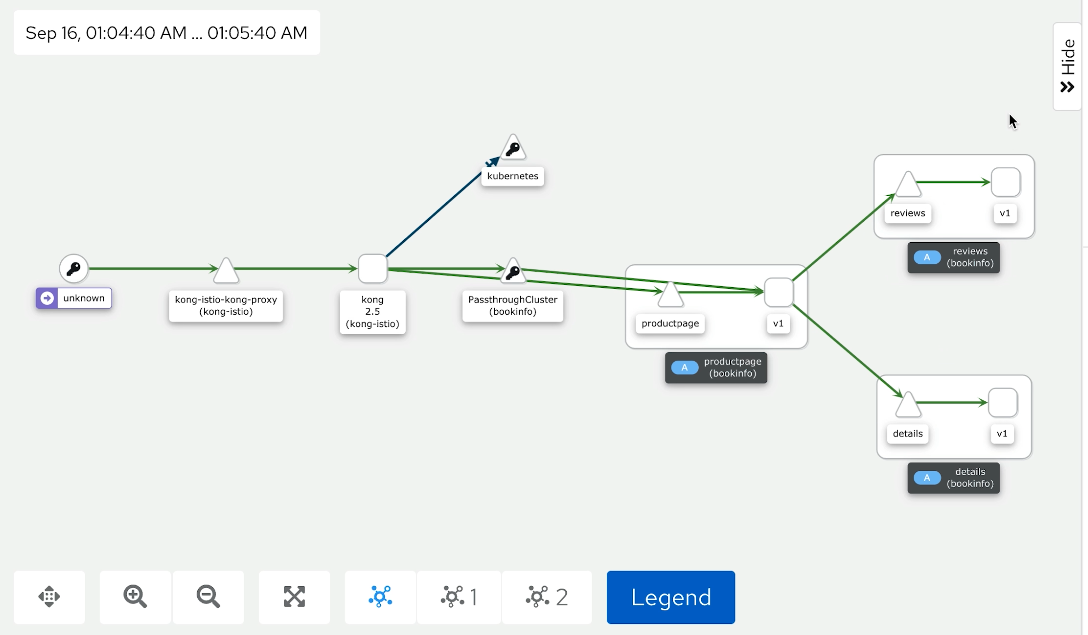
This browser is going to this application through the ingress for normal and test users, so we're hitting kong-ingress here.
If we refresh the screen, we immediately start seeing all traces – all the things going on in our application.
Simulate Normal User Behavior
Let's have some fun with this deployment and deploy some additional destination rules. We want to see that random load balancer routes us to different versions every time we hit our review service.
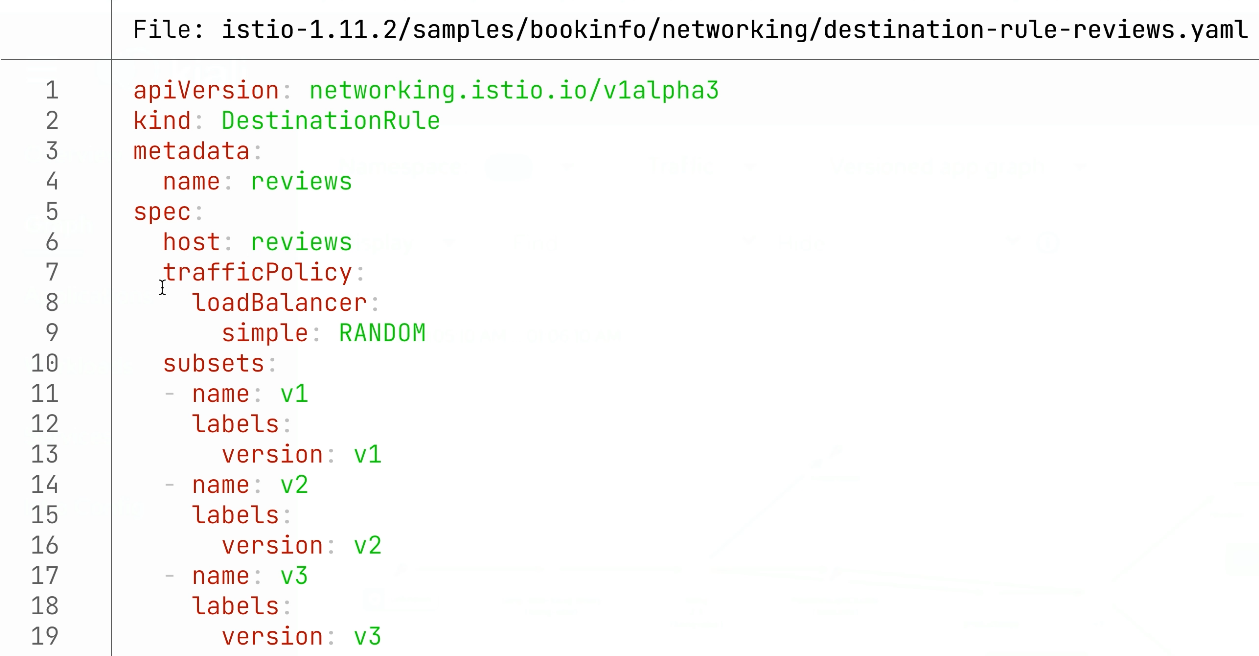
Just for fun, just to see how it works and how we can observe this, let's apply this with kubectl apply file (kaf).
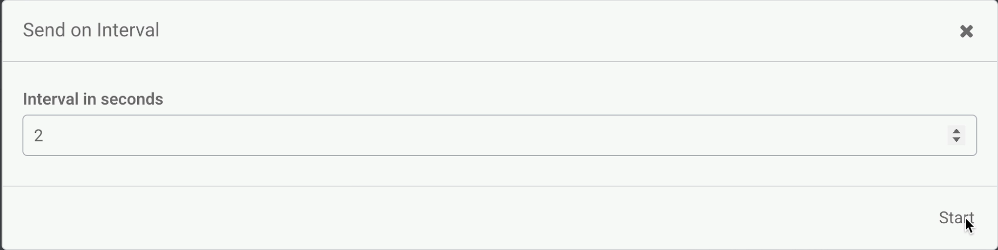
kaf istio-1.11.2/samples/bookinfo/networking/destination-rule-reviews.yamlNext, we will use Insomnia’s functionality that allows us to repeat certain requests at a particular interval.
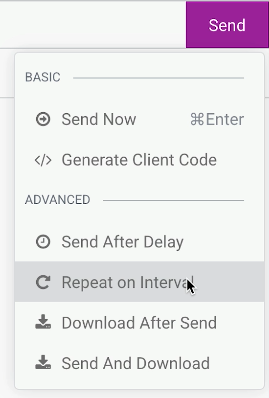
We're going to hit this page with the two-second interval to simulate user behavior – like someone is hitting this page, the same way we can go to different pages and pretend that a normal user is clicking around here with a two-second interval.
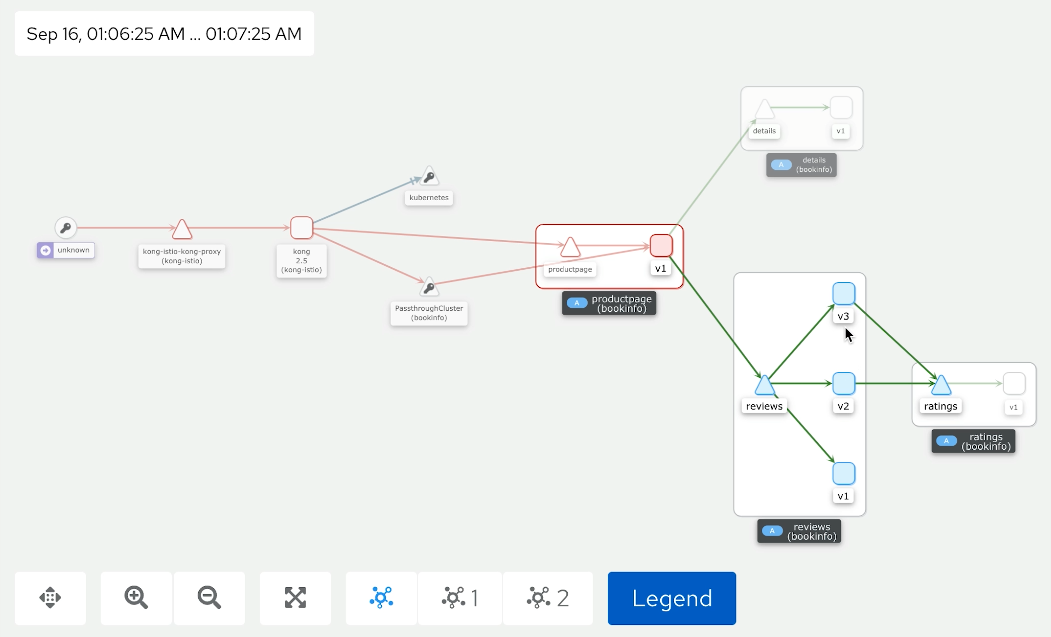
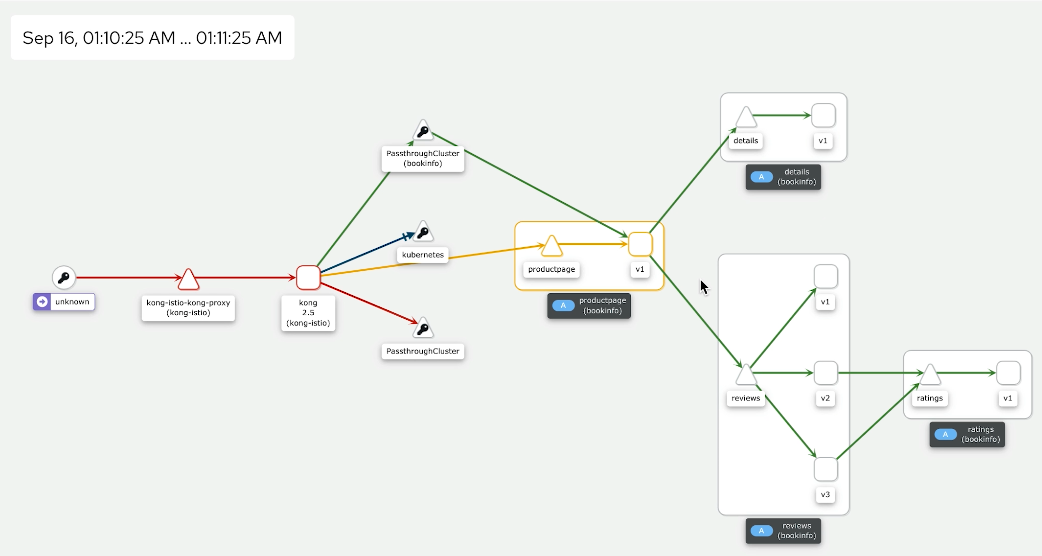
We can get back to the Kiali UI and see what we have. Whenever we hit views, we go into a different version of this review service. Some of the services depend on the rating application, and some of the services don’t. So that's why we might see some of the ratings and sometimes we cannot see some ratings. With these traffic policies, we can have a very flexible routing to our application.
Protect Your Services With the Rate Limiting Plugin
Next, we’ll enable some of the Kong plugins with plugin.yaml in this deployment and see how we can leverage this. We're going to be deploying a rate limiting plugin with 30 requests per minute.
apiVersion: configuration.konghq.com/v1
kind: KongPlugin
metadata:
  name: rate-limit
  namespace: bookinfo
plugin: rate-limiting
config:
  minute: 30
  policy: local
Then, we're going to do kubectl apply plugin (kaf plugin.yaml).
The next step will be enabling this plugin for ingress. After applying this plugin, we need to modify our ingress to enable this plugin for a particular ingress. In this case, we're adding a notation called konghq.com/plugins. And we enable this plugin here.
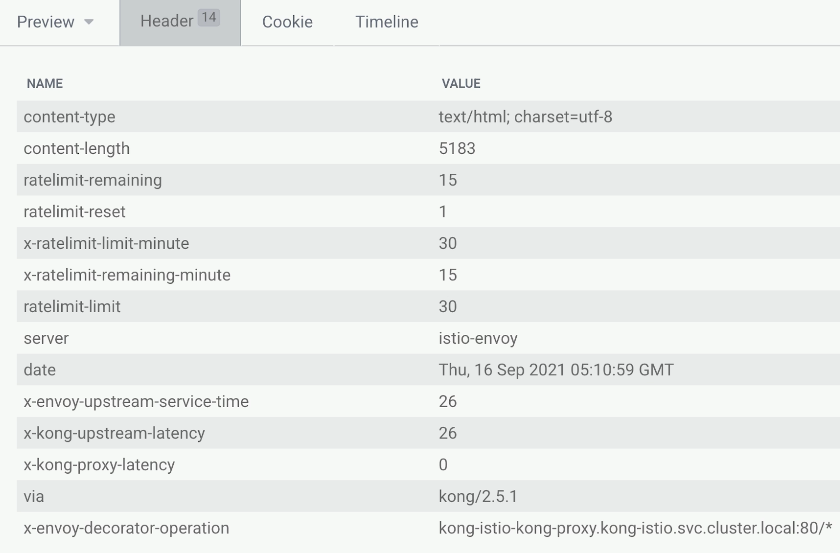
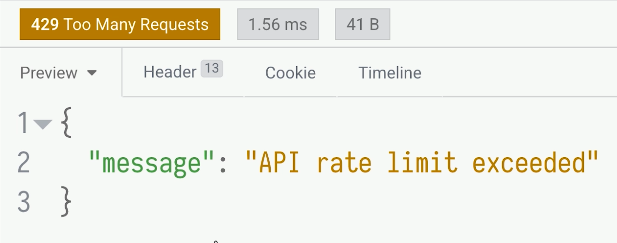
kubectl -n bookinfo patch ingress productpage -p '{"metadata":{"annotations":{"konghq.com/plugins":"rate-limit"}}}'We do have some extra headers for our rate limiting. We know when it will expire, how many requests we have left, and when the next time will be when we have an opportunity to submit new requests. So we have it here.
We submit this every second to get a quicker result. After a while, we start seeing some errors. We quickly see the API rate limit exceeded, meaning that's just too many requests that happen here.
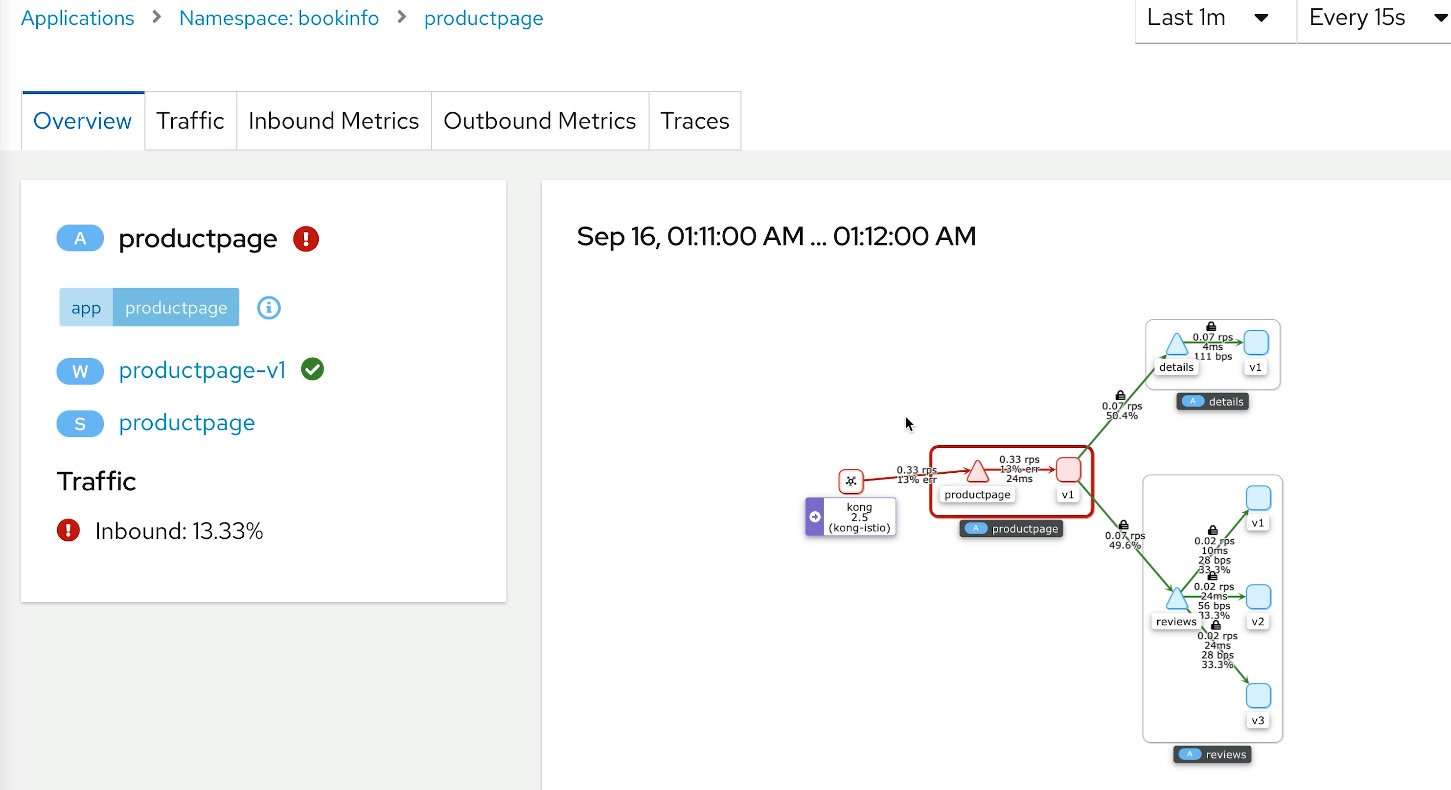
And Kiali will be able to capture this 429 error in a UI, and we will be able to observe this in a UI quickly because Kong is pushing back. So we will see this red line when the browser hits Kong, and we see these errors below.
Because we cannot access this product page, Kiali thinks there are 429 errors, which aren’t as critical as a 500 or a 502 but still errors.
Supercharge Your Istio Clusters With Kong Istio Gateway
Now you’re ready to use Kong Istio Gateway to secure, control and expose Istio services via 100+ Kong Plugins at the edge and internally.
Recommend
About Joyk
Aggregate valuable and interesting links.
Joyk means Joy of geeK