

A guide for serving local files securely to authorized users
source link: https://www.devbridge.com/articles/secure-file-sharing-tutorial/
Go to the source link to view the article. You can view the picture content, updated content and better typesetting reading experience. If the link is broken, please click the button below to view the snapshot at that time.

5 steps for secure file sharing
Jaroslav Rynkevič
11.08.21
How to host and serve files securely
Sharing specific files via URL tends to be rather simple. However, there are times when files warrant added security measures. For example, a developer hosts files (i.e., images, HTML, and CSS) that need to be protected by authorization and accessible via URL. The main component for authorization to work is a key that we are generating. When keys are stored in cookies, consequent requests to serve files will already be authorized and enable viewing of simple HTML-based web pages. This article provides a step-by-step guide for setting up static files with authorization.
The use case for file authorization
The Devbridge team was working on a project where viewing documentation was generated by an external tool. The documentation included confidential information—hosting it publicly was not an option. As such, the team set out to serve static files only for authorized users.
We determined that a custom solution to serve and authorize HTML and subsequent files would be the best option. Submitting a manual request for the main file (HTML in this use case) would require a key for authorization, while any additional resources included in the main file authorization (e.g., an image, JS, CSS, or other media on the site) would be served automatically without a key in the URL.
5 steps to set up static file authorization in .NET core apps
The steps below detail how to serve a static file with authorization using examples that benefit from the approach (e.g., loading whole static HTML sites into an existing application). No one can access files without proper credentials.
NOTE: The code below shows how to implement simple key-based authorization for easy integration. For future reference, all of the code used in the tutorial can be found here.
1. Generate a key with cache.
A key must be generated and then passed as a URL parameter to safely serve a file via URL. The application then knows that the request comes from a valid user. As an added safety measure, store keys in a cache with an expiration period. If a key comes into possession of an unauthorized person, it expires after a set time, thus removing access to unknown resources.
This demonstration shows a simple key generation implementation. You can change everything from the key format to the cache provider or use external authorization services for further customization.
The code sample below uses a basic in-memory cache to hold keys and manage the expiration period.
private readonly IMemoryCache _cache;
Guid is generated as a key to provide uniqueness and authorization value. The cache duration includes a requirement for a key expiration period.
public Guid GenerateKey()
{
    var key = Guid.NewGuid();
    _cache.Set($"{CacheName}_{key}", key, TimeSpan.FromMinutes(CacheDurationInMinutes));
    return key;
}
2. Validate and register the key.
Be sure to validate the key after it’s created. If the key is present, valid, and not expired, the user moves on to gain access to the file.
public bool IsValid(string key)
{
    var valid = _cache.TryGetValue($"{CacheName}_{key}", out _);
    return valid;
}
The memory cache should be registered in Startup.cs.
services.AddMemoryCache();
services.AddSingleton<IKeyCache, KeyCache>();
3. Refresh the key.
Allow users to refresh the key if a new key generation is not an option.
public void RefreshKey(string key)
{
    if (IsValid(key))
    {
        var cacheEntryOptions = new MemoryCacheEntryOptions()
            .SetAbsoluteExpiration(TimeSpan.FromMinutes(CacheDurationInMinutes));

_cache.Set($"{CacheName}_{key}", key, cacheEntryOptions);
    }
}
4. Use middleware to store the file and authorize via the key.
AuthStaticFilesExtension creates options for the StaticFileMiddleware class to serve and authorize files using the key provided via URL. The GetOptions method contains the main logic. The location on the disc that stores files will need to be defined. It acts as a black box where everything happens. If the functionality works, then the user gains access. If not, a browser error appears.
var staticFilePath = Path.Combine(Directory.GetCurrentDirectory(), DirectoryName);

if (!Directory.Exists(staticFilePath))
{
    Directory.CreateDirectory(staticFilePath);
}
NOTE: When utilizing Microsoft Azure App Service, use the HOME environment variable for the current directory. More information can be found here.var staticFilePath = Environment.GetEnvironmentVariable("HOME");
Next, set up how to handle responses when a file is requested. A request query is checked for the key parameter to determine the next steps. In other words, a request query helps determine what steps to take if a key is or is not valid, either granting or denying access.
ctx.Context.Request.Query.TryGetValue(KeyName, out StringValues key);
If the key is in the URL and is present in the key cache, it is appended into cookies. Then, a requested file is returned successfully.
if (_keyCache.IsValid(key))
{
    ctx.Context.Response.Cookies.Append(KeyName, key, new CookieOptions
    {
        SameSite = SameSiteMode.None,
        Secure = true,
        HttpOnly = true
    });
}
Otherwise, request cookies are checked for key presence. If it is not found, unauthorized status is returned. Cookie creation combined with a key check gives file authorization without URL parameters and denotes how files requested by other files (e.g., JS, CSS for HTML) are authorized.
else if (!ctx.Context.Request.Cookies.ContainsKey(KeyName) || !_keyCache.IsValid(ctx.Context.Request.Cookies[KeyName]))
{
    ctx.Context.Response.StatusCode = (int)HttpStatusCode.Unauthorized;
    ctx.Context.Response.ContentLength = 0;
    ctx.Context.Response.Body = Stream.Null;
}
An optional step: All files do not need to be cached. Set a no-cache header for files with sensitive content so that user’s browsers don’t save them. The line below shows how it's done.
ctx.Context.Response.Headers.Add(HeaderNames.CacheControl, CacheControlHeaderValue.NoStoreString);
Lastly, register the file provider.
FileProvider = new PhysicalFileProvider(staticFilePath),
RequestPath = $"/{DirectoryName}"
Be sure to register the middleware in the Statup.cs file. A key provider must be passed as a parameter.
var keyCache = app.ApplicationServices.GetService<IKeyCache>();
app.UseAuthStaticFiles(keyCache);
5. Test and demo.
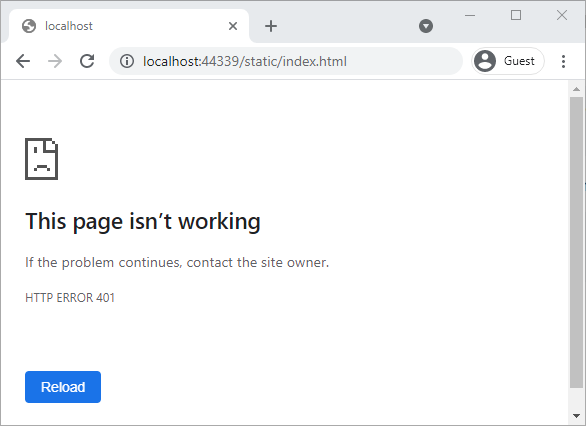
Send a request to {URL}/{directory name}/{file name} using https://localhost:44339/static/index.html to access the static file. As expected, a 401 error is received, which notes unauthorized usage.
A key needs to be generated to authorize use and depends on the key provider implementation.
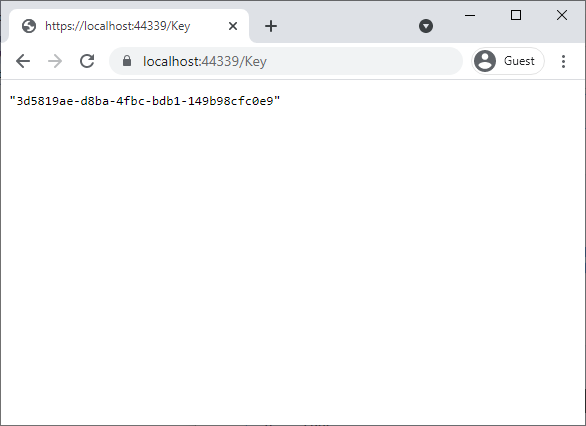
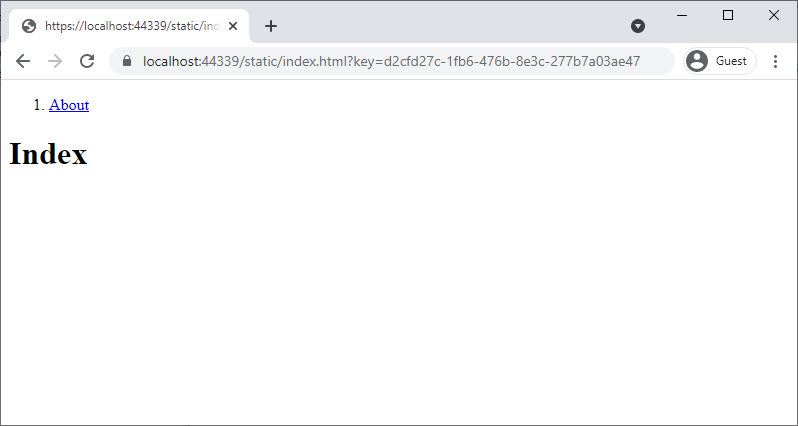
In this demonstration, the key API method calls for files to be accessed with a generated key provided as a query parameter.
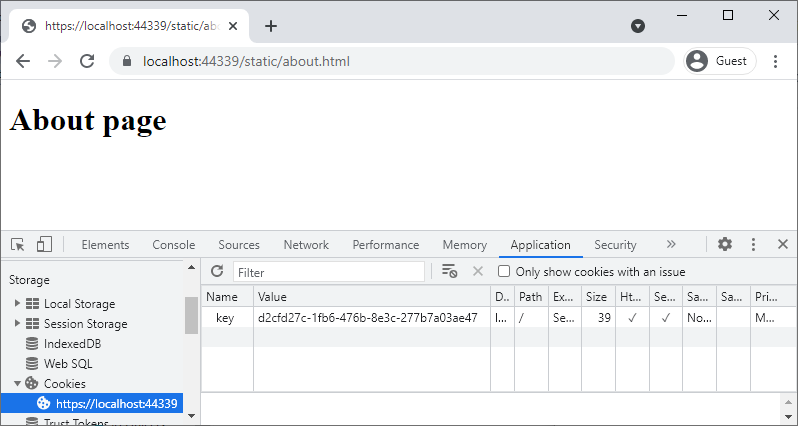
No key in the query parameter is required when the about page navigation appears as the generated key is stored in cookies.
Conclusion
Taking the steps noted in this article helps ensure files and sensitive information remains secure. An important takeaway of the implementation is to create keys as you see fit. The mechanism to store keys can be changed, leaving room for customization. The use of keys creates an authorization for the files via custom middleware. Be sure to check out the code provided and see for yourself how it works.
Recommend
About Joyk
Aggregate valuable and interesting links.
Joyk means Joy of geeK