

How to Bypass Cognito-Hosted UI With Federated Sign In
source link: https://spin.atomicobject.com/2021/11/02/bypass-cognito-hosted-ui/
Go to the source link to view the article. You can view the picture content, updated content and better typesetting reading experience. If the link is broken, please click the button below to view the snapshot at that time.

How to Bypass Cognito-Hosted UI With Federated Sign In
Amazon Cognito has many useful tools for authentication workflows, including federated sign-in with third-party identity providers. As part of this workflow, Cognito provides a hosted UI to easily integrate social sign-in to your application. However, if you would prefer to create your own sign-in UI and not just customize what Cognito has to offer, it’s possible to bypass the UI completely. Below is the simple process for skipping over Cognito’s hosted UI while still using federated authentication.
Before We Begin
The example below is from a React app using the AWS Amplify library. Although the example uses Google as the identity provider, it works for other providers as well.
This guide assumes you have set up a Cognito User Pool and properly configured it for federated authentication. Make sure that you also configure the amplify auth library (Auth.configure) using the values from your user pool.
Implementation
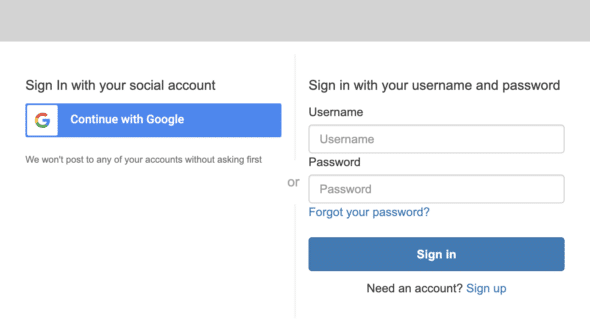
By default, calling Auth.federatedSignIn() will route users to Cognito’s hosted UI.
In our case, we will completely skip over this method call. Instead, we can navigate directly to the URL that Cognito uses when a user clicks on a link from the Cognito-hosted UI. One easy way to find this URL is to simply inspect the buttons on the hosted UI to see what they do. In this example, when we inspect the button for Google, we see the following onClick handler:
onclick=“window.location.href=‘/oauth2/authorize?identity_provider=Google&redirect_uri=http://localhost:3000&response_type=CODE&client_id=**************&scope=email openid profile'"
Using our Cognito domain as a prefix, we can use this URL to navigate directly to the identity provider’s sign-in screen.
example-cognito-domain.us-west-1.amazoncognito.com
/oauth2/authorize?identity_provider=Google&redirect_uri=http://localhost:3000&response_type=CODE&client_id=**************&scope=email openid profile
Now we can attach this URL to the onClick handler of a button in some custom UI. Simply set the onClick handler of your button to the following:
() => window.location.href=example-cognito-domain.us-west-1.amazoncognito.com
/oauth2/authorize?identity_provider=Google&redirect_uri=http://localhost:3000&response_type=CODE&client_id=**************&scope=email openid profile
This will take us directly to Google’s sign-in screen where we can select an account to sign in with.
Bypass Cognito-Hosted UI
Although Cognito’s hosted UI is useful, it’s limiting when it comes to customizing the look and feel of the login page. Using the strategy above, we can easily create your own UI while still leveraging the federated sign-in capabilities of Cognito.
Recommend
About Joyk
Aggregate valuable and interesting links.
Joyk means Joy of geeK