

Create an Amazon SNS SQS Pub/Sub Model in Mule 4 - DZone Integration
source link: https://dzone.com/articles/amazon-sns-sqs-publish-subscribe-model-in-mule-4
Go to the source link to view the article. You can view the picture content, updated content and better typesetting reading experience. If the link is broken, please click the button below to view the snapshot at that time.
MuleSoft — SNS Connector
Anypoint Connector for Amazon SNS (Amazon SNS Connector) provides connectivity to the Amazon Simple Notification Service (Amazon SNS) API, enabling you to build distributed web-enabled applications. Mule apps can use Amazon SNS Connector to easily push real-time notification messages to interested subscribers over multiple delivery protocols.
MuleSoft — SQS Connector
Anypoint Connector for Amazon SQS (Amazon SQS Connector) provides an easy way to interface with the Amazon Simple Queue Service (Amazon SQS) API, enabling Mule users to manage SQS queueing services without having to interact with the API directly.
Prerequisites
Before using an Amazon SNS/SQS connector we need the following:
- An AWS account with access to the Amazon SNS/SQS.
- AWS identity and access management (IAM) credentials. These credentials include an access key and secret key.
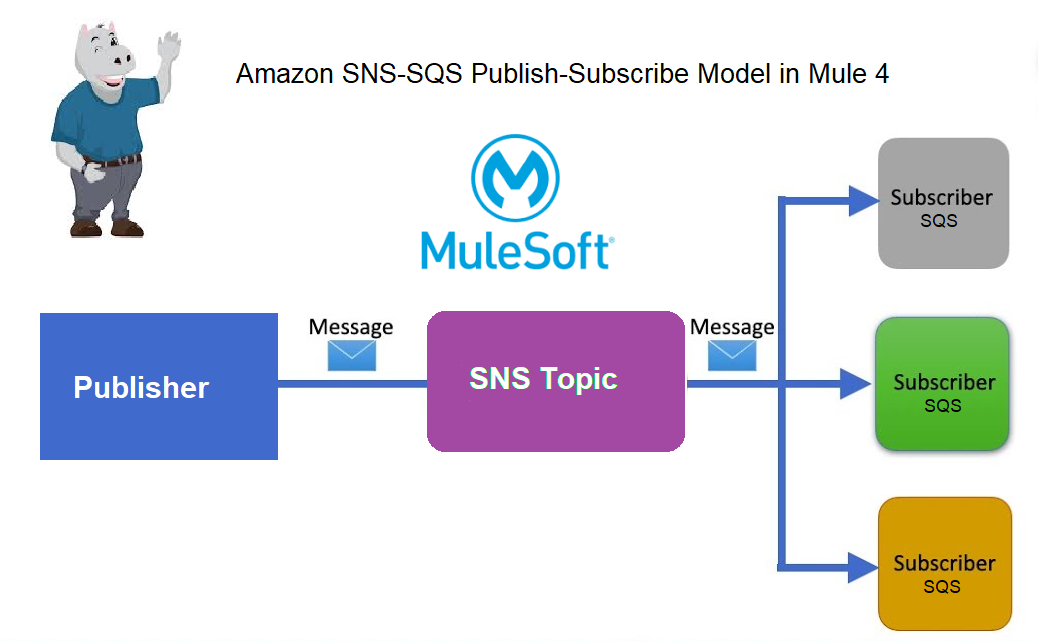
Demo SNS SQS Pub/Sub Application
We have to follow the below steps:
- Create SQS Queues and SNS Topic.
- Subscribe the SNS Topic to the SQS Queues.
- Add permissions to Queues to receive messages from Topic.
- Publish a message to Topic.
- Retrieve messages from Queue.
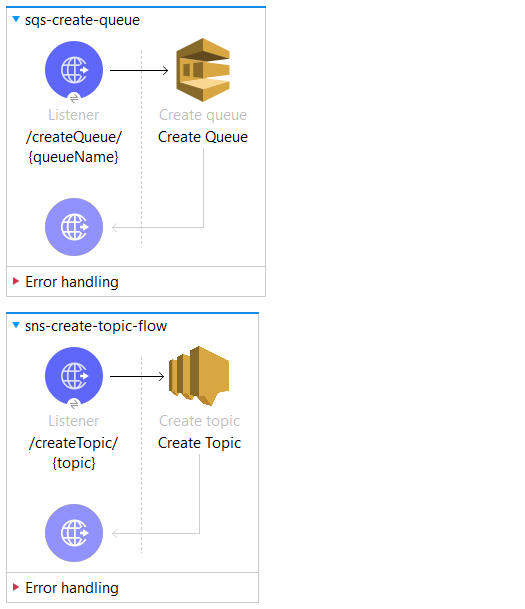
We are using an HTTP listener to invoke functionalities like creating Queues, creating Topic, and publishing messages to the Topic. We are further using SQS create queue, SNS create topic, SNS Publish, and SQS Retrieve connector. Below are the steps in detail:
Step 1: Create SQS Queues To Be Subscribed and SNS Topic
PFB the configurations for SNS and SQS:
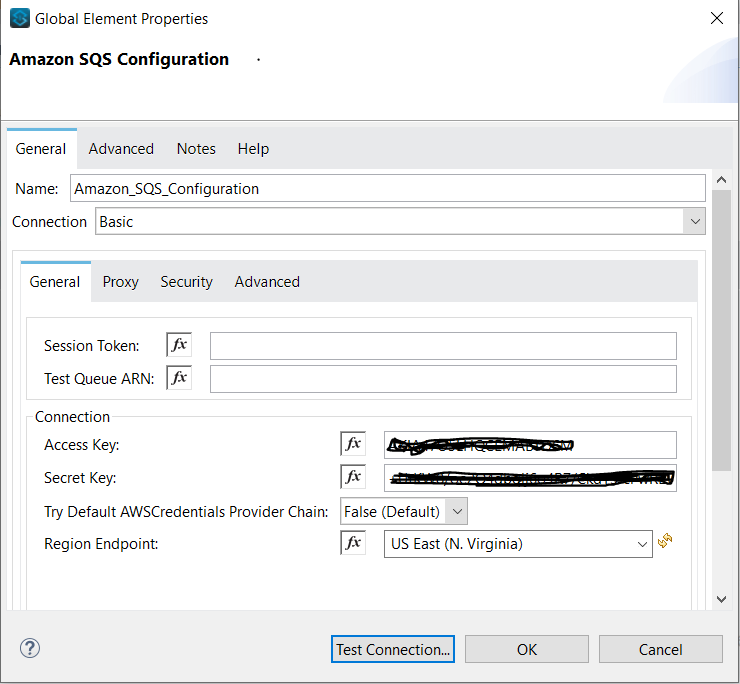
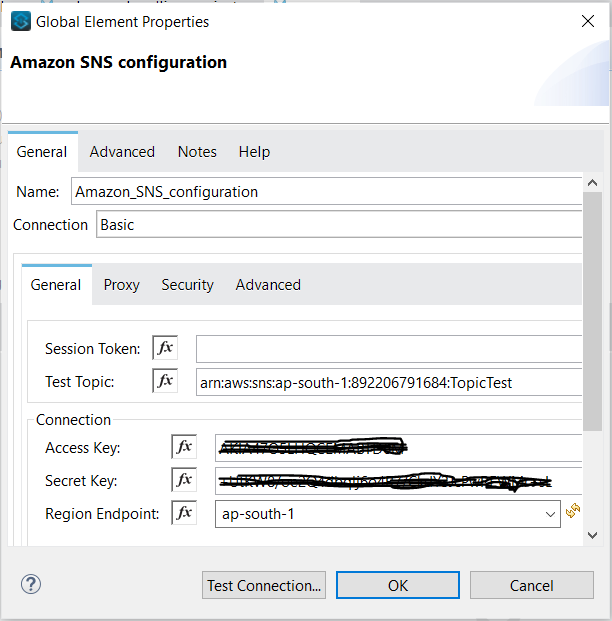
Make sure that the test connection is successful.
We have to send queueName and topic to be created in the Uri parameter.
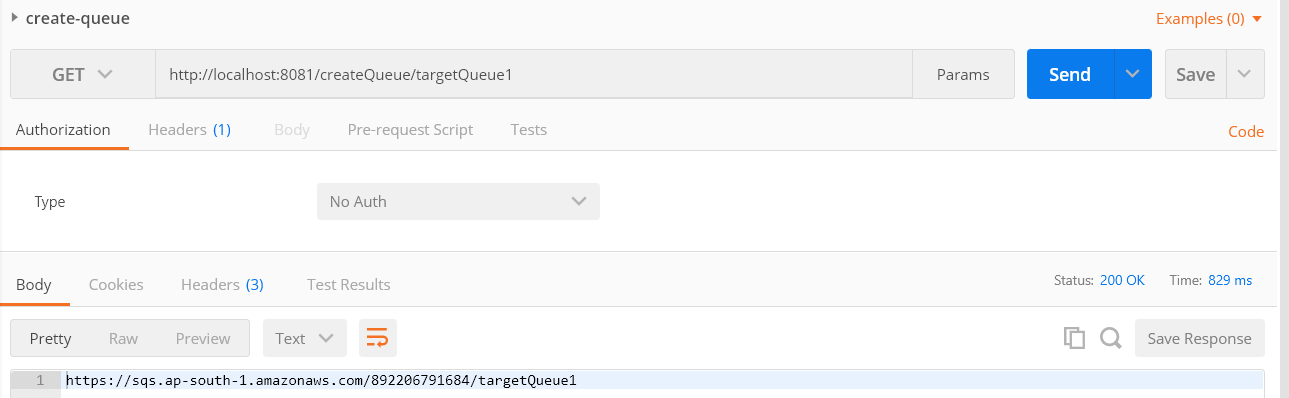
We'll create three target queues: targetQueue1, targetQueue2 and targetQueue3. PFB the create queue request-response. Please copy the queue URL received as a response. We will use it for further requests.
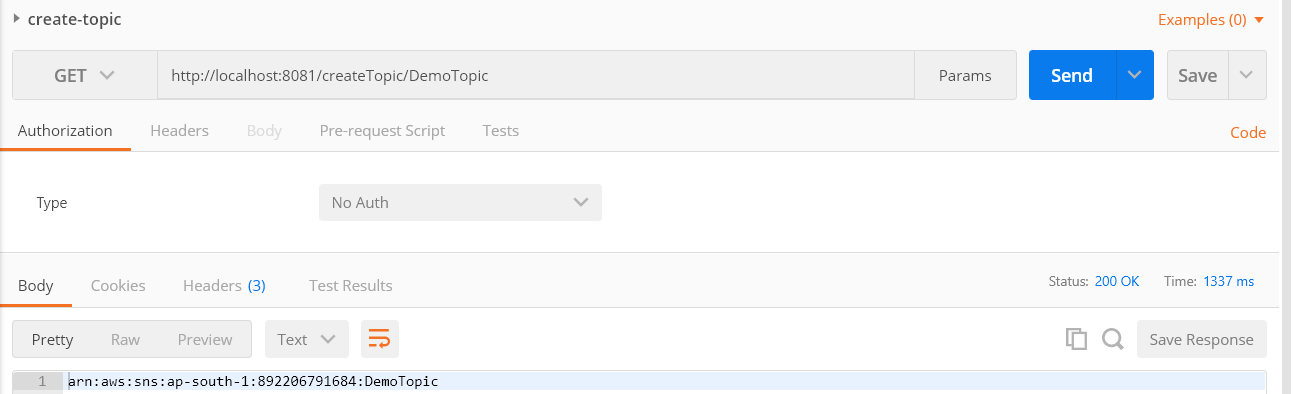
We'll create SNS Topic — DemoTopic. PFB the create topic request-response. Please copy the topic ARN received as a response. We will use it for further requests.
We've successfully created the queues and topic so far.
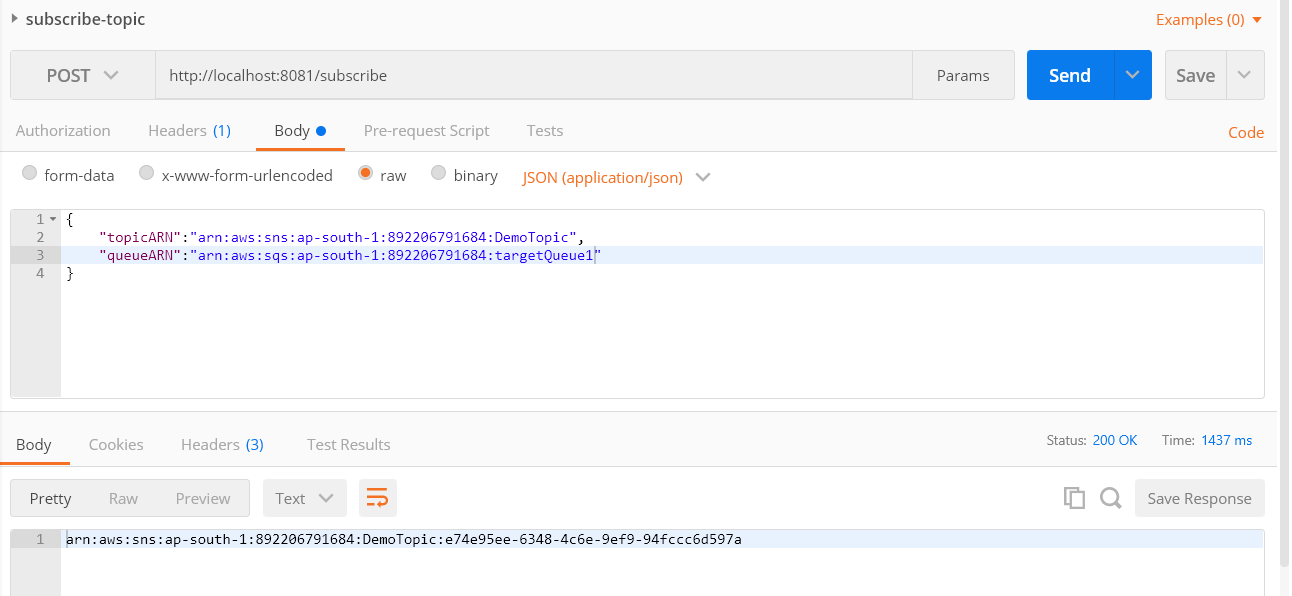
Step 2: Subscribe the SNS Topic to the SQS Queues
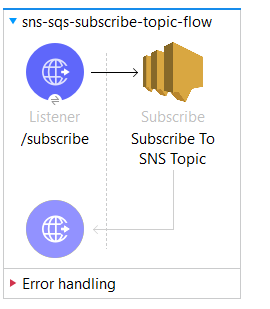
Subscribe to SNS Topic Config.
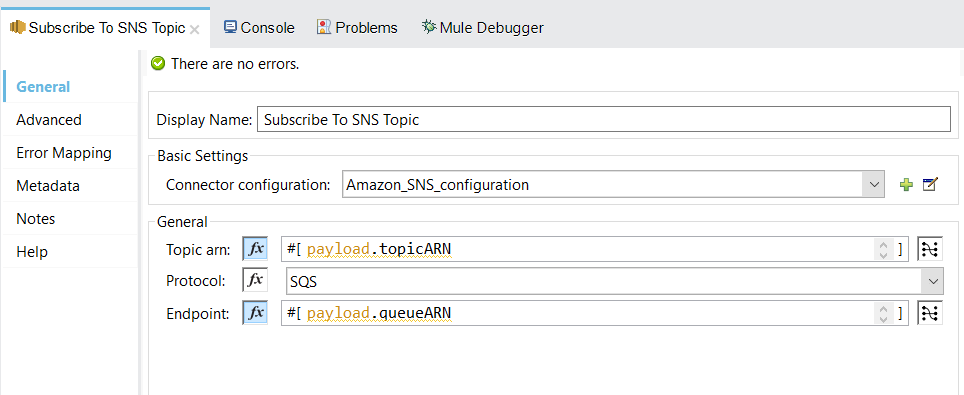
We will subscribe to the topic DemoTopic for all the target queues. We need to provide topic ARN and queue ARN in the request payload. We can get the queue ARN from the queue URL. PFB the postman request-response.
Step 3: Add Permissions to Queues To Receive Messages From Topic
We need to provide the permissions to the SQS Queue to receive messages from a subscribed topic. In order to do this, we need to add the topic to the access policy of the queue. We will do the same for all the target or subscriber queues.
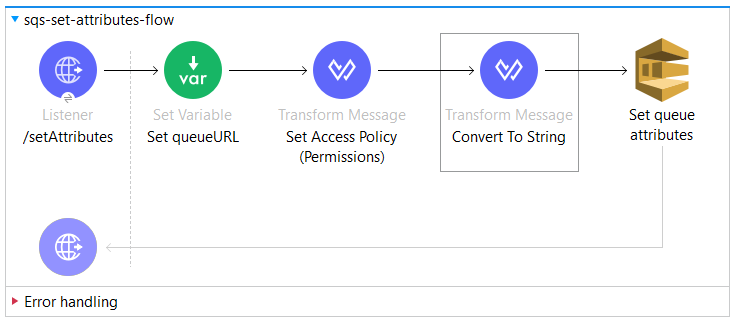
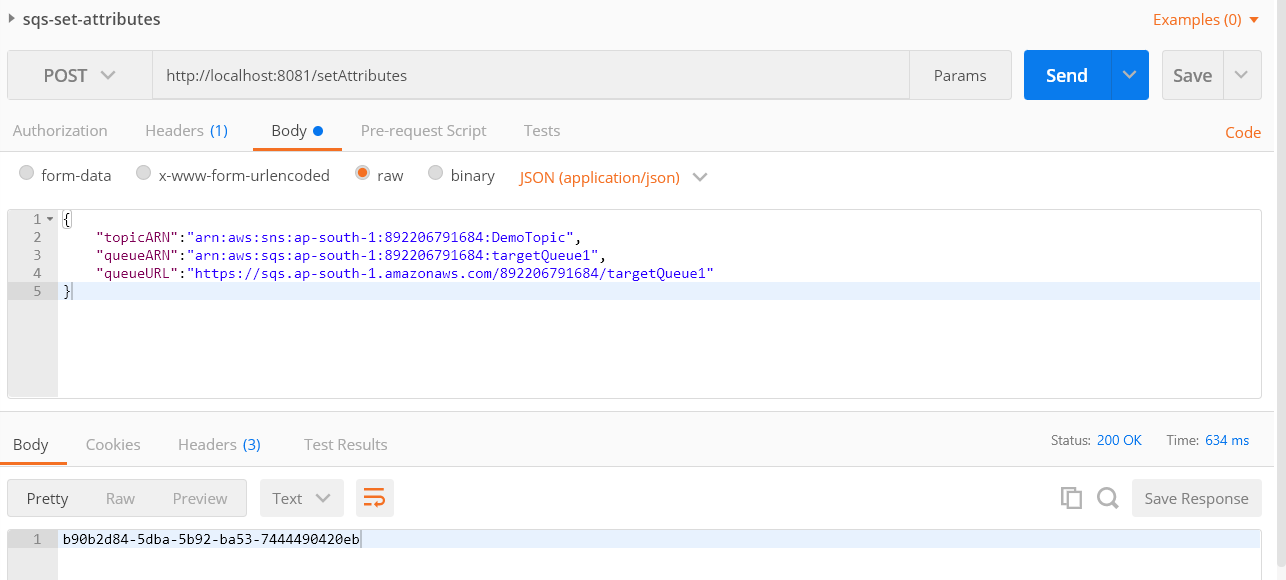
Request payload will have topic ARN, queue ARN, and queue URL. We will store the queue URL from the payload to a variable, as we'll need to pass it to the Set queue attributes connector at the end of the flow.
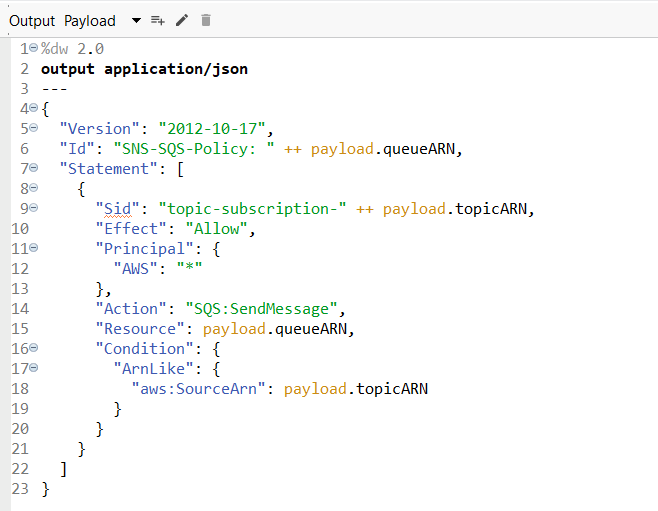
Set Access Policy Transform.
Convert to String Transform:

We need to convert the policy to text and then send it to the SQS set attribute connector.
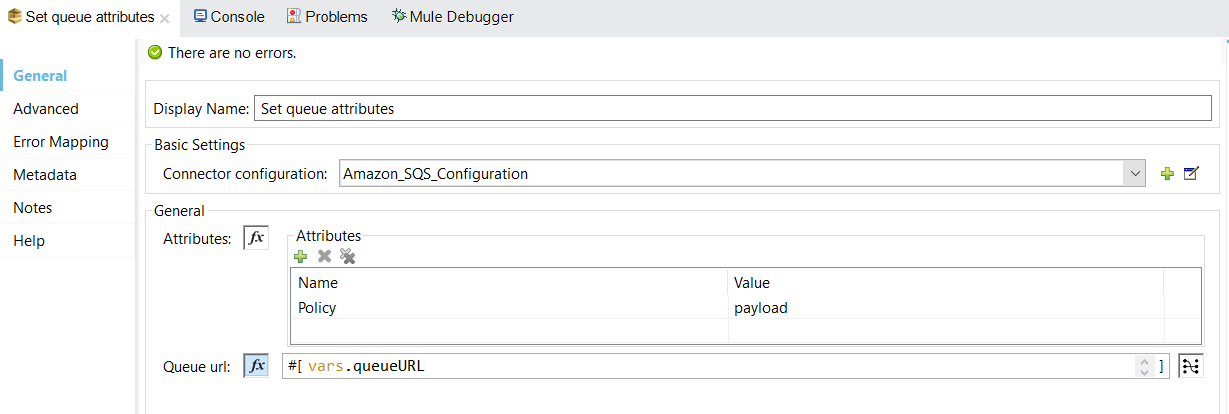
Set queue attributes.
PFB the postman request-response for reference.
Now we are all set to publish a message to the SNS Topic.
Step 4: Publish a Message to SNS Topic

Payload to String Transform:
We need to convert the payload to text/plain format and then publish it. PFB the postman request-response for reference.
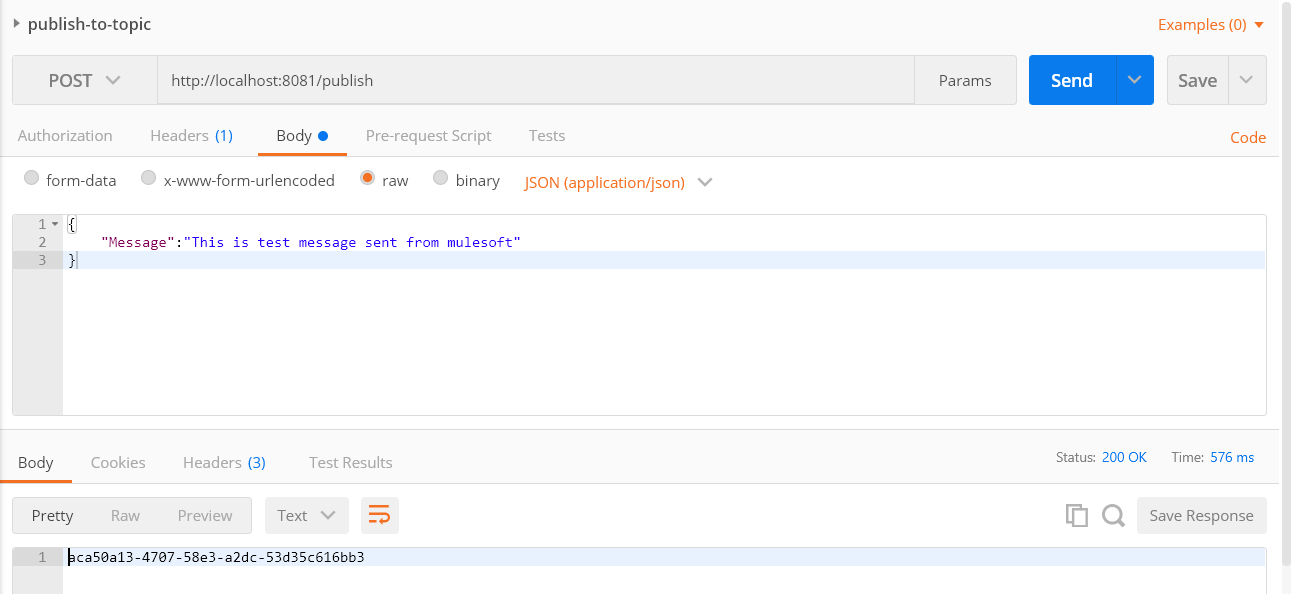
The message is published successfully to the SNS Topic.
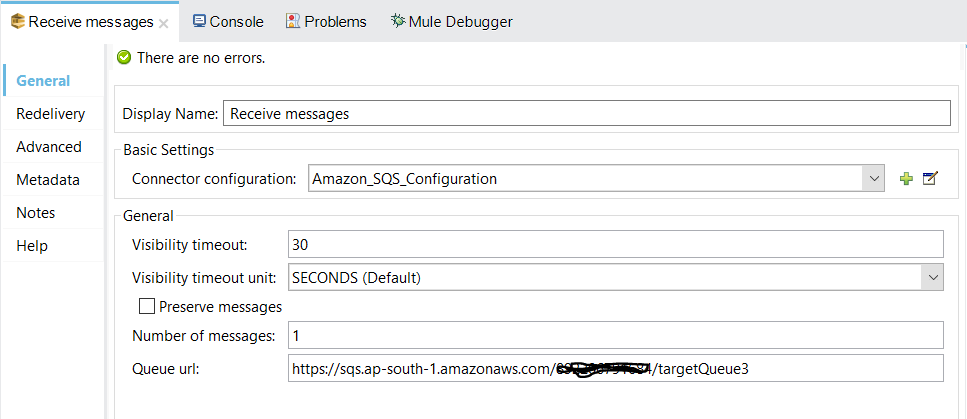
Step 5: Retrieve Messages From Queue
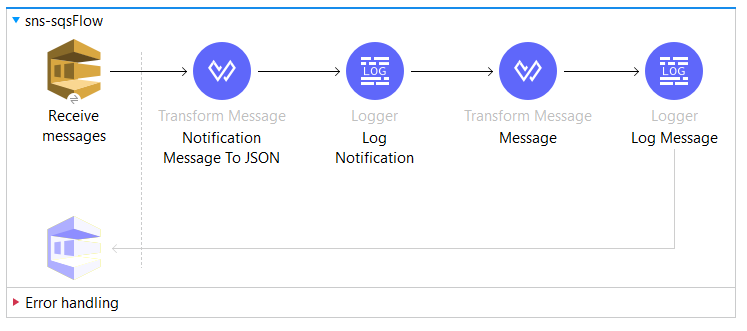
This flow will receive the message published to the Topic as a subscriber queue is configured at Receive messages connector.
Receive messages config:
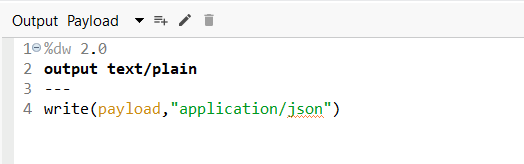
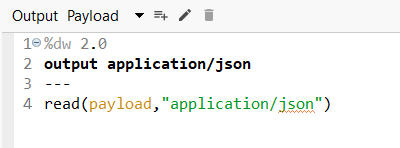
Notification Message to JSON Transform:
Log Notification console output:

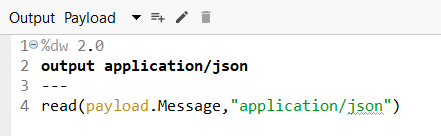
Message Transform:
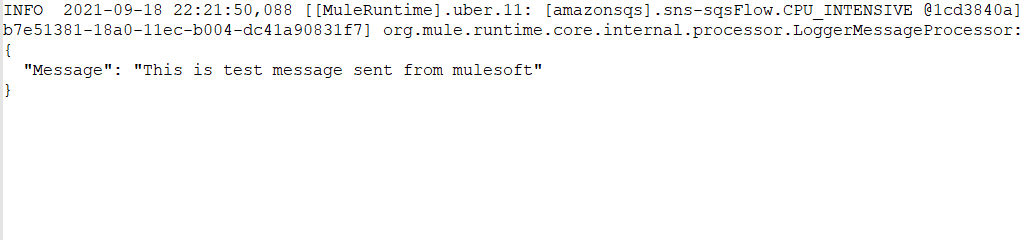
Log Message console output:
Now we have successfully created an Amazon SNS SQS Publish-Subscribe Model in Mule 4.
Recommend
About Joyk
Aggregate valuable and interesting links.
Joyk means Joy of geeK