

How to make a SwiftUI view to fill its container width and height
source link: https://sarunw.com/posts/how-to-make-swiftui-view-fill-container-width-and-height/
Go to the source link to view the article. You can view the picture content, updated content and better typesetting reading experience. If the link is broken, please click the button below to view the snapshot at that time.

How to make a SwiftUI view to fill its container width and height
Table of Contents
A SwiftUI view that has content, such as Text and Button, usually take the smallest space possible to wrap their content. But there is a time that we want these views to fill its container width or height. Let's learn a SwiftUI way to do that.
You can easily support sarunw.com by checking out this sponsor.
How to make a SwiftUI view to fill its container width or height
To make a SwiftUI view take all available width, we use .frame() modifier with maxWidth and maxHeight set to .infinity.
The result of using .frame(maxWidth: .infinity, maxHeight: .infinity) might not be what you expected though. There are a few things you should know about .frame() modifier behavior.
What is frame modifier
The Apple documentation states that frame modifier positions a modified view within an invisible frame with the specified size constraints.
It is easier to see this in action. First, let create a simple text view.
A simple text view
Let's start by creating a simple text view.
Text("Hello, SwiftUI!")
    .font(.headline)
    // 1
    .border(Color.pink)
1 We add a pink border to show a frame of the text view.
The frame of a text view equals the string it contains, as you can see from the pink border.
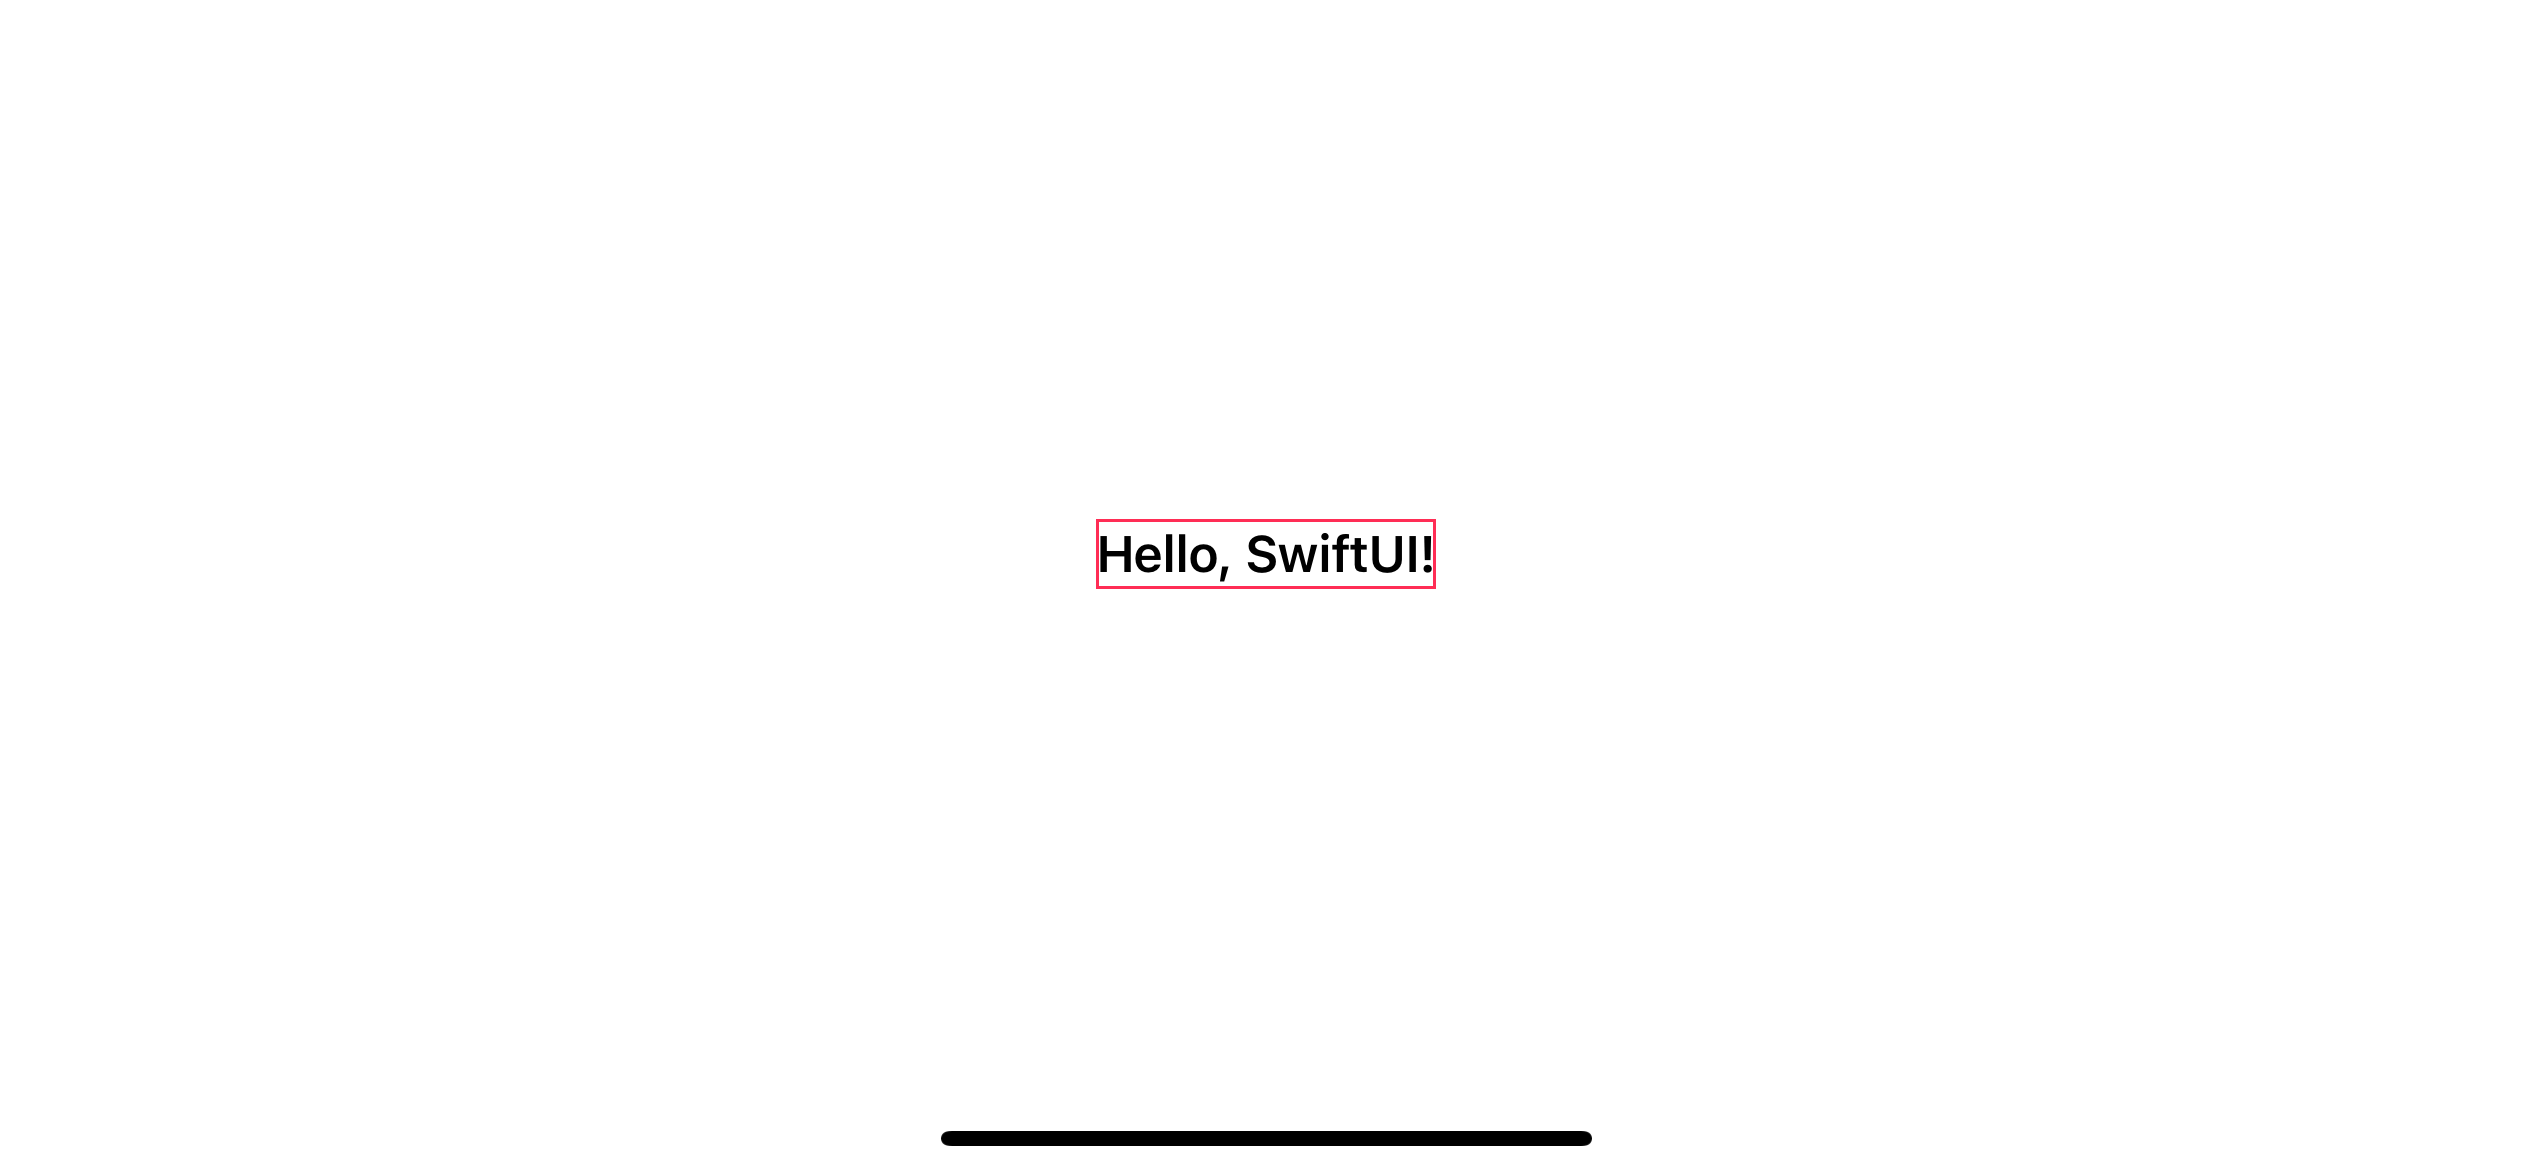 A text view take space equals to its contents.
Make a text view fill its container width with frame modifier
Apply .frame(maxWidth: .infinity) to make a view fill container width.
Text("Hello, SwiftUI!")
    .font(.headline)
    .border(Color.pink)
    // 1
    .frame(maxWidth: .infinity)
    // 2
    .border(Color.blue)
1 Set .frame(maxWidth: .infinity) to make the text view expand to fill a container width.
2 Set blue border will make an invisible frame of a frame modifier visible.
As you can see, the text view's size stays the same as depicted by the pink border. Frame modifier just created an invisible frame with a maximum width of infinity. .infinity will take the whole space available. We make this visible by applying a blue border modifier.
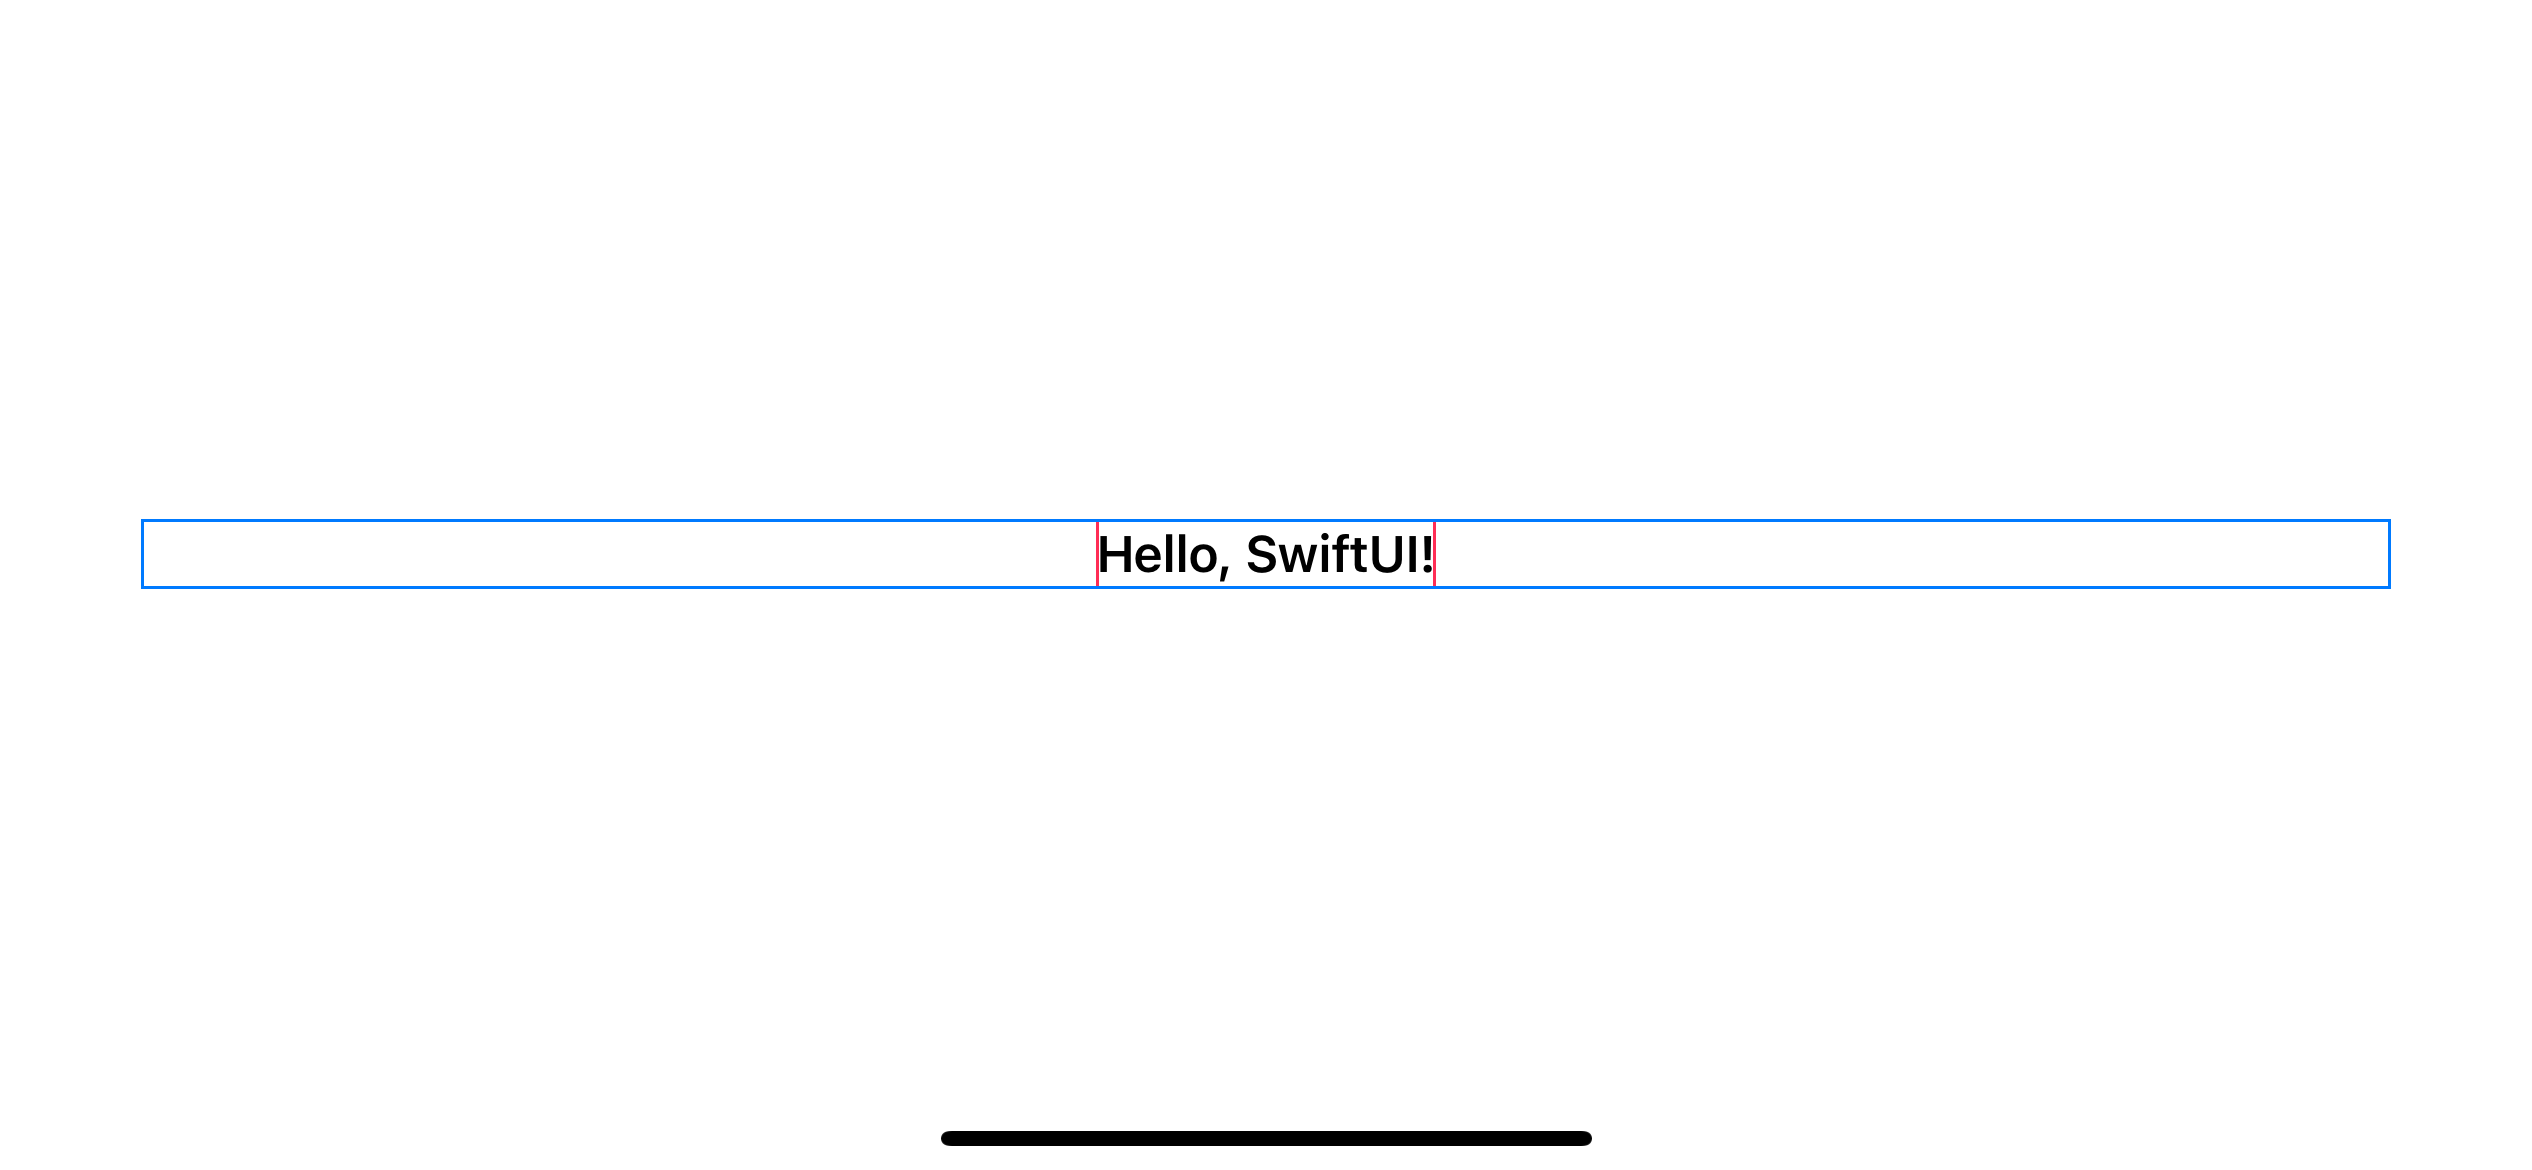 Text view size stays the same. Frame modifier just creates a new invisible frame around it.
You might be reluctant to call the text view filling its container this way. It still has the same size. We just added another full-width view around it.
What do you expect when making a view fill its container
Even though the actual layout might differ from what you expected, the behavior is the same. We will cover two areas, which we usually refer to when making a view taking a full width or height.
- Background color.
- Alignment.
Background color
In a real app, users don't see borders that we add. So we don't need to care whether an actual width of a text view equals its container or not as long as it appears that way.
To make a text view appear like it is taking a full width, we can apply background color after a frame modifier instead of a text view.
Text("Hello, SwiftUI!")
    .font(.headline)
    .border(Color.pink)
    .frame(maxWidth: .infinity)
    .background(Color.indigo)
    .border(Color.blue)
Put .background(Color.indigo) after frame modifier will paint a background using a size of .frame().
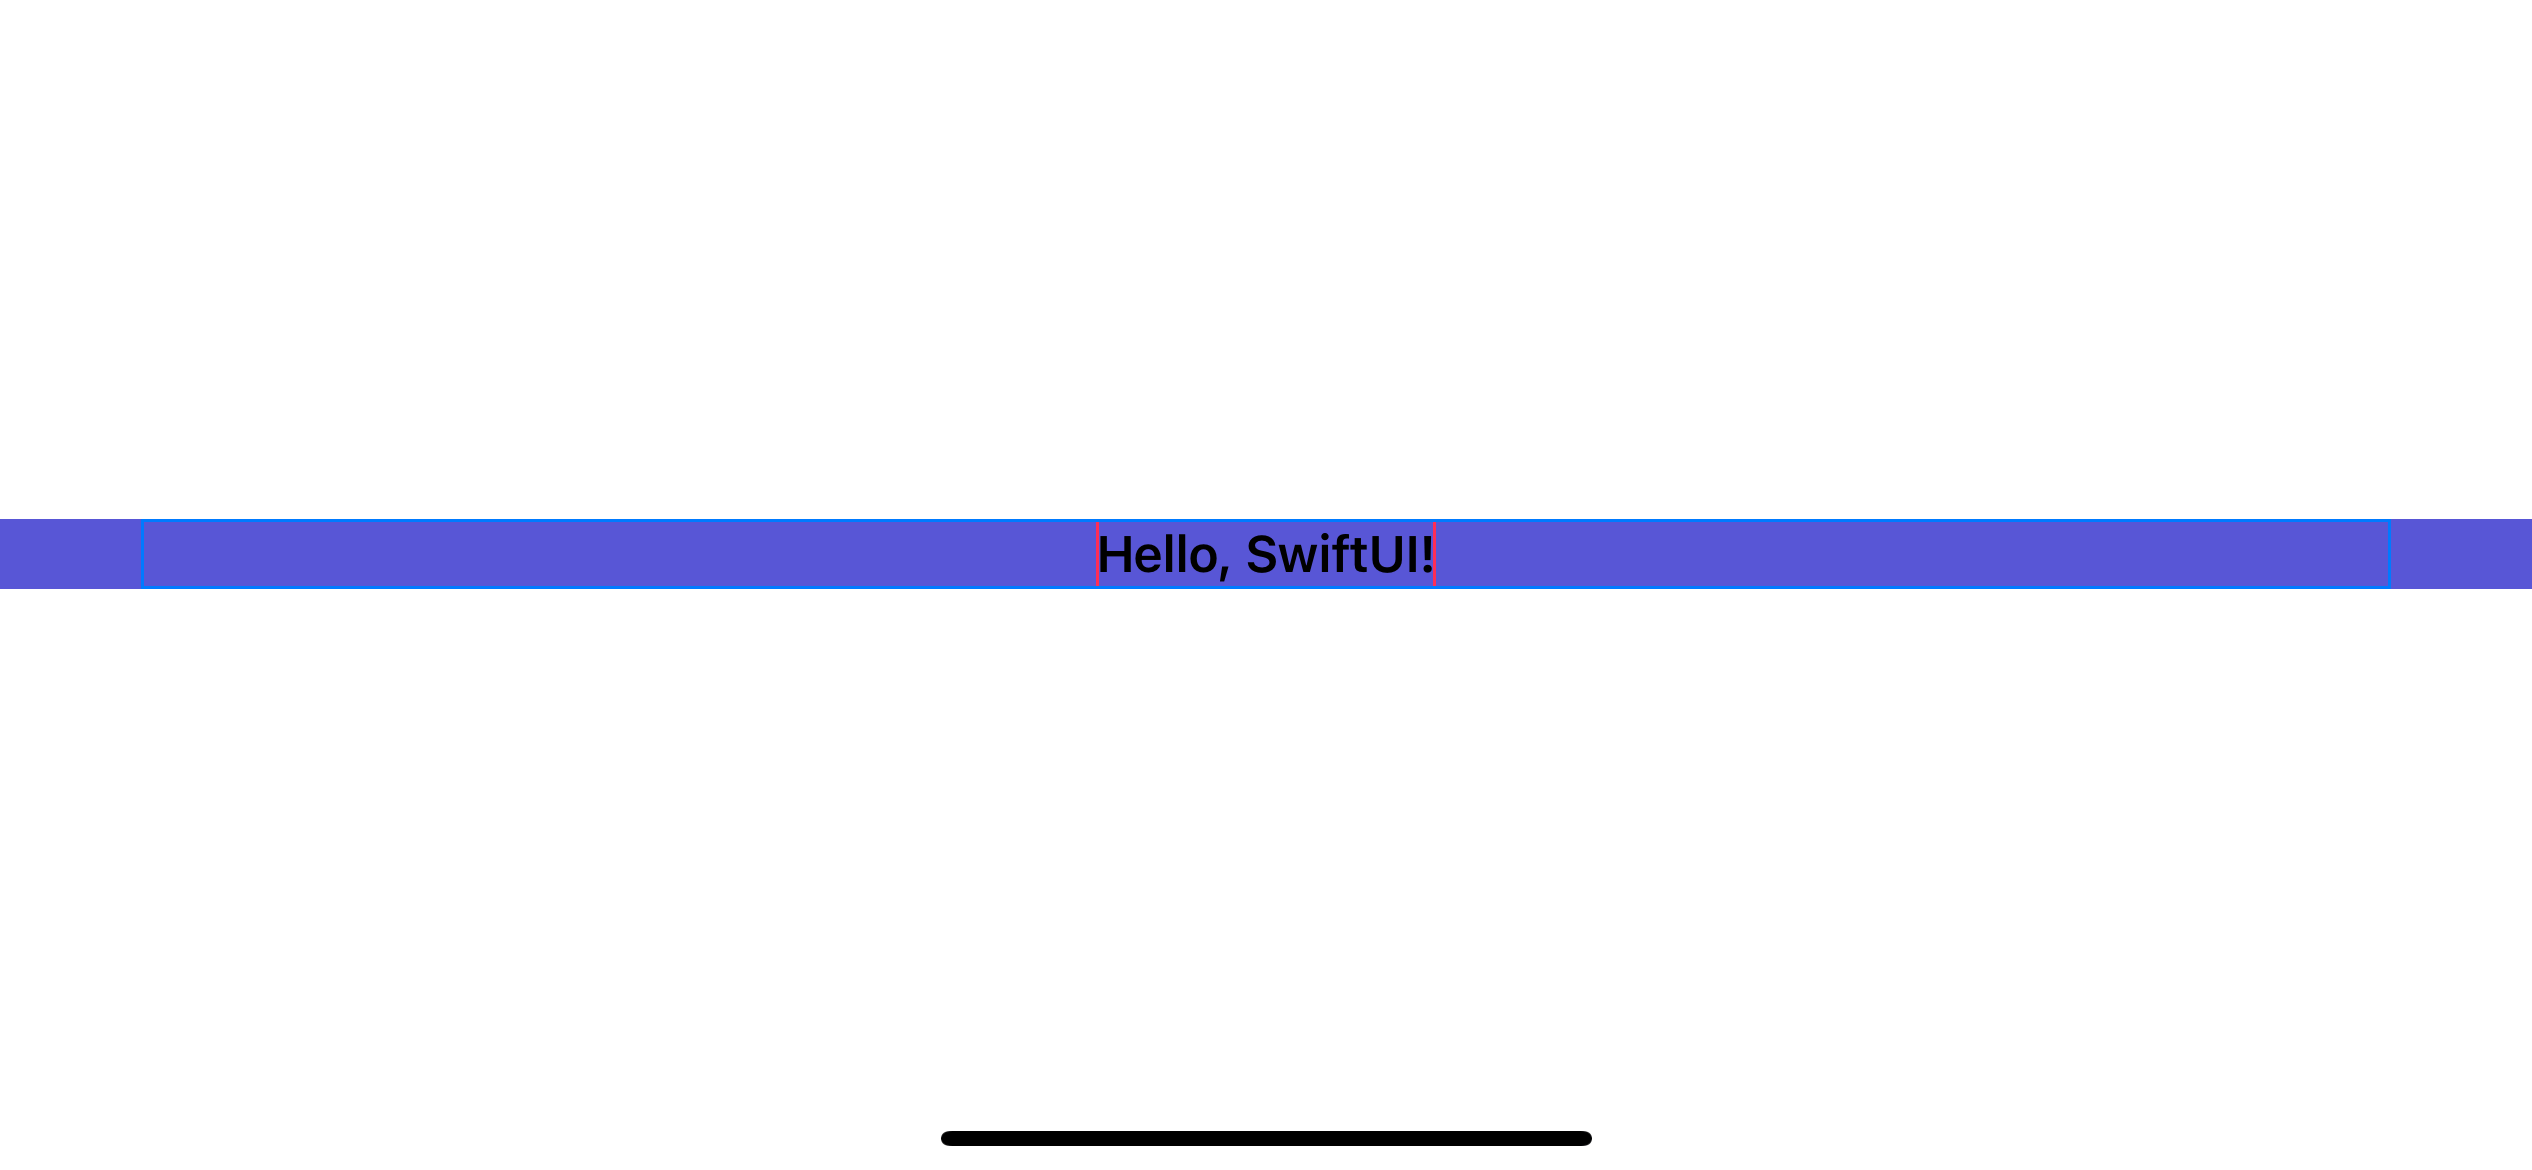 We apply background color over a frame modifier instead of a text view to make our text view appear like taking the full width.
Put .background(Color.indigo) right after text view, would apply background on a text view size, which equals an actual string content.
Text("Hello, SwiftUI!")
.background(Color.indigo)
.font(.headline)
.border(Color.pink)
.frame(maxWidth: .infinity)
.border(Color.blue)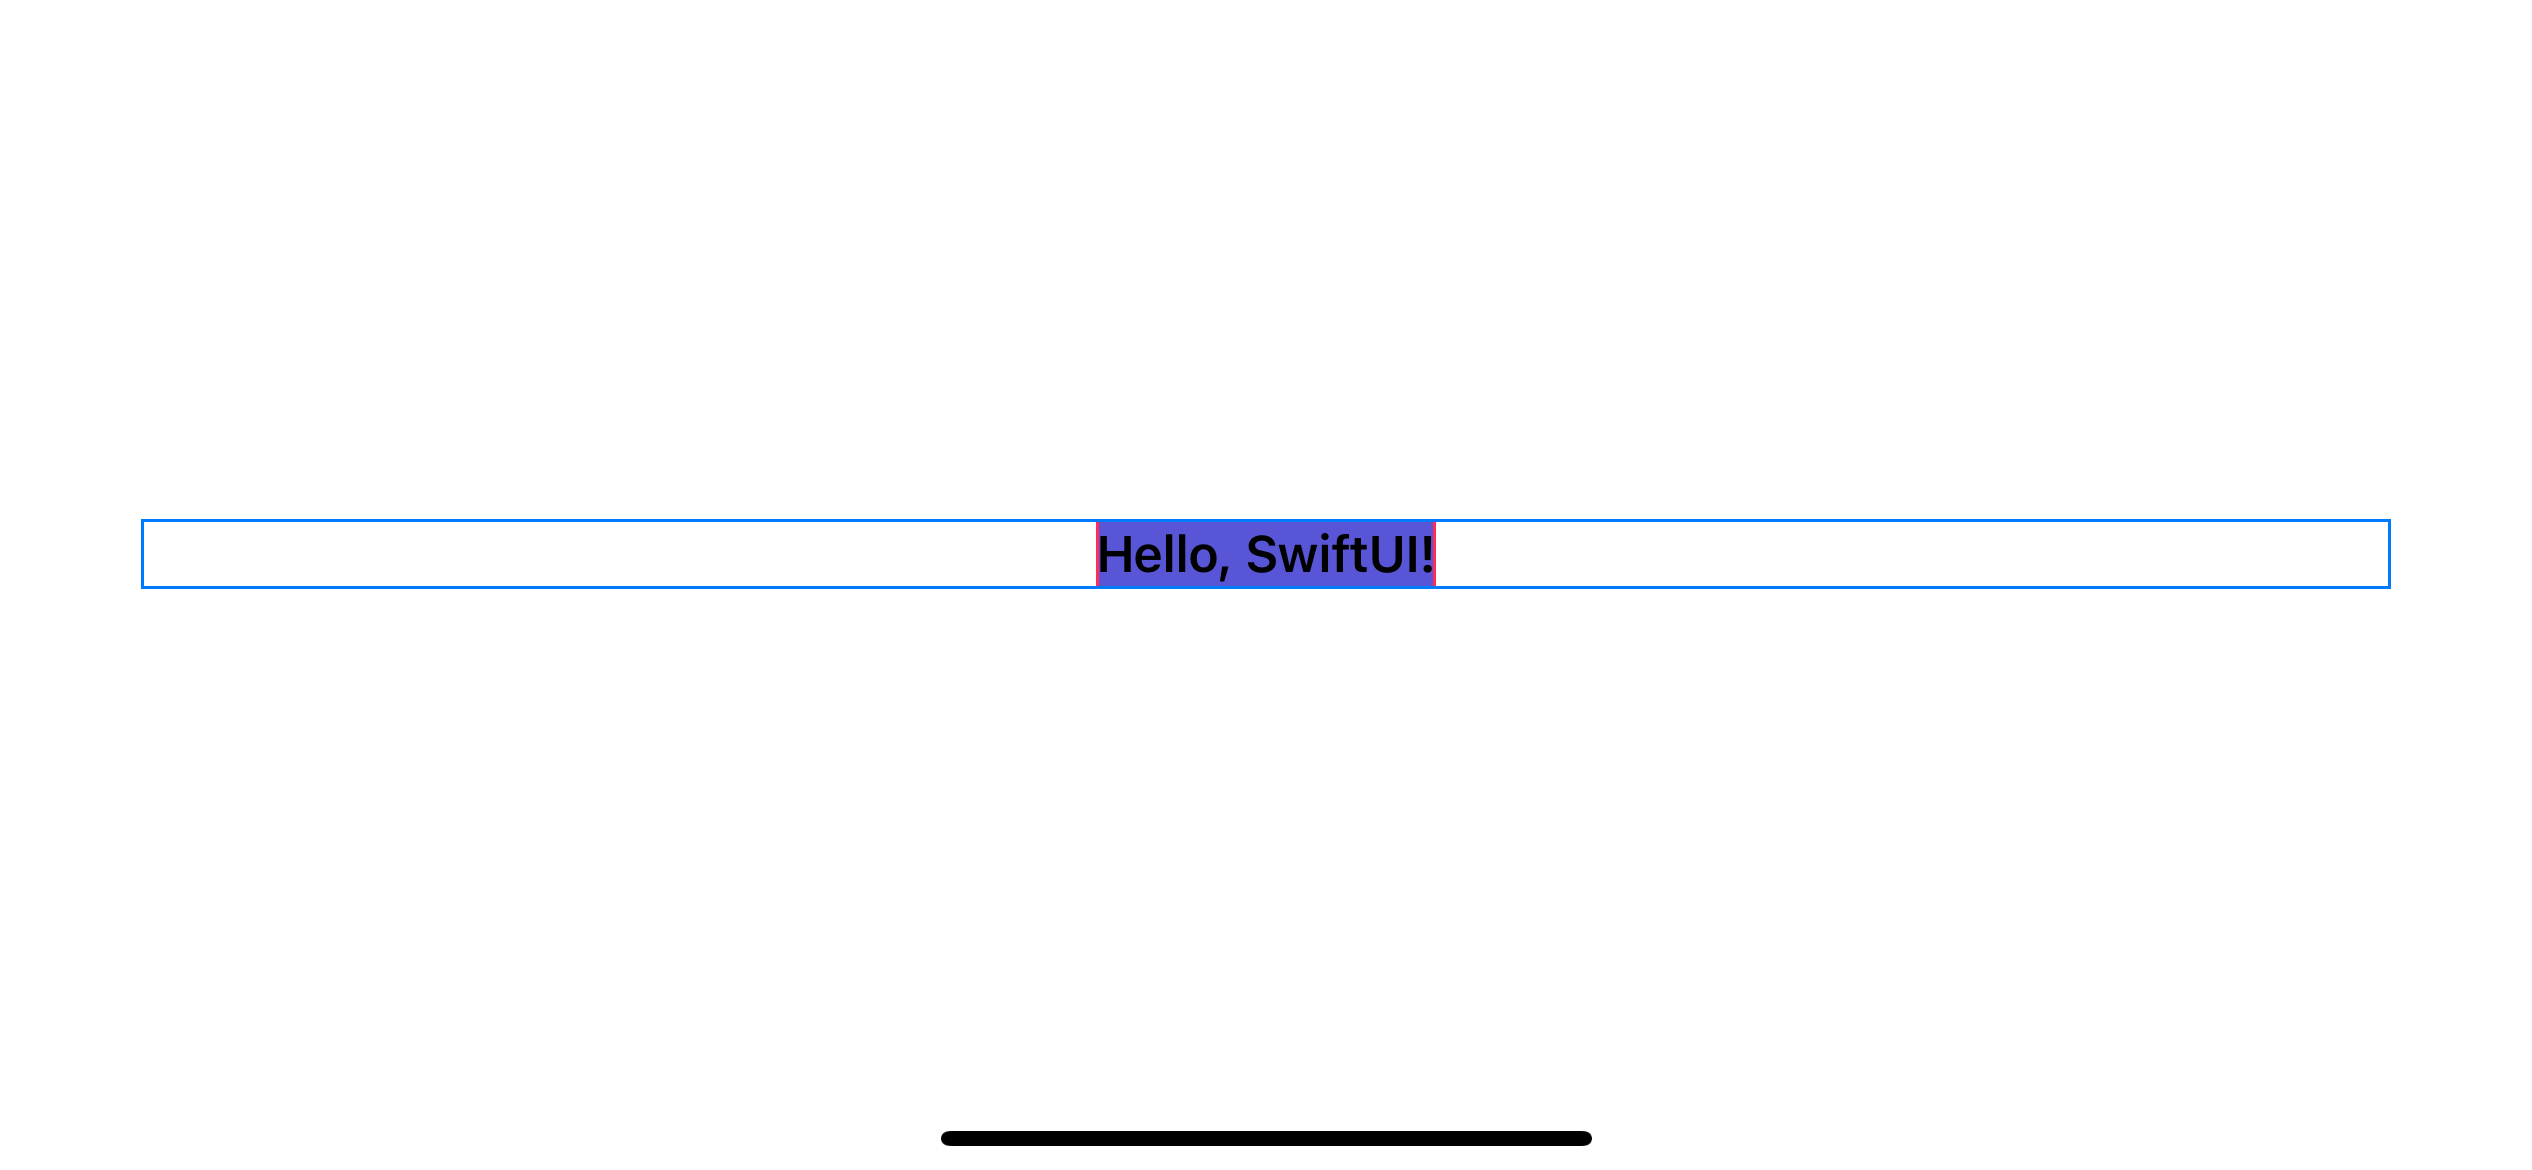 Do not apply background on a text view. It will show the true size of the text view.
Alignment
Another thing that you expected from a full-width view is the ability to align them within that frame. Frame modifier allows us to position a modified view within its bounds. To align a view, we specified the aligment argument with a position we wanted.
Text("Hello, SwiftUI!")
    .font(.headline)
    .border(Color.pink)
    // 1
    .frame(maxWidth: .infinity, alignment: .leading)
    .border(Color.blue)
1 We push a text view to the leading edge of the invisible frame.
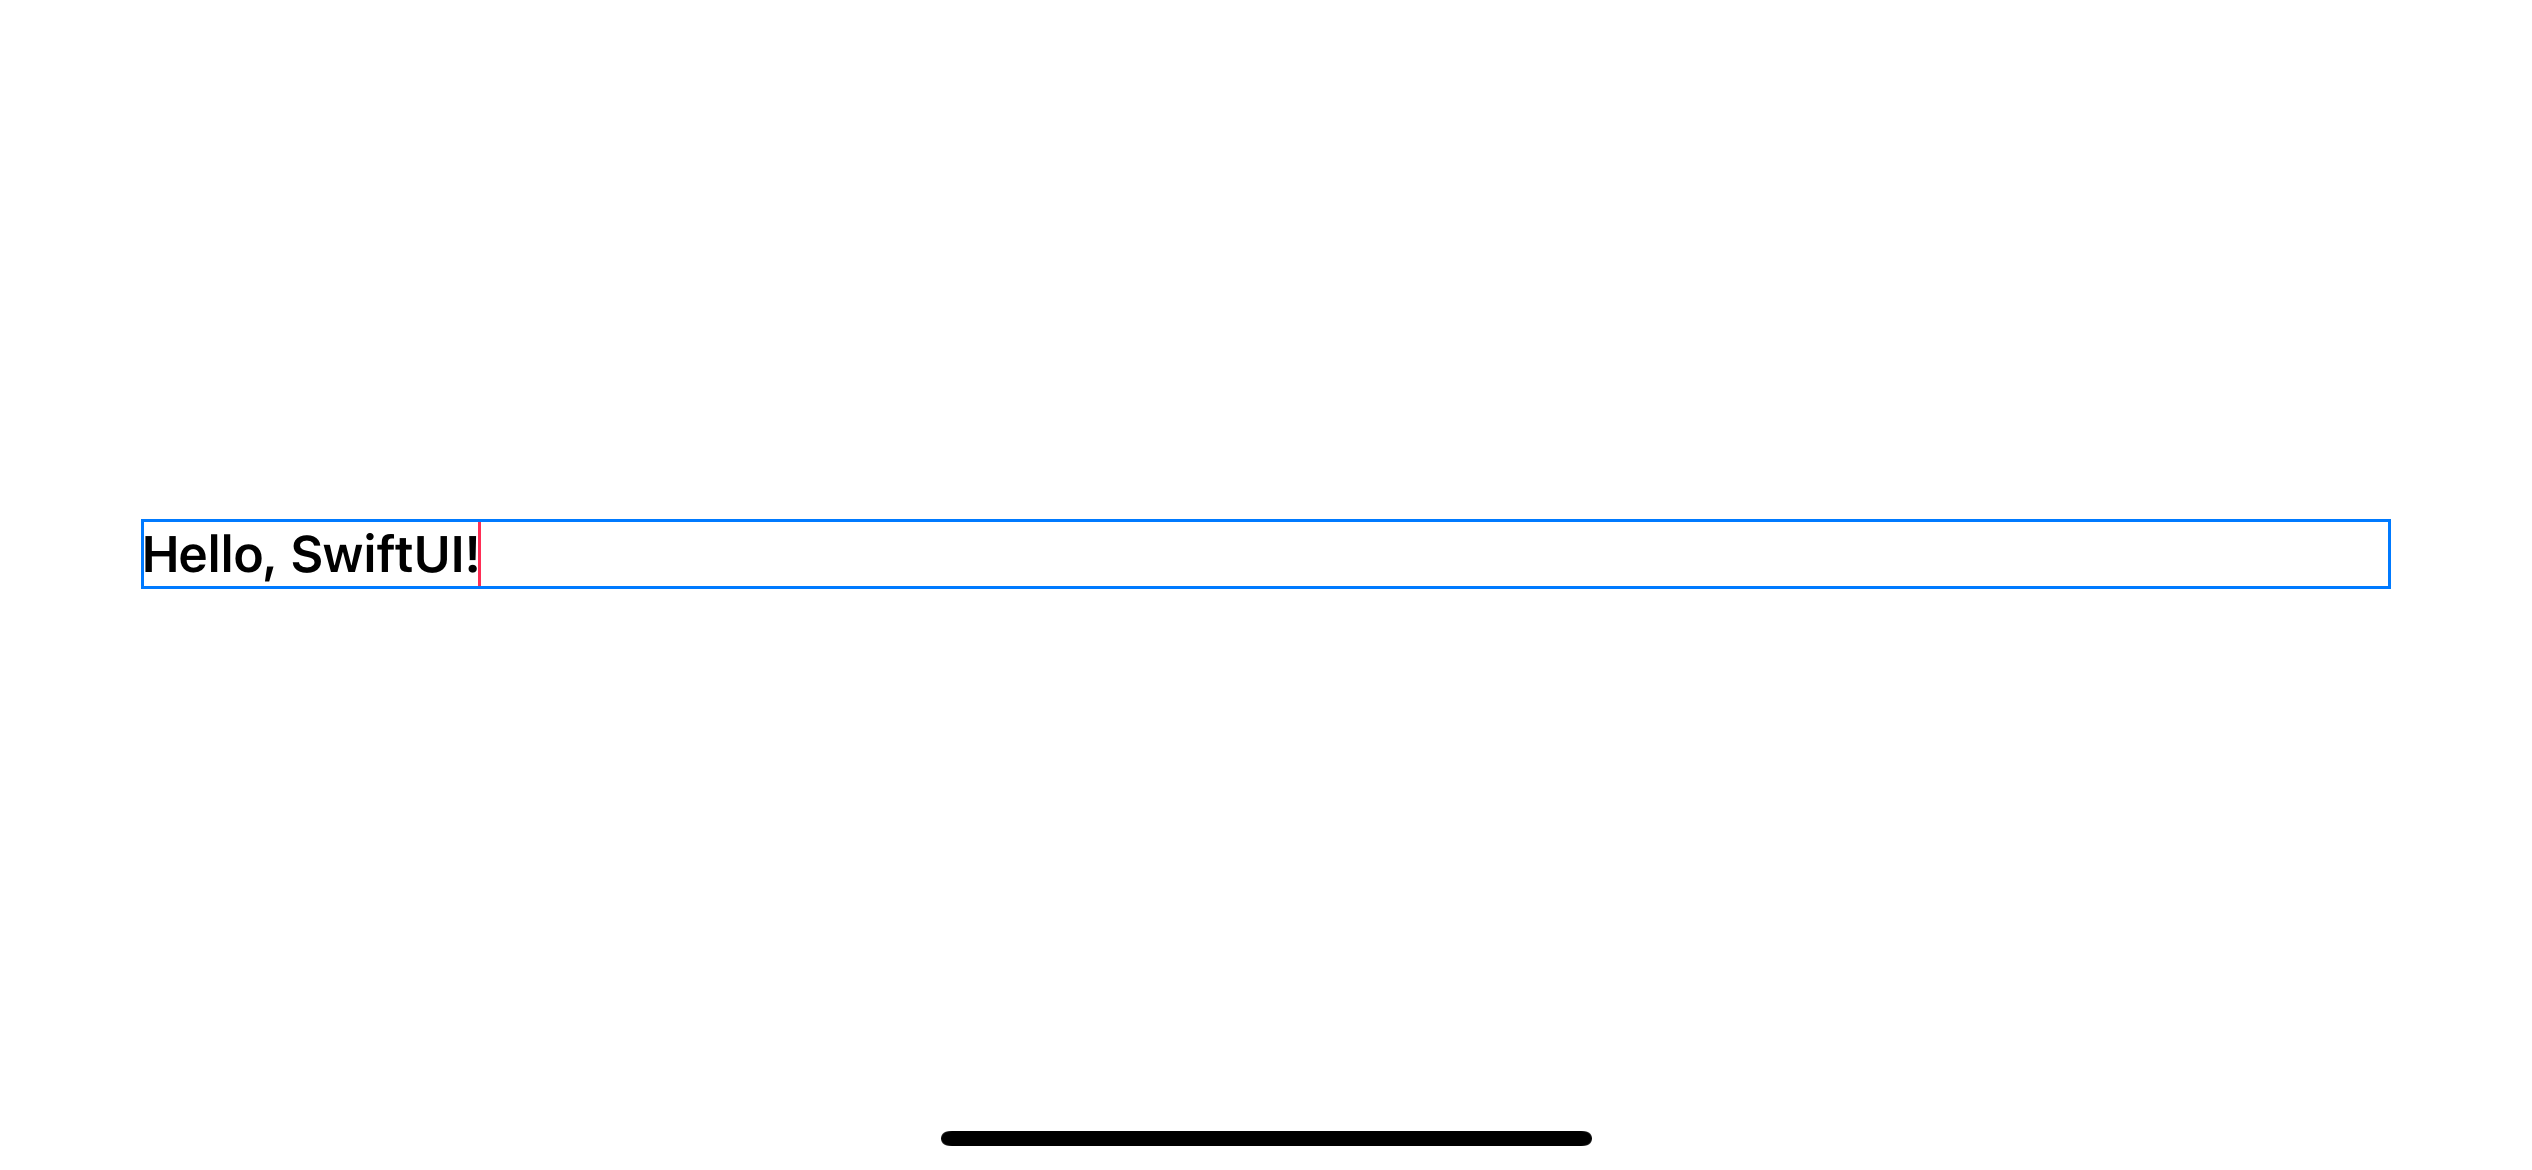 alignment: .leading
Here is another example where we push a text view to the trailing edge of the invisible frame.
.frame(maxWidth: .infinity, alignment: .trailing)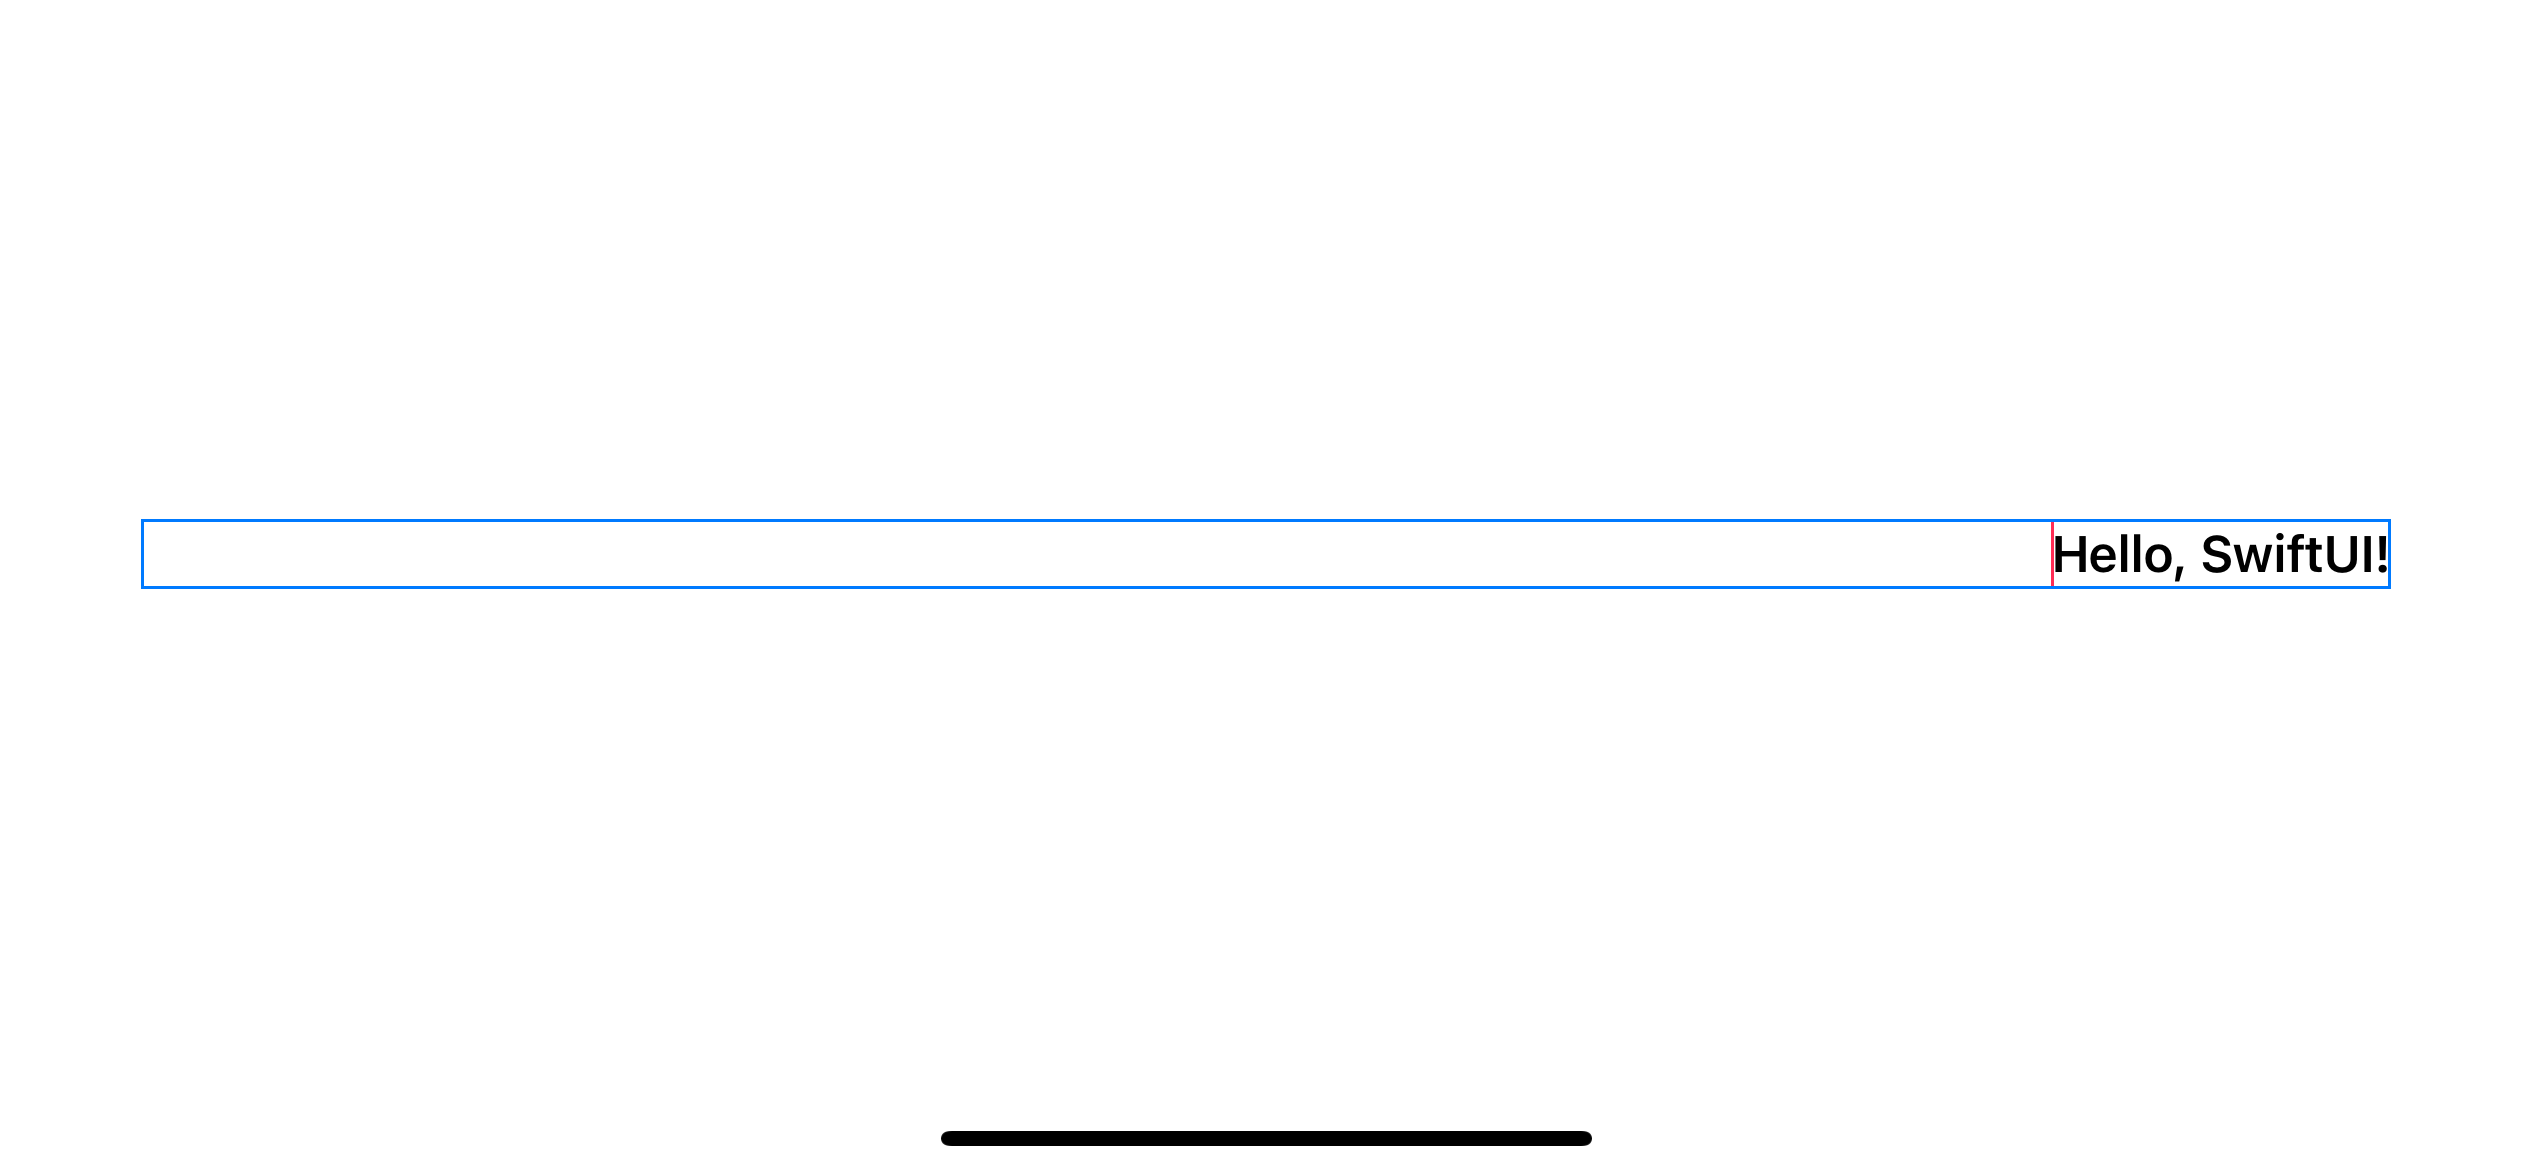 alignment: .trailing
maxHeight
To make a view taking full height, instead of setting maxWidth to .infinity, we set maxHeight to .infinity.
Text("Hello, SwiftUI!")
    .font(.headline)
    .border(Color.pink)
    .frame(
        maxWidth: .infinity,
        maxHeight: .infinity
    )
    .border(Color.blue)
Set maxHeight to .infinity to make a view fill available height.
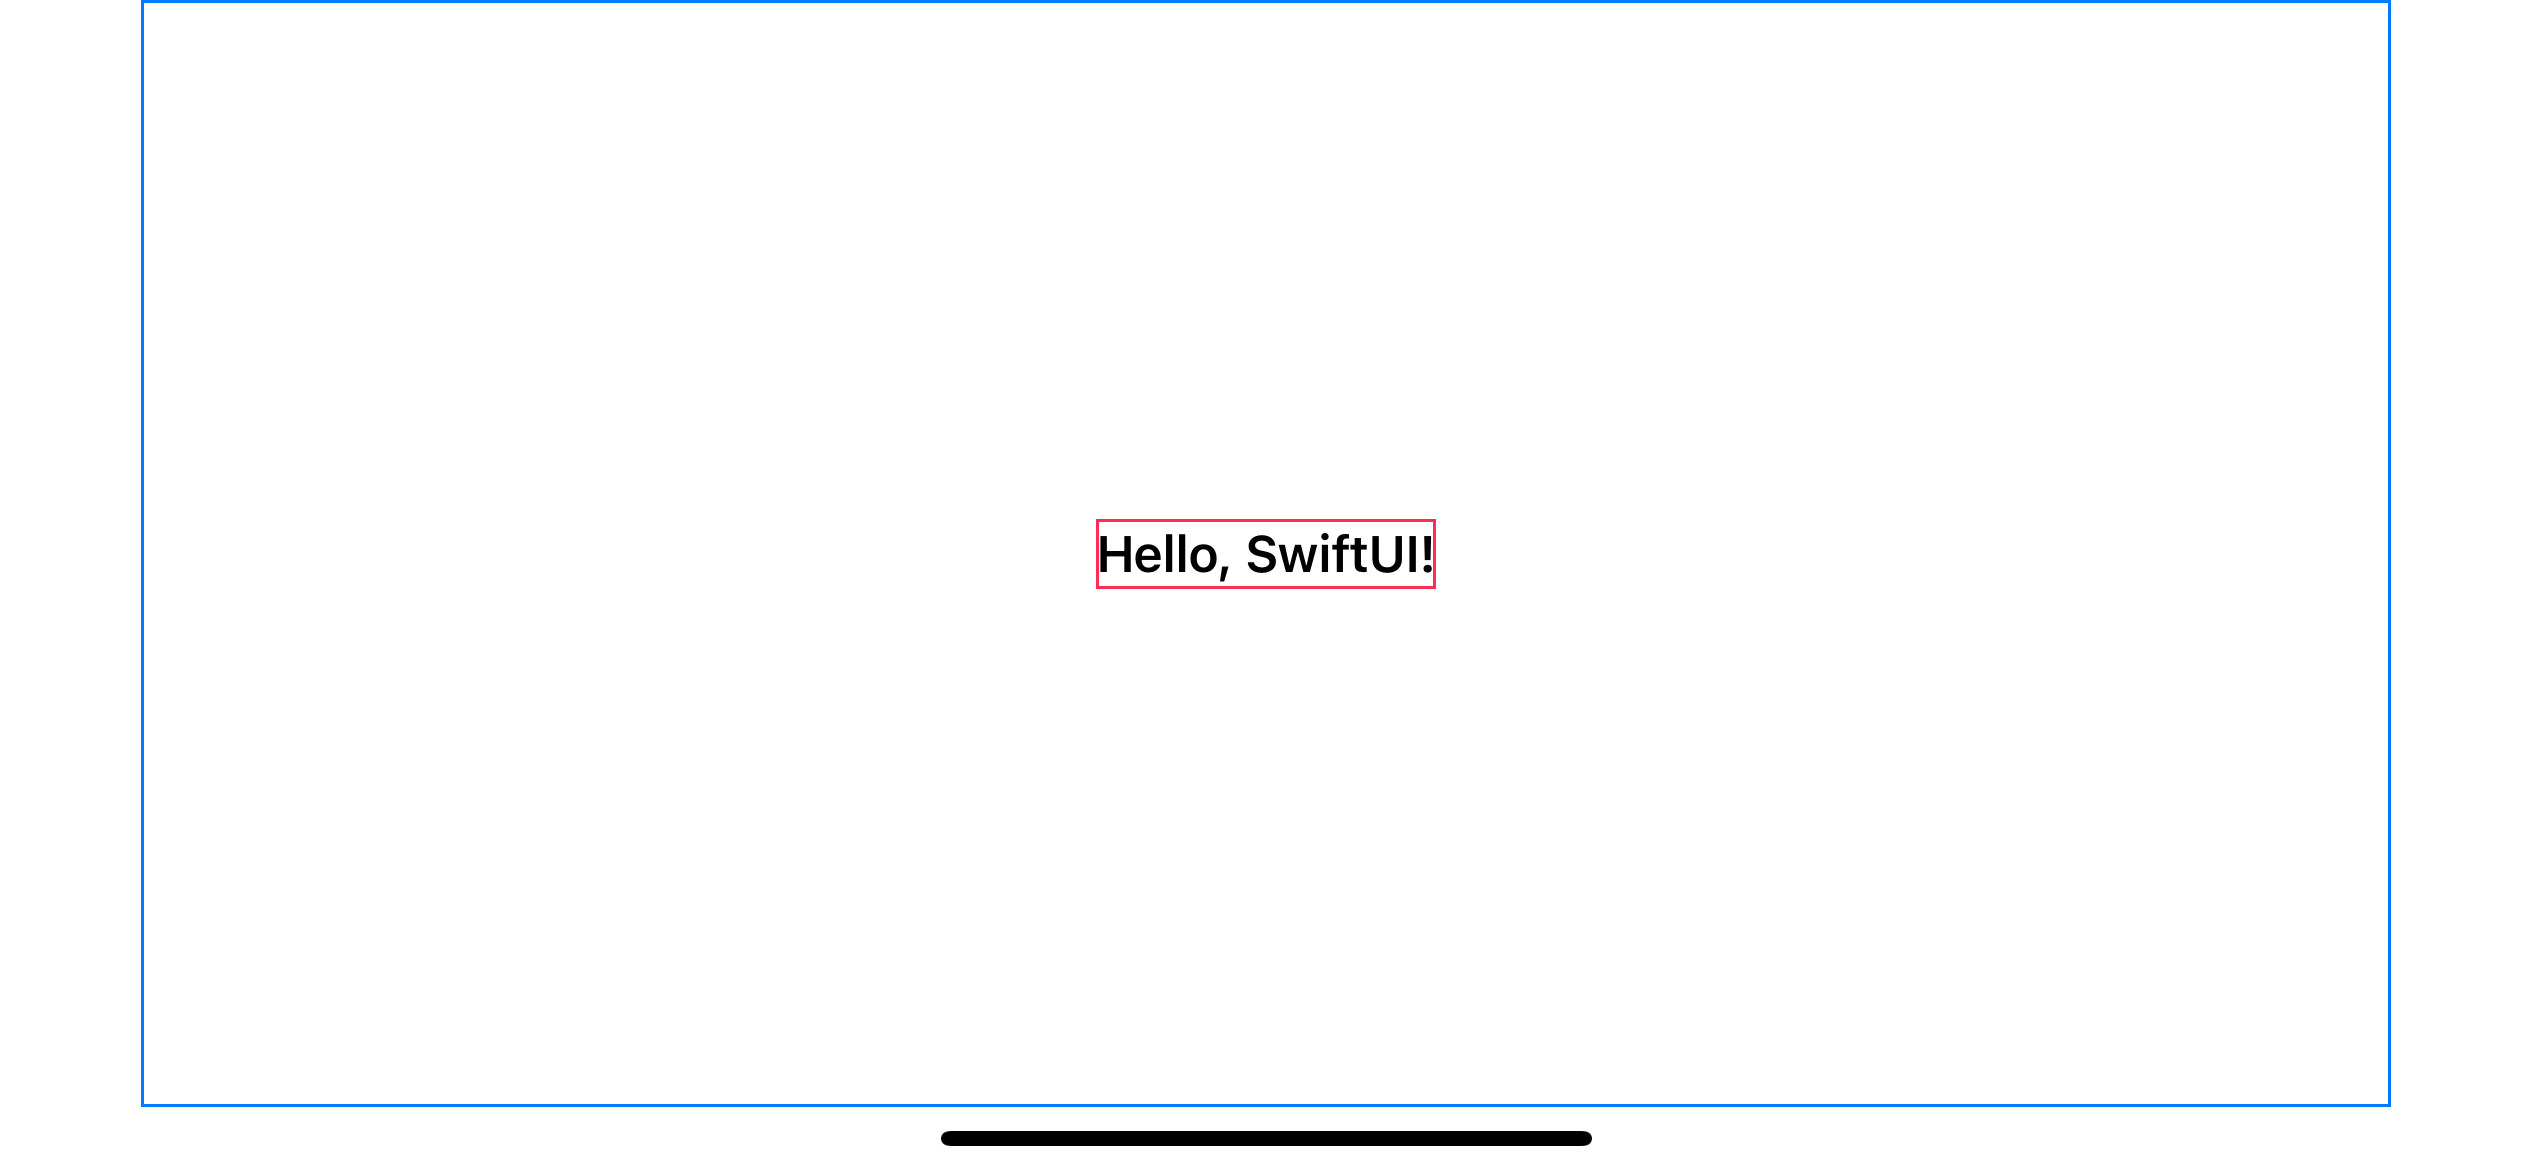 Set maxHeight to .infinity to make a view fill available height.
Set both maxWidth and maxHeight to .infinite to make the frame take available spaces in both directions. This is an excellent opportunity to show you all the nine alignment positions you can have.
.topLeading.top.topTrailing.leading.center.trailing.bottomLeading.bottom.bottomTrailing
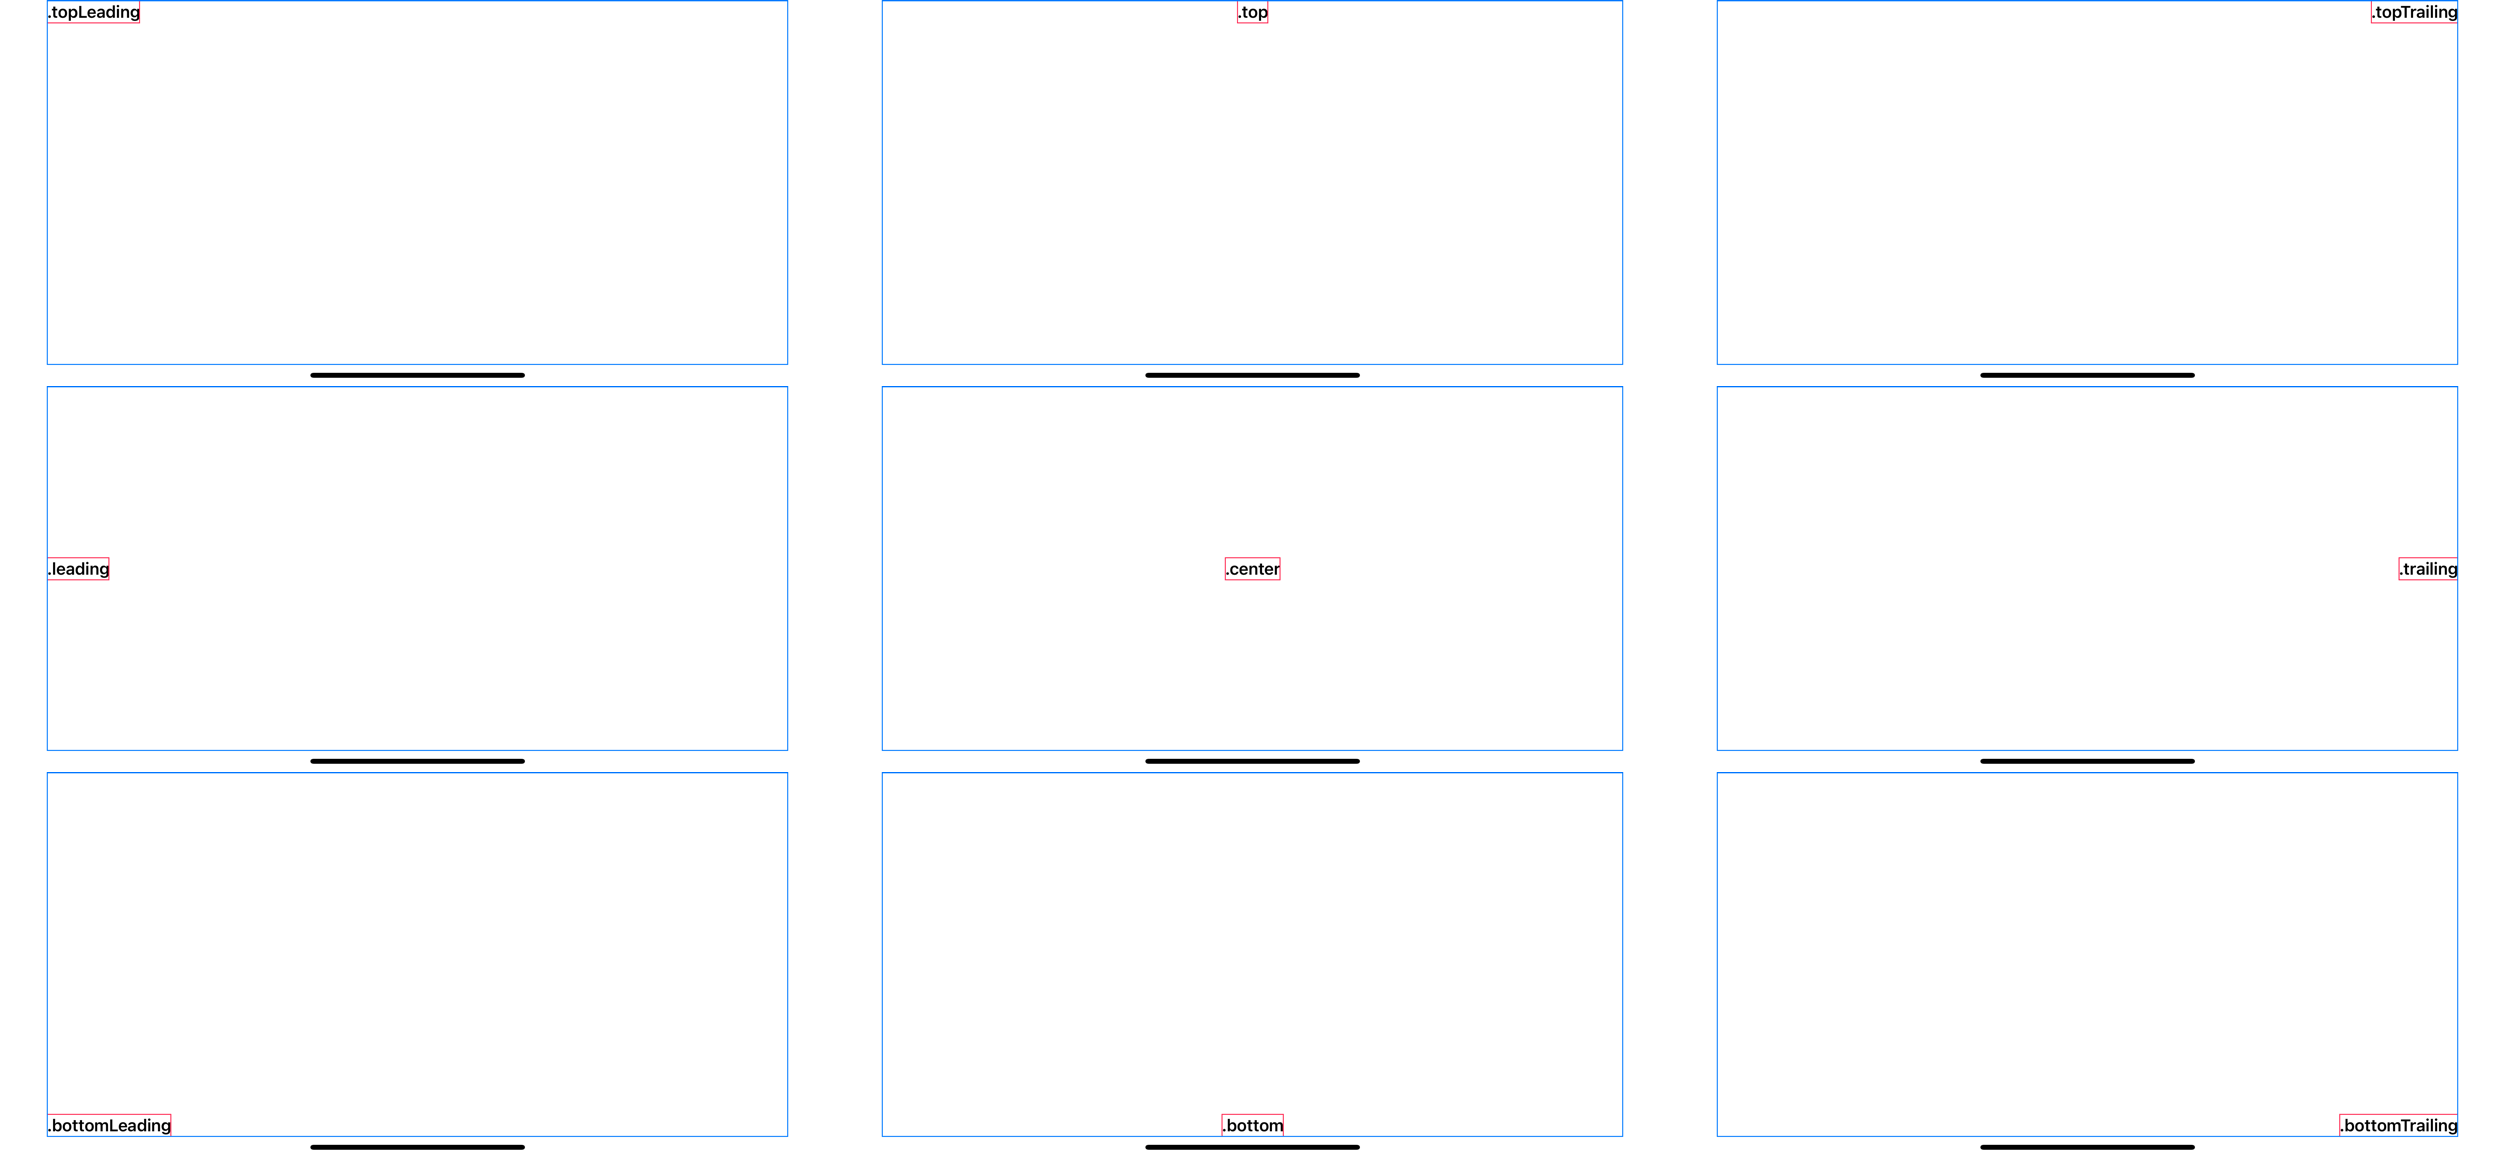 All nine alignment position options.
You can easily support sarunw.com by checking out this sponsor.
Conclusion
If it looks like a duck, swims like a duck, and quacks like a duck, then it probably is a duck.
As you can see, setting maxWidth and maxHeight to .infinity doesn't actually expand a frame of a view, but we can make it look and behave like it is.
You may also like
Setting background color in SwiftUI is not as straightforward as UIKit. Let's learn how to do it.
SwiftUISwiftUI provides an easy way to convert to render any view into a placeholder style by redacting its content.
SwiftUINew in iOS 15, SwiftUI has finally support preview in landscape orientation. Let's find out how to do it.
SwiftUIRead more article about SwiftUI
or see all available topic
Enjoy the read?
If you enjoy this article, you can subscribe to the weekly newsletter.
Every Friday, you'll get a quick recap of all articles and tips posted on this site. No strings attached. Unsubscribe anytime.
Feel free to follow me on Twitter and ask your questions related to this post. Thanks for reading and see you next time.
If you enjoy my writing, please check out my Patreon https://www.patreon.com/sarunw and become my supporter. Sharing the article is also greatly appreciated.
How to make a custom button style supports leading dot syntax in SwiftUI
In Swift 5.5, we can apply button style using leading dot syntax, .buttonStyle(.plain), instead of a full name of a concreate type, .buttonStyle(PlainButtonStyle()). Let's see how we can make our custom button style support this.
How to remove extra padding when converting HTML to NSAttributedString
When you convert HTML string to NSAttributedString, sometimes, you will get an extra unwanted bottom padding. Learn what is causing this and how to mitigate the problem.
Recommend
About Joyk
Aggregate valuable and interesting links.
Joyk means Joy of geeK