

Fastlane Tutorial for Android: Getting Started
source link: https://www.raywenderlich.com/26869030-fastlane-tutorial-for-android-getting-started
Go to the source link to view the article. You can view the picture content, updated content and better typesetting reading experience. If the link is broken, please click the button below to view the snapshot at that time.

Fastlane Tutorial for Android: Getting Started
Learn how to use fastlane to automate tasks like generating screenshots, updating metadata for your Android apps and uploading apps to the Play Store.
Version
Android app development has many aspects, including making releases, taking screenshots and updating metadata in Google Play Store. The good news is you can automate these tasks, letting developers spend their time doing more important things, such as adding features and fixing bugs.
fastlane lets you automate every aspect of your development and release workflows.
In this tutorial, you’ll learn how to automate common tasks using fastlane. By the end, you’ll know how to:
- Set up fastlane in an existing project.
- Automate app screenshots.
- Use Firebase App Distribution to distribute your app to beta testers.
- Upload marketing material from the command line.
- Easily publish release notes or a changelog.
Getting Started
To begin, download the starter project by clicking the Download Materials button at the top or the bottom of this tutorial.
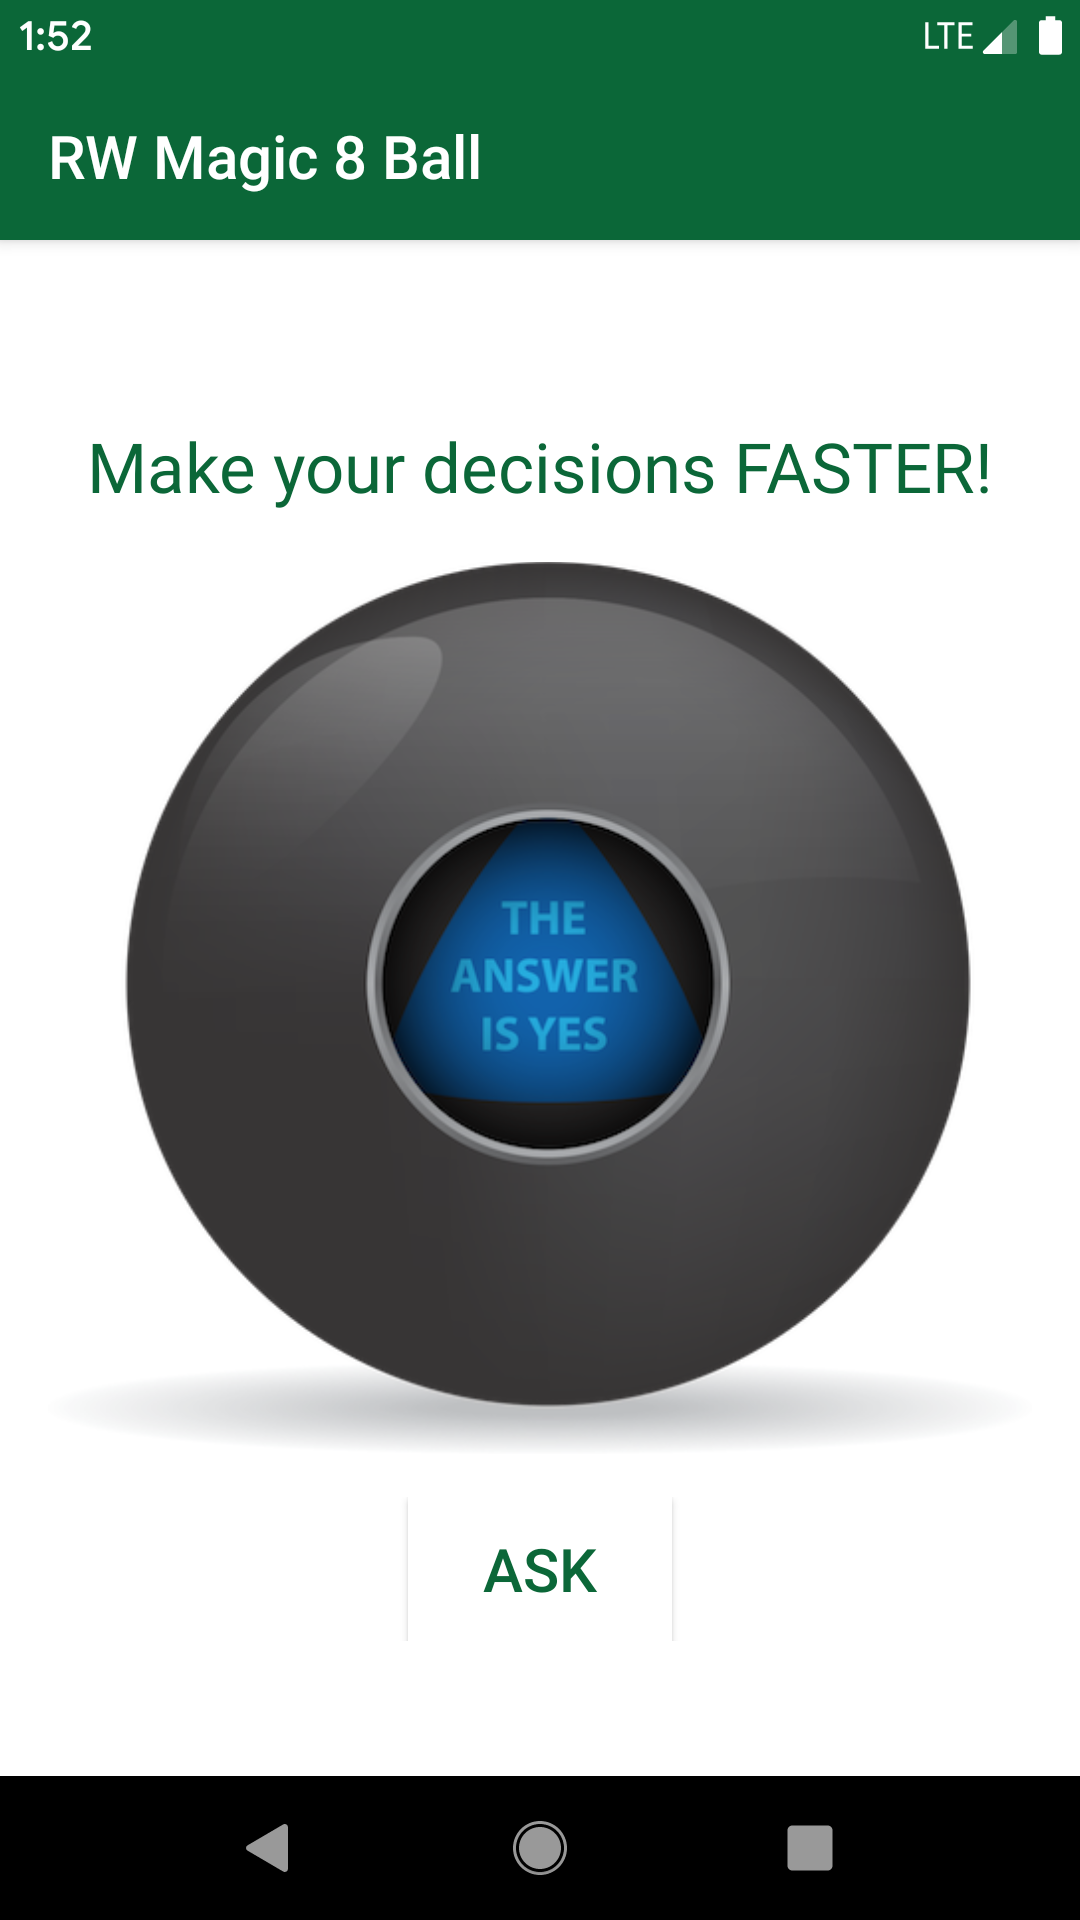
Open the project in Android Studio, then build and run the app. You’ll see something like this:
This app allows users to click the ASK button and receive a random answer.
The app is ready for you to package and share with beta testers. It’s time to get started with those tasks!
Installing fastlane
Before installing fastlane, you must have Ruby version 2.5 or higher installed. Check your Ruby version by entering this command into Terminal:
ruby -v
To install or update Ruby with Homebrew, see the iOS tutorial Fastlane Tutorial: Getting Started, for instructions.
Next, install fastlane by executing the following command in Terminal:
sudo gem install fastlane
To verify fastlane has been successfully installed and to check its version, run the following command:
fastlane -v
Great, you’re ready to get started now!
Naming Your Package
Your package name must be unique in Google Play. Give the starter project a new package name before you start using fastlane.
To do this, follow the steps described in the Getting Started section of Android App Distribution Tutorial: From Zero to Google Play Store.
Build and run to verify your app works correctly with its new package name.
Now, you’re ready to work with fastlane.
Setting up fastlane
In this section, you’ll follow the steps in the setting up fastlane documentation to initialize fastlane in a new project.
First, change into the starter project directory in Terminal and enter the following command:
sudo.fastlane init
When prompted with Package Name (com.krausefx.app), enter your app’s new, unique package name. For the sample app, it’s com.raywenderlich.android.rwmagic8ball.
When you see the prompt for the Path to the JSON secret file, press Enter to skip. You’ll handle this later.
Next, you’ll see the prompt: Do you plan on uploading metadata, screenshots and builds to Google Play using fastlane?. Press n. You’ll set up this option later.
You’ll receive several more prompts. Press Enter to continue.
When you’re done, run this command to try your new fastlane setup:
fastlane test
You’ve created a new fastlane directory containing two files: Appfile and Fastfile. You’ll use them in the next sections to configure fastlane.
Configuring fastlane
fastlane uses a Fastfile to store its automation configuration. Open Fastfile and see the following:
default_platform(:android)

platform :android do
  desc "Runs all the tests"
  lane :test do
    gradle(task: "test")
  end

  desc "Submit a new Beta Build to Crashlytics Beta"
  lane :beta do
    gradle(task: "clean assembleRelease")
    crashlytics

    # sh "your_script.sh"
    # You can also use other beta testing services here
  end

  desc "Deploy a new version to the Google Play"
  lane :deploy do
    gradle(task: "clean assembleRelease")
    upload_to_play_store
  end
end
fastlane groups different actions into lanes. A lane starts with lane :name, where name is the name given to a lane. In this file, you’ll see three different lanes: test, beta and deploy.
Here’s an explanation of the actions each lane performs:
- test: Runs all the tests for the project, using the gradle action. You won’t use this lane in this tutorial.
-
beta: Submits a beta build to Firebase App Distribution, using the
gradleaction followed by the crashlytics action. -
deploy: Deploys a new version to Google Play, using the
gradleaction followed by the upload_to_play_store action.
To run a lane, you must run fastlane <lane> where lane is the lane to execute.
In the following sections, you’ll edit the available lanes with fastlane actions to customize RWMagic8Ball’s setup.
Editing the Building Lane
In the Fastfile, modify platform :android do to add a new build lane after the test lane:
desc "Build"
lane :build do
  gradle(task: "clean assembleRelease")
end
Run the build lane from Terminal:
bundle exec fastlane build
When the command runs successfully, you’ll see the following at the end of the command output:
[13:37:40]: fastlane.tools finished successfully 🎉
Using Screengrab
fastlane’s screengrab is an action that generates localized screenshots of your Android app for different device types and languages. In this section, you’ll learn how to use it to create screenshots.
To use the screengrab tool, you need to install the command-line tool first:
gem install screengrab
Next, you need to add the permissions below to AndroidManifest.xml, in the manifest XML tag:
<!-- Allows unlocking your device and activating its screen so UI tests can succeed -->
<uses-permission android:name="android.permission.DISABLE_KEYGUARD" />
<uses-permission android:name="android.permission.WAKE_LOCK" />

<!-- Allows for storing and retrieving screenshots -->
<uses-permission android:name="android.permission.WRITE_EXTERNAL_STORAGE" />
<uses-permission android:name="android.permission.READ_EXTERNAL_STORAGE" />

<!-- Allows changing locales -->
<uses-permission xmlns:tools="http://schemas.android.com/tools"
  android:name="android.permission.CHANGE_CONFIGURATION"
  tools:ignore="ProtectedPermissions" />
The comments in the code above explain why fastlane needs different permissions. Now that fastlane has the permissions it needs, you can move on to automation.
Setting up Screenshot Animation
In Android, you set up screenshot automation over the Instrumentation Testing toolchain. Before starting, you need to install the necessary dependencies.
Open app/build.gradle and add the following in dependencies:
testImplementation 'junit:junit:4.13.2'

androidTestImplementation 'androidx.test.ext:junit:1.1.3'
androidTestImplementation 'androidx.test:rules:1.4.0'
androidTestImplementation 'androidx.test.espresso:espresso-core:3.4.0'

androidTestImplementation('tools.fastlane:screengrab:2.1.0') {
  exclude group: 'com.jraska:falcon'
}
androidTestImplementation 'com.jraska:falcon:2.2.0'
In the defaultConfig block, add testInstrumentationRunner:
testInstrumentationRunner 'androidx.test.runner.AndroidJUnitRunner'
These dependencies are needed for fastlane to run the tests and capture the screenshots. Sync Gradle before moving on.
Setting up the Instrumentation Tests
Navigate to app/src/androidTest/java/ to find the instrumentation tests.
To create a new instrumentation test file, right-click <your package name> and select New ▸ Kotlin File/Class:
For the Name in the pop-up window, enter ScreenshotInstrumentedTest, select Class and press Enter:
Next, implement ScreenshotInstrumentedTest by adding the following to the newly created class:
import androidx.lifecycle.Lifecycle
import androidx.test.core.app.ActivityScenario
import androidx.test.espresso.Espresso
import androidx.test.espresso.action.ViewActions
import androidx.test.espresso.assertion.ViewAssertions
import androidx.test.espresso.matcher.ViewMatchers
import androidx.test.ext.junit.rules.ActivityScenarioRule
import org.junit.Rule
import org.junit.Test
import org.junit.runner.RunWith
import org.junit.runners.JUnit4
import tools.fastlane.screengrab.Screengrab
import tools.fastlane.screengrab.UiAutomatorScreenshotStrategy
import tools.fastlane.screengrab.locale.LocaleTestRule

@RunWith(JUnit4::class)
class ScreenshotInstrumentedTest {

  // JVMField needed!
  @Rule
  @JvmField
  val localeTestRule = LocaleTestRule()

  @get:Rule
  var activityRule = ActivityScenarioRule(MainActivity::class.java)

  @Test
  fun testTakeScreenshot() {
    val scenario: ActivityScenario<*> = activityRule.scenario
    scenario.moveToState(Lifecycle.State.RESUMED)
    //1
    Screengrab.setDefaultScreenshotStrategy(UiAutomatorScreenshotStrategy())

    Espresso.onView(ViewMatchers.withId(R.id.askButton))
        .check(ViewAssertions.matches(ViewMatchers.isDisplayed()))
    //2
    Screengrab.screenshot("rwmagic8ball_beforeFabClick")
    //3
    Espresso.onView(ViewMatchers.withId(R.id.askButton)).perform(ViewActions.click())
    //4
    Screengrab.screenshot("rwmagic8ball_afterFabClick")
  }
}
The code above contains a JUnit 4 test. The test function testTakeScreenshot() performs the magic. It:
- Prepares to take a screenshot of the app.
- Takes a screenshot of the first screen.
- Selects the Ask button and triggers a click on it.
- Takes another screenshot.
As with instrumentation testing on Android, installing a separate APK package installs the test APK to drive the UI automation.
Run this command:
./gradlew assembleDebug assembleAndroidTest
This assembles and tests the APK.
When the command completes, you’ll see the normal APK saved under app/build/outputs/apk/debug/app-debug.apk. Meanwhile, you’ll find the test APK under app/build/outputs/apk/androidTest/debug/app-debug-androidTest.apk.
Now that you’ve created the APKs, you’ll configure fastlane screengrab to create the screenshots automatically!
Creating Screenshots
Automating the screenshot generation process saves a lot of time. Now, you get to try it out.
As mentioned in the fastlane documentation, you’ll save the screengrab configuration in a Screengrabfile.
Run the following command in Terminal:
bundle exec fastlane screengrab init
This creates the screengrab file.
Now, replace the contents of the fastlane/Screengrabfile with the following:
# 1
android_home('$PATH')

# 2
use_adb_root(true)

# 3
app_package_name('com.raywenderlich.android.rwmagic8ball')

# 4
app_apk_path('app/build/outputs/apk/debug/app-debug.apk')
tests_apk_path('app/build/outputs/apk/androidTest/debug/app-debug-androidTest.apk')

# 5
locales(['en-US', 'fr-FR', 'it-IT'])

# 6
clear_previous_screenshots(true)
Here’s what’s happening:
- android_home: Sets the path to the Android SDK that has the command line tools.
-
use_adb_root: Starts
adbin root mode, giving you elevated permissions to writing to the device. - app_package_name: Sets the unique package name of your app.
- app_apk_path and tests_apk_path: The file path to the app APK and test APK files, which you created in the previous section.
- locales: Designates the areas where you want to create screenshots. Here, it creates screenshots for English, French and Italian locales.
-
clear_previous_screenshots: If set to
true, this clears all previously-generated screenshots in your local output directory before creating new ones.
Testing in an Emulator or Device
To test, you need to start an emulator or device.
adb needs to run as root. That’s only possible with the Google APIs target.
However, if you run a device or emulator with API 23 or below, either option will work. See comment #15788 under fastlane issues for more information.
To check an existing emulator’s target, open AVD Manager and read the Target column:
Next, you need to make sure you have adb and aapt in your path. There are many ways of setting up the path; these differ based on the OS you use. To set it up in your current terminal session, execute the code below, being sure to use the correct path, according to your Android SDK setup:
# Path to Android SDK
export ANDROID_HOME=$HOME/Library/Android/sdk

# Path to Android platform tools (adb, fastboot, etc)
export ANDROID_PLATFORM_TOOLS="$ANDROID_HOME/platform-tools"

# Path to Android tools (aapt, apksigner, zipalign, etc)
export ANDROID_TOOLS="$ANDROID_HOME/build-tools/29.0.3/"

# Add all to the path
export PATH="$PATH:$ANDROID_PLATFORM_TOOLS:$ANDROID_TOOLS"
Here, you’re making sure all tools under the Android SDK are available in the path.
Notice ANDROID_TOOLS references the build-tools folder for version 29.0.3. Make sure to specify the version you have.
After the emulator or device starts, run this command in the project’s root folder:
bundle exec fastlane screengrab
If you have multiple devices connected, you can specify which one to use by first running adb devices and then using the identifier in the screengrab command:
bundle exec fastlane screengrab --specific_device emulator-5554
This starts the screenshot-grabbing process. Right now, it will throw errors; just ignore them. Eventually, it will complete and your default browser will open a new tab to display the screenshots for each locale.
Congratulations! You’ve created screenshots for RWMagic8Ball with fastlane for the Play Store!
But before you proceed to the next topic, there’s one more step to finish: Creating a lane to group multiple commands into one.
Adding a Lane
Open Fastfile and add the build_for_screengrab lane below the build lane:
desc "Build debug and test APK for screenshots"
lane :build_for_screengrab do
  gradle(
    task: 'clean'
  )
  gradle(
    task: 'assemble',
    build_type: 'Debug'
  )
  gradle(
    task: 'assemble',
    build_type: 'AndroidTest'
  )
end
From now on, you can create new screenshots with below commands:
bundle exec fastlane build_for_screengrab && bundle exec fastlane screengrab
Perfect. Now, it’s time to distribute your app!
Automating App Distribution
The beauty of fastlane is you can easily switch to different beta providers or even upload to multiple providers at once, with minimal configuration.
In the following sections, you’ll configure fastlane with two app distribution providers:
- Beta Testing: Once you have a new feature ready, you’ll want to share it with beta testers to gather feedback before releasing it on the Play Store. To do that, you’ll use the Firebase App Distribution service.
- Play Store: Fastlane provides the upload_to_play_store action to upload metadata, screenshots and binaries to the Play Store.
To upload a build to Google Play, use the fastlane supply action.
Google Play provides different release tracks, which come in handy when you want to send a build to a selected set of early testers.
The available tracks are: open, closed and internal test. More information is available from the Play Console Help docs.
The default value of the fastlane track parameter is production.
Using Firebase CLI
Your next step is distributing builds to testers with Firebase App Distribution. Although the Play Store provides similar functionality through the internal and beta tracks, you’ll see Firebase App Distribution provides a better user management experience when you upload a new version of your app.
To use Firebase App Distribution, first create a Firebase project.
Visit the Firebase website. You’ll see something like this:
To get started, click the Go to Console button on the upper-right side of the screen. You might need to sign in with Google.
Create a new Firebase project by clicking Add project:

For this tutorial, use RWMagic8Ball for the project name. Your setup will look like this:
Read and accept the terms, if needed, and click Create Project. You’ll see a message that your new project is ready.
Click Continue to view the project dashboard.
When fastlane uploads a build to Firebase App Distribution, it uses the Firebase CLI to connect with the Firebase servers. Install or update to the latest version of Firebase CLI for your OS.
After the installation completes, run this command to sign in to your Firebase account:
firebase login
Installing the fastlane Plugin
You’re now ready to configure fastlane with Firebase App Distribution.
Run the following command:
bundle exec fastlane add_plugin firebase_app_distribution
This installs the firebase plugin for fastlane.
You’ll see a prompt like this:
[07:49:07]: Plugin 'fastlane-plugin-firebase_app_distribution' was added to './fastlane/Pluginfile'
[07:49:07]: It looks like fastlane plugins are not yet set up for this project.
[07:49:07]: fastlane will modify your existing Gemfile at path '/Users/jamesnocentini/Documents/project/rw/rwmagic8ball/RWMagic8Ball-final/Gemfile'
[07:49:07]: This change is necessary for fastlane plugins to work
[07:49:07]: Should fastlane modify the Gemfile at path
'/Users/jamesnocentini/Documents/project/rw/rwmagic8ball/RWMagic8Ball-final/Gemfile' for you? (y/n)
Press y to continue and install the plugin.
Open the Firebase console to add the Android app to your project. Select your project and click Add Firebase to your Android app.
Enter your package name and click Register app. SHA key can be empty for now; you only need it when signing an APK.
Follow the instructions to add google-services.json to your project, then click Next.
Follow the instructions to add the Firebase SDK to your project and click Next.
Once installed, open the General Settings page for the project. Scroll down to the Your apps section. Write down the App ID — you’ll need it to configure fastlane later.
Now, you’re ready to use Firebase to send different builds of your app to different groups of testers.
Testing Groups
Firebase App Distribution lets you create groups with different users and specify which group should receive each build release.
To implement this, navigate to the App Distribution tab:
Go to the Testers and Groups tab and click Add group. Name the first group: Group one.
Next, click Add group again and add a second group named Group two.
Finally, click Add testers and enter your email address to add yourself as a tester in Group two.
You’re now ready to upload your first build with fastlane.
Deploying for Beta Testing
Open Fastfile and replace the beta lane with the following, making sure to replace app with the App ID you copied previously:
desc "Submit a new Beta Build to Firebase App Distribution"
lane :beta do
  build

  firebase_app_distribution(
      app: "1:123456789:android:abcd1234",
      groups: "group-two",
      release_notes: "Lots of amazing new features to test out!"
  )
end
The code above sets up the beta lane for the group-two test group. You can read more about the available parameters in the firebase_app_distribution action in the Firebase documentation.
Run the beta lane:
bundle exec fastlane beta
When the upload completes, you’ll see the following command output:
[08:28:48]: ---------------------------------------
[08:28:48]: --- Step: firebase_app_distribution ---
[08:28:48]: ---------------------------------------
[08:28:51]: ▸ i  getting app details...
[08:28:54]: ▸ i  uploading distribution...
[08:29:29]: ▸ ✔  uploaded distribution successfully!
[08:29:29]: ▸ i  adding release notes...
[08:29:30]: ▸ ✔  added release notes successfully
[08:29:30]: ▸ ⚠  no testers or groups specified, skipping

+------+------------------------------+-------------+
|                 fastlane summary                  |
+------+------------------------------+-------------+
| Step | Action                       | Time (in s) |
+------+------------------------------+-------------+
| 1    | default_platform             | 0           |
| 2    | Switch to android build lane | 0           |
| 3    | gradle                       | 53          |
| 4    | firebase_app_distribution    | 42          |
+------+------------------------------+-------------+

[08:29:31]: fastlane.tools finished successfully 🎉
The build is now visible on the Firebase App Distribution tab.
Users in Group two will receive instructions by email to install the app, as shown below:
Congratulations! You used Firebase App Distribution for beta testing.
In the next section, you’ll learn how to do the same with the Google Play Console.
Creating Play Console Credentials
You can read more about associating an account and the registration fee on the Google Play Console website.
To connect it with the Play Store, you need to configure it with the appropriate credentials. To do this, you’ll need an API key file. This JSON file contains the credential data fastlane uses to connect to your Play Store account.
To get one for your Play Store account, follow these steps from the fastlane documentation.
After you complete those steps, you’ll see the newly created API access JSON file.
Run the following command to test the connection to the Play Console API:
bundle exec fastlane run validate_play_store_json_key json_key:/path/to/your/downloaded/file.json
You’ll see the following output:
[07:53:45]: Successfully established connection to Google Play Store.
To use the key in this project, specify the path to that credential file in the Appfile, which you generated earlier in the tutorial.
Rename the private key file to api-play-store-key.json. Move it to the root directory of the project. Then, update fastlane/Appfile with the following line:
json_key_file("./api-play-store-key.json")
Done! Your next step is to upload it to the Play Console.
Uploading to Play Console
If you try to upload a build to the Play Store using the deploy command at this stage, it fails. Give it a try:
bundle exec fastlane deploy
You’ll see the output:
[07:56:56]: Google Api Error: Invalid request - Package not found: com.raywenderlich.android.rwmagic8ball.
This message means an app with that package name doesn’t exist on the Play Store Console yet.
fastlane cannot create a new listing on the Play Store. Creating an app listing includes uploading the APK to one of the available tracks so the Play Console knows your app’s package name. You don’t need to publish the APK.
In the next section, you’ll create the app on the Play Store Console website.
Creating a Play Store Listing
To create a new app listing, open the Google Play Console and click CREATE APPLICATION.
On the pop-up, leave the Default language input to its automatic value. For the app name, write RWMagic8Ball and provide the additional requested information. Once that’s done, click Create app.
Return to the Applications tab. You should now see the RWMagic8Ball app in the list.
Next, you’ll manually upload the first build on the Play Console so the Play Store can identify the app ID.
Manually Updating a Build on the Play Console
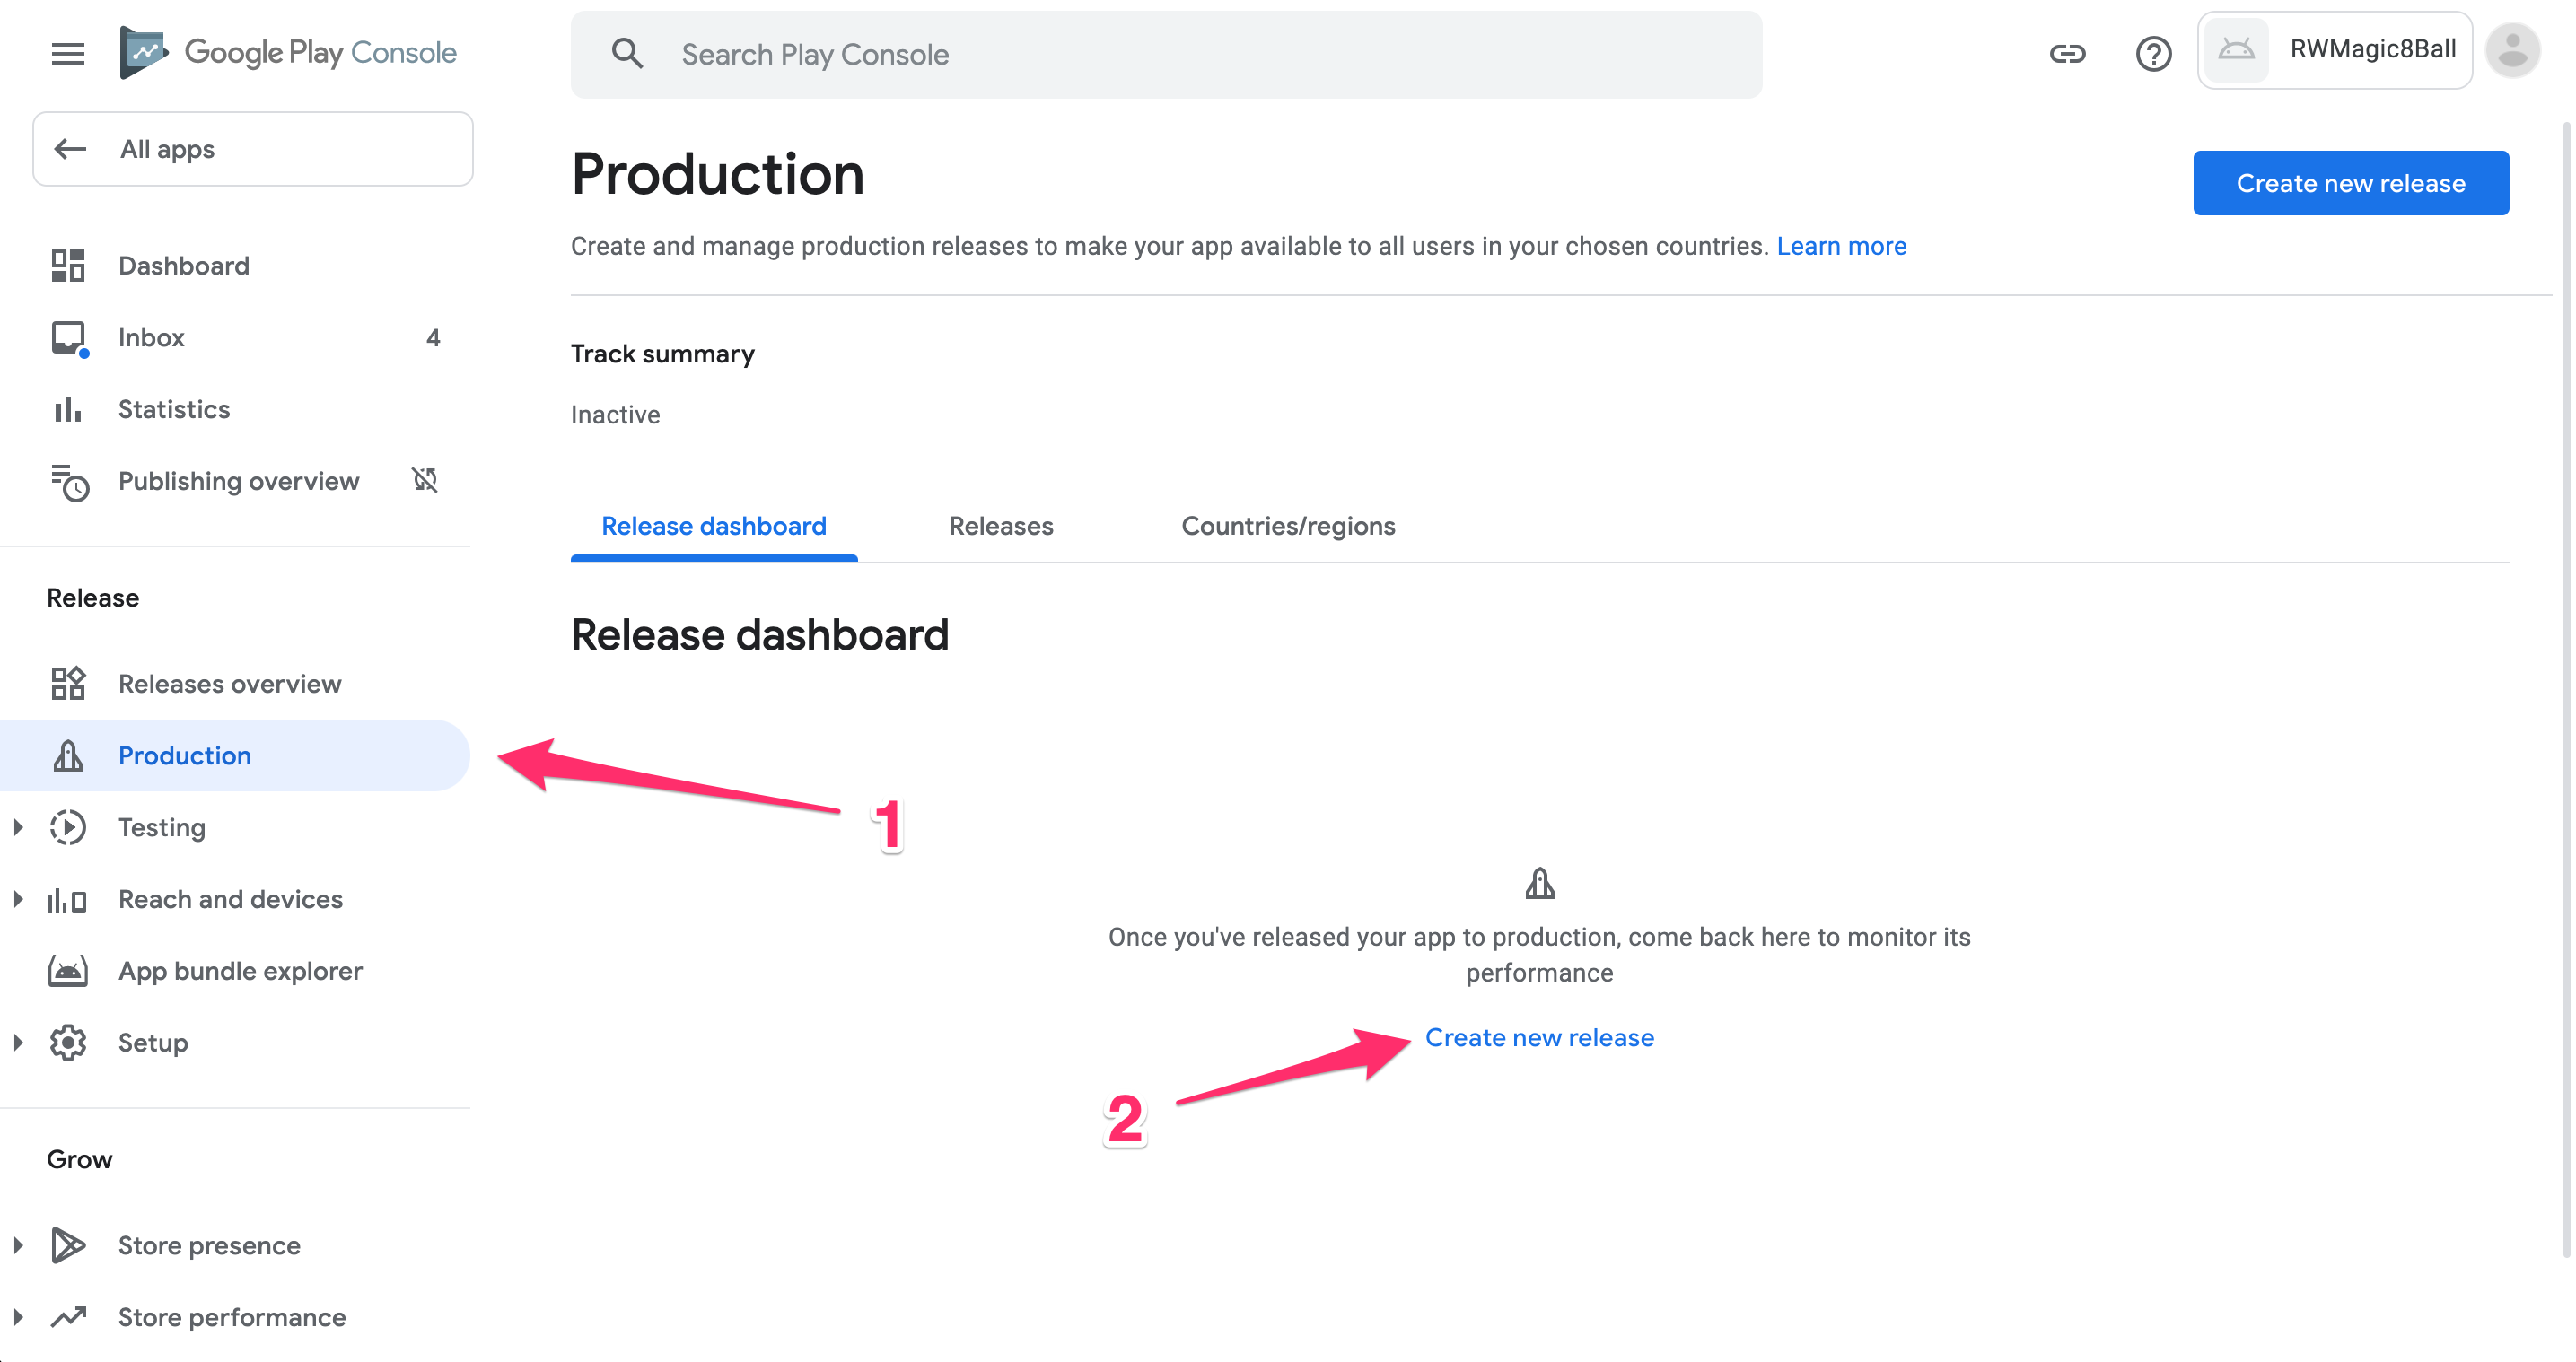
Select the application to open listing specific details. Then click the Production button to open the Production track page and click Create new release:
Scroll down to App Bundles. So far, you’ve been using APKs, but the Play Store now requires the packaged app to be in the AAB format and no longer accepts APKs. Run the following command to package the app as an App Bundle.
./gradlew bundleRelease
The app bundle will be saved under app/build/outputs/bundle/release/app-release.aab. Back in the Play Store console, click the Upload button and select the newly created .aab file:
The starter project comes pre-configured with app signing. If you’d like to configure app signing for a different app, follow the steps from the Android Studio user guide.
You must provide some additional details before submitting the build. Because this is the first upload, the Release name can be anything; in this case, use 1.0 – 3. Provide a short description of the changes in this release. For now, use Lots of amazing new features to test out!
Click Save.
Next, return to the list of apps. This time, you’ll see your package name below the app name:
From now on, when fastlane connects to the Play Store with your Google credentials, it’ll automatically find the app on the Play Store Console with your package name.
Downloading Metadata
In addition to uploading a build of your app, fastlane can upload app metadata, including screenshots, descriptions and release notes. This approach lets you keep a local copy of the metadata, check it in version control and upload it when you’re ready.
When you connect fastlane supply to the Play Store for the first time, you must run the init command, as the fastlane documentation describes.
The init command downloads the existing metadata to fastlane/metadata. If you followed the previous sections of this tutorial, that directory already exists and contains app screenshots. Remove that folder for now; otherwise, the following command will fail.
Now, run:
bundle exec fastlane supply init
This command downloads any existing content from the Play Store Console. Once the command runs successfully, you’ll see the following output:
[✔] 🚀
[13:48:36]: 🕗  Downloading metadata, images, screenshots...
[13:48:37]: 📝  Downloading metadata (en-GB)
[13:48:37]: Writing to fastlane/metadata/android/en-GB/title.txt...
...
[13:48:37]: 🖼️  Downloading images (en-GB)
[13:48:37]: Downloading `featureGraphic` for en-GB...
...
[13:48:43]: ✅  Successfully stored metadata in 'fastlane/metadata/android'
The downloaded content saves in fastlane/metadata. Open android/en-GB/changelogs/1.0 – 3.txt and notice it contains the text you entered on the Play Store Console:

Congratulations! You’ve set up a new app on the Play Store Console, configured fastlane and retrieved the app metadata.
Uploading Metadata
Your next step is to update some metadata locally and upload it with fastlane — to provide app screenshots, for example. Run the lanes to create app screenshots:
bundle exec fastlane build_for_screengrab && bundle exec fastlane screengrab
Now, you’ll see two screenshots in metadata/android/phoneScreenshots:
Run fastlane supply again, this time without the init command to upload the new screenshots:
bundle exec fastlane supply --skip_upload_changelogs
In the Play Store Console, select Store listing on the left pane and English (United States) in the Languages drop-down, then scroll down to the Screenshots section. You’ll see the screenshots that screengrab created:
You can see fastlane also enabled the French (France) – fr-FR and Italian – it-IT languages on the Play Store Console. That’s because screengrab created the fr-FR and it-IT folders in fastlane/metadata/android and supply detected those folders.
Where to Go From Here?
Congratulations! You’ve learned how to configure fastlane in an Android app. You can download the final project by clicking the Download Materials button at the top or the bottom of this tutorial.
If you run the final app right away, you see the following error message:
File google-services.json is missing. The Google Services Plugin cannot function without it
Provide a valid google-services.json file for it to work.
fastlane is a big help in managing the mobile app release tasks. In addition to what you learned here, fastlane with Android also offers:
- Uploading app metadata to Google Play with fastlane supply.
- Creating screenshots in different languages. See Advanced Screengrabfile Configuration for more information.
- Many other options. See fastlane’s available actions page for a complete list.
You can also learn more about the different app distribution providers:
Feel free to let us know what you enjoyed and how we can improve the tutorial in the future by leaving comments in the forum below!
raywenderlich.com Weekly
The raywenderlich.com newsletter is the easiest way to stay up-to-date on everything you need to know as a mobile developer.
Get a weekly digest of our tutorials and courses, and receive a free in-depth email course as a bonus!
Add a rating for this content
Sign in to add a ratingRecommend
About Joyk
Aggregate valuable and interesting links.
Joyk means Joy of geeK