
Figma: Grouping Things
source link: https://blog.prototypr.io/figma-grouping-things-5580117279af
Go to the source link to view the article. You can view the picture content, updated content and better typesetting reading experience. If the link is broken, please click the button below to view the snapshot at that time.

Figma: Grouping Things
A quick look at the differences between groups, frames and components in Figma.
It’s hard to imagine any project that doesn’t utilize some form of grouping objects together. Grouping helps you keep your files nice and tidy, and — even more importantly — allows for the creation of structures such as buttons, tiles, or entire pages. Figma lets you group things in various ways that may seem confusing, intimidating, and almost redundant at first. Let’s look at how groups differ from frames and how components come into all this. Let’s talk about the information architecture of the project files themselves.
Groups
The most basic way of grouping elements is, rather unsurprisingly, through the use of groups. A group is just as big as the sum of its visible elements. It can’t be any bigger or any smaller. Resizing it causes the objects inside to scale with it. The only properties a group can receive are position, dimensions, blending mode, and opacity; modifying fill, stroke or effects affects all objects inside.
Regular Frames
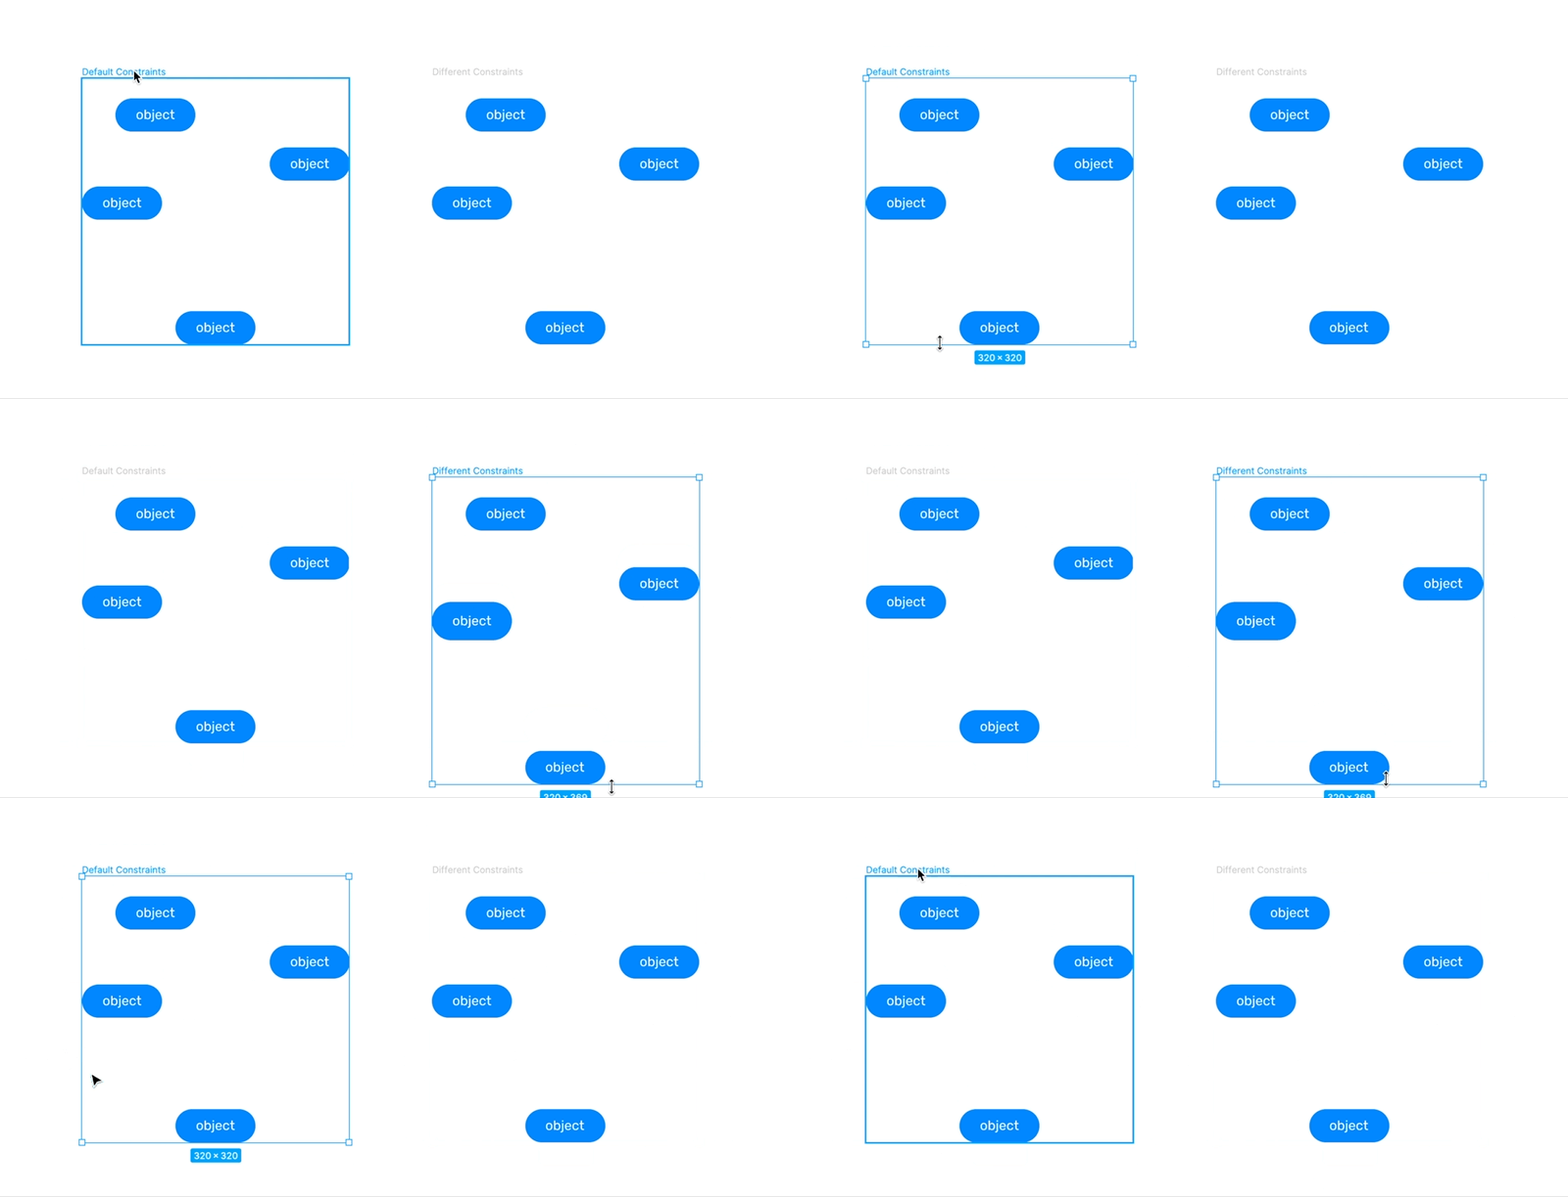
Frames are a step up from groups. They can exist by themselves, they can be freely resized, and assigned the same properties you could apply to any rectangular vector. The way objects inside a frame behave when it’s resized is dependent on each object’s individual constraints. To give you an example of what this means, imagine you can force objects to stretch with the frame or stick to the edge’s frame or its center. The settings are applied for the vertical and horizontal axis separately.

The fact that you can apply settings like fill to a frame and have the objects inside behave in a certain way is a huge improvement over groups. Imagine you were trying to construct a simple white text on a blue background button. You can either create a rectangle vector, drop a text object on top, and put them both in a group. If you were to do that in a frame, all you need is a text object inside a frame without the vector.
Auto Layout Frames
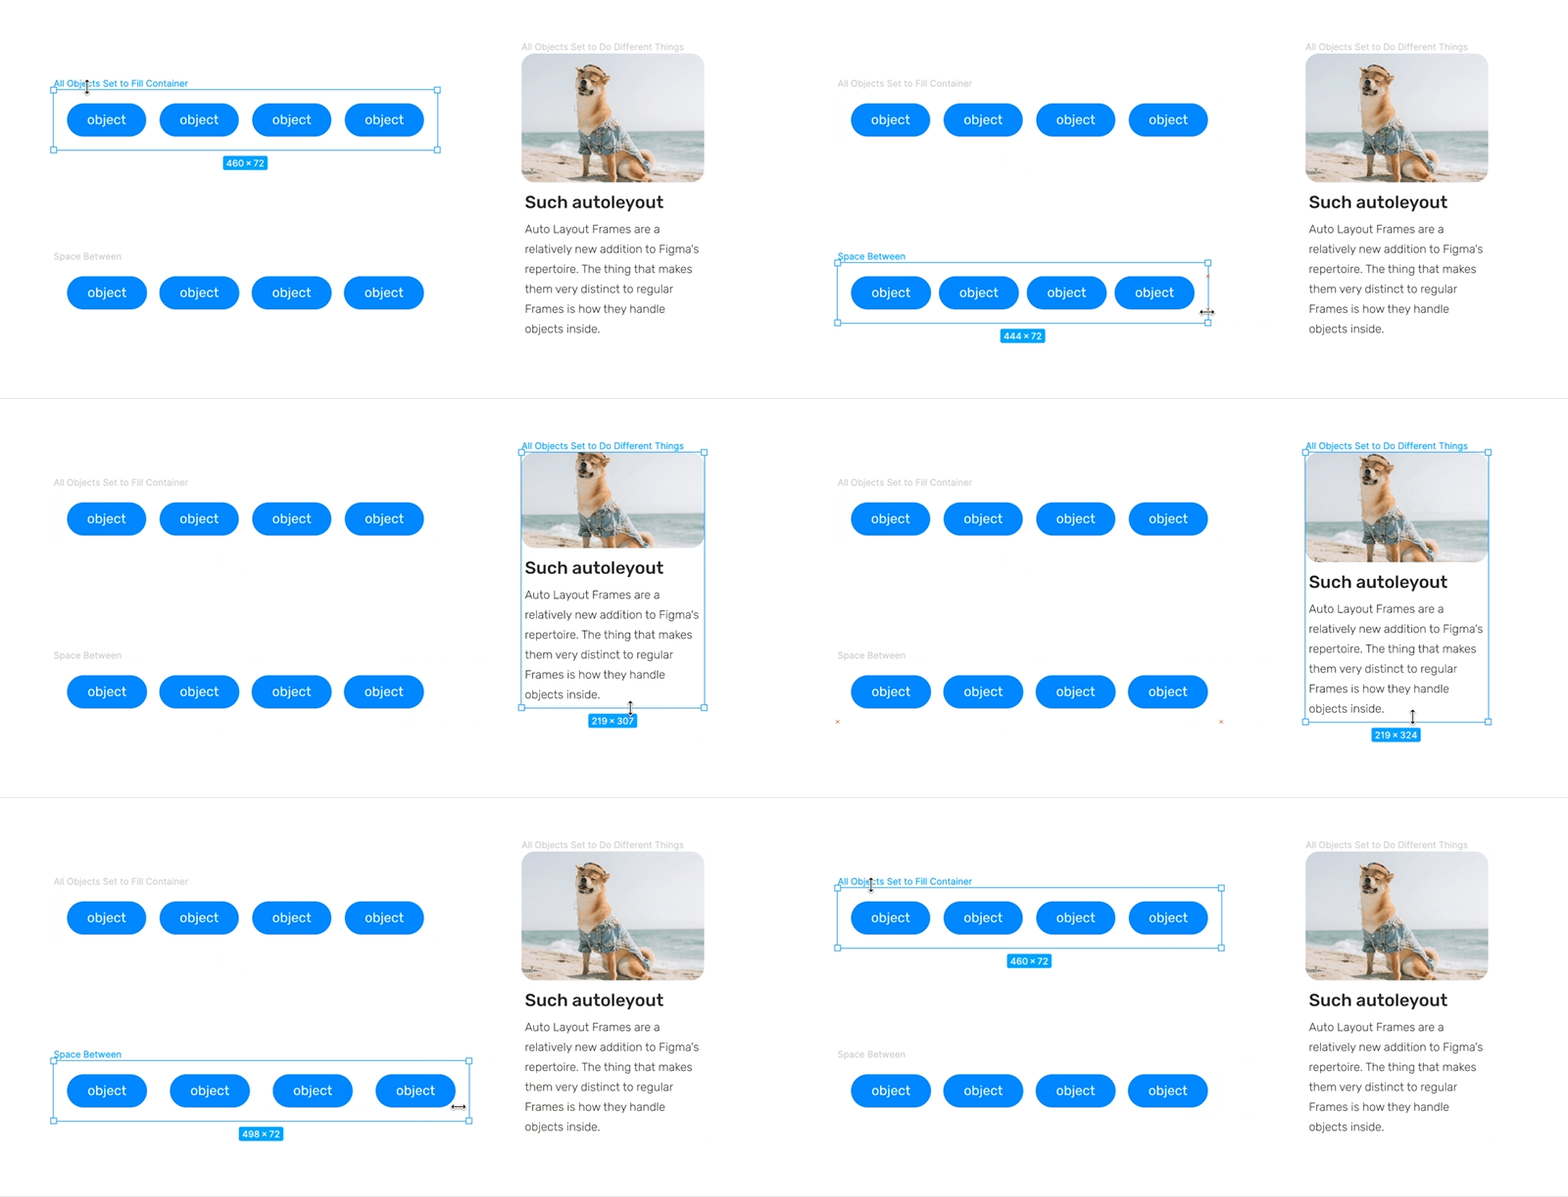
Auto Layout Frames are a relatively new addition to Figma’s repertoire. They too can be freely resized as well as assigned properties such as fill, stroke or effects. The thing that makes them very distinct from regular frames is how they handle objects inside — objects cannot be put on top of one another, the spacing between them has to be even, and they can only be put in a single row or a column (so you cannot have multiple rows or columns of objects unless you nest frames).

While auto layout frames can exist without any objects inside, their main purpose is to automatically distribute objects that they contain, either horizontally or vertically. Check out my article on auto layout frames in Figma if you want to learn more.
Regular vs Auto Layout Frame
Now whether you should use regular or auto layout frames comes down to what effect you want to achieve. I’d argue that if you’re designing any layouts, 9 times out of 10, you should go with auto layout. When set up properly, auto layout groups will resize automatically as you change the contents or dimensions of the objects inside and will always make sure that all the paddings and spacings are nice and even without you having to take any measurements the old school way (yes, I know what you’re doing with that rectangle.) The only case where auto layout causes more harm than good are frames that hold icons, vector images, etc. You can find out more about how to use and where to use auto layout by checking out my article.
Components
Components are frames that, when copied, spawn instances (or children) instead of duplicates. What that means is that when you go back to the main or parent component and change its properties or its contents, it will affect the properties and contents of all its children. You can turn any object or a group of objects into a component. When a single object or a group of objects are turned into a component, they’re put inside a frame that’s just as big as all of the objects inside it. When a group is turned into a component, it is automatically converted into a frame. Since components are frames, either regular or auto layout ones, everything I’ve said about regular or auto layout frames applies to them as well.
When should you create a component? Whenever you’re going to be using the same object or the same group of objects in many different places. You should always start small and remember that nesting components and sometimes putting them together to create bigger components is a thing. It all depends on whether you’re going to be using the smaller components in many bigger ones.
Check out my article on creating a simple, reusable design system in Figma to learn more about how to utilize components.
Making connections
Personally, I never use groups for anything other than moving a bunch of elements around just to ungroup the quickly after or grouping together some temporary trash elements that I don’t want getting lost. How you use these tools is totally up to you and depends on many things like the size of the projects and what you want to achieve. My suggestion would be to stick to using frames, as they should provide you with the most flexibility. You can resize them independently of the objects inside, you can add fills, use different types of layout settings. In any case, it’s worth exploring all the available options Figma provides to be able to decide which one of them best suits your use case.
Recommend
About Joyk
Aggregate valuable and interesting links.
Joyk means Joy of geeK