

TokenBased Security, OAUTH, OIDC, IdentityServer – Part 4
source link: https://dzone.com/articles/tokenbased-security-oauth-oidc-identityserver-part
Go to the source link to view the article. You can view the picture content, updated content and better typesetting reading experience. If the link is broken, please click the button below to view the snapshot at that time.

Introduction
In the previous post of this series, we set up IdentityServer with some test users and client configurations. We then used the postman tool to get the access token with couple of different flows.
In this post, we will move forward and add a resource API to our solution. This will be simple .NET Core WebAPI application. This API will contains endpoints which different client applications will call. We will protect this API using IdentityServer.
We will then access this API from from client applications. We will keep using the Postman tool and also add a .NET Core WebApi application as a .NET Client to see how to make REST calls from code.
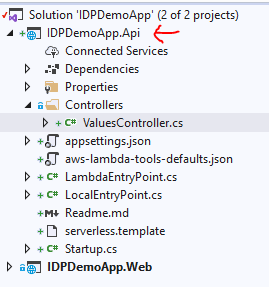
Here is how our solution will look at end of this post:

Adding a Resource API
I’ve added a .NET Core Web API project IDPDemoApp.Api (AWS Serverless Template) to the solution. This API will host our resources which will be protected by IdentityServer and called by our client applications.
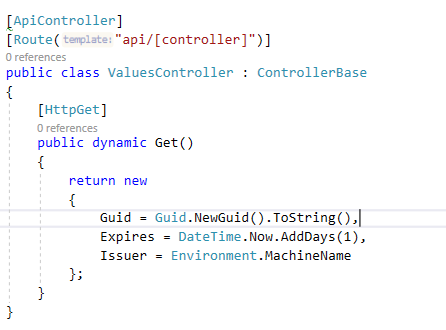
In the ValuesController, I updated the code as shown below:
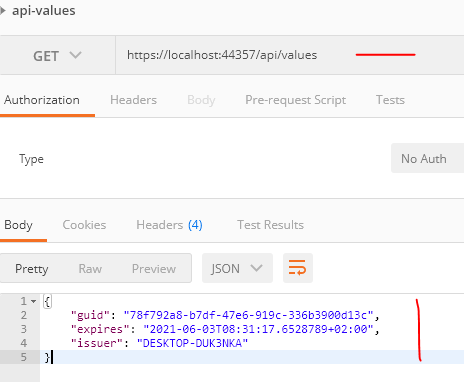
And, here is how the API Response looks:
Next, let’s protect this API using IdentityServer.
Protecting API With IdentityServer
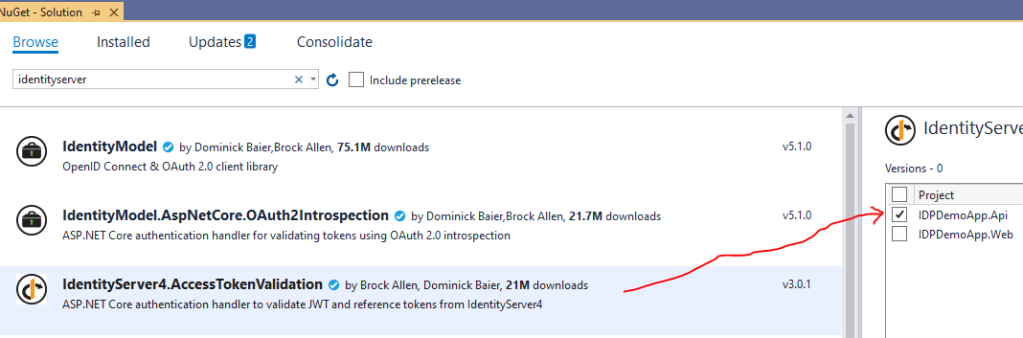
First, to enable validation of access token we will install the Nuget package in API project as shown below:
With the package installed, let’s update the startup.cs file with auth middlewares as shown in the next part.
Configure the API
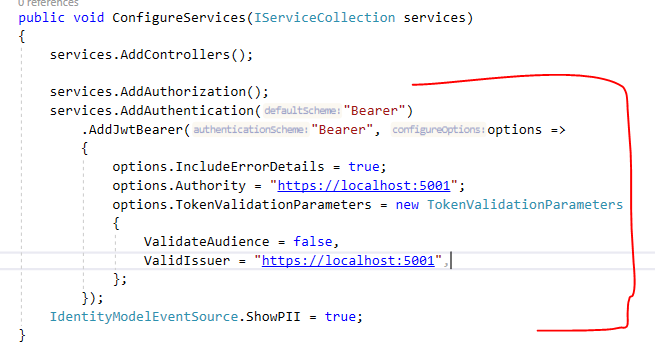
Here, we set up authorization, with the “AddAuthorization” middleware for enabling making endpoint authorized with the “Authorize” attribute.
We also setup up middleware for bearer authentication. The Authority is the baseUrl of the AuthorizationServer and this is used for getting the public key when the API is verifying and validating the access token for an authorized request. Future requests will use an in-memory cached public key for verifying the access token.
We also mentioned ValidIssuer in TokenValidationParameters. There are many other properties, but for this demo, that’s all we need.
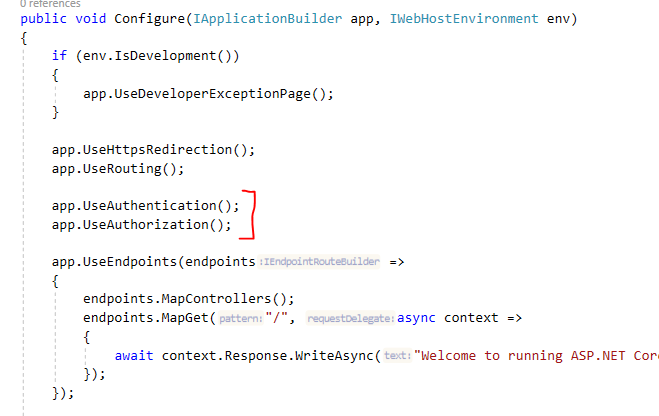
I also updated the Configure method as shown below:
Protect the API Endpoint
We also need to use Authorize theattribute on API endpoint as shown below:
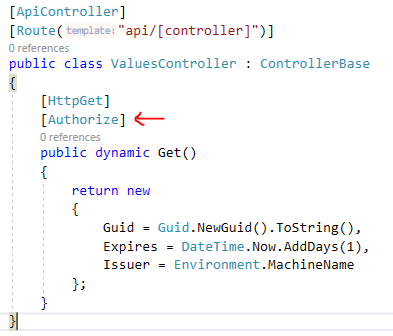
And, now, if we try calling this endpoint, it is protected and will not be publicly accessible:
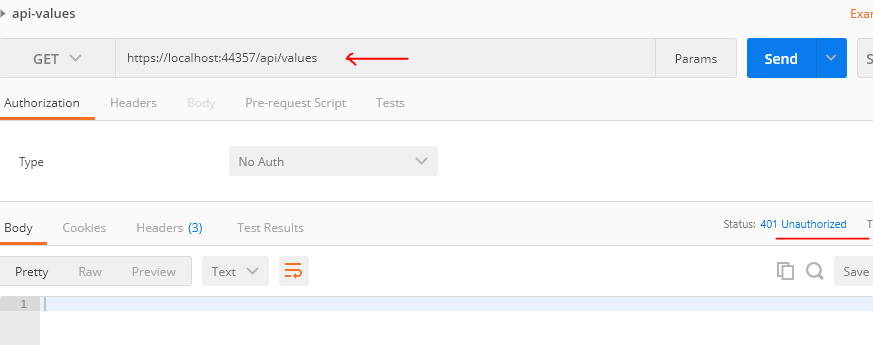
At this point, our resource API is protected and, next, we will see how to use AccessToken to call this endpoint.
Using Access Token to Call API
We saw this part in previous post. So, let’s get an access token as we learned in the previous post.
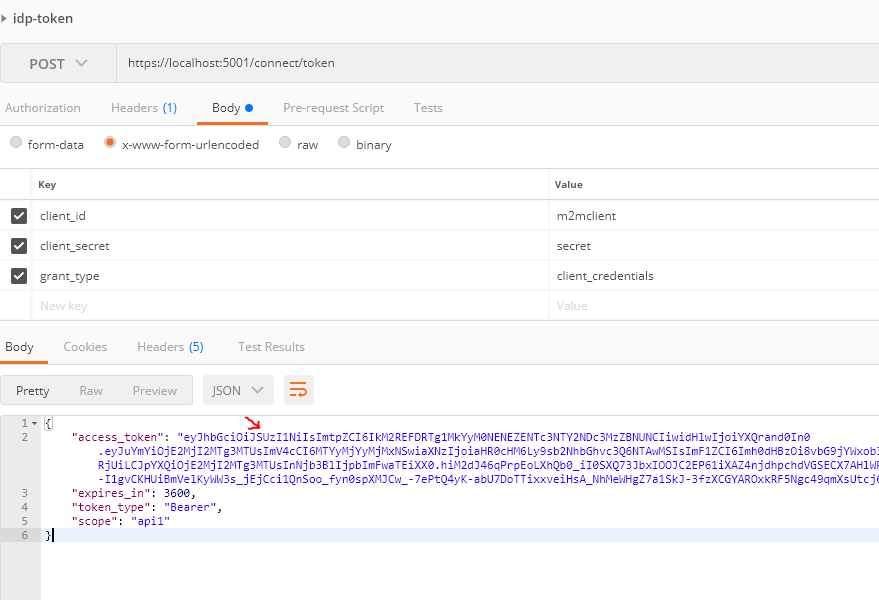
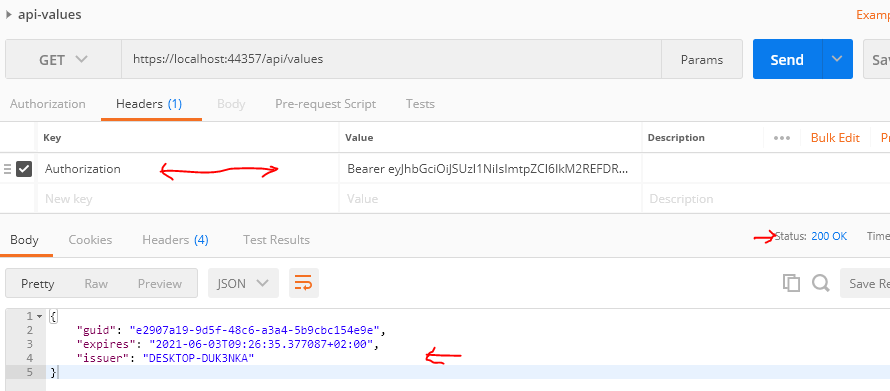
Now, we can use this token as the Authorization header in the "Get Request" to Resource API, and this time HTTP request resulted as expected.
HTTP Client (Client Credentials)
So far, I’ve used Postman for demos. Let’s see how we can make these calls from code. For this purpose, I’ve added another .NET Core WebApi project (IDPDemoApp.HttpClient) to the solution.
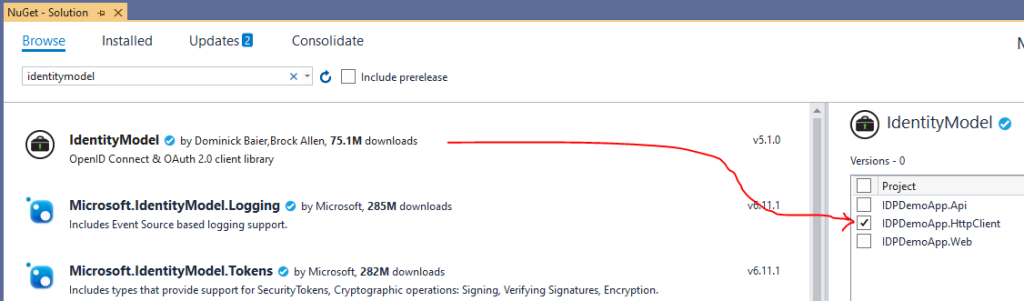
I also added IdentityModel nuget package to this project, as shown below:
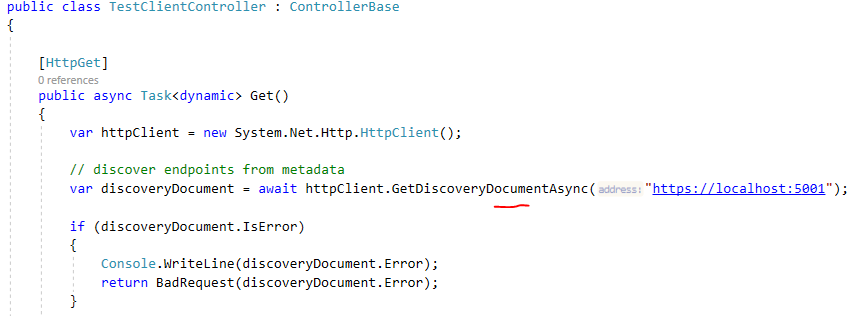
I also created a new controller called TestClientController with a Get method that will do the following:
- Create an HttpClient.
- Get Discovery Document from IdentityServer (this will contain token-endpoint info etc).
- Make a ClientCredentialsTokenRequest to IdentityServer with client-id and secret to get a token.
- Use a token to make an HTTP call to Resource API (api1) protected endpoint.
Below is the code for the same.
Get Discovery Document:
Make Token Request: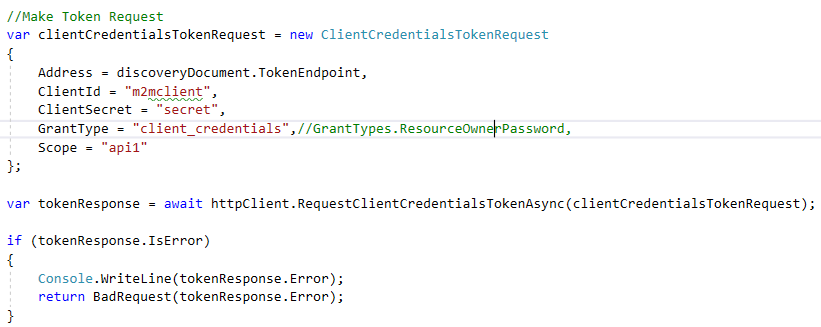
Call Resource API: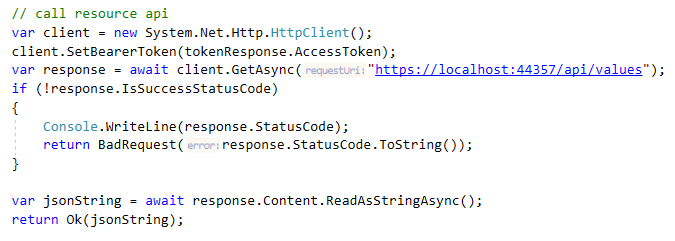
Run Solution and Test:
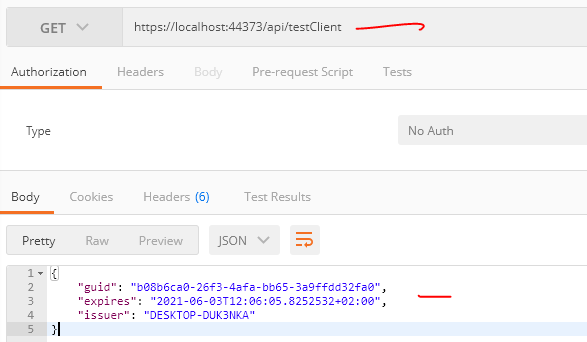
Now, run all three projects together, and below is the result.
HTTP Client (Resource Owner Password)
To demonstrate this flow, I created a controller endpoint in the Resource API project. Then, I called this endpoint from the HTTPClient .NET Core project.
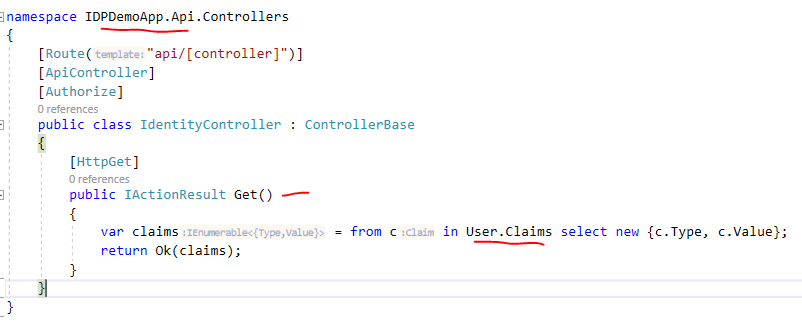
Resource API Endpoint:
I created a new controller in Resource API project (IDPDemoApp.Api).
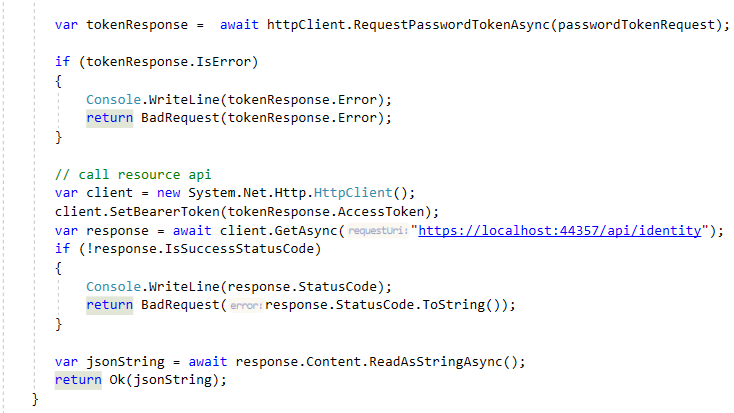
HTTPClient (Resource Owner Password) Method:
I also created a new method in the HttpClient project which will the above created IdentityController endpoint. This time we will use PasswordTokenRequest as shown below:

You can see full code in the repository.
API Result:
Now, if we call to make a call to the endpoint, we can see the result returned from protected Resource API via HTTPClient application using Postman.

Summary
In this post, we created a resource API using the .NET Core WebApi project template. Then, we created few protected endpoints in this API. We wired this API with IdentityServer for authorization. If we have more APIs, we can protect them in similar fashion.
We then used postman and .NET core code to get the token from identityserver and then pass those tokens as Authorization Headers in our HTTP Calls and the client application was able to get the data as expected.
We will continue our learning in next post in this series. You can download the source code from this git repo. Let me know if you have some comments or questions. Until next time, happy coding!
Recommend
About Joyk
Aggregate valuable and interesting links.
Joyk means Joy of geeK