

Ship With the Docker Hub CLI Tool
source link: https://hackernoon.com/ship-with-the-docker-hub-cli-tool
Go to the source link to view the article. You can view the picture content, updated content and better typesetting reading experience. If the link is broken, please click the button below to view the snapshot at that time.

Ship With the Docker Hub CLI Tool
@miketechgameMike Wolfe
Software Developer, Tech Enthusiast, Runner.
Photo by Aron Yigin on Unsplash
Something you can likely conclude from my previous articles is that I prefer using the command line interface whenever possible. Admittedly, there have been times where I have worked even harder to use the command line.
One such occasion was my introduction to R article, in which we used Visual Studio Code and the terminal to run the R script.
It would have been much easier to use something like RStudio, which we did for graphs, but nothing wrong with learning a little command line now and then.
In case you are new to Docker or need a refresher, it is a containerization tool. The goal of containers is a form of the “divide and conquer” concept. Usually, you would just use the stand-alone interface.
However, I found that Docker also supports a command-line interface. What was difficult to find was any range of documentation on it. In fact, there was very little.
With that in mind, I figured I would mess around with the commands and jot down my findings in hopes someone may find them useful in the future. As an important note, Hub-Tool is more experimental at this point in time, but still worth a look.
Installing Docker Hub-Tool
Before we can start, we will need to install the hub-tool.
This is assuming you already have a Docker account and have Docker installed as well. Navigate to Github for the Hub-Tool download:
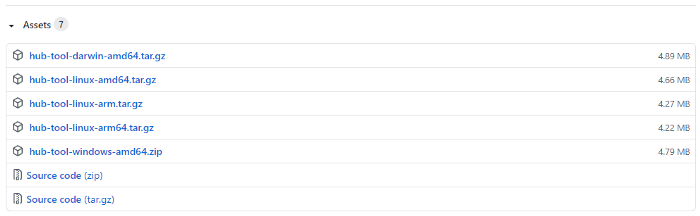
Hub-Tool download page.
Download the package for your system.
In my case, it is the amd64 for Linux. Once downloaded, unzip the tar file. Now that it is unzipped, we can go navigate to the directory via the command line. While in the hub-tool directory, we can run the help to see our options.
./hub-tool --help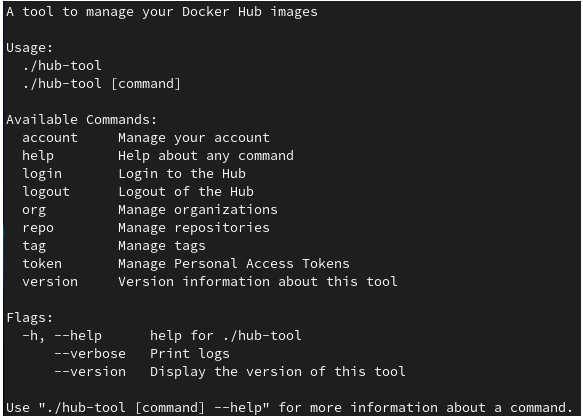
Listing commands.
Note, before getting started anywhere else, we will need to log onto our Docker account. Running other commands will throw an error asking for an account. We can log in by using the following:
./hub-tool login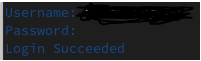
Logging in.
Now we can go down the line and learn about each option. To gain information about the account, such as the owner’s name, the plan, the limits, joined date, etc., use the following command:
./hub-tool account info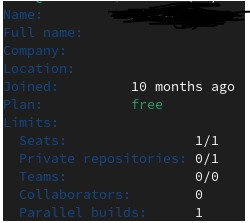
Account info.
For the rate-limiting information on the account, use the following:
./hub-tool account rate-limiting
Rate-limiting.
Next down the list is the help feature, which we previously used.
Just note that instead of “ — help”, you could instead simply use “help” for the list of commands. The next command on the list was login, which we also used. Next, logout, which we will use at the end. On the list after logout is org.
./hub-tool org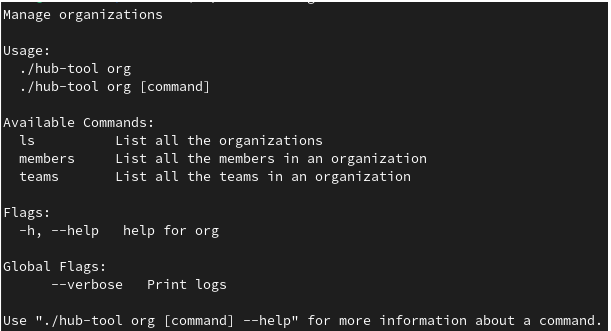
Organization commands.
Org is used to list the organizations. To list the basics, use the ls command like such:
./hub-tool org lsTo list something more specific, you can use “org members” or “org teams”. To do so you would use commands such as:
./hub-tool org members <MemberName>./hub-tool org teams <TeamName>Because I have none set up currently, there is nothing to search for.
The next thing we can do is list the repositories:
./hub-tool repo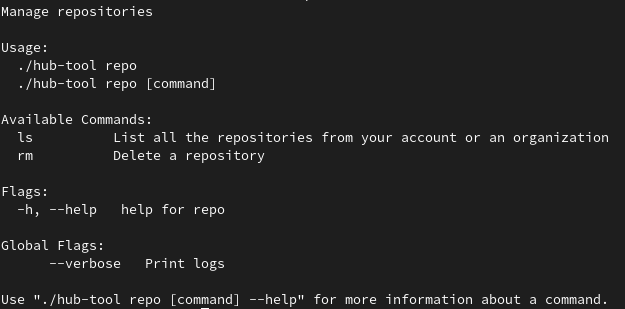
Repositories commands.
As you can see, we can first list our repositories:
./hub-tool repo ls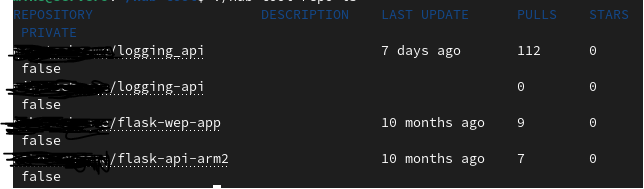
Listing repositories.
Another option is we can remove a repository with the following:
./hub-tool repo rm <RepositoryName>I will not run this for now, as I have none that I want to delete for now.
The next command we can review is how to manage tags:
./hub-tool tag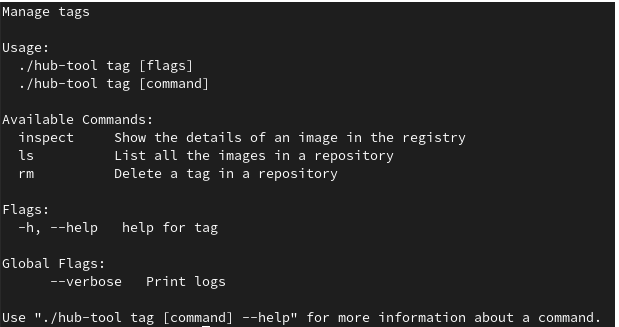
Tag commands.
We can now list the tags for a repository. You will need the name of the repository to review:
./hub-tool tag ls <RepositoryName>
Repository information.
Next with tags, we can inspect those in a repository. This includes data such as where it manifests, the configuration, and the layers. This one will not include a screenshot, as it includes private paths and information.
./hub-tool tag inspect <RepositoryName>As well as the others we previously used, we can also use the remove command with the repository name.
./hub-tool tag rm <RepositoryName>Next, there is a token command, where we can manage the personal access tokens:
./hub-tool token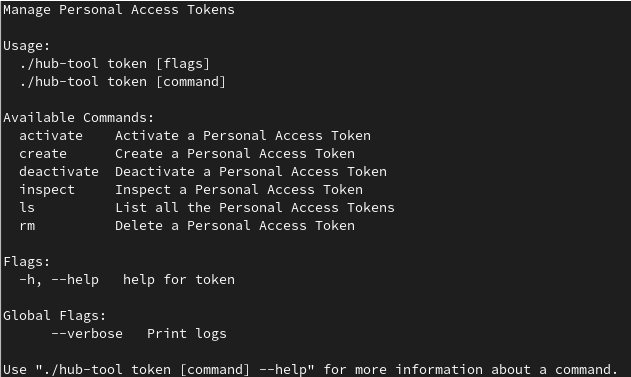
Token commands list.
We will first need to create a token:
./hub-tool token create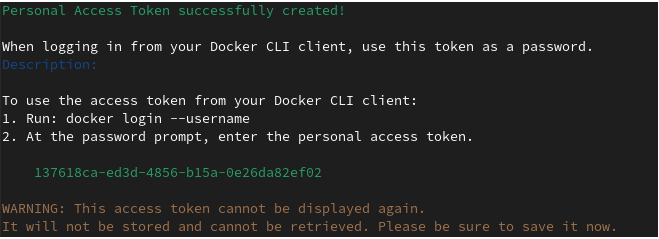
Creating a token.
With a token created, we can review them using a list:
./hub-tool token ls
Showing the tokens.
Next, we can inspect the specifics on that token:
./hub-tool token inspect <TokenName>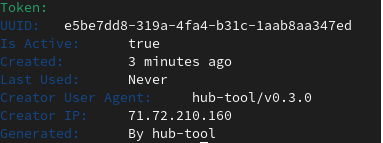
Token information.
As we saw the active was true, we could deactivate the token if desired:
./hub-tool token deactivate <TokenName>
Deactivated token.
If we do want the token reactivated, we can also do that using a similar command:
./hub-tool token activate <TokenName>
Activated token.
Like with everything else, we could also use the remove option when the token is no longer needed. This action takes username authentication as well.
./hub-tool token rm <TokenName>Another option is the version option. It will display the version of Docker, as well as the Git commit:
./hub-tool versionNote, you could use “- -version” instead of “version.

Docker version installed.
The final option is the logout option:
./hub-tool logout
Logged out.
Conclusion
Although this list is inclusive, it is not entirely detailed and contains only brief overviews of each option. However, I feel it brings a little more clarity to options that do not have a variety of documentation. I hope you found my examples and summaries useful.
Even though the Docker interface is strong and useful, for managing repositories I could see myself this CLI again. Although there are not very many options currently, I enjoyed diving in and learning more about the Docker Hub-tool. Until next time, cheers!
References:
This article was first published here.
Recommend
About Joyk
Aggregate valuable and interesting links.
Joyk means Joy of geeK