

Xamarin.Forms Custom WebView Headers (iOS WKWebView + Android WebView)
source link: https://xamarinhowto.com/xamarin-forms-custom-webview-headers-ios-wkwebview-android-webview/?utm_campaign=xamarin-forms-custom-webview-headers-ios-wkwebview-android-webview
Go to the source link to view the article. You can view the picture content, updated content and better typesetting reading experience. If the link is broken, please click the button below to view the snapshot at that time.
On a recent app I worked on, there was a requirement for authentication within a WebView. For this to work custom request headers had to be sent through a Xamarin.Forms WebView. This is quite standard for a lot of hybrid web applications. I found some resources on the topic, however, all were quite outdated and none had reference to Apple’s new AppStore requirement of WKWebView. So let’s jump straight into the code.
Shared Code
This code will allow us to use the CustomWebView in XAML. We can set the header value straight into the XAML or bind it to our ViewModel.
iOS Custom Renderer (WKWebView)
For the iOS custom renderer simply inherit the appropriate ViewRenderer and override OnElementChanged. In here, set the Control to a new instance of WKWebView. Then create a NSDictionary with your desired header key and the CustomHeaderValue that we obtain from the shared code we created beforehand. Create a new NSMutableUrlRequest and set the headers to the dictionary.
Android Custom Renderer (Android.Webkit.WebView)
The Android custom renderer is very similar to that of iOS. Start by inheriting the appropriate ViewRenderer and override OnElementChanged. In here, set the Control to a new instance of Android.Webkit.Webview. Then create Dictionary<string, string> with your desired header key and the CustomHeaderValue that we obtain from the shared code we created beforehand. Set the WebViewClient to a new instance of a CustomWebViewClient with the dictionary created.
Using the Custom Control
The Result
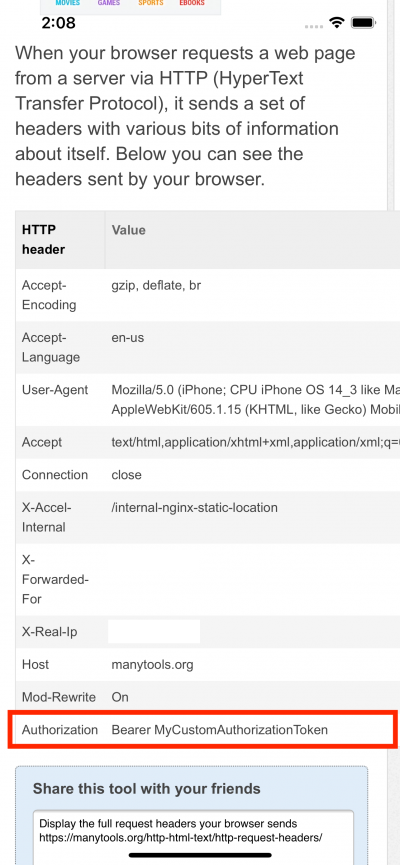
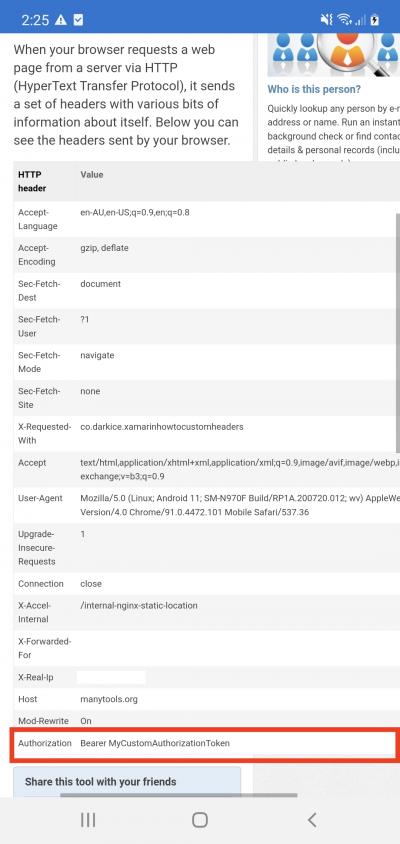
This webpage shows all of the HTTP request headers that have been sent by the WebView. It can be seen that the Authorization header now shows “Bearer MyCustomAuthorizationToken” which has been passed in via my viewmodel.
Android
That wraps up the entire project, very simple to modify and add multiple headers if required. Let me know if there are any questions below and I will try to answer them all.
As usual, if you want the entire working example, please have a look here on GitHub.
Recommend
-
36
Oops, I did it again… Another PR got merged into Xamarin .Forms , this time adding the ability to set op zooming on the WebView on Android. In th...
-
15
Xamarin Forms – Custom Visual State triggers and Control Templates Not so long ago there was this little online event called Xamarin Expert Day that featured a bunch of awesome speakers...
-
11
Xamarin forms – Switch custom font on Style Trigger Just a small reminder for myself. I was actually unaware this was possible in XAML styling, but now that I know it can be done, I will be using this more often
-
8
Beautiful Custom RadioButton with Xamarin.Forms 5Beautiful Custom RadioButton with Xamarin.Forms 5Jame...
-
12
#XamarinForms #FontIcons #FontAwesome
-
15
How to Reuse Xamarin.Forms Custom Renderers in .NET MAUINowadays, we see many devices working across multiple platforms, from Android and iOS to Windows and macOS. To develop multiple applications for a single p...
-
8
Creating a custom control is a common thing to do when developing a Xamarin Forms application. In many cases, the main purpose of creating one is to have a reusable control that we can use across all our application. In this articl...
-
6
#xamarinforms #dotnetmaui #xamexpertday
-
6
Migrate Your Existing Xamarin.Forms Custom Renderers to .NET MAUI App Xamarin.Forms evolved into a new framework—.NET MAUI. And from our prac...
-
4
Porting Custom Controls from Xamarin Forms to Uno Platform ...
About Joyk
Aggregate valuable and interesting links.
Joyk means Joy of geeK