

Configuring custom MX records
source link: https://help.dreamhost.com/hc/en-us/articles/215035328-Configuring-custom-MX-records
Go to the source link to view the article. You can view the picture content, updated content and better typesetting reading experience. If the link is broken, please click the button below to view the snapshot at that time.

Configuring custom MX records
Overview
This article explains how to update your MX records to point to another email provider. This will redirect all new email to the new email hosting company.
Only enter custom records if your email service is hosted at a different company and you want your site's email delivered there. This means your email will no longer be delivered to DreamHost.
Adding custom MX records
- Navigate to the Custom MX page.
Google Workspace users
If you have enabled Google Workspace on your domain in the DreamHost panel, you will see Google Workspace to the right of your domain. This means your MX records are already pointed to Google where it's currently hosted.
If you have already purchased Google Workspace directly through Google and not DreamHost, you'll need to add custom MX records that point to Google as shown below.
- To the right of your domain, click the Edit button.
- Scroll down to the Custom MX Records section.
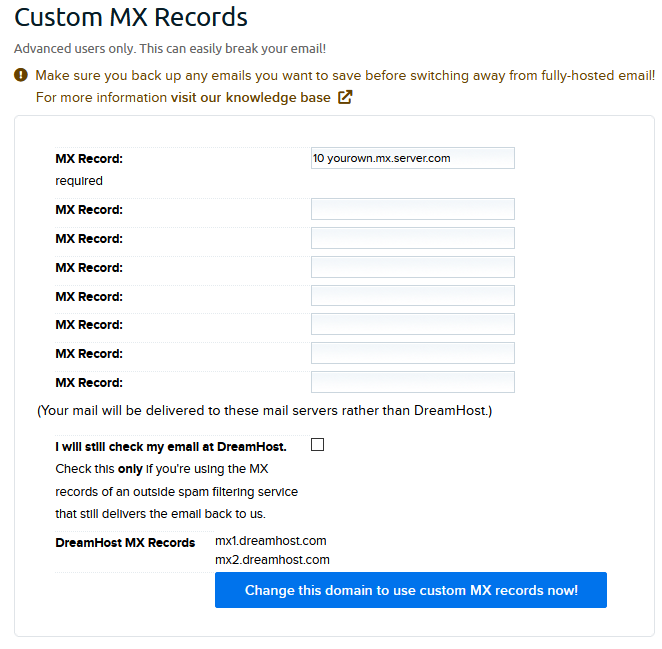
- Enter your custom MX records into the text fields provided.

Make sure to enter the priority number before the address.
Example of adding custom records
The example below shows what records you would add in your panel if you needed to point your email to Google, however, the instructions are the same for any email provider.
Adding custom records
- First, obtain the MX records from your new email hosting provider. They will look like the following:

- Add each record into the text fields in your DreamHost panel.
Make sure you add the priority number before the MX record address.
Do not add the @ symbol anywhere.
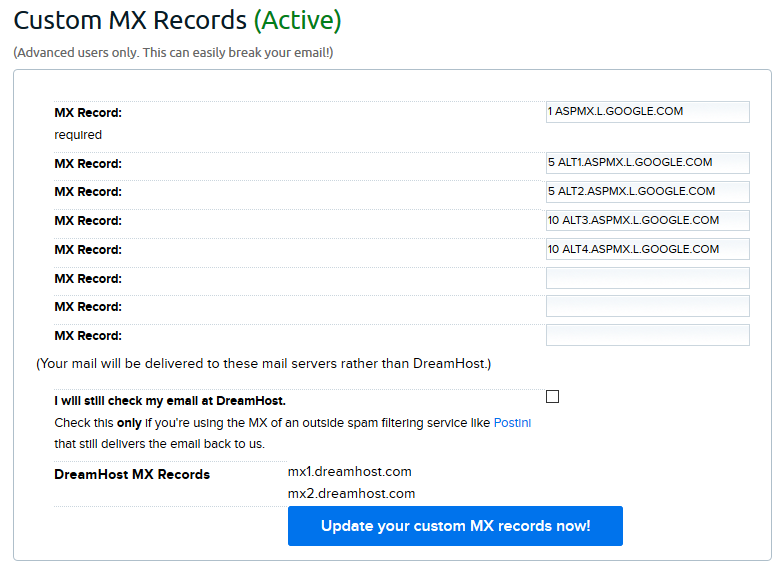
- Leave the "...still check my email..." option un-checked to ensure emails are properly delivered to your custom MX records server.
- Click Update your custom MX records now! button to save.
Once saved, the new DNS records will take 4-6hrs to fully propagate online. After that, any new incoming email will be redirected to your new email hosting provider.
Do I need to enter the dot at the end of the record?
No. The DreamHost system will add this automatically.
How do I locate my new provider's DNS records?
Your new mail provider will give you the MX records you need to enter on this page. They may also give you Custom A or Custom CNAME records to add as well, but those must be added on the Manage Domains page as 'Custom DNS' records. View the following article for instructions on how to add those (if necessary):
Other considerations
Any DreamHost-hosted mail accounts you currently use will remain active, but existing old emails may not be saved. You can download them in your panel by running a full account backup.
Additionally, the Manage Email page will no longer display or let you configure the old addresses.
To use custom MX records with an external spam filtering service that sends all emails back to DreamHost for delivery to your mail accounts hosted here, see the Mail Service Provider instructions.
Did this article answer your questions?
Recommend
About Joyk
Aggregate valuable and interesting links.
Joyk means Joy of geeK