

How to create multiple pages for your Remixer site
source link: https://help.dreamhost.com/hc/en-us/articles/115000103612-How-to-create-multiple-pages-for-your-Remixer-site
Go to the source link to view the article. You can view the picture content, updated content and better typesetting reading experience. If the link is broken, please click the button below to view the snapshot at that time.

How to create multiple pages for your Remixer site
Overview
Remixer offers two different services to create a website: single page and multipage.
The following describes how to use the multipage feature using the left panel in the Remixer editor.
Step 1 — Select a theme
Open Remixer at https://remixer.panel.dreamhost.com/ and select a theme:
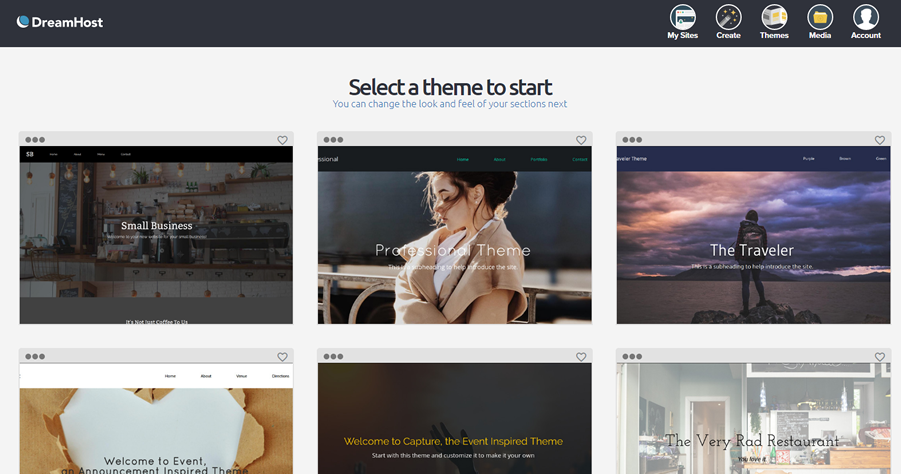
Select a theme primarily based on the preferred color scheme for your pages, since some 'Web Section' background colors are not editable at this time.
After you select a theme, you can swap out any 'Web Section' for different design layout needs. View the following links for a list of articles on how to update a page:
Step 2 — Create a new page
A blue '(now editing)' status appears in the left panel to show you which page you are currently editing.
View the left pane of your Remixer page. Here you can create new pages with new names.
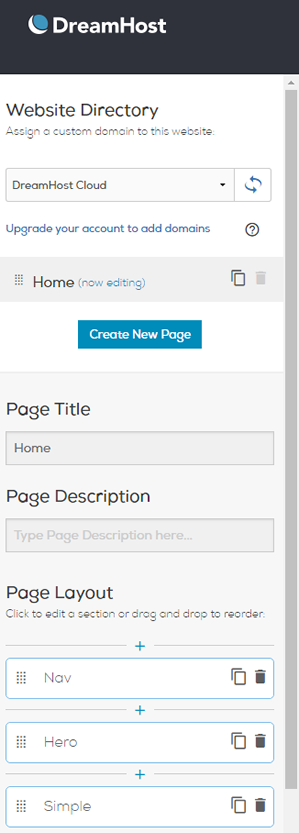
- Click the Create New Page button.
- In the left pane, click the new page title so it shows (now editing).
- Enter a 'Page Title'.
- Type a brief 'Page Description'.
- Re-order the appearance of your 'Web Sections' under 'Page Layout' as needed.
Your page automatically saves as you edit.
Step 3 — Copy an existing page
This is a quick option instead of manually creating a new page and all of its sections.
If you wish to copy an existing page to your new page, click the double sheets icon next to a page on the left panel. The new page is titled the same, but you'll see (Clone) appears next to it.
Step 4 — Edit details for an existing page
Click on an existing page in the left panel:
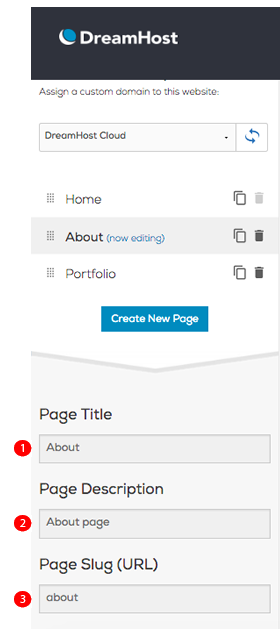
Enter the following details for all existing pages and any new ones you create:
- Page Title
- Page Description
- Page Slug URL (e.g., enter 'about' to designate a sub-URL for domain.com/about)
Custom URLs must follow these rules:
- Only English letters should be used. For example: a-Z.
- Only numbers 0-9 should be used.
- sub-URLs are case sensitive. It's recommended that you use lower case characters.
Step 5 — Create links for each page
When you finish designing your pages, you can assign hyperlinks on any header 'Web Section' for each page.
- Add a 'Header' 'Web Section' to your page if it doesn't already exist.
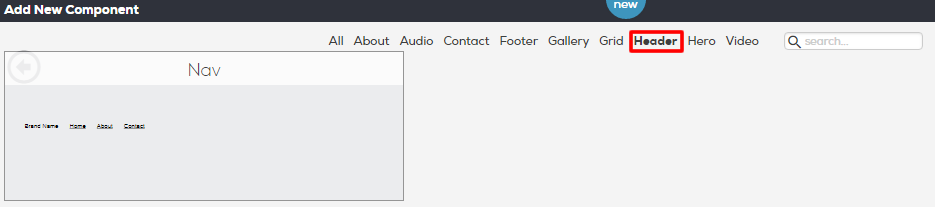
- Find the 'Web Section' in the left panel.

- Click the 'Header' 'Web Section'.

- Select a component within the header 'Web Section' in the main editing panel, such as 'Home', 'About', 'Services', or any other item.
The 'Links & Navigation' pop up screen opens: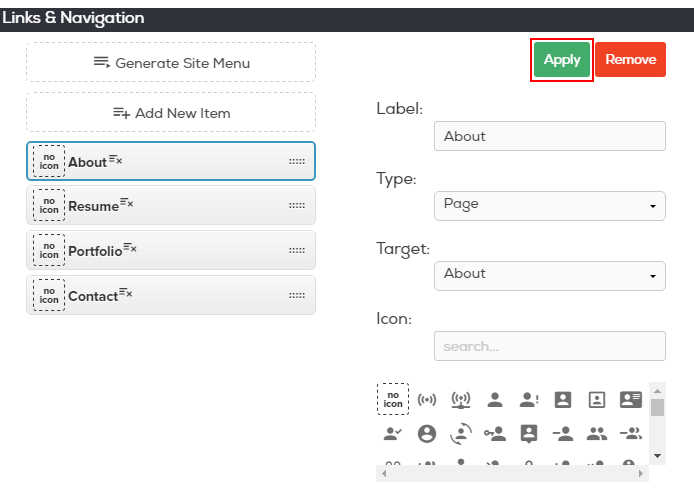
- Click the Generate Site Menu button to synchronize the 'Header Menu' across all pages. This changes the links on the left to the page names you've created.
- To add or remove page links, click on it, then click the red Remove button on the top right.
- Click the green Apply button to save your recent menu hyperlink edits.
These links now function, but only work within a 'Header' 'Web Section' where you just created them.
Linking selected text to a page
For linking selected text to one of your pages, highlight the word and click on the interlocking chain icon in text toolbar:
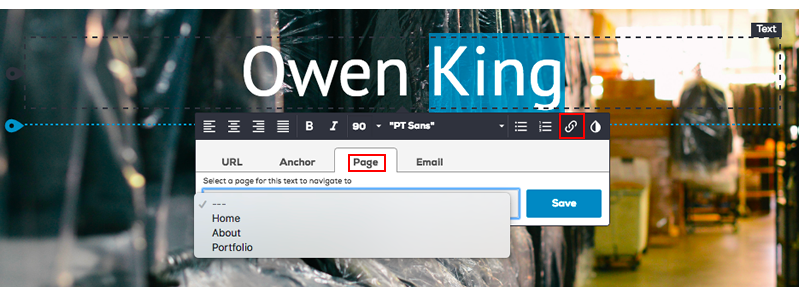
- Click the Page tab and then select a page you want to link to from the dropdown list.
Step 6 — Publish your Remixer site
After completing your page edits and setting the hyperlinks, you are ready to launch your Remixer multipage site to your domain.
- Make sure your pages are edited and ready to publish.

- Click the Publish button in the top right corner to save and preview your work.
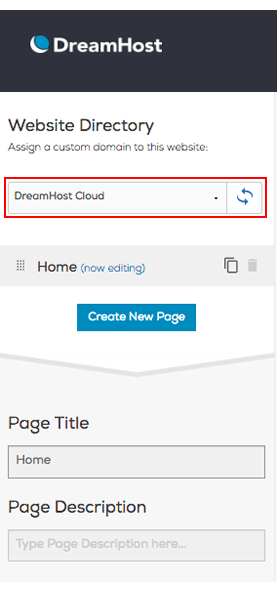
- Click the top dropdown menu box in the left panel to select a domain. The default domain is 'DreamHost Cloud'.
- Select an available domain.
- Click the Publish button (upper right toolbar) to launch your multipage site to your live domain.
See also
Did this article answer your questions?
Recommend
About Joyk
Aggregate valuable and interesting links.
Joyk means Joy of geeK