

WPM4: Updating DNS for your migrated WordPress site
source link: https://help.dreamhost.com/hc/en-us/articles/115004336388-WPM4-Updating-DNS-for-your-migrated-WordPress-site
Go to the source link to view the article. You can view the picture content, updated content and better typesetting reading experience. If the link is broken, please click the button below to view the snapshot at that time.

WPM4: Updating DNS for your migrated WordPress site
Do not use these instructions unless explicitly instructed to by the DreamHost Professional Services Team. The following information is only to be used in a particular phase of a WP migration being done for you by that team; otherwise, the steps will be out of context and can lead to errors if implemented.
Now that your migration is complete, you must perform specific actions to point your domain to DreamHost. It’s important to consider DNS changes, items related to your previous website configuration (use of a CDN, SSL, and redirects), and any other items specific to the service you have selected (i.e., Shared hosting or DreamPress).
The following information helps you to make any necessary adjustments to finalize your migration. You can also contact Technical Support if you have any questions or issues along the way.
Before you change your domain
Here are some questions to consider before making changes to point your domain to DreamHost and/or ending your previous hosting services:
- Do you have active email addresses (e.g., [email protected])? If so, do you want to host email at DreamHost or keep the same email provider?
- Do you want to use an SSL certificate for HTTPS services? If so, do you want a free self-signed certificate (not recommended), a free Let’s Encrypt certificate, a professionally-signed certificate from DreamHost, or an existing certificate you already own?
- Do you want to consolidate all of your services including domain registration to DreamHost (e.g., your ownership of the domain name itself)?
This section applies if:
- You have current @example.com email addresses on your domain that you wish to keep active
- You do not currently have any @example.com addresses and want to start using DreamHost email services.
Keep existing email provider and existing DNS provider
If you want to keep your existing email provider AND keep your existing DNS provider, change DNS using 'Method 2' described in the DNS instructions below (editing A-records).
Keep existing email provider, use DreamHost DNS
You can keep your existing email provider while DreamHost manages your DNS records. To ensure uninterrupted email service, you must first add your email provider’s email DNS records to DreamHost. Please see the following articles for more information:
After updating the DNS records, use 'Method 1' in the DNS instructions below to change the nameservers to DreamHost.
Use DreamHost email and DNS
If you want DreamHost to host your email addresses, you must first add them to the DreamHost panel. The following article provides further information on how to quickly set up email:
If you have existing archived emails on your old mail host you wish to keep, you can transfer those emails to DreamHost:
After transferring your emails, use 'Method 1' in the DNS instructions below to change the nameservers to DreamHost.
Use DreamHost email, but keep existing DNS provider
If you want DreamHost to host your email addresses but you are using another DNS provider (e.g., cloudflare.com), you should follow the instructions above but use 'Method 2' in the DNS instructions below (editing A-records) instead. The following article provides further information about obtaining your MX records and other mail DNS records:
SSL certificates and HTTPS
As indicated in the 'Request For Credentials' that DreamHost sent you to begin the migration, HTTPS and any related configuration of SSL certificates are out of scope for the migration project, but you can proceed to add them now. The following articles provide further information:
A Let’s Encrypt certificate can only be installed properly after DNS points to DreamHost, so you must first perform the DNS change described below. If you wish to purchase a Sectigo certificate in the DreamHost panel or import an existing SSL certificate you already own, you can do this before changing DNS so that they are ready to use it immediately.
SSL: DreamPress only
If you have DreamPress, a free Let’s Encrypt SSL certificate automatically attempts to install during the DreamPress setup, however this often fails because Let’s Encrypt only works when DNS for your domain points to DreamHost. If you wish to use Let’s Encrypt after you have changed DNS, please use the following process:
- Remove HTTPS from the domain by going to the Manage Domains page and clicking the https On link to the far right of your domain name.
- Go to the Secure Certificates page and click the Add button next to the Let's Encrypt SSL option.
- Choose your domain and check the box to agree to the Let’s Encrypt terms.
- When finished, click the Add now! button.
DNS (or, how the world sees your domain)
Reference
The following article provides a good reference for understanding the Domain Name System (DNS) which is at the heart of how web browsers find websites:
Optional: Reducing DNS propagation delay (TTL)
You can minimize the time visitors may see the old site after you change DNS records by reducing the Time-To-Live (TTL) value on the domain. To reduce the TTL, you must request it through your current hosting provider to set the value to the briefest period of time they can provide.- If you don't mind the possibility of some repeat visitors loading the old host’s site for several hours, you can just leave the TTL where it is.
- If you do lower the TTL, you must wait until the current TTL time has elapsed before making any DNS changes. To see how this works, please visit the DNS propagation overview article.
After the DNS resolves to DreamHost, you should contact Technical Support to reset the TTL on the domain to 4 hours which is optimal. Leaving it at a lower TTL is NOT recommended and could potentially cause site loading issues.
Changing DNS
Changing DNS is almost always accomplished in either of two different ways:
- Changing nameservers at your domain’s registrar, or
- Editing A-records where your domain’s nameservers exist.
Method 1: Changing nameservers at your registrar (recommended)
Point your nameservers at your current registrar to DreamHost's nameservers:
ns1.dreamhost.com
ns2.dreamhost.com
ns3.dreamhost.com
Optional: How to host the main domain at DreamHost while keeping any subdomains hosted at your current host
If you happen to have subdomains (e.g., subdomain.example.com) under your migrated domain, changing nameservers will cause them to no longer function. If you need the subdomains to continue to function at your current host, follow these steps:
- Add the primary domain to your DreamHost panel.
- Create Custom DNS records for each subdomain.
- When creating the custom subdomain record, point it to the A-record IP address at your current host. Ask your current host for the correct IP address.
Once those new records are updated online, any visitor that views the subdomain site is redirected to your current hosting company while the primary site continues to be hosted at DreamHost.
Method 2: Editing A-records
A-records for a domain always point to an IP address. Editing A-records is an alternative way to send your traffic to your migrated site instead of changing the nameservers for the domain. Please check with your current host or DNS provider if you are not familiar with how to edit your A-records.
The downside of this approach is that you must manually change the A-record in the future if an IP address at DreamHost changes for any reason (which is rare). You typically receive an automated email from DreamHost if the IP address changes, and you will have a few days to make the change before the old IP no longer works and the site goes down.
Follow these steps to point your A-records to to your DreamHost site:
- Navigate to the Manage Domains page.
- Click the DNS link under the domain.
- On this page, several DNS records appear at the bottom of the page.
Find the A-records for the website. The one with 'www' in the first column uses the correct IP address. If needed, find other IP addresses of any other DreamHost service you wish to use. For example, the MySQL A-record is important if you need to use phpMyAdmin with your new DreamHost site. Enter these A-records at your current non-DreamHost DNS provider.
Domain Registrations
You are not required to transfer your domain registration to DreamHost. If you choose to transfer your registration, carefully review the following article:
DreamHost recommends initiating a registration transfer at least one day after you have changed the DNS to point to DreamHost.
Contact forms (or, other mail-sending forms/scripts)
DreamHost offers four platforms for hosting websites:
- Shared
- Dedicated
- DreamPress
On Shared hosting, please note that DreamHost must comply with stringent Internet spam and “spoofing” rules for sending emails from your contact forms.
Shared hosting plans only
Contact forms sometimes send email from whatever visitor address is typed into the form. This functionality isn't allowed on Shared servers since it violates DreamHost's 'Sender Domain Policy'. If a contact form is set up in this way, email will not be sent.
For best results, the from value on your form should be set to an email address on the same domain. For example, if your site is example.com, the 'from' field in your form should be something like [email protected]. For further information, visit the following article:
SMTP plugins (recommended)
The easiest and recommended way to fix this issue is to use an SMTP plugin. This forces the email to send through the mail server (instead of the web server). View the following article for an example of how to configure an SMTP plugin:
Your existing contact form plugin remains in place, and this plugin just adds the SMTP capability to your form’s email.
Sending email from a custom script
If you choose to instead run a script that sends email, it's highly recommended to use SMTP authentication in that form. View the following article for an example on how to set up a script using a PHP form:
You can also use PHPMailer.
Troubleshooting
If your site does not resolve several hours after updating your DNS, you can use the following links to test your site to confirm the DNS has updated online:
- whatsmydns.net — A popular site that checks DNS records around the world.
- Viewing your DreamHost DNS records — Use DreamHost's DNS propagation checker in the panel.
If you still cannot view the updated site on your computer, try clearing your browser's cache and flushing your DNS:
Re-editing the local hosts file
In DreamHost's prior emails to you, you were probably instructed to view the migrated site through editing a local hosts file on your home computer:
Ultimately, you must undo any edits you made to this file. If you don’t make this edit and the IP of your site changes at DreamHost, you won't be able to view your migrated site.
If you run one or more Content Delivery Networks (CDNs) on your site for images, you may need to reconfigure your CDN settings to refresh the images or upload them accordingly.
Preserving or creating web page redirects
View the following articles if you've created page redirects in your site using an .htaccess file:
DreamPress caching
The following applies only if your site uses DreamPress.
Part of the remarkable speed that DreamPress provides is due to the way it caches content using the built-in server cache. Even though DreamPress uses advanced caching, you may experience unexpected behavior in how your site displays updated content.
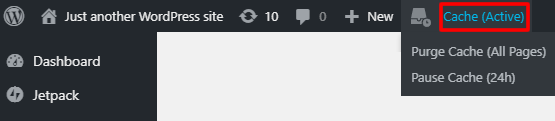
If you happen to make changes and see a lag between the time you save a change and the time it appears, you may want to click the Purge Cache link within the Cache drop-down menu, located in the WP-Admin toolbar at the top:
For more information about using the DreamPress Cache, see the following article:
DreamPress with other non-WordPress applications
If the team migrated any files for you that constitute some sort of non-WordPress application which runs under the same domain as your migrated WordPress install, the team can't guarantee the DreamPress platform will properly run that application. This is because DreamPress is only designed to run WordPress sites.
See also
Recommend
About Joyk
Aggregate valuable and interesting links.
Joyk means Joy of geeK