

Using the MVC DocumentViewer in ASP.NET Web Forms
source link: https://www.textcontrol.com/blog/2021/08/12/using-the-mvc-documentviewer-in-aspnet-web-forms/
Go to the source link to view the article. You can view the picture content, updated content and better typesetting reading experience. If the link is broken, please click the button below to view the snapshot at that time.

The ASP.NET MVC DocumentViewer for ASP.NET provides more features and functionality including document signing capabilities and annotations that are not supported by the Web Forms version of the DocumentViewer. This article shows how to use the MVC DocumentViewer in an ASP.NET Web Forms project.
Adding MVC Support
Adding MVC support to existing Web Forms projects can be easily done by adding the MVC NuGet package (https://www.nuget.org/packages/Microsoft.AspNet.Mvc/) to your project. As this is a requirement by the MVC DocumentViewer, all you need to do is to add the MVC DocumentViewer NuGet package to your Web Forms project.
-
Click Manage NuGet Packages for Solution... from the Tools -> NuGet Package Manager main menu.
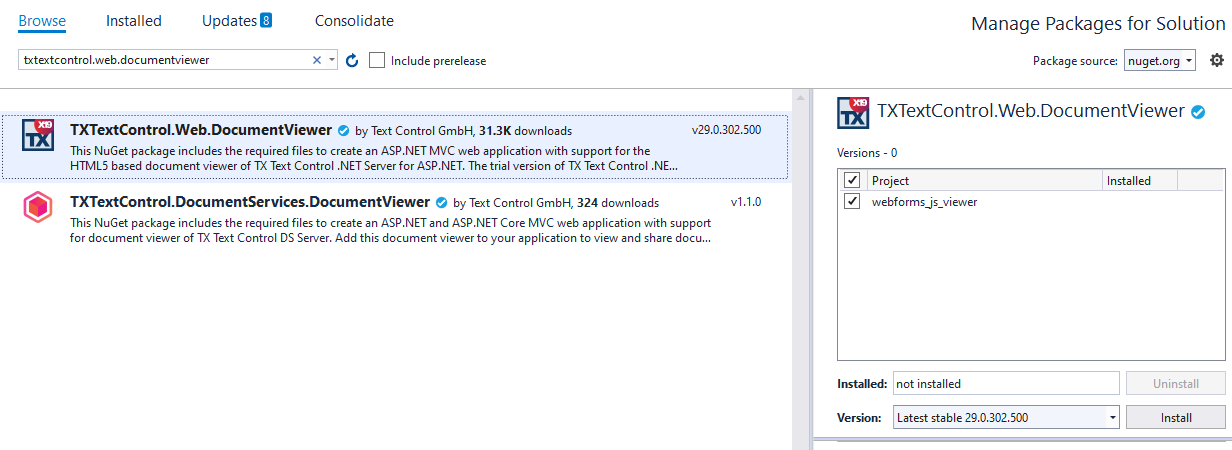
Search for txtextcontrol.web.documentviewer and select the TXTextControl.Web.DocumentViewer package and click Install to add the package to your project.
-
Click Add Reference... from theProject main menu. In the opened Reference Manager, click on Browse... and find the TX Text Control Assembly folder that is located in the installation directory of TX Text Control .NET Server for ASP.NET:
C:\Program Files\Text Control GmbH\TX Text Control 29.0.NET Server for ASP.NET\Assembly\
Select the 3 files TXDocumentServer.dll, TXTextControl.dll and TXTextControl.Server.dll and confirm with Add.
-
In the Solution Explorer, select the project and choose Add New Item... from the Project main menu. Select General -> Text File as the template, name it licenses.licx and confirm with Add.
Paste the following string into the newly created file:
TXTextControl.ServerTextControl, TXTextControl.Server, Culture=neutral, PublicKeyToken=6b83fe9a75cfb638
-
The MVC routing must be added to the RouteConfig.cs file. In the Solution Explorer, open the RouteConfig.cs in the App_Start folder and add this route to the RegisterRoutes method:
routes.MapRoute( name: "Default", url: "{controller}/{action}/{id}", defaults: new { controller = "Home", action = "Index", id = UrlParameter.Optional } );
Your complete RouteConfig.cs should look similar to this:
using System; using System.Collections.Generic; using System.Web; using System.Web.Mvc; using System.Web.Routing; using Microsoft.AspNet.FriendlyUrls;
namespace webforms_js_viewer { public static class RouteConfig { public static void RegisterRoutes(RouteCollection routes) { var settings = new FriendlyUrlSettings(); settings.AutoRedirectMode = RedirectMode.Permanent; routes.EnableFriendlyUrls(settings);
routes.MapRoute( name: "Default", url: "{controller}/{action}/{id}", defaults: new { controller = "Home", action = "Index", id = UrlParameter.Optional } ); } } }
-
In any Web Form (ASPX), add the following code to initialize the MVC DocumentViewer using JavaScript:
<script src="https://localhost:44323/TextControl/GetResource?Resource=minimized.tx-viewer.min.js"></script>
<style> #txViewerHost { width: 1000px; height: 800px; } </style>
<div id="txViewerHost"></div>
<script> // create a new DocumentViewer TXDocumentViewer.init( { containerID: 'txViewerHost', viewerSettings: { toolbarDocked: true, dock: "Fill", isSelectionActivated: true, showThumbnailPane: true, basePath: 'https://localhost:44323', } }); </script>
Make sure to replace https://localhost:44323 with your actual location and port number.
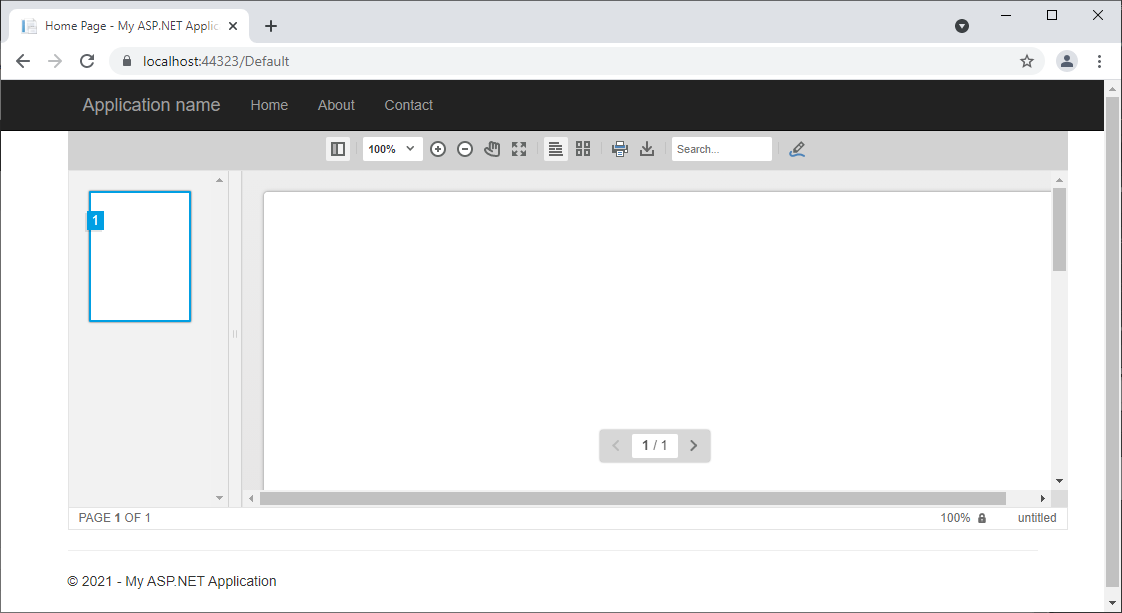
In a default Web Forms application, the results should look like in the screenshot below:
Recommend
About Joyk
Aggregate valuable and interesting links.
Joyk means Joy of geeK