

Importing email from a DreamHost panel backup to your new email hosting provider
source link: https://help.dreamhost.com/hc/en-us/articles/360001315506-Importing-email-from-a-DreamHost-panel-backup-to-your-new-email-hosting-provider
Go to the source link to view the article. You can view the picture content, updated content and better typesetting reading experience. If the link is broken, please click the button below to view the snapshot at that time.

Importing email from a DreamHost panel backup to your new email hosting provider
Download and decompress your mail files
When you use the One-Click panel backup, all data is saved as .tar.gz files in your panel. View the following article for instructions on how to download and decompress these files:
Adding a .eml file extension to all files
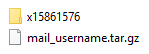
When you decompress your mail file using the article above, the decompressed files are put into a folder titled something like x15861576.
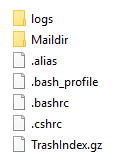
This folder contains a Maildir folder. Click into this folder.
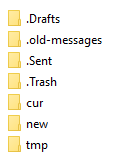
Within that folder you'll find your email folders and messages. For your Inbox messages, click into the /cur or /new folders. For all other messages, click into their folder and view their /cur or /new directories.
Emails will appear in the following format:
1435986g36.V34I895305bS934136.homiemail-master
If you drag and drop this file into your mail client, it will not work. You must rename the file first.
Add .eml to the end of any mail file. For example:
1435986g36.V34I895305bS934136.homiemail-master.eml
Only when they end in this format will your mail client recognize the file type. You can then drag and drop this file into your client.
How to add the .eml extension to multiple files at once
Mac or Linux
- If you're on a Mac or Linux computer, open a terminal and navigate to the directory where your emails are stored. This should be the /Maildir directory for a specific email address.
- Run the following command in this address' directory:
[local ~]$ find . -type f -exec mv '{}' '{}'.eml \; - This adds the .eml extension to all files in this directory and all of its subdirectories. You can now drag these into your mail client to upload them to your new address.
Windows
- If you're on a Windows computer, download this program that will allow you to run Unix commands.
- In Windows, navigate to the directory where you backed up and decompressed your email file. As shown above, make sure you're in your /Maildir directory for a specific email address.
- Right click within this directory.
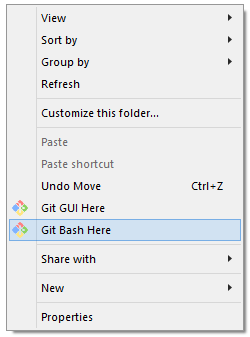
- In the menu that appears, click 'Git Bash Here'. This opens a terminal where you can run Unix commands.
- Run the following command in this address' directory:
[local ~]$ find . -type f -exec mv '{}' '{}'.eml \; - This adds the .eml extension to all files in this directory and all of its subdirectories. You can now drag these into your mail client to upload them to your new address.
Importing contacts
View the following article for instructions on how to import contacts:
See also
Did this article answer your questions?
Recommend
About Joyk
Aggregate valuable and interesting links.
Joyk means Joy of geeK