

Creating a user with Shell (SSH) access
source link: https://help.dreamhost.com/hc/en-us/articles/216385837-Creating-a-user-with-Shell-SSH-access
Go to the source link to view the article. You can view the picture content, updated content and better typesetting reading experience. If the link is broken, please click the button below to view the snapshot at that time.

Creating a user with Shell (SSH) access
Overview
A user assigned to your website is the username you use to log into your server using an FTP program, or a terminal application. This user can be created as either an SFTP or SSH user. The difference is that only a Shell user can run Unix commands on the server from a terminal.
DreamHost provides shell access to all of its customers, but it needs to be specifically enabled for each user added to your account. In the following, you'll find information on how to create a new user with SFTP or Shell access and how to modify an existing user to grant or remove SFTP or Shell access.
Creating a new user with shell access
To add a new website user with shell access:
- Navigate to Files page in your panel.

- Click the + Add A User button at the top right.
The 'Add User Details' page appears:
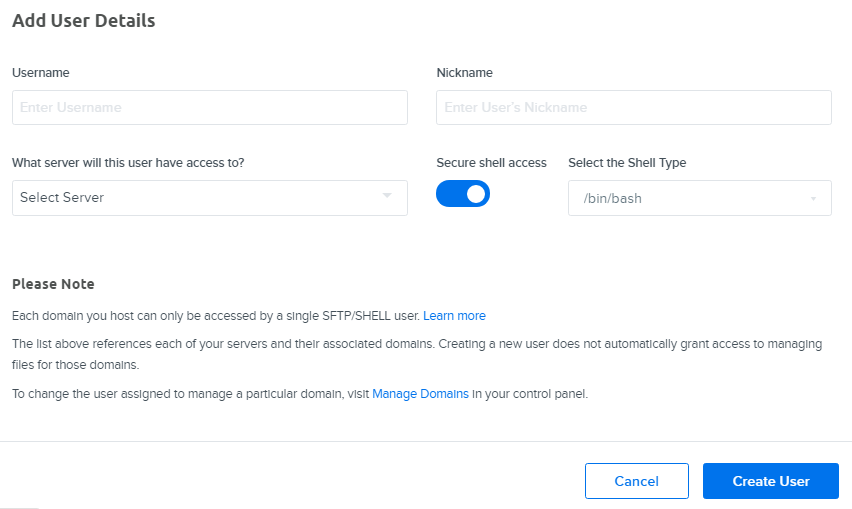
- Enter the following:
- Username — A username for the new user.
- Nickname — A nickname for the new user.
- What server will this user have access to? — Click the down arrow and select the server on which the user will have access.
- Secure shell access — Use the toggle button to enable Secure Shell/SSH (toggle right). When enabled, the toggle button turns blue.
- Select the Shell Type — When Secure shell access is enabled, the 'Select the Shell Type' drop-down box appears. You can select bash, tcsh, ksh, or zsh. See Shell users for more information about the various Shell types you can use.
- When finished, click the Create User button.
Keep in mind that it takes about 5 minutes for this change to take effect.
Editing an existing user to become a SHELL user
To edit an existing user:
- Navigate to Files page in your panel.
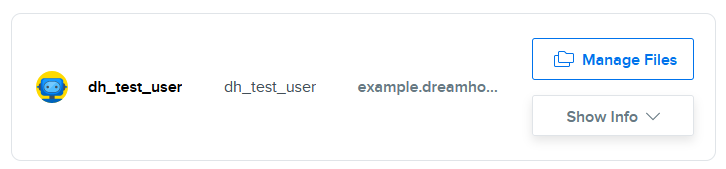
- Select a user and click the 'Show Info' drop-down menu.
The following appears if your user is an SFTP user:

- To change the user from SFTP to an SSH user, click the Edit Access Settings link.
The 'Edit Access Settings' page opens for the user you selected:

- Enter the following:
- Protocol — Select SSH - Port 22 (SSH on) from the drop-down list.
- Shell Type — Select a Shell type from the drop-down list that you wish to use.
- Secure connection (FTP access disabled) — Make sure to disable FTP access (as FTP is not secure) by checking this checkbox.
- When finished, click the Save Changes button.
Once SSH is selected and enabled, the following settings are displayed on your user's info page:

Can I create a Shell user on my server via SSH?
No. All users must be created in the DreamHost panel. It's not possible to add a Shell user on the server after logging in via SSH.
Connecting to your server
Did this article answer your questions?
Recommend
About Joyk
Aggregate valuable and interesting links.
Joyk means Joy of geeK