

Getting started with Red Hat OpenShift Streams for Apache Kafka
source link: https://developers.redhat.com/articles/2021/07/07/getting-started-red-hat-openshift-streams-apache-kafka
Go to the source link to view the article. You can view the picture content, updated content and better typesetting reading experience. If the link is broken, please click the button below to view the snapshot at that time.

Article
Getting started with Red Hat OpenShift Streams for Apache Kafka
Red Hat OpenShift Streams for Apache Kafka is Red Hat’s fully hosted and managed Apache Kafka service. It targets development teams that want to incorporate streaming data and scalable messaging in their applications without the burden of setting up and maintaining a Kafka cluster infrastructure.
Announced at Red Summit in April 2021, OpenShift Streams for Apache Kafka is in Development Preview mode today. As part of the Development Preview program, you can provision a Kafka cluster free of charge. This instance will remain available for 48 hours.
In this article we'll show you two ways to provision an OpenShift Streams for Apache Kafka instance: using the UI on cloud.redhat.com, and using the Red Hat OpenShift Application Services command-line interface (CLI).
Prerequisites
Prerequisites
This article assumes that you already have access to Red Hat OpenShift Streams for Apache Kafka.
Provision a Kafka cluster with OpenShift Streams for Apache Kafka through the UI
Provision a Kafka cluster with OpenShift Streams for Apache Kafka through the UI
Provisioning a Streams for Apache Kafka instance is very straightforward:
- Go to cloud.redhat.com and log in with your Red Hat account. If you don’t have one already, you can create a new account from the Red Hat login screen.
- On the cloud.redhat.com landing page, select Application Services from the menu on the left.
- On the Application Services landing page, select Streams for Apache Kafka → Kafka Instances, as shown in Figure 1 (or click the Try OpenShift Streams for Apache Kafka button in the banner).
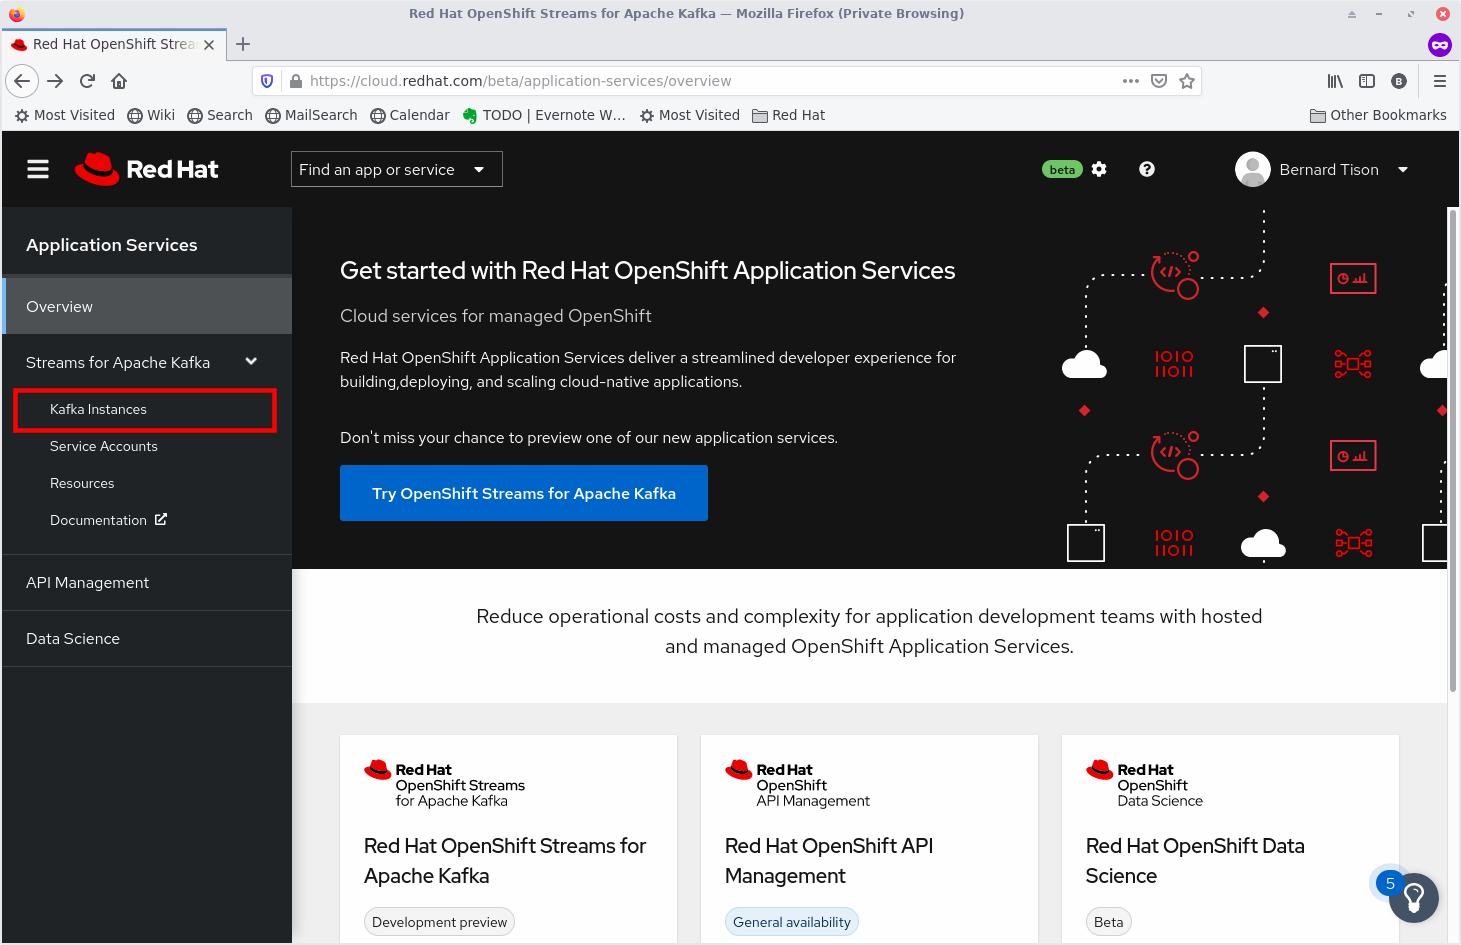 Figure 1: The Application Services landing page.
 - On the Kafka Instances overview page, click the Create Kafka instance button. Choose a name for your Kafka instance and click Create instance. From there, a managed Kafka instance will be provisioned for you. After a couple of minutes, your instance should be marked as ready (see Figure 2).
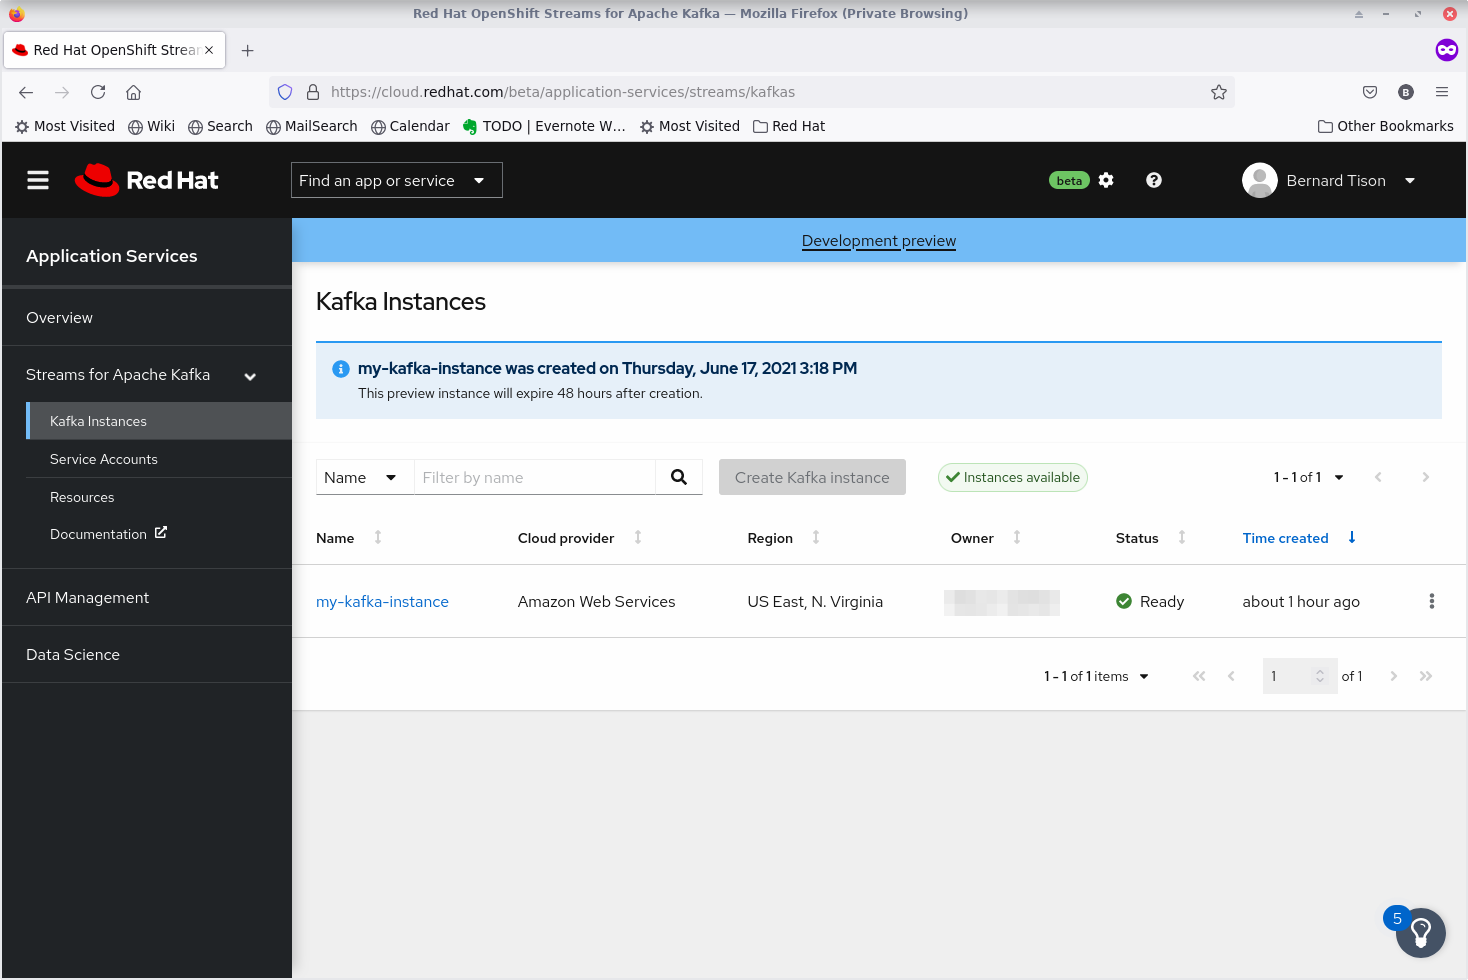 Figure 2: Streams for Apache Kafka instances.
To connect your applications or services to a Streams for Apache Kafka instance, you need to create a service account. As part of the Development Preview program, you can create up to two service accounts.
- On the Kafka Instances overview page, select the Options icon (the three dots) for the Kafka instance you just created. Select View connection information.
- Copy the Bootstrap server endpoint (shown in Figure 3) to a secure location.
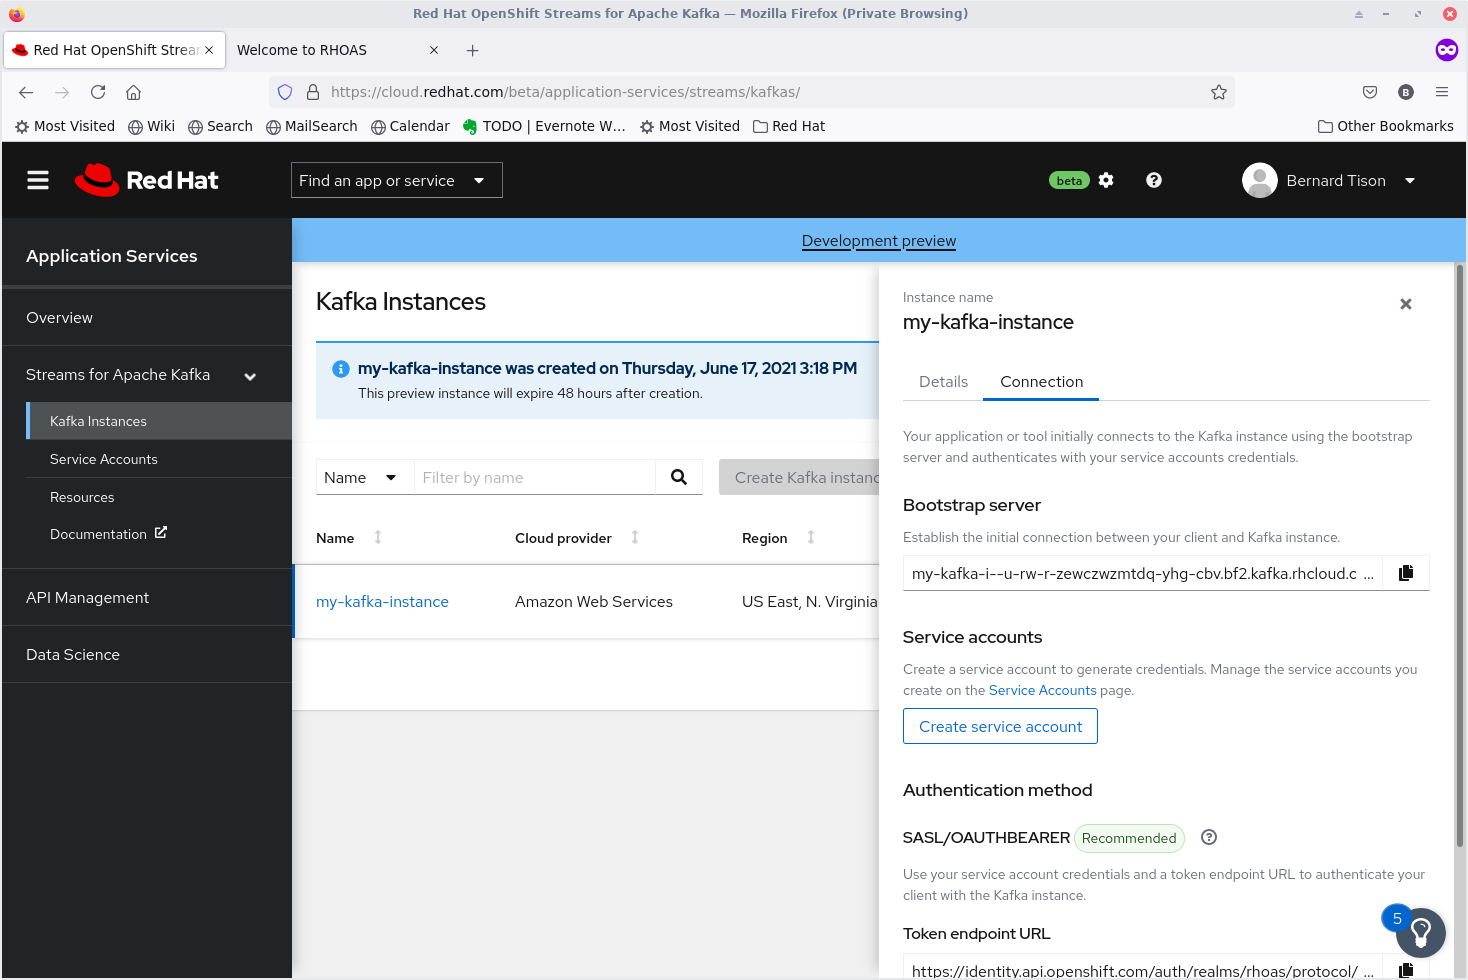 Figure 3: Streams for Apache Kafka instances connection details.
 - Click the Create service account button to generate the credentials that you’ll use to connect to this Kafka instance. Copy the generated Client ID and Client Secret to a secure location.
- After saving the generated credentials, select the confirmation check box and close the Credentials window (see Figure 4).
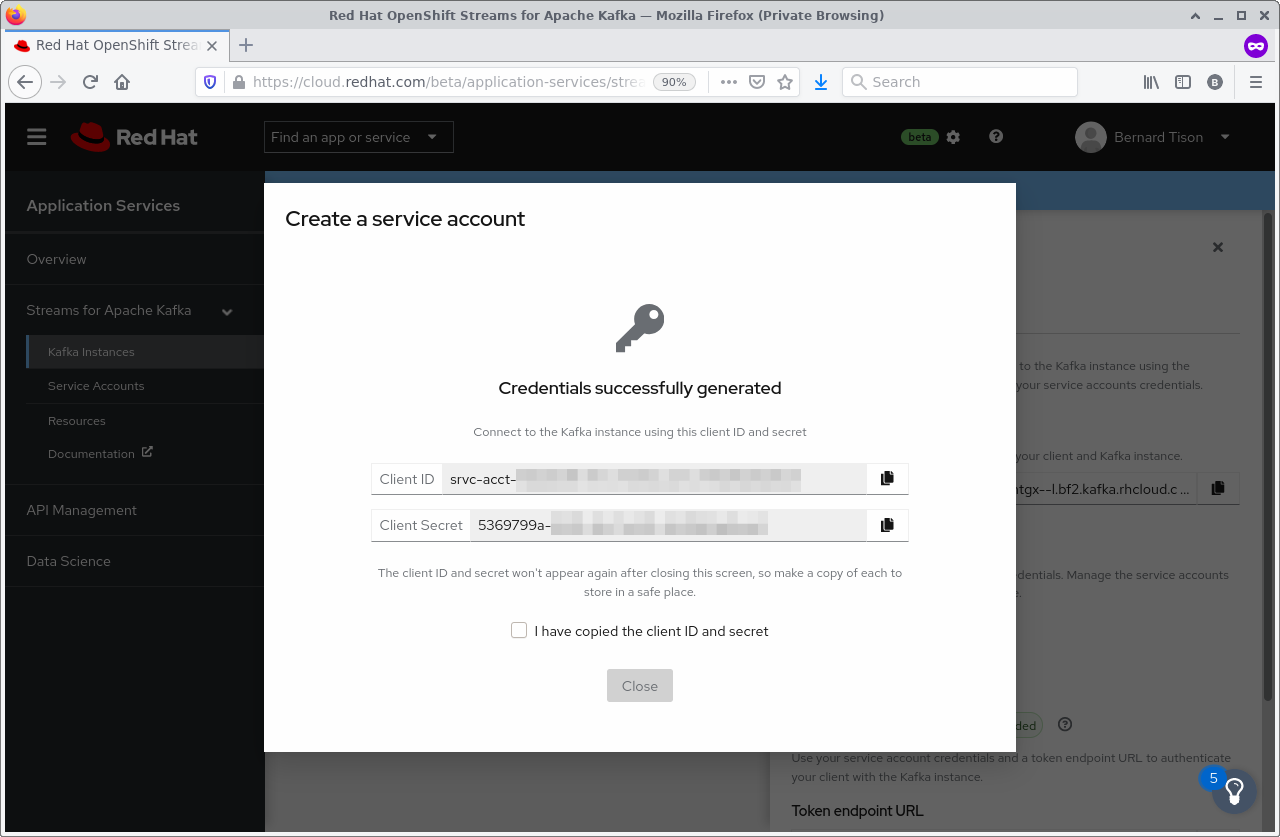 Figure 4: Service Account credentials.
Creating Kafka topics
To use your Kafka instance, you need to create one or more topics:
- On the Kafka instances overview page, click the name of the Kafka instance you just created.
- Select the Topics tab, click the Create Topic button, and follow the guided steps to define the topic details. As part of the topic guided steps, you'll choose a name for your topic, set the number of partitions, and decide on the message retention policy (see Figure 5).
 Figure 5: Streams for Apache Kafka topics.
You can now start using your managed Kafka instance. At the end of this article, you’ll find additional resources to get you started.
Provision a Kafka cluster with the Red Hat OpenShift Application Services CLI
Provision a Kafka cluster with the Red Hat OpenShift Application Services CLI
If you prefer to use the command line, you can use the Red Hat OpenShift Application Services CLI tool (rhoas). The tool is available for Linux, macOS, and Windows.
Download the latest version for your OS. Extract the downloaded package and add the rhoas executable to your path.
Check the installation using the following command:
$ rhoas version
rhoas version 0.25.0
To provision an OpenShift Streams for Kafka instance using the CLI, proceed as follows:
The first step is to log in. The
rhoas logincommand initiates a browser-based login sequence. If you are not yet logged in to cloud.redhat.com, your browser will show the Red Hat login screen. Log in with your Red Hat account credentials, as shown here:$ rhoas login Logging in... Logged in successfully Logging in to MAS-SSO... Logged in successfully to MAS-SSO- If you created a Kafka instance using the UI, you can see the instance with
rhoas kafka list. You can also create a Kafka instance using the CLI:$ rhoas kafka create my-kafka-instanceFigure 6 shows the output of the command.
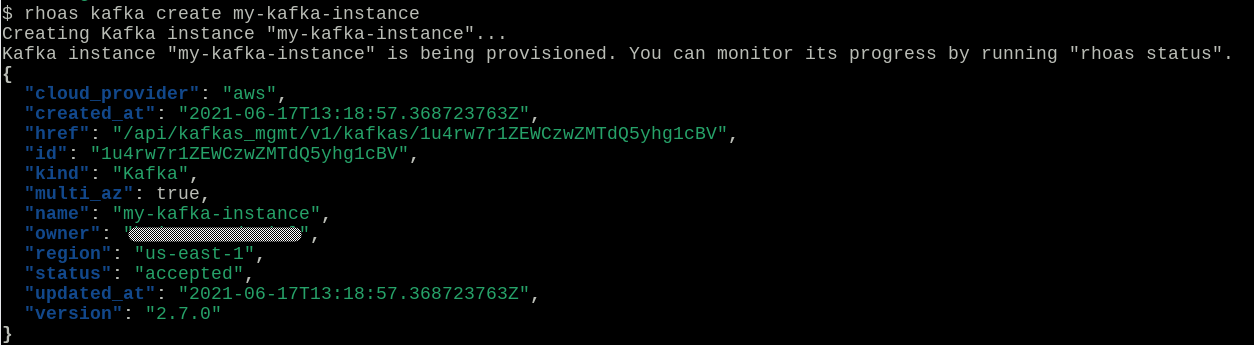 Figure 6: The
 rhoas kafka createcommand output. - After a couple of minutes, your Kafka instance should be ready. You can check this using the CLI (or through the UI, if you prefer).
$ rhoas statusFigure 7 shows the output of the command.
 Figure 7: The
 rhoas statuscommand output. - Once your cluster is ready, you need to set it as the default cluster to use for subsequent commands, like creating a topic:
$ rhoas kafka useSelect the Kafka instance you just created by pressing Enter (see Figure 8).
 Figure 8: The
 rhoas kafka usecommand output. - Next, create a service account. You can export the service account credentials to your file system as a JSON, properties, or
envfile.$ rhoas serviceaccount create --name my-service-account \ --file-format env --file-location /tmp/rhosak-serviceaccount.envFigure 9 shows the output of this command.
 Figure 9: The
 rhoas serviceaccount createcommand output. - Finally, you need to create a topic. You can set the number of partitions and retention times using property flags, or omit them to use the defaults. These defaults are 1 partition, a retention time of 604,800,000 milliseconds (7 days), and an unlimited partition size. So, for example, to create a topic with 15 partitions and the default retention settings, you would enter the following:
$ rhoas kafka topic create my-first-topic --partitions 15 - Verify the creation of the topic:
$ rhoas kafka topic listFigure 10 shows the output of this command.
 Figure 10: Output of the
 rhoas kafka topic listcommand.
Connecting to your managed Kafka instance
If you’re familiar with Apache Kafka, you are ready to connect your application and services to the managed Kafka instance. Just remember to configure your Kafka clients for SASL/PLAIN authentication. You can also use SASL/OAUTHBEARER. The token endpoint URL required for OAUTHBEARER authentication can be obtained from the connection details of your cluster in the UI.
If you’re new to Kafka, the Developer Sandbox for Red Hat OpenShift has a number of quick starts for OpenShift Streams for Apache Kafka. The Developer Sandbox for Red Hat OpenShift provides you with a private OpenShift environment in a shared, multi-tenant OpenShift cluster that is preconfigured with a set of developer tools, free of charge.
To access the Developer Sandbox, go to https://developers.redhat.com/developer-sandbox/get-started, and click the Launch your Developer Sandbox for Red Hat OpenShift button. After a couple of seconds, you should be able to access your Sandbox by clicking the Start using your Sandbox button.
This will bring you to the Developer Sandbox for Red Hat OpenShift login screen. Click the DevSandbox button to log in. Once logged in, you are directed to the OpenShift Developer Perspective (see Figure 11).
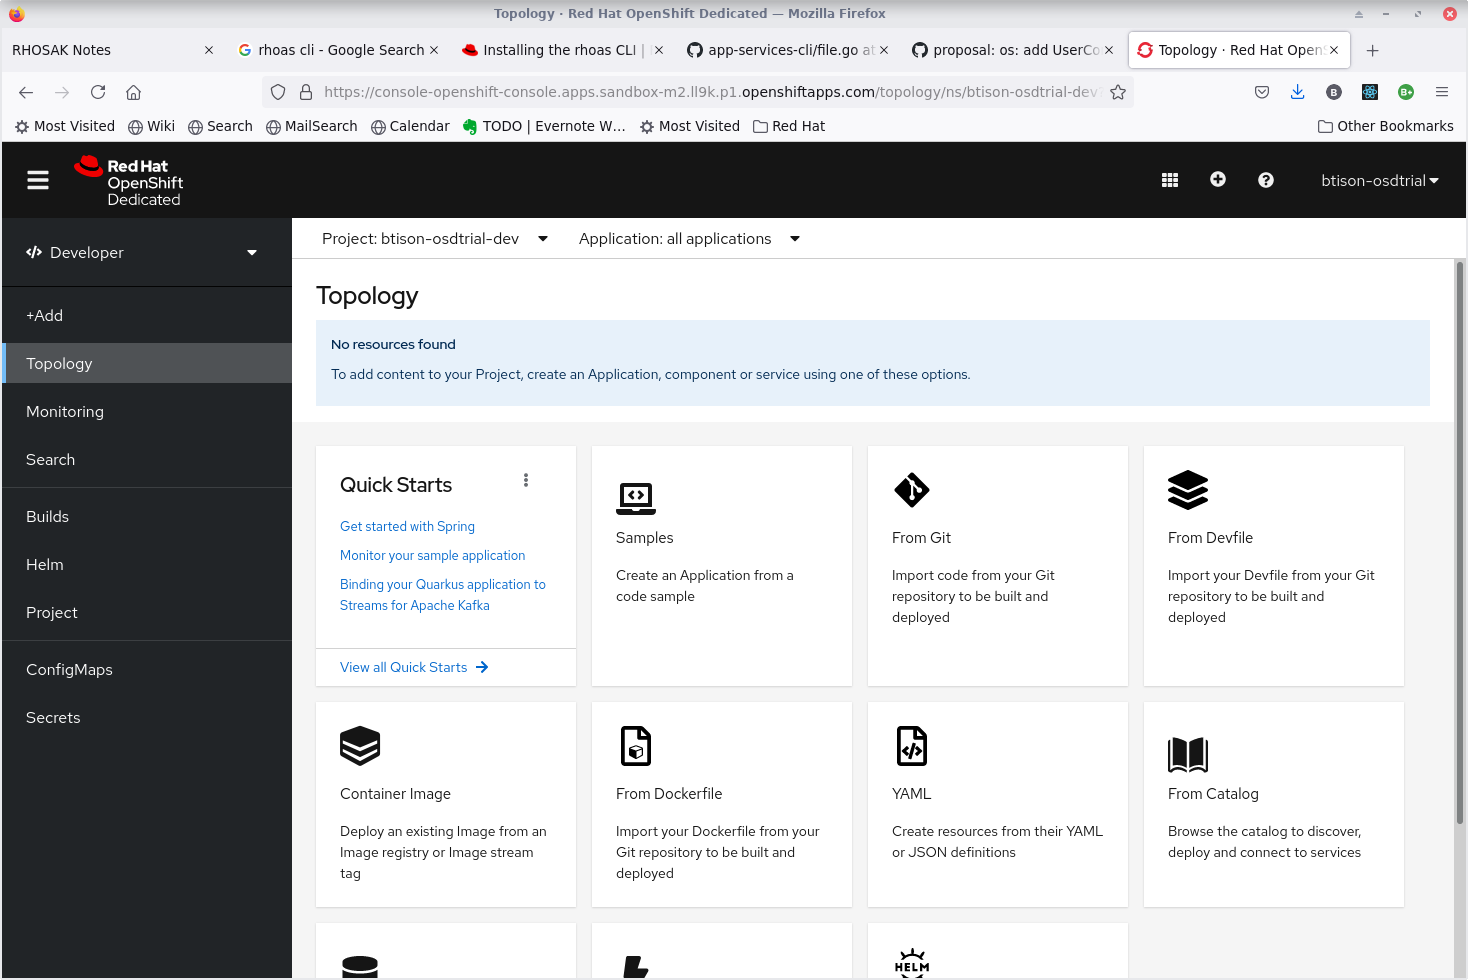 Figure 11: The Developer Perspective on the Developer Sandbox.
In the Developer Perspective, click the View all Quick Starts link on the Quick Starts card. At the moment, there are four quick starts for OpenShift Streams for Apache Kafka:
- Getting started with Red Hat OpenShift Streams for Apache Kafka
- Using kafkacat with Apache instances in Red Hat OpenShift Streams for Apache Kafka
- Connecting Red Hat OpenShift Streams for Apache Kafka to OpenShift
- Binding your Quarkus application to Streams for Apache Kafka
Summary
In this article, we showed you how to get started with OpenShift Streams for Apache Kafka. For additional resources, check out the following links:
- OpenShift Streams for Apache Kafka YouTube playlist
- OpenShift Streams for Apache Kafka Getting Started
Have fun with your managed Kafka instance, and stay tuned for more articles on interesting use cases for Red Hat OpenShift Streams for Apache Kafka.
Recommend
About Joyk
Aggregate valuable and interesting links.
Joyk means Joy of geeK