

Secure Applications with OAuth2 and OpenID Connect in ASP.NET Core 5 - Complete...
source link: https://procodeguide.com/programming/oauth2-and-openid-connect-in-aspnet-core/?utm_campaign=oauth2-and-openid-connect-in-aspnet-core
Go to the source link to view the article. You can view the picture content, updated content and better typesetting reading experience. If the link is broken, please click the button below to view the snapshot at that time.

Secure Applications with OAuth2 and OpenID Connect in ASP.NET Core 5 – Complete Guide
This article covers details about how to secure your ASP.NET Core 5 application i.e. how to secure Web Application & Web API using modern standards like OAuth2 and OpenID Connect in ASP.NET Core. It is important to secure your applications and in this, we will learn how to correctly secure your ASP.NET Core Applications.
We will be using IdentityServer4 which is a framework for implementation of OAuth2 and OpenID Connect in ASP.NET Core.
This is the fifth post in the Series – ASP.NET Core Security. In my previous posts, I covered how to get started with ASP.NET Core Identity, understanding claims/roles, implementing claims/roles-based authorization & Cookie-based authentication in ASP.NET Core.
Why & What is OAuth2 and OpenID Connect in ASP.NET Core?
In today’s world of modern applications, we build Web API which is consumed not only by a web application but even other applications like mobile app, other Web API, etc. Also these days applications are no more hosted only within the company network in fact we have hosting’s on the cloud over the internet which makes it even more necessary to protect our applications from unauthorized access.
So using the old methods of user-id & password to secure these modern applications would not be a good idea as in some cases it might require to send user-id & password on each request which will make it easier for man in the middle to sniff user-id & password. So came the token-based authorizations where instead of sending user-id & password in each request tokens were sent in each request and were used to authorize the access.
Now the question was how to create secure tokens & how to deliver them safely to the client applications. Every application or organization had its own implementation for token creation & delivery to the client. This called for some standard protocol which can be followed for implementing authentication & authorization across applications or industry.
OAuth2 is a popular standard security protocol that allows for secure authorization in a simple & industry-standard method for web applications, desktop applications, mobile applications & IoT devices. OAuth2 defines standards about how a client i.e. application can securely get an access token from the service that can verify user identity and provide access-tokens & client applications can use this access token to access the Web API resources. OAuth2 is used by many organizations to protect sensitive data.
OpenID Connect is an extension to OAuth2 to implement a simple identity layer. With OpenID Connect it is possible to issue an identity token (if required) along with an access token. Access tokens should only be used to access resources like Web API and should not be used to sign into an application. If you want to sign in to an application then an Identity token can be used. OpenID Connect implements an additional endpoint for UserInfo that allow client applications to get user information.
OAuth2 and OpenID Connect in ASP.NET Core are standard popular protocols for implementation of Security feature to protect your application and data from unauthorized access.
OAuth2 vs Open ID Connect
OAuth2 is an authorization protocol i.e. it allows clients to access protected resources like Web API by issuing access tokens to the client. OAuth2 is like giving an access key to someone to access all the available information there is no control over what can be accessed i.e. it’s like providing someone with a key to your house and the entire house can be accessed with that key including safes, cupboards, drawers, etc.
OpenID Connect is a superior protocol that extends OAuth2 and is not a replacement for OAuth2. OpenID Connect uses the same terminology and concepts as OAuth2 but also defines an additional Id token for returning user information. Thus it provides some controls over the information that can be shared with the client. i.e. instead of providing access to the complete house, it provides access to the required part of the house.
OpenID Connect also provides flexibility by implementing discovery protocol which make it possible for clients to register with the Identity provider of their choice without need to pre-register your application with them.
Even if the client application only requires authorization to access Web API resources we should use OpenID Connect instead of plain OAuth2.
How OpenID Connect works
There are different flows (Authorization Code, Implicit & Hybrid) available in OpenID connected which can be implemented by applications that want to implement authentication & authorization with OpenID Connect. These flows define how the code and token will flow to the application. Selection of flow mainly depends on the type of application (Confidential or Public clients) & requirements around security, token life, etc.
Type of Flows
Authorization Code – This is the most commonly used flow in OpenID Connect. This is suitable for confidential clients i.e. web-based applications like ASP.NET Core Web Applications. In this flow, the authorization endpoint returns only the authorization code. This authorization code can be used to obtain an Id token and optional OAuth access token from the token endpoint. This flow allows access even when users are offline using refresh tokens. These offline access refresh tokens are only used with confidential clients.
Implicit – This flow is suitable for public clients. This flow exposes token to the front channels i.e. token will be visible to the applications (mobile or JavaScript applications). In this flow, the authorization endpoint returns directly an Id token and an optional OAuth access token. Refresh tokens are not allowed in this flow. This may also be used by confidential clients based on the requirements.
Hybrid – This is suitable for confidential clients i.e. web-based applications like ASP.NET Core Web Applications. This flow allows authorization endpoint to return code and also some tokens like Id token. This hybrid flow can be useful in cases where applications need to perform some actions before they can use authorization code to request the token from token endpoint like in authorization code flow. This flow allows access even when users are offline using refresh tokens. These offline access refresh tokens are only used with confidential clients.
Application Types
Confidential Clients – These are web apps that are hosted on servers like ASP.NET Core Web Applications. These clients can safely maintain the confidentiality of client data along with their passwords/secrets.
Public Clients – These are client-side applications like a javascript-based application or mobile applications. These applications run on the device or in browsers. These clients cannot safely maintain the confidentiality of client data along with their passwords/secrets.
Choosing the right flow for the client is very important as selecting the wrong flow will be a potential security risk for the application.
Since we will be working on ASP.NET Core Web application for demonstration of OpenID Connect so we will be using Authorization Code flow for our demo.
Authorization Code Flow
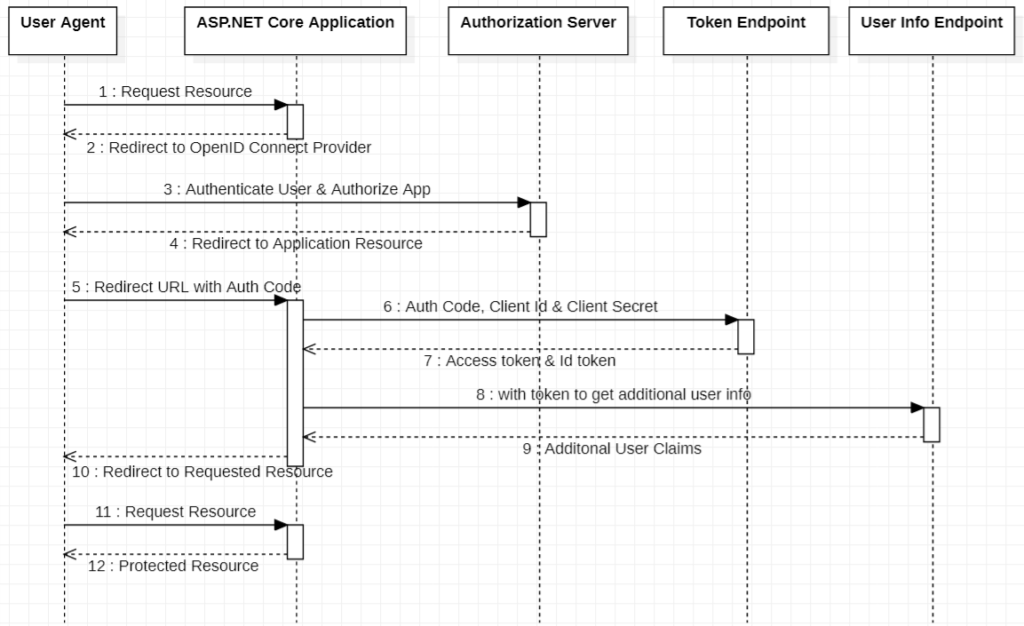
- User request for a resource that is protected
- In the response, the user is redirected to log in screen from the Identity provider (Authorization Server) for login process completion
- The user performs login and authorizes this application for access.
- In response to successful login, the user is redirected to the application resource and also Identity server returns an authorization code.
- User redirects to the specified URL along with authorization code as part of the request
- The application uses this authorization code along with the client Id & client secret to get request tokens from the token endpoint.
- In the response, on successful validation of client details & authorization code, both tokens Id token and access token are returned back to the application.
- The application then uses these tokens to request additional user claims from the user info endpoint
- If tokens are valid then request user claims are returned back to the application
- In response, the user receives a cookie for user claims and is redirected to the originally requested resource
- User request the originally requested resource along with the cookie as part of the request
- On successful user claims validations from the cookie, the user receives the requested resource from the server.
Introduction to IdentityServer4
IdentityServer4 is a popular OpenID Connect and OAuth 2.0 framework for ASP.NET Core. It provides authentication as a service and can be used to build centralized login logic for all your applications i.e. web applications, mobile applications, Web API (Microservices), IoT devices, etc. It also supports in implementation of single sign-on & sign-off for all the applications across organizations.
Also supports access tokens that can be used to authenticate calls from Web API, Angular based Single Page Applications, native mobile applications, etc. IdentityServer4 is highly flexible and can be customized as per your needs.
We will be using IdentityServer4 framework to demonstrate implementation of OAuth2 and OpenID connect in ASP.NET Core
Implement OAuth2 and OpenID Connect in ASP.NET Core
I will be demonstrating the Implementation of OAuth2 and OpenID Connect in ASP.NET Core by building the following projects:
- IdentityServer4 Project with OAuth2 and OpenID Connect in ASP.NET Core
- Sample ASP.NET Core Web API Project which will be protected using IdentityServer4
- Sample ASP.NET Core MVC Web App which uses OpenID Connect for login and OAuth2 token to call Sample Web API
- Sample ASP.NET Core Web API Client that will use endpoint protected using IdentityServer4
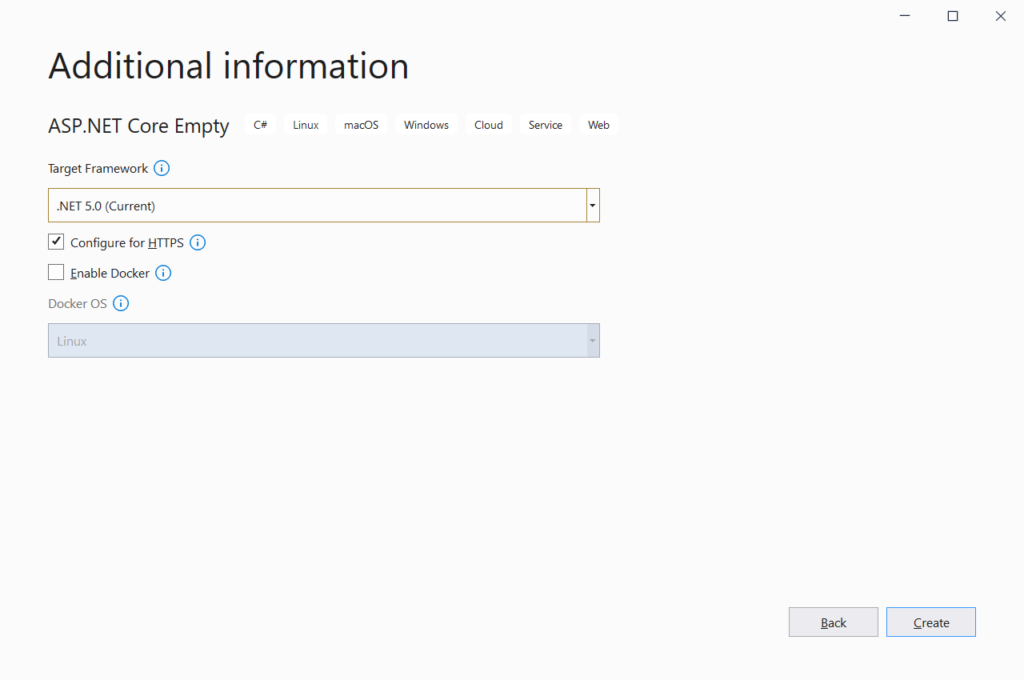
I will be using Visual Studio Community edition 2019 version 16.10.2 & .NET 5 to demonstrate this Implementation of IdentityServer4 for OAuth2 and OpenID Connect in ASP.NET Core
Getting Started with IdentityServer4 in ASP.NET Core (Setup Identity Server)
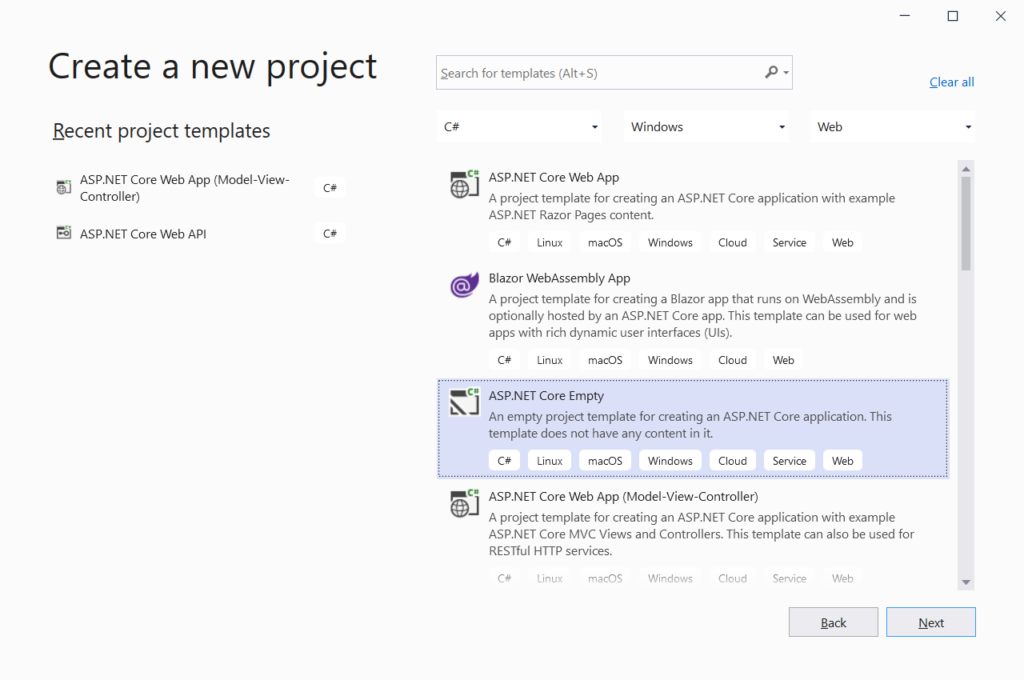
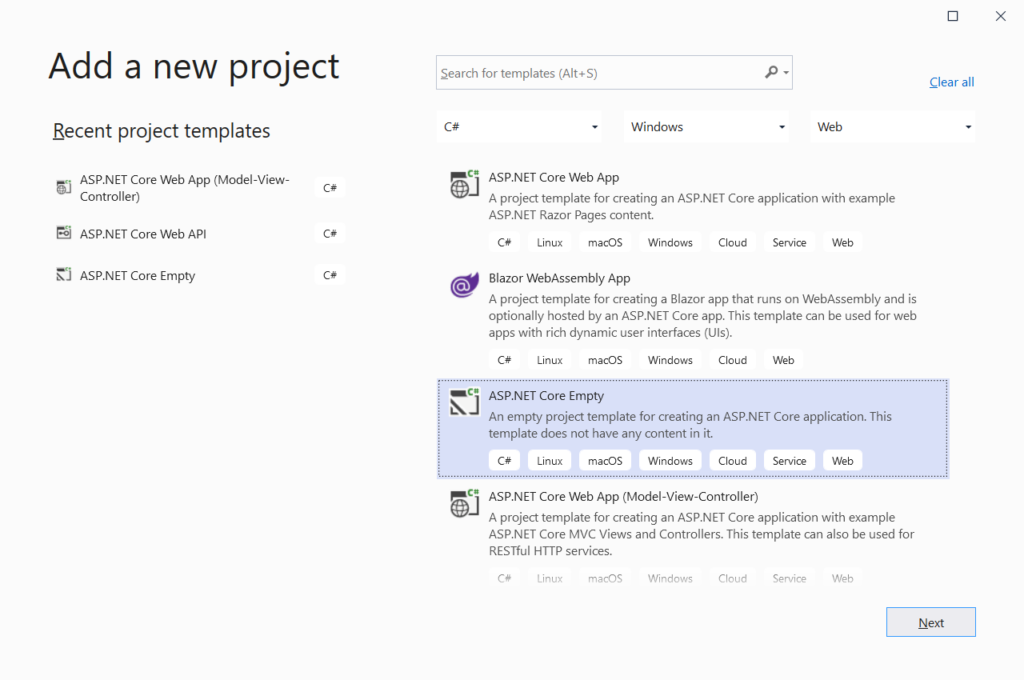
For IdentityServer4 you can use an existing template that can simplify the job for Implementation of IdentityServer4 on ASP.NET Core. But here we will use the ground-up approach i.e. we will be creating an empty ASP.NET Core project and Implement IdentityServer4 in that empty project so that we get a fair idea about the steps required for the implementation of IdentityServer4 i.e. OAuth2 and OpenID Connect in ASP.NET Core.
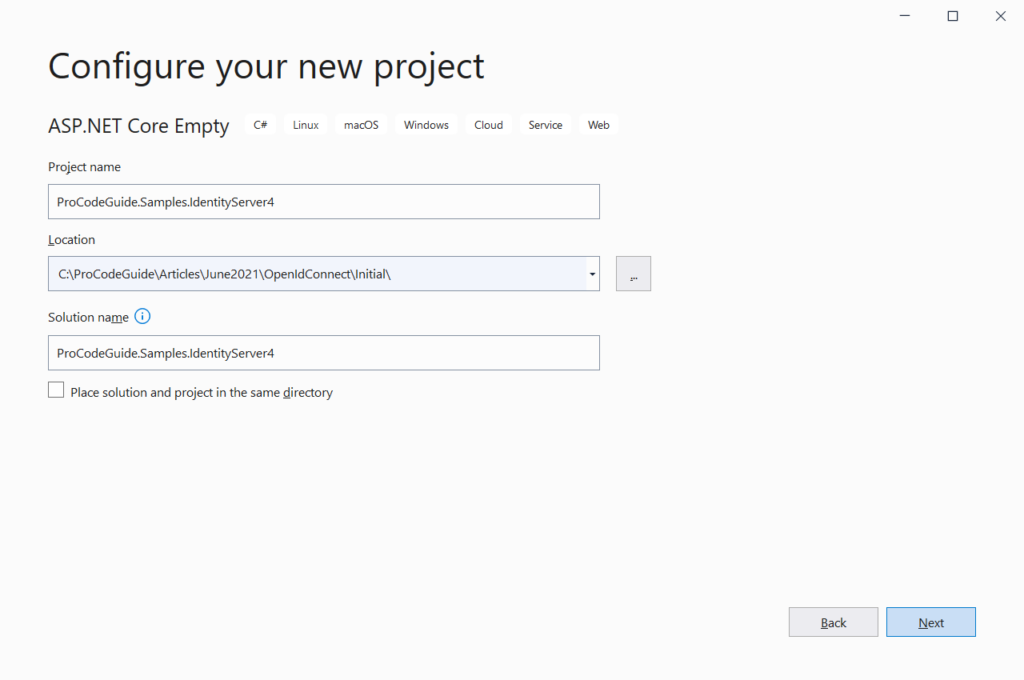
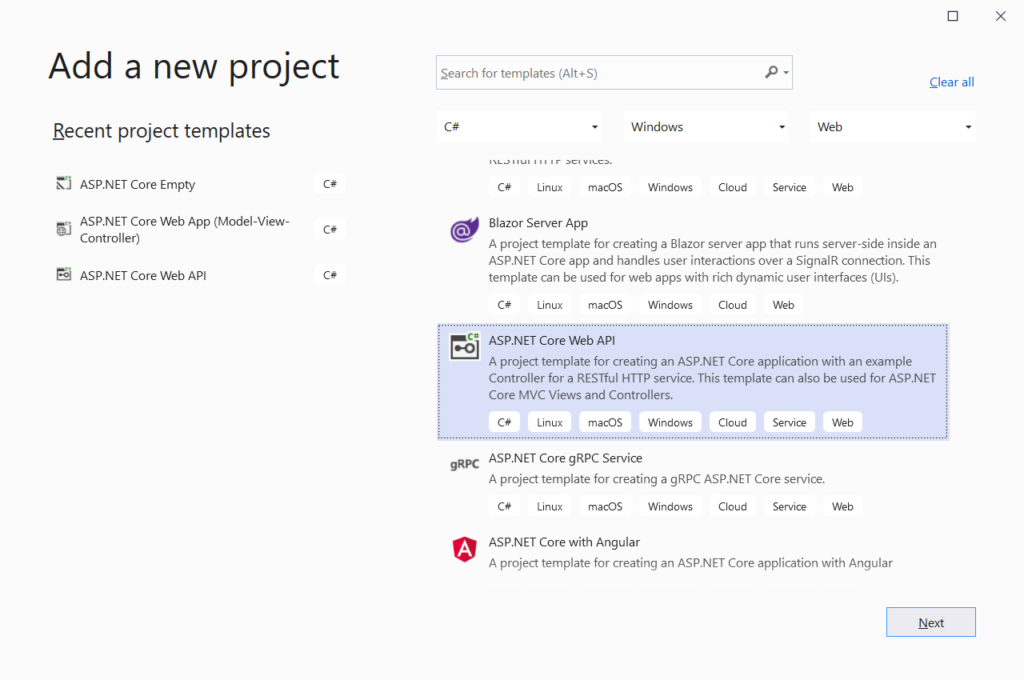
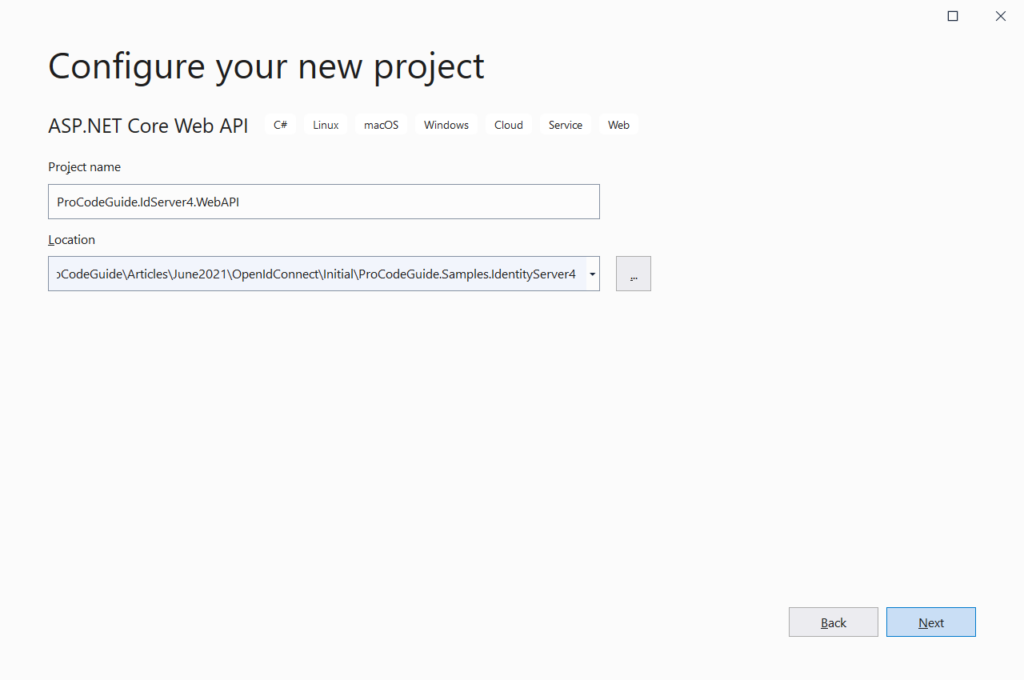
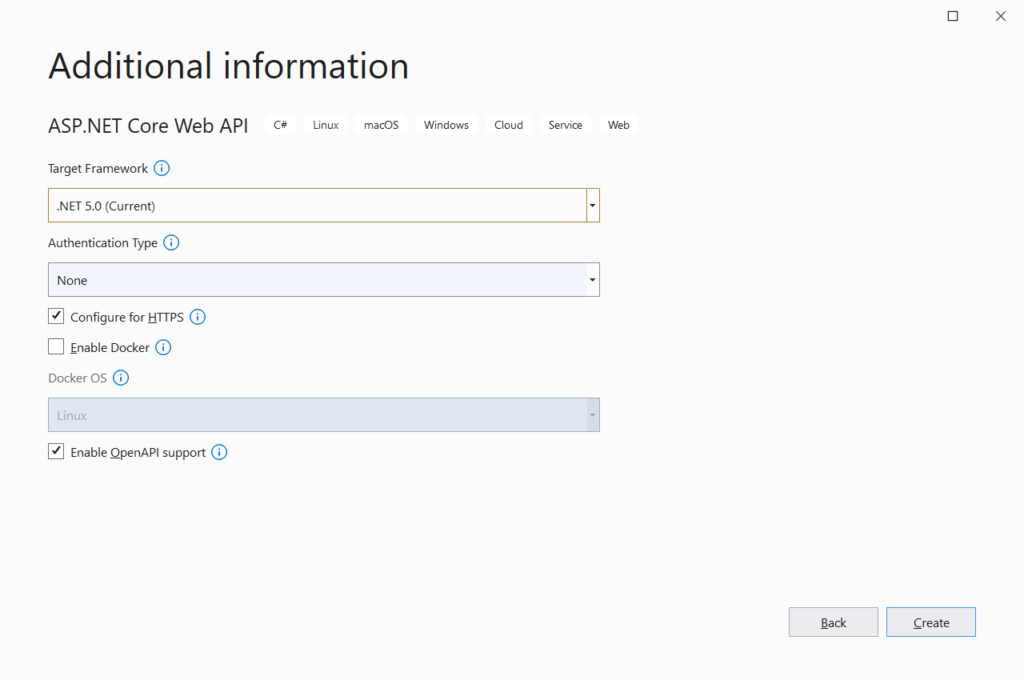
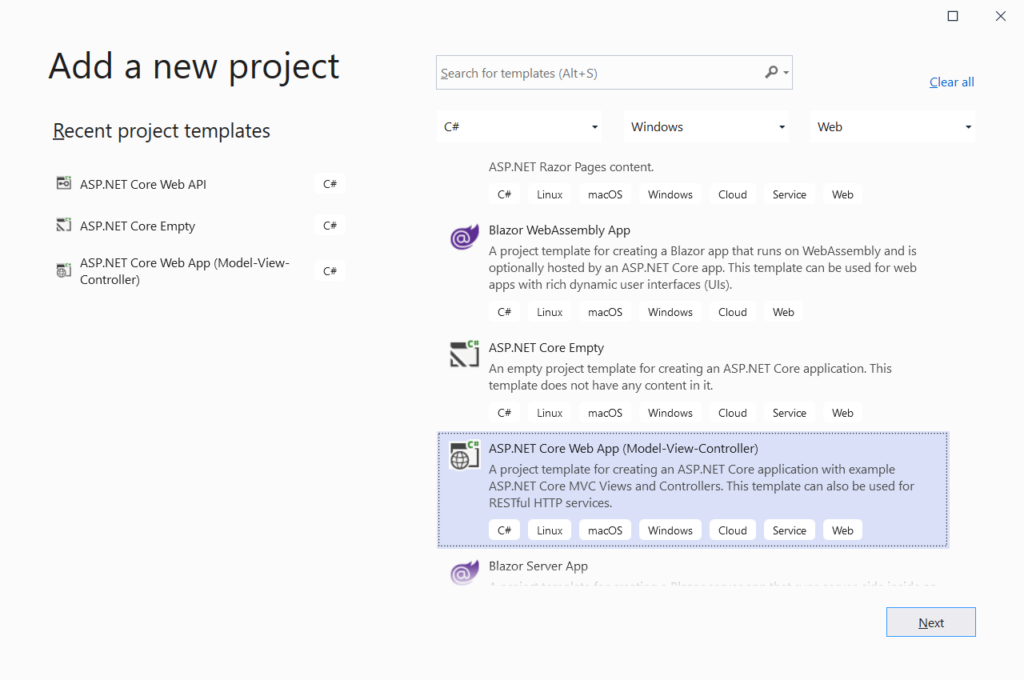
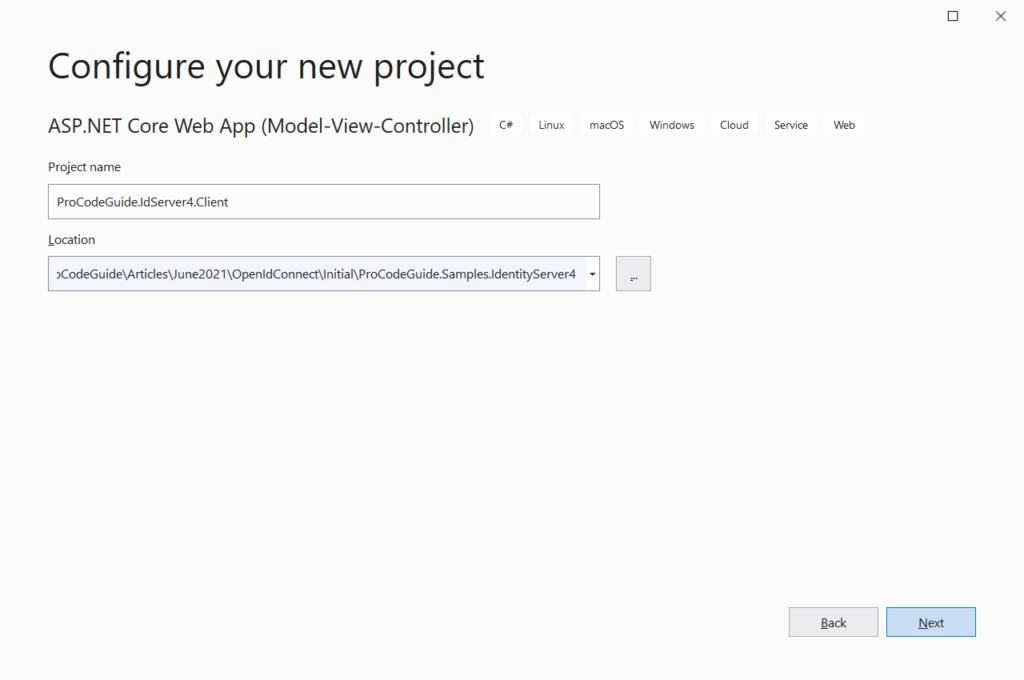
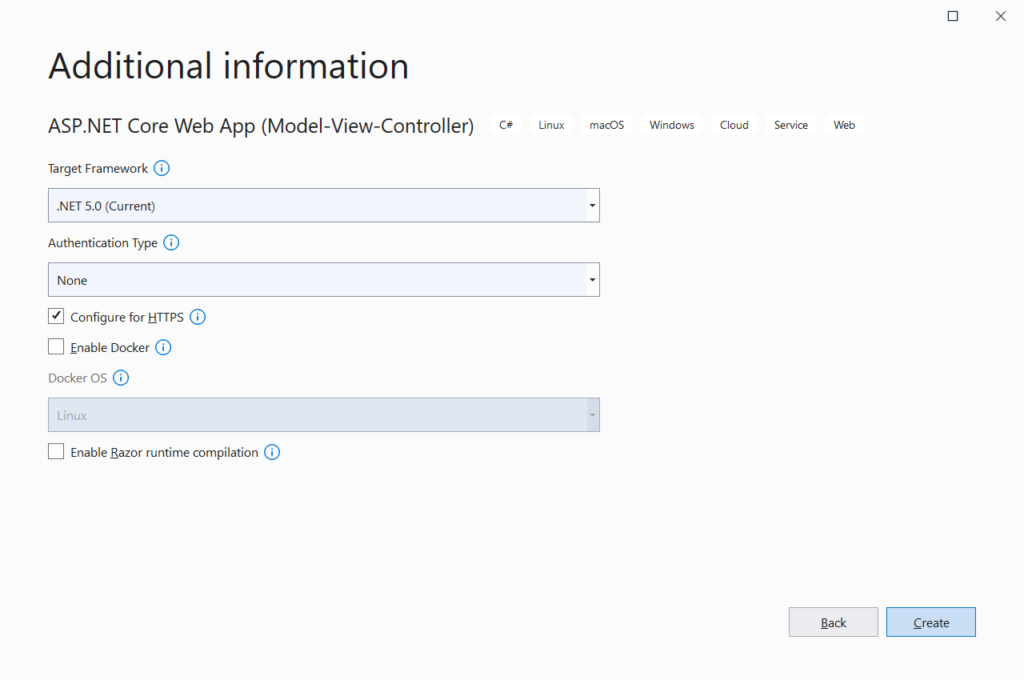
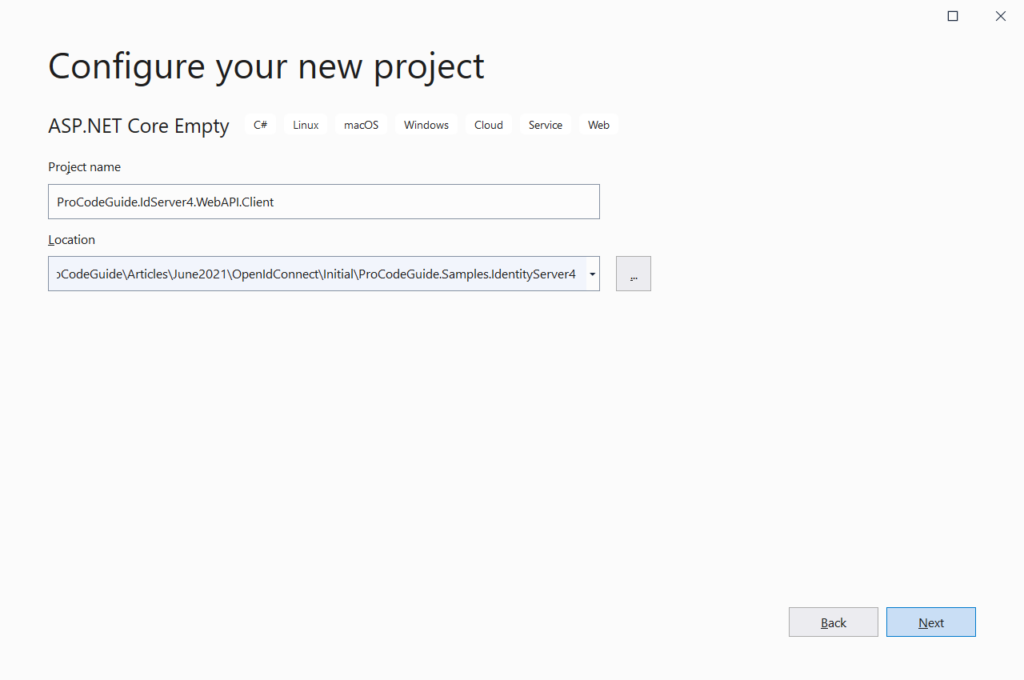
Create ASP.NET Core Project for IdentityServer4
Create & name the project with specified type and settings as shown in the below screens
Install IdentityServer4 Nuget Package to the project
You can add it from Nuget Package Manager or use the below-mentioned command in the Package Manager Console window to install the same.
Install-Package IdentityServer4
Add UI, Clients, Resources, Scopes & Users for IdentityServer4 Configuration
We have installed IdentityServer4 in to the project but we will need data to configure IdentityServer4
Add Clients
By adding clients we register all the applications with IdentityServer4 that are allowed to use it. As discussed earlier multiple applications can use the same Identity Provider so we can register more than 1 client that will use IdentityServer4
We will add the below code to register 2 clients one for OAuth2 (machine to machine interaction) and the other for Open ID Connect which will be an interactive authentication. Code is added to file IdentityConfiguration/Clients.cs
public class Clients
{
    public static IEnumerable<Client> Get()
    {
        return new List<Client>
        {
            new Client
            {
                ClientId = "weatherApi",
                ClientName = "ASP.NET Core Weather Api",
                AllowedGrantTypes = GrantTypes.ClientCredentials,
                ClientSecrets = new List<Secret> {new Secret("ProCodeGuide".Sha256())},
                AllowedScopes = new List<string> {"weatherApi.read"}
            },
            new Client
            {
                ClientId = "oidcMVCApp",
                ClientName = "Sample ASP.NET Core MVC Web App",
                ClientSecrets = new List<Secret> {new Secret("ProCodeGuide".Sha256())},

                AllowedGrantTypes = GrantTypes.Code,
                RedirectUris = new List<string> {"https://localhost:44346/signin-oidc"},
                AllowedScopes = new List<string>
                {
                    IdentityServerConstants.StandardScopes.OpenId,
                    IdentityServerConstants.StandardScopes.Profile,
                    IdentityServerConstants.StandardScopes.Email,
                    "role",
                    "weatherApi.read"
                },

                RequirePkce = true,
                AllowPlainTextPkce = false
            }
        };
    }
}
We have added a couple of clients. The first one is a client that uses the Client Credentials OAuth grant type i.e. it requires client id & secret to authorize access.
Here since it’s an in-memory configuration so the secret is in plain text but in reality, your secrets should never be in plain text i.e. it should always be protected that no one should be able to view it.
Here is the allowed scope configured is read access i.e. the client is only allowed to request the read access permission from the identity server by specifying client id & secret.
The second client is for demonstration of OpenID Connect that uses authorization code flow with proof-key for code exchange (PKCE). This flow is interactive where the user needs to sign in using his/her credential. It also has a redirect URL (Application Client URL) that is used to send the results of the authentication from the Identity Server to the client application. Client Id & Secret will be used to authorize access.
PKCE is used to ensure that the client application requesting tokens in exchange for code is the same application that had initially requested that code.
We added clients support for both Oauth2 and OpenID connect in ASP.NET Core
Add Resources
We will add the below code to register resources for the IdentityServer4. Code is added to file IdentityConfiguration/Resources.cs
public class Resources
{
    public static IEnumerable<IdentityResource> GetIdentityResources()
    {
        return new[]
        {
            new IdentityResources.OpenId(),
            new IdentityResources.Profile(),
            new IdentityResources.Email(),
            new IdentityResource
            {
                Name = "role",
                UserClaims = new List<string> {"role"}
            }
        };
    }

    public static IEnumerable<ApiResource> GetApiResources()
    {
        return new[]
        {
            new ApiResource
            {
                Name = "weatherApi",
                DisplayName = "Weather Api",
                Description = "Allow the application to access Weather Api on your behalf",
                Scopes = new List<string> { "weatherApi.read", "weatherApi.write"},
                ApiSecrets = new List<Secret> {new Secret("ProCodeGuide".Sha256())},
                UserClaims = new List<string> {"role"}
            }
        };
    }
}
Identity Resources are some standard open id connect scopes, that are unique to a particular user, which you want Identity Server to support. We have added standard scopes like OpenId, profile & Email and also a custom scope role that holds and returns role claims for the authenticated user. Standard scope OpenId needs to be supported if you want to implement OpenID Connect flow for Identity token.
API Resources are used to define the API that the identity server is protecting i.e. that API is secured using an identity server. In this case, it is the Weather API that is being protected using the Identity Server.
Add Scopes
We will add the below code to register API Scopes for the IdentityServer4. Code is added to file IdentityConfiguration/Scopes.cs
public class Scopes
{
    public static IEnumerable<ApiScope> GetApiScopes()
    {
        return new[]
        {
            new ApiScope("weatherApi.read", "Read Access to Weather API"),
            new ApiScope("weatherApi.write", "Write Access to Weather API"),
        };
    }
}
API Scopes is used to specify what actions authorized user can perform at the level of the API. An API can be an CRUD API with different scopes like read, write & create and API Scopes can be used to control what scopes on an API are allowed for the authorized user. In this case with have defines two scopes for Weather API i.e. read & write.
Add User(s)
For demo purpose we will be using a test user and will add it as shown in the code below. Code is added to file IdentityConfiguration/Users.cs
public class Users
{
    public static List<TestUser> Get()
    {
        return new List<TestUser>
        {
            new TestUser
            {
                SubjectId = "56892347",
                Username = "procoder",
                Password = "password",
                Claims = new List<Claim>
                {
                    new Claim(JwtClaimTypes.Email, "[email protected]"),
                    new Claim(JwtClaimTypes.Role, "admin"),
                    new Claim(JwtClaimTypes.WebSite, "https://procodeguide.com")
                }
            }
        };
    }
}
We have added one user with username ‘procoder’ and password ‘password’. This user is added with claims like email, role as admin & website.
Add UI
Since we will also be using this Identity Server for OpenID connect which is an interactive authentication with a login so we will have to provide the necessary UI part for log-in.
Every application will have its own look & feel as well as workflow but what we need now is just a simple MVC based UI that can be used for demonstration purpose.
We can make use of Quickstart UI for IdentityServer4 which contains a sample MVC based UI login, logout, grant management and consent.
You can clone or download this repo and drop the controllers, views, models and CSS into your web application i.e. copy all folders in the repo into your project
Register IdentityServer4 in Startup.cs
To register we need to add IdentityServer4 in the DI container and add it to the middleware pipeline.
Add below mentioned code in ConfigureServices method in Startup class
public void ConfigureServices(IServiceCollection services)
{
    services.AddIdentityServer()
        .AddInMemoryClients(Clients.Get())
        .AddInMemoryIdentityResources(Resources.GetIdentityResources())
        .AddInMemoryApiResources(Resources.GetApiResources())
        .AddInMemoryApiScopes(Scopes.GetApiScopes())
        .AddTestUsers(Users.Get())
        .AddDeveloperSigningCredential();

    services.AddControllersWithViews();
}
Code Explanation
- AddIdentityServer – This will register IdentityServer4 in DI container
- AddInMemoryClients – Hard coded Clients in Clients.Get() will be loaded into in-memory store
- AddInMemoryIdentityResources – Hard coded Identity Resources in Resources.GetIdentityResources() will be loaded into in-memory store
- AddInMemoryApiResources – Hard coded Api Resources in Resources.GetApiResources() will be loaded into in-memory store
- AddInMemoryApiScopes – Hard coded Api Scopes in Scopes.GetApiScopes() will be loaded into in-memory store
- AddTestUsers – Hard coded Users in Users.Get() will be loaded as test user
- AddDeveloperSigningCredential – IdentityServer4 will be configured to use demo signing certificate. IdentityServer4 uses certificate for signing credentials to verify that contents of the token have not been altered in transit.
Add the following code to Configure method in the Startup class to start handling request from clients for OAuth2 and OpenID Connect in ASP.NET Core
public void Configure(IApplicationBuilder app, IWebHostEnvironment env)
{
    if (env.IsDevelopment())
    {
        app.UseDeveloperExceptionPage();
    }

    app.UseStaticFiles();

    app.UseRouting();

    app.UseIdentityServer();

    app.UseEndpoints(endpoints => endpoints.MapDefaultControllerRoute());
}
Let’s build & run the project
After running the project you should see below screen
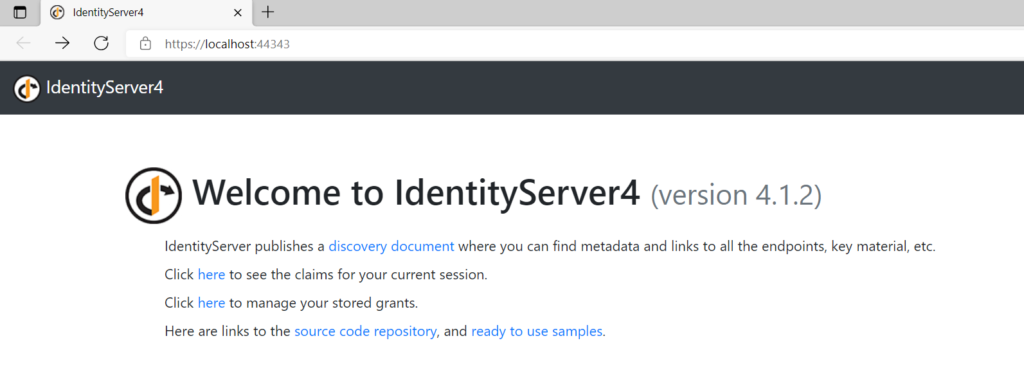
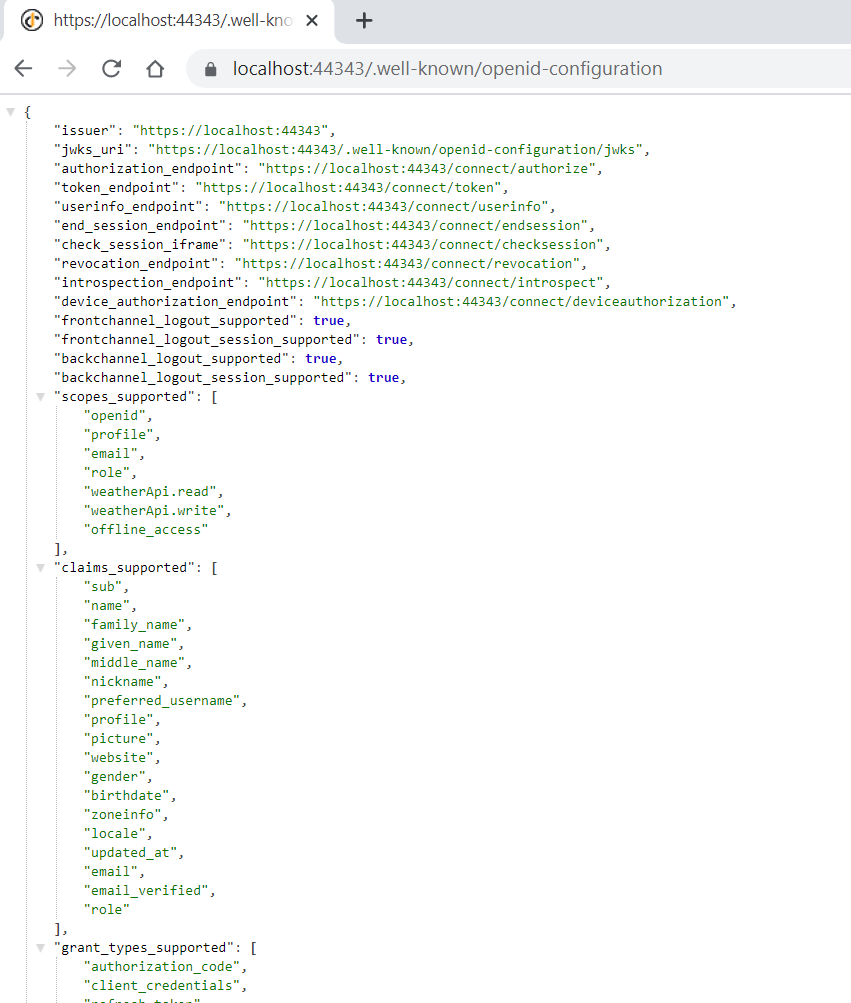
You can also view the OpenID Discovery Document that is available from the OpenID provider by navigating to the URL https://server:portno/.well-known/openid-configuration. This document provides details about your IdentityServer like issuer, supported scopes, claims supported, grant types supported, etc. OpenID Discovery Document for our configured IdentityServer4 is shown below
Let’s test access token from IdentityServer4 using Postman
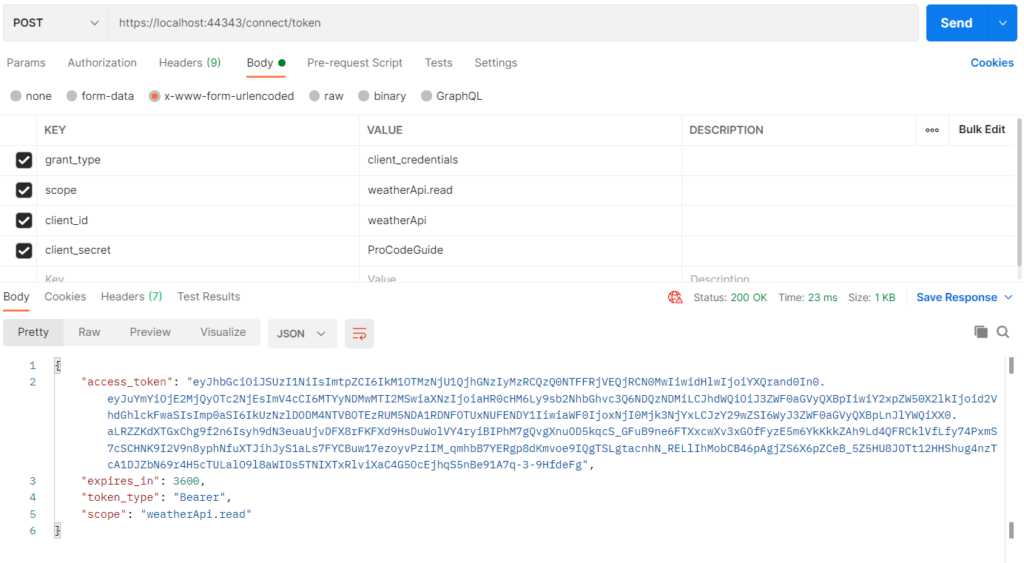
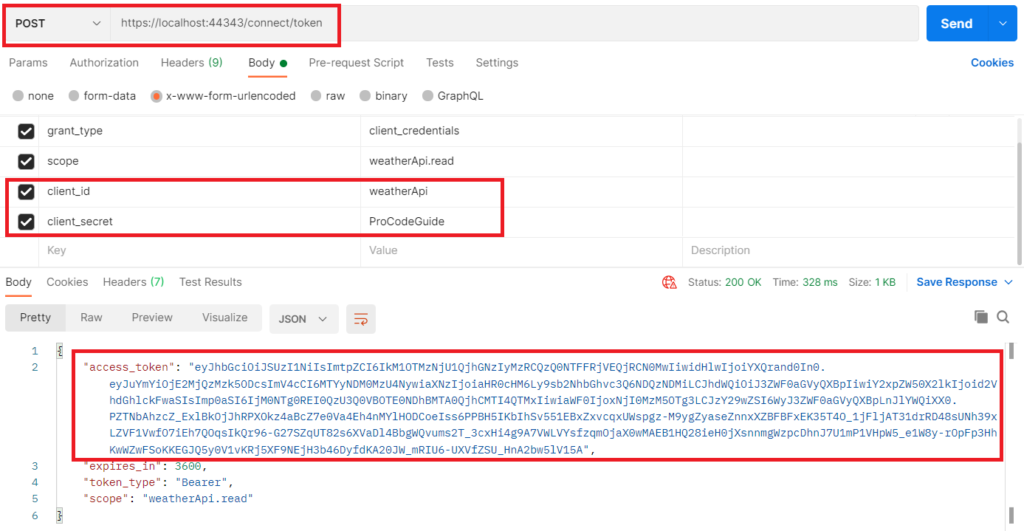
To fetch access token from Identity Server you will have to use grant type as client credentials with client Id and client secret. You will also have to specify the scope for which access is being requested. Using postman we can send the request for an access token as shown below. The default URL to fetch access token is https://server:port/connect/token and on successful authorization, it will return a token response as shown below.
If your decode this token using jwt.ms then you can see following claims
{
"alg": "RS256",
"kid": "C5933655B8F72234BC4451EF5DB4B7C0",
"typ": "at+jwt"
}.{
"nbf": 1624298203,
"exp": 1624301803,
"iss": "https://localhost:44343",
"aud": "weatherApi",
"client_id": "weatherApi",
"jti": "26B1B63D8CFD7DB48CD872CDEC31B58C",
"iat": 1624298203,
"scope": [
"weatherApi.read"
]
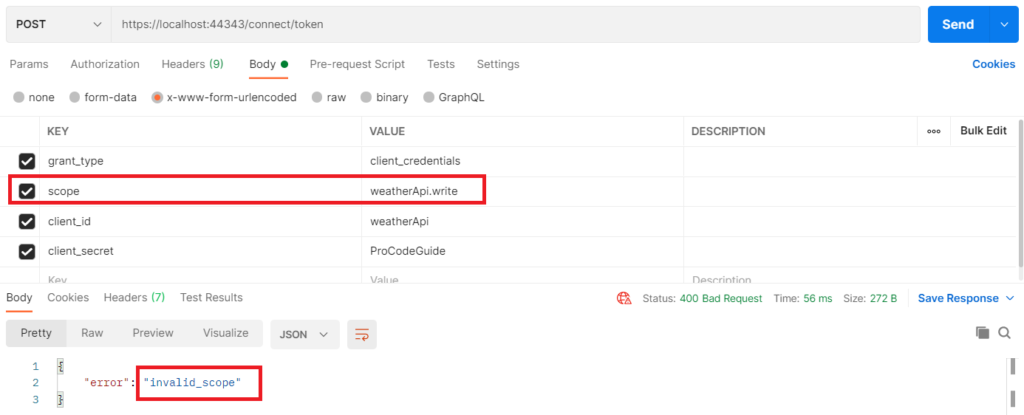
}For this Client Id & secret, we have allowed only read scope and write scope is not allowed. Now if you try to get a token for write scope then you get the below error.
So far we covered how to build an Identity Server with OAuth2 and OpenID connect in ASP.NET Core. Next, let’s build an ASP.NET Core Web API that will be protected using this Identity Server i.e. an access token will be required to access this Web API for our demonstration of OAuth2 and OpenID connect in ASP.NET Core
Create ASP.NET Core Web API Project (Secured using IdentityServer4)
Create & name the project with specified type and settings as shown in the below screens (Add this project to the same solution which was created as part of IdentityServer4 project). This project will protect its endpoints using the OAuth2 access token and for this, it will utilize Identity Server which was built earlier to implement OAuth2 and OpenID connect in ASP.NET Core.
Install required package to the project
You will have to add the package IdentityServer4.AccessTokenValidation to the Web API project. This package can be added from Nuget Package Manager or use the below-mentioned command in the Package Manager Console window to install the same.
Install-Package IdentityServer4.AccessTokenValidation
Configure Authentication in Startup.cs
Add below code for authentication details to ConfigureServices method in Startup class
services.AddAuthentication("Bearer")
.AddIdentityServerAuthentication("Bearer", options =>
{
    options.ApiName = "weatherApi";
    options.Authority = "https://localhost:44343";
});
ApiName is the name that has been configured in IdentityServer4 for the client application. Authority URL is the URL of our Identity Server. This Authentication configuration will make use of the discovery document on startup to configure the security for this API
You will also have to add authentication to the pipeline by making the below code changes to Configure method in the Startup class
public void Configure(IApplicationBuilder app, IWebHostEnvironment env)
{
    if (env.IsDevelopment())
    {
        app.UseDeveloperExceptionPage();
        app.UseSwagger();
        app.UseSwaggerUI(c => c.SwaggerEndpoint("/swagger/v1/swagger.json", "ProCodeGuide.IdServer4.WebAPI v1"));
    }

    app.UseHttpsRedirection();

    app.UseRouting();

    app.UseAuthentication();

    app.UseAuthorization();

    app.UseEndpoints(endpoints =>
    {
        endpoints.MapControllers();
    });
}
To enforce access token for the WeatherForecast controller you will have to add Authorize attribute to the controller. This will secure your endpoints for the Weather Service.
[ApiController]
[Route("[controller]")]
[Authorize]
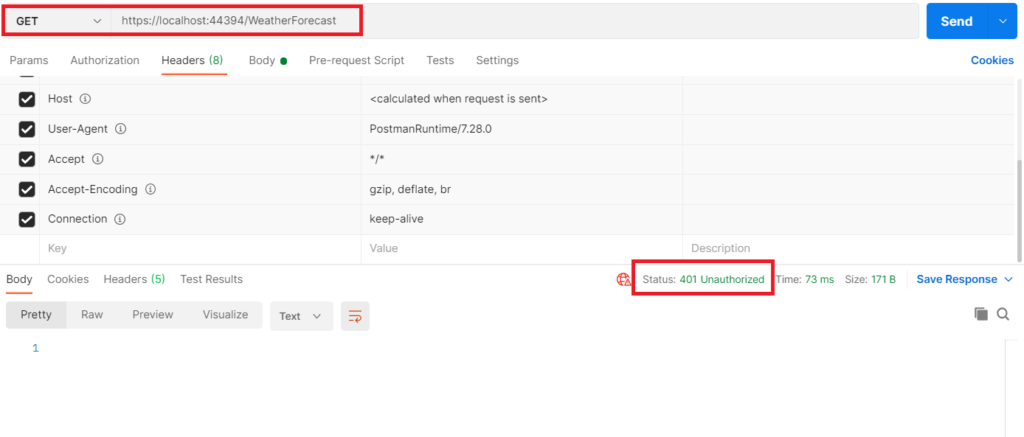
public class WeatherForecastController : ControllerBaseRun & test the Web API with Postman
After running the application open postman to send a get request to the weatherforecast service endpoint. Since our endpoint is protected and this will be a request without token so this should fail with a return code 401 – Unauthorized access as shown below
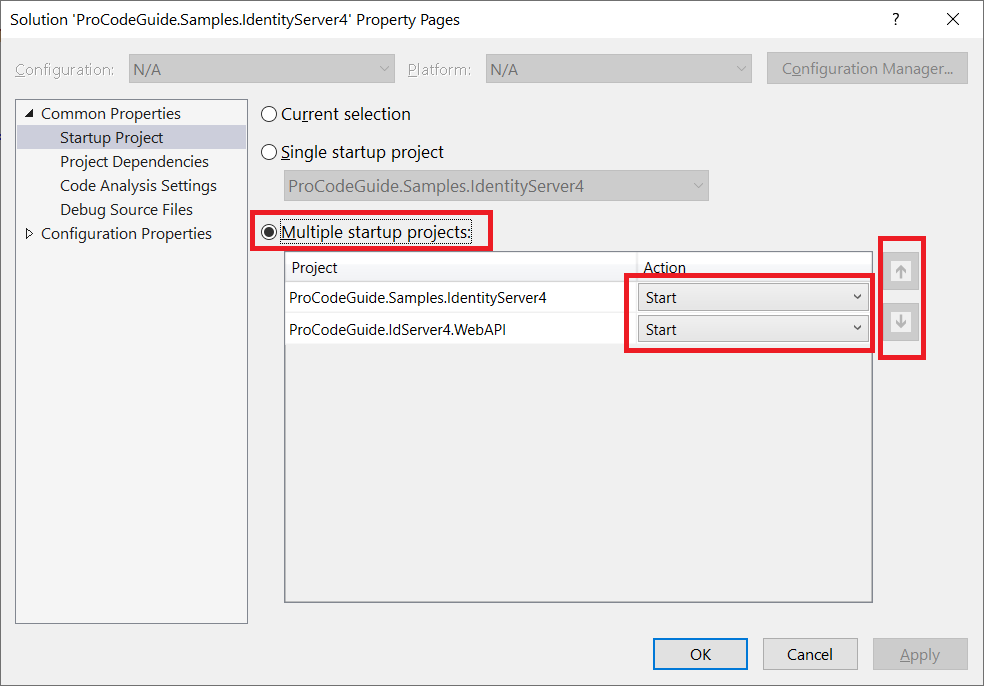
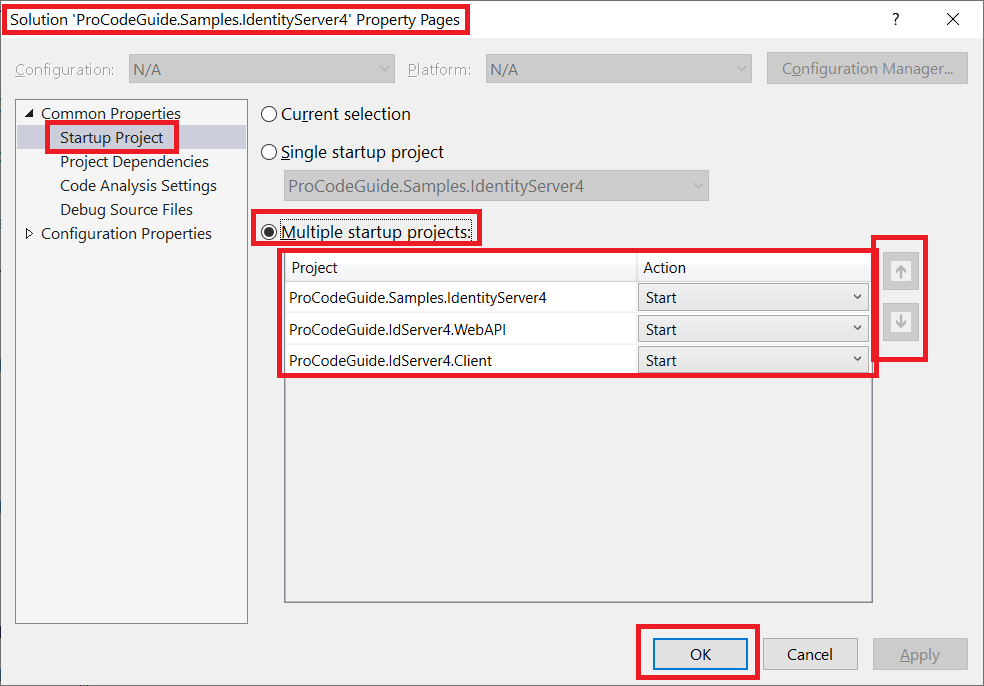
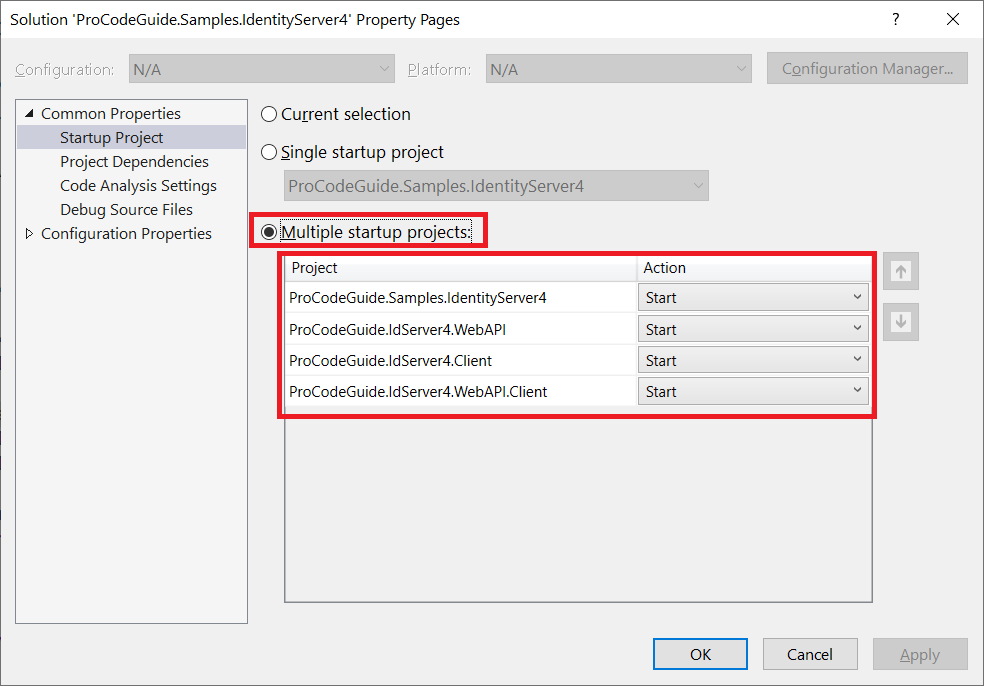
Please ensure that when you run the application you run both the projects in Solution Explorer i.e. IdentityServer4 Project & this API project. You can configure this by right-clicking on Solution Explorer and selecting the menu option “Set Startup Projects”.
Now we will use Postman to get token from the Identity Server project for client weatherApi for weatherApi.read scope. We will be using the client secret to get the token. (How to get token is covered in details above)
Now since we have the access token for the weatherApi client so now we will use this OAuth2 access token to access the weatherforecast service endpoint. For this, we have to attach this access token to the get request in the Authorization header
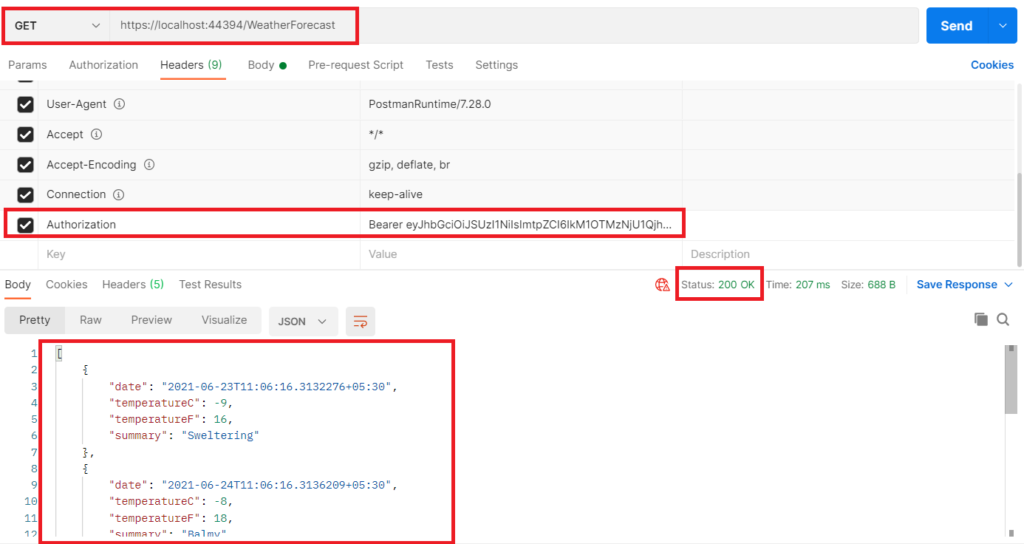
As shown above after attaching access token to the request we got successful response & data from the service endpoint.
Authorization in API
Our current configuration in API will accept any token that is issued by Identity Server but we need to protect API to allow only tokens with a specific scope.
Let modify the code that allows further checking of specific scope in the access token. For this configure authorization policy system in ConfigureServices method in the Startup class
public void ConfigureServices(IServiceCollection services)
{
    services.AddAuthentication("Bearer")
    .AddIdentityServerAuthentication("Bearer", options =>
    {
        options.ApiName = "weatherApi";
        options.Authority = "https://localhost:44343";
    });

    services.AddAuthorization(options =>
    {
        options.AddPolicy("weatherApiScope", policy =>
        {
            policy.RequireAuthenticatedUser();
            policy.RequireClaim("scope", "weatherApi.read");
        });
    });

    services.AddControllers();
    services.AddSwaggerGen(c =>
    {
        c.SwaggerDoc("v1", new OpenApiInfo { Title = "ProCodeGuide.IdServer4.WebAPI", Version = "v1" });
    });
}
Now we have defined the policy but this policy will have to be enforced and it can be enforced at various levels like global, all API endpoints & specific controllers or actions.
To set this policy for all API endpoints in the routing system make the below changes to Configure method in the Startup class
public void Configure(IApplicationBuilder app, IWebHostEnvironment env)
{
    if (env.IsDevelopment())
    {
        app.UseDeveloperExceptionPage();
        app.UseSwagger();
        app.UseSwaggerUI(c => c.SwaggerEndpoint("/swagger/v1/swagger.json", "ProCodeGuide.IdServer4.WebAPI v1"));
    }

    app.UseHttpsRedirection();

    app.UseRouting();

    app.UseAuthentication();

    app.UseAuthorization();

    app.UseEndpoints(endpoints =>
    {
        endpoints.MapControllers().RequireAuthorization("weatherApiScope"); ;
    });
}
Now let’s learn about how to build a client i.e. ASP.NET Core MVC Web App that will make use of this OpenID connect login to allow access to users. Also, we will see how to make calls to this protected weatherforecast Web API from a program using an access token i.e. Machine to Machine calls.
Create Sample ASP.NET Core MVC Web App Client Secured using OpenID Connect
We will build a client that will use OpenID Connect to implement login functionality. i.e. instead of implementing login functionality in the application, we will make use of login functionality available in IdentityServer4. This way we can achieve the goal of a single Identity server for all the application.
Create & name the project with specified type and settings as shown in the below screens (Add this project to the same solution which was created as part of IdentityServer4 project). This project will protect its application access using the OpenID Connect protocol and for this, it will utilize Identity Server which was built earlier to implement OAuth2 and OpenID connect in ASP.NET Core.
Install required package to the project
You will have to add the package Microsoft.AspNetCore.Authentication.OpenIdConnect to the MVC project. This package can be added from Nuget Package Manager or use the below-mentioned command in the Package Manager Console window to install the same.
Install-Package Microsoft.AspNetCore.Authentication.OpenIdConnect
Configure Authentication in Startup.cs
Add below code for authentication details to ConfigureServices method in Startup class
public void ConfigureServices(IServiceCollection services)
{
    services.AddAuthentication(options =>
    {
        options.DefaultScheme = "cookie";
        options.DefaultChallengeScheme = "oidc";
    })
    .AddCookie("cookie")
    .AddOpenIdConnect("oidc", options =>
    {
        options.Authority = "https://localhost:44343";
        options.ClientId = "oidcMVCApp";
        options.ClientSecret = "ProCodeGuide";

        options.ResponseType = "code";
        options.UsePkce = true;
        options.ResponseMode = "query";

        options.Scope.Add("weatherApi.read");
        options.SaveTokens = true;
    });

    services.AddControllersWithViews();
}
Code Explanation
- AddCookie(“cookie”) – Add cookie authentication using the specified scheme ‘cookie’ i.e. on successful authentication from IdentityServer4 a domain cookie will be issued and set in the HTTPS request for user details/claims.
- DefaultScheme = “cookie” – Set the default scheme to cookie.
- AddOpenIdConnect – Adds OpenID connect authentication using the specified scheme ‘oidc’
- Authority – Authority URL is the URL of our Identity Server
- ClientId & ClientSecret is the client details that have been configured in our Identity Server 4 as part of client configurations and should match with those.
- ResponseType is used to set the desired authorization processing flow.
- ResponseMode is used to the mechanism to be used for returning Authorization response parameters from the authorization server.
- UsePkce – PKCE is used to ensure that client application requesting tokens in exchange of code is the same application that had initially requested that code.
- SaveTokens – Specifies whether access and refresh token should be saved in authentications properties or not
- DefaultChallengeScheme = “oidc” – Set the default challenge scheme to odic i.e. when a user tries to access a protected resource but authentication has not happened yet then where should be authenticated using the options specified in oidc.
You will also have to add authentication to the pipeline by making the below code changes to Configure method in the Startup class
public void Configure(IApplicationBuilder app, IWebHostEnvironment env)
{
    if (env.IsDevelopment())
    {
        app.UseDeveloperExceptionPage();
    }
    else
    {
        app.UseExceptionHandler("/Home/Error");
        app.UseHsts();
    }
    app.UseHttpsRedirection();
    app.UseStaticFiles();

    app.UseRouting();

    app.UseAuthentication();
    app.UseAuthorization();

    app.UseEndpoints(endpoints =>
    {
        endpoints.MapControllerRoute(
            name: "default",
            pattern: "{controller=Home}/{action=Index}/{id?}");
    });
}
To enforce authentication for the ASP.NET Core MVC application i.e. to make Login mandatory before anyone can access the application we will have to add Authorize attribute to the Home controller. This will secure your application for all actions in the Home controller.
[Authorize]
public class HomeController : Controller
Now we are ready to build, run & test our application. Ensure that you have configured in solution to start both the project i.e. Identity Server Project and this ASP.NET Core MVC project. Also, configure that Identity Server project starts before this ASP.NET Core MVC project as shown below
Run & test the application
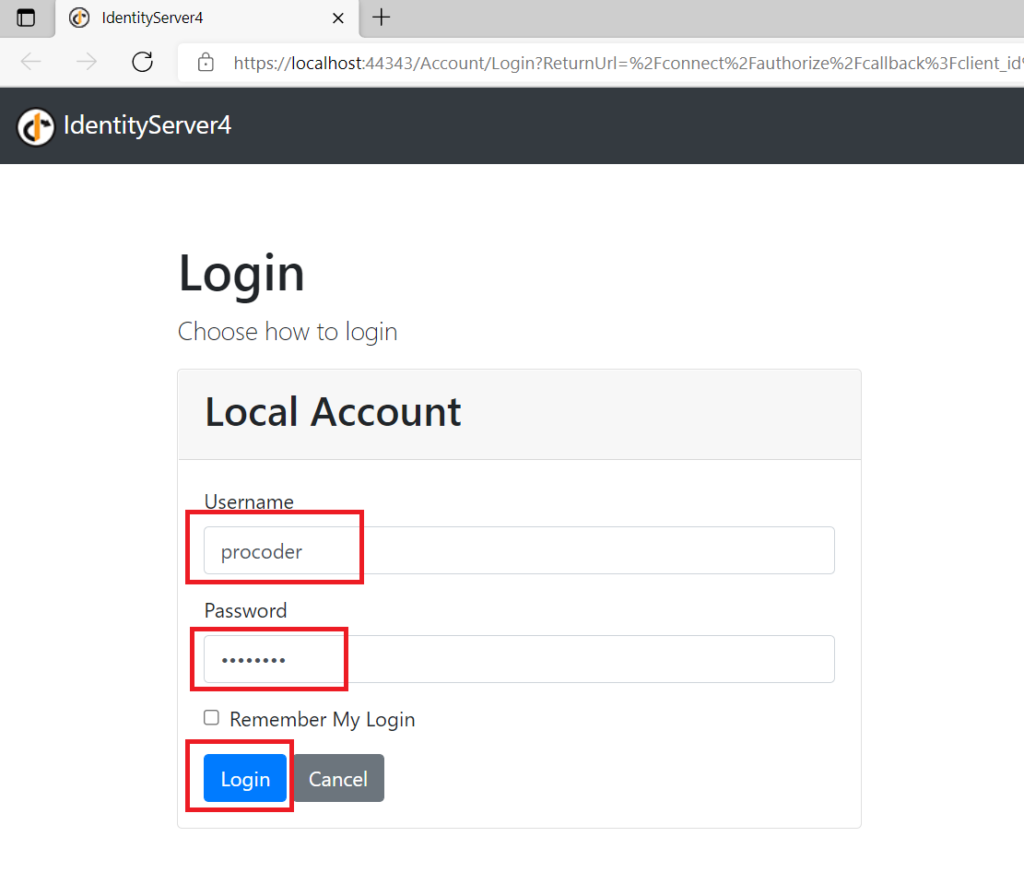
After you run the application default home page will be requested but since we have secured the home page it will be not allowed by the application. Instead, we will be routed to the login page from Identity Server where we will have to successfully login first and on successful login, we will be allowed to view the Home page. Since we have set authorize attribute at the controller level this behaviour will be applied to all the actions in the home controller
After running the application you should see the below login screen from Identity Server 4
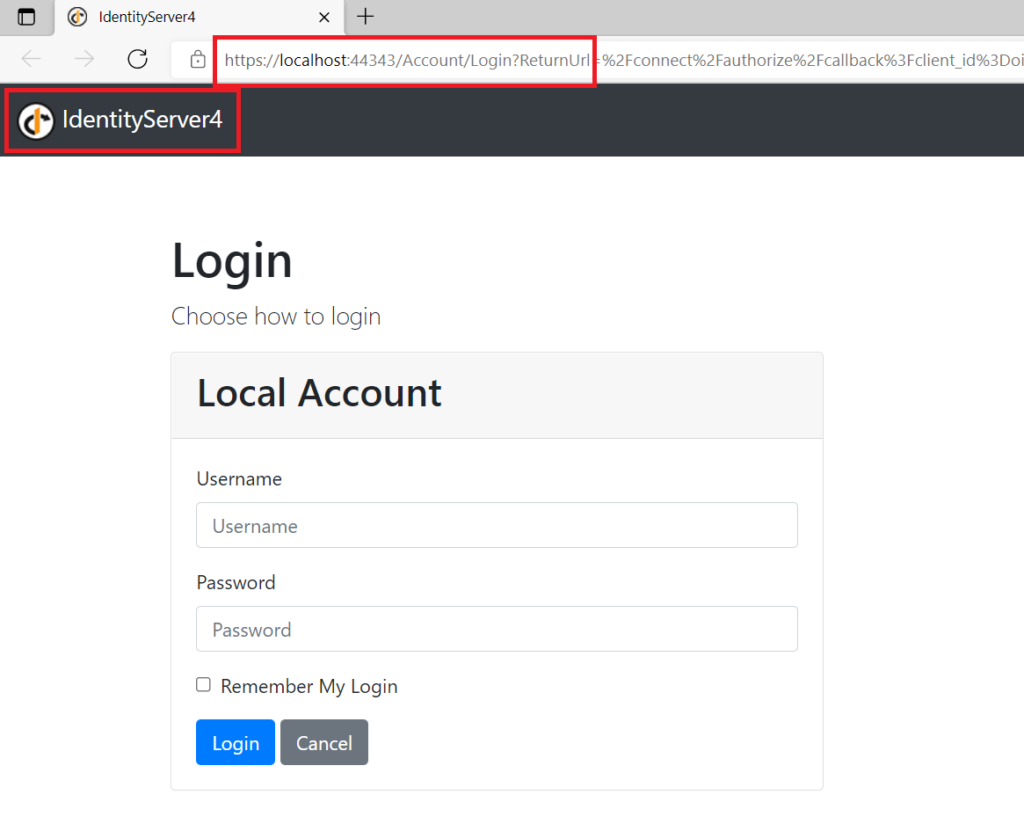
You need to login to the application to be able to navigate to Application Home page. We had configured a Test User in Identity Server 4 in the memory store same user can be used for login.
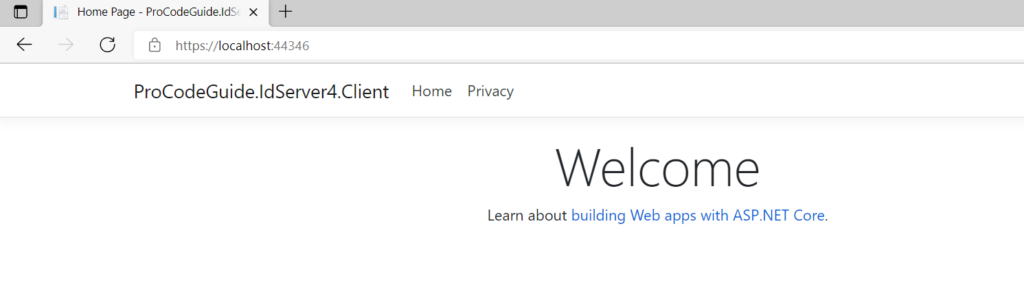
After successful login, you will be redirected back to your client applications redirect URI (that has been set in clients in Identity Server project) and logged in using a domain cookie and then redirected to the Home page of the ASP.NET Core MVC application as shown below. Now that we have logged in successfully we can also navigate to other links in the application i.e. Privacy
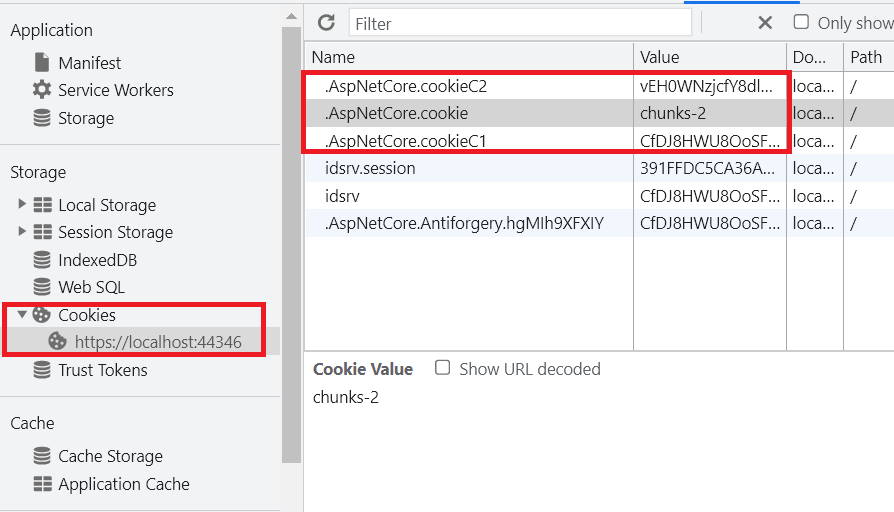
After successful login, we can see from developer tools that as configured in OpenId Connect authentication a cookie has been set for the application domain to indicate the user details on subsequent requests from the same session for that application.
Now let’s learn about how to create an ASP.NET Core Web API client that will call OAuth2 access token protected weather API i.e. machine to machine calls using OAuth2 access token.
Build ASP.NET Core Web API Client to call Weather API using OAuth2 access token
We will build a client that will use the OAuth2 access token to call Weather API that is protected using IdentityServer4 OAuth2. We will add Weather Controller to this project that in turn will call the WeatherForecast controller in protected API to display data.
Create & name the project with specified type and settings as shown in the below screens (Add this project to the same solution which was created as part of IdentityServer4 project)

Install required package to the project
You will have to add the package IdentityModel to the Web API Client project. This package can be added from Nuget Package Manager or use the below-mentioned command in the Package Manager Console window to install the same.
Install-Package IdentityModel
Token endpoint i.e. Identity Server uses OAuth2 protocol for which we can use raw HTTPS calls but IdentityModel simplifies the task as it encapsulates the OAuth2 interactions in an easy to use client library.
Since we are going to call a protected Web API that requires an access token for authorization so we will have to first get an access token from our Identity Server using client id/secret & then attach that access token in HTTPS request to protected API for authorization.
Add Code to get access token from Identity Server
Let’s write a service to get token from Identity Server. First we will add an interface for the service Services/IIdentityServer4Service.cs as shown below
public interface IIdentityServer4Service
{
    Task<TokenResponse> GetToken(string apiScope);
}
Next we will add the implementation of service Services/IdentityServer4Service.cs as shown below
public class IdentityServer4Service : IIdentityServer4Service
{
    private DiscoveryDocumentResponse _discoveryDocument { get; set; }
    public IdentityServer4Service()
    {
        using (var client = new HttpClient())
        {
            _discoveryDocument = client.GetDiscoveryDocumentAsync("https://localhost:44343/.well-known/openid-configuration").Result;
        }
    }
    public async Task<TokenResponse> GetToken(string apiScope)
    {
        using (var client = new HttpClient())
        {
            var tokenResponse = await client.RequestClientCredentialsTokenAsync(new ClientCredentialsTokenRequest
            {
                Address = _discoveryDocument.TokenEndpoint,
                ClientId = "weatherApi",
                Scope = apiScope,
                ClientSecret = "ProCodeGuide"
            });
            if (tokenResponse.IsError)
            {
                throw new Exception("Token Error");
            }
            return tokenResponse;
        }
    }
}
Code Explanation
IdentityModel makes use of discovery endpoint so we have specified the URL of our identity server discovery endpoint. By referring to discovery endpoint clients need to know only the base address of the Identity Server and rest can be determined from the metadata.
In the GetToken method information from discovery document is being used to request access token from the Identity Server.
Register Service
Now that we have added the service implementation we need to register this service in the DI container so that it can be in controller through Dependency Injection. For this we modify code in Startup class as shown below.
public class Startup
{
    public void ConfigureServices(IServiceCollection services)
    {
        services.AddSingleton<IIdentityServer4Service, IdentityServer4Service>();

        services.AddControllers();
    }

    public void Configure(IApplicationBuilder app, IWebHostEnvironment env)
    {
        if (env.IsDevelopment())
        {
            app.UseDeveloperExceptionPage();
        }

        app.UseRouting();

        app.UseEndpoints(endpoints => endpoints.MapControllers());
    }
}
Add Model
We will add below model for Weather data that needs to be returned.
public class WeatherForecast
{
    public DateTime Date { get; set; }

    public int TemperatureC { get; set; }

    public int TemperatureF { get; set; }

    public string Summary { get; set; }
}
Add controller to return Weather data
Now we will add Weather Controller Controllers/WeatherController.cs that will implement a get method to return weather data as shown below.
[Route("api/[controller]")]
[ApiController]
public class WeatherController : ControllerBase
{
    private IIdentityServer4Service _identityServer4Service = null;
    public WeatherController(IIdentityServer4Service identityServer4Service)
    {
        _identityServer4Service = identityServer4Service;
    }

    [HttpGet]
    public async Task<IEnumerable<WeatherForecast>> Get()
    {
        var OAuth2Token = await _identityServer4Service.GetToken("weatherApi.read");
        using (var client = new HttpClient())
        {
            client.SetBearerToken(OAuth2Token.AccessToken);
            var result = await client.GetAsync("https://localhost:44394/weatherforecast");
            if (result.IsSuccessStatusCode)
            {
                var model = await result.Content.ReadAsStringAsync();
                return JsonConvert.DeserializeObject<List<WeatherForecast>>(model);
            }
            else
            {
                throw new Exception("Some Error while fetching Data");
            }
        }
    }
}
In this controller we will be calling a method on protected API to get weather data so we have injected Identity Server Service (IdentityServer4Service) so that we can make use of access token to make a call to secured API. SetBearerToken method has been used to set access token in the HTTP header.
Run and test the code
Ensure that you have configured in solution to start all 3 projects the project i.e. Identity Server Project Project Web API Project & this Web API client. Also, configure that Identity Server project starts before other projects as shown below
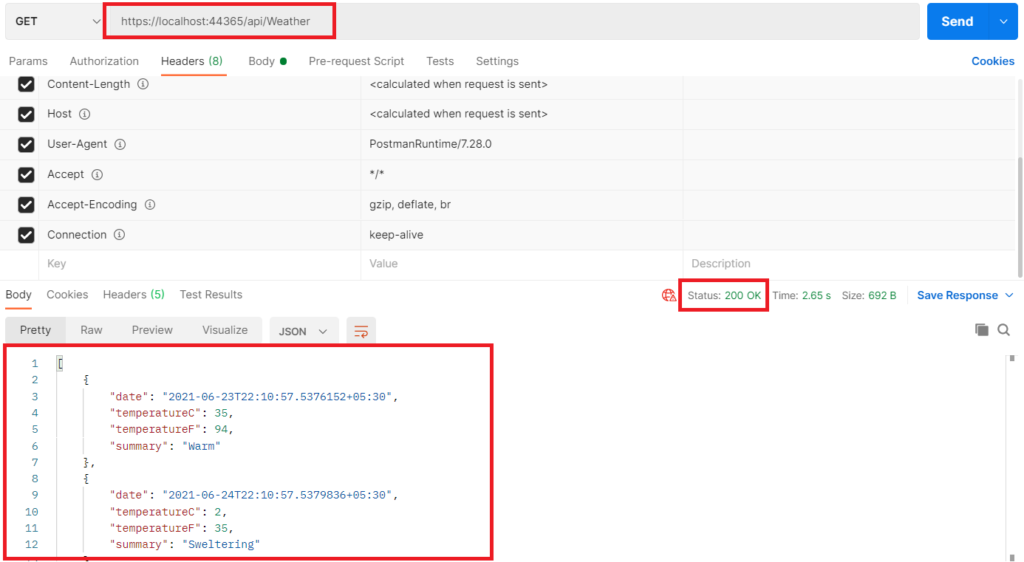
After running all the required projects use Postman to get the data from our Web API client as shown below. If the configuration is proper then you should be able to see weather data from Secured Web API
So far we saw how to build identity server using IdentityServer4 for implementation of OAuth2 and OpenID Connect in ASP.NET Core. We also built various project for demonstration of the same. I will wind up this Article here and look forward to your feedback in comments section.
Summary
In this article, we learnt how to Implement OAuth2 and OpenID Connect in ASP.NET Core. We started with a basic understanding of OAuth2, OpenID Connect & IdentityServer4 then we built the required projects to demonstrate the concepts i.e. IdentityServer4 Host, Web API protected using OAuth2, MVC App protected using OpenID Connect & finally Web API consuming another Web API protected using OAuth2.
Let me know your questions & suggestions in the comments section below.
Download Source Code
Download source code for Implementation of OAuth2 and OpenID Connect in ASP.NET Core
You can also check my other article on Implement Unit Testing in ASP.NET Core 5 Application – Getting Started
Hope this article helped. Your help is appreciated!Recommend
About Joyk
Aggregate valuable and interesting links.
Joyk means Joy of geeK