

Pull to refresh in SwiftUI with refreshable
source link: https://sarunw.com/posts/pull-to-refresh-in-swiftui/
Go to the source link to view the article. You can view the picture content, updated content and better typesetting reading experience. If the link is broken, please click the button below to view the snapshot at that time.
Pull to refresh in SwiftUI with refreshable
Table of Contents
This article covers beta technology (iOS 15 and Xcode 13) which might subject to change in the future.
SwiftUI 2 is great, but it lacks some crucial UI components that its ancestor (UIKit) has. This year in WWDC 2021, with a coming of iOS 15 and SwiftUI 3, most missing pieces are fulfilled. In this article, I will visit one of the most used UI elements in an app, UIRefreshControl or pull to refresh.
refreshable
We can add a refresh control to a List view with the new refreshable modifier.
It has the following signature.
func refreshable(action: @escaping () async -> Void) -> some ViewHow to add the refresh control
To add a refresh control, we apply the .refreshable modifier to a view that supports refresh operation (only a List view in this beta).
List {
    ...
}
.refreshable {
    await loadMore()
}
When you apply this modifier to a view that supports refreshable like List, the view provides a way for the user to refresh the content. For List in iOS, we got this old friend loading indicator just like UIRefreshControl in UIKit.
 List view reveals a refresh control when a user drags the top of the scrollable content.
How to show and hide the refresh control
If you try to pull to refresh, it will immediately bounce back, which is quite different from UIRefreshControl behavior in UITableView.
struct ContentView: View {
    @State var data = Array(0..<10)

var body: some View {
        List {
            ForEach(data, id: \.self) { i in
                Text(i.description)
            }
        }
        .refreshable {
          // Nothing to execute
        }
    }
}
Refresh indicator bounces back immediately.
This is different from what we have in UIKit, where the refresh indicator will stay there until we call endRefreshing().
In UIKit, we have to control the refresh indicator ourselves by calling beginRefreshing() or endRefreshing(), but Apple decided to use the new Swift feature, async/await[1], to control this. The refresh indicator will stay visible for the duration of the awaited operation that pass to .refreshable.
This is how it works:
- When use initiated the refresh control by pull-down the content, the list view executes the provided action from
.refreshable. - It uses an await expression inside the action to refresh your data.
- The refresh indicator remains visible for the duration of the awaited operation.
So, let's put some async operation to see it in action.
struct ContentView: View {
    @State var data = Array(0..<10)

var body: some View {
        List {
            ForEach(data, id: \.self) { i in
                Text(i.description)
            }
        }
        .refreshable {
          await loadMore() // 1
        }
    }

func loadMore() async {
        let request = URLRequest(url: URL(string: "https://httpbin.org/delay/2")!) // 2
        let _ = try! await URLSession.shared.data(for: request)
        data.append(contentsOf: Array(10..<20)) // 3
    }
}
<1> We create a new async method to refresh our data model and use it in .refreshable. The List will show a refresh indicator until this awaited operation is finished.
<2> Create a dummy request to the network. In this case, I use an endpoint that will delay response for two seconds (We will see the refresh indicator spinning for two seconds).
<3> We update our data model after the operation is finished. This is just for demonstration. We don't use anything from our request's response.
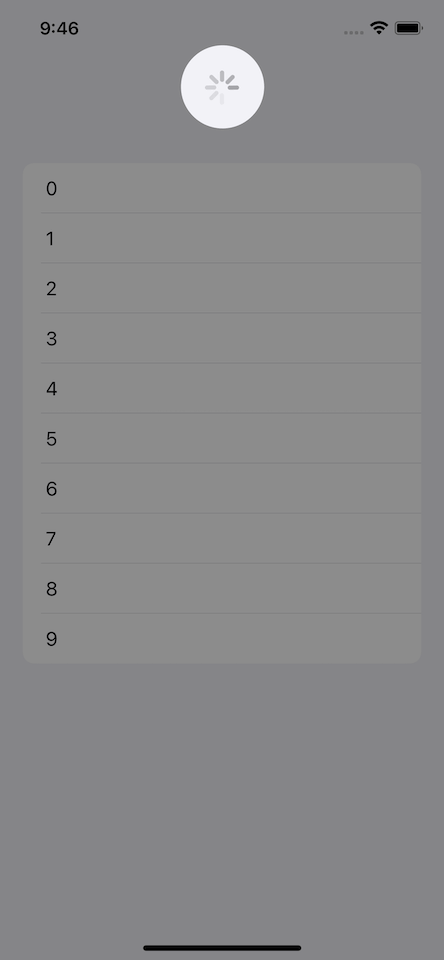
 The refresh indicator will stay visible for the duration of the awaited operation.
https://httpbin.org/ is a simple HTTP Request & Response Service. They provide my request and response endpoint, and /delay is one of them.
In the current beta, Version 13.0 beta (13A5154h), I can't make it work with any other scrollable view, e.g., LazyVGrid.

Make your custom view refreshable
The beauty of this .refreshable approach is it doesn't restrict to only List view. You can add refreshable functionality to any custom view.
To do that, let dig a little bit deeper into .refreshable.
Behind the scene, what .refreshable(action:) does is it set the refresh value in the view's environment.
Any view that wants to support refresh operation uses the existence of a refresh action in the view’s environment to change the view’s appearance and behavior to provide a way for the user to initiate the refresh action. An action of nil indicates that the view doesn’t need to support refresh.
To make your view support refresh operation, you need to do three things.
Listen to refresh view's environment
We need to check the existence of the refresh environment variable to determine that the user wants to support refresh or not. In this List view case, this controls the presence of refresh control when pulling down.
I will make a new view to support refresh operation called Refresher. This view will show a button to initiate refresh operation if .refreshable is present.
struct Refresher: View {
    @Environment(\.refresh) private var refresh // 1

var body: some View {
        VStack {
            Text("Refresher")
            if let refresh = refresh { // 2
                Button("Refresh") {

}
            }
        }
    }
}
<1> Create environment variable to read refresh value.
<2> Use this to determine whether to show refresh control or not. In our case, we use a simple button as a way to refresh content.
Then use it like this.
struct ContentView: View {
    var body: some View {
        VStack {
            Refresher() // 1
                .refreshable {

}
            Divider()
            Refresher() // 2
        }.padding()
    }
}
<1> The first view would show the refresh button since the presence of the refresh environment variable.
<2> The second view has no refresh function.
 A custom view with .refreshable (top) and without .refreshable (bottom).
You can read more about @Environment here.
Initiate refresh action
Adding .refreshable means users expect our view to refresh the content when trigger the refresh action, so we need to call the refresh variable, which is RefreshAction.
struct Refresher: View {
    @Environment(\.refresh) private var refresh

var body: some View {
        VStack {
            Text("Refresher")
            if let refresh = refresh {
                Button("Refresh") {
                    async {
                        await refresh() // 1
                    }
                }
            }
        }
    }
}
<1> We call refresh action when a user initiates refresh operation. In our case, a button action.
Add async function to .refreshable.
struct ContentView: View {
    var body: some View {
        VStack {
            Refresher()
                .refreshable {
                    await loadMore() // 1
                }
            Divider()
            Refresher()
        }.padding()
    }

func loadMore() async {
        let request = URLRequest(url: URL(string: "https://httpbin.org/delay/2")!)
        let _ = try! await URLSession.shared.data(for: request)
    }
}
<1> Add sync function to refresh content. We just use a dummy one here for demonstration.
Our view now supports the refreshing operation, but there is no apparent change in our view, which might confuse users. So, we come to the last step, adding a refreshing state.
Adding a refreshing state
There is no magic here. We have to manage the loading/refreshing state ourselves. This is a simple task in SwiftUI with the help of @State.
struct Refresher: View {
    @Environment(\.refresh) private var refresh
    @State private var isLoading = false // 1

var body: some View {
        VStack {
            Text("Refresher")
            if let refresh = refresh {
                if isLoading { // 2
                    ProgressView()
                } else {
                    Button("Refresh") {
                        isLoading = true // 3
                        async {
                            await refresh()
                            isLoading = false // 4
                        }
                    }
                }
            }
        }
    }
}
<1> Adding a new @State variable to keep the loading state.
<2> Use isLoading to change the UI accordingly. In this case, we show a loading indicator if isLoading is true instead of a button.
<3> We update isLoading before executing the refresh action and update again once finished <4>.
Run the app, and we got a working refreshable custom view.
 A custom view with .refreshable supported.
Conclusion
It quite surprises me at first that Apple adopts async/await[1:1] in their API this fast without any alternative. At first, I thought Apple would introduce a new view with some binding like what we have in Toggle.
Something like this.
@State var isLoading = false;

RefreshControl(isOn: $isLoading)
After digging deeper into the API, I think we can agree that the async/await and refresh environment is better. It shift the concern about managing loading state to underlying view and expose only what really matters to the user of the view, which is how to refresh the data.
You may also like
Learn how SwiftUI shares application settings and preference values across the app.
SwiftUIRead more article about SwiftUI
or see all available topic
Get new posts weekly
If you enjoy this article, you can subscribe to the weekly newsletter.
Every Friday, you’ll get a quick recap of all articles and tips posted on this site — entirely for free.
Feel free to follow me on Twitter and ask your questions related to this post. Thanks for reading and see you next time.
If you enjoy my writing, please check out my Patreon https://www.patreon.com/sarunw and become my supporter. Sharing the article is also greatly appreciated.
How to change status bar text color in Flutter
Learn different ways to change status bar text color in Flutter.
How to use a pre-release Swift version in Xcode
Each Xcode version comes with a specific Swift toolchain, but you don't have to wait for a new Xcode version to try the new Swift features. Let's see how we can switch between different Swift toolchains in Xcode.
Recommend
About Joyk
Aggregate valuable and interesting links.
Joyk means Joy of geeK