

ASP.NET Core: State Management in Blazor Applications
source link: https://www.dotnetcurry.com/aspnet-core/blazor-state-management
Go to the source link to view the article. You can view the picture content, updated content and better typesetting reading experience. If the link is broken, please click the button below to view the snapshot at that time.

Blazor is a framework for building interactive client-side Web UI using .NET.
Blazor provides features to create RICH and interactive UI using C# instead of JavaScript. It provides a full-stack application development experience with end-to-end support from .NET, which allows the sharing of logic written on server-side to the client application.
Web UI developed using Blazor has support from all the modern browsers, including mobile browsers. Blazor renders HTML and CSS on the browser for interactive UI. One advantage of Blazor is that it supports .NET libraries from the .NET ecosystem.
One of the major concepts in Blazor is a Component.
A Component is an object which is rendered in the browser and this object is responsible for providing interactivity to the end user so that the data entered by the end user can be manipulated and then used for processing.
A component is an autonomous object which contains user interface, data as well as behaviour. This behaviour is bound with various UI elements of the component using data binding as well as event binding.
Elements of the component may be standard HTML elements used for defining layout of the component e.g. Div, Table etc., as well as the standard Blazor components e.g. InputText, InputNumber, InputSelect, etc. Using these standard components, interactivity can be provided to end-users.
A component can contain multiple child components in it.
These components can talk to each other by sharing some data across them. In this case, a parent component sends data to the child component, and the chid component can emit data back to parent component using an event.
The communication can be established across components as well without a parent-child relationship. This results into a disconnected communication across the components. In the case of disconnected communication across components, State is maintained by a Global State Container Object. This object is managed in the global scope of the application as a singleton object in the dependency container.
Figure 1 provides an idea of State Management using a Blazor application.
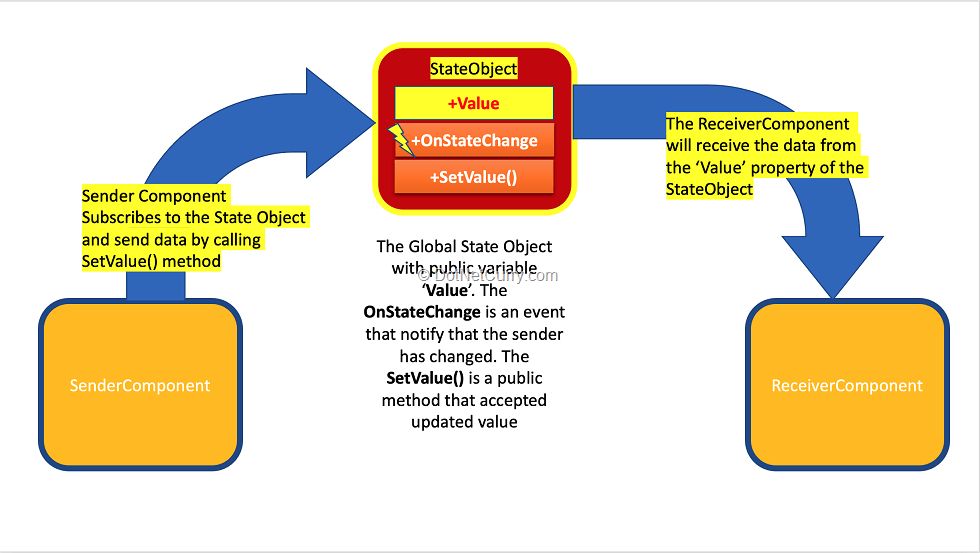
Figure 1: The State Management in Blazor App
As shown in Figure 1, the global state object must be defined. This object must define property (or properties) that will be used to maintain the state of data to be shared across the components. This object also defines an event.
The event is raised when the sender component modifies its state and updates the previous state of the value – from global state container object, to new state. The public method in this object will be accessed by the sender component to send the new state to the global object. Once the state is changed in the global object, the other receiver component can subscribe to the global state object and receive the modified state.
State Management in Blazor – Implementation
In this Blazor Tutorial, we will be discussing about the state management features provided by Blazor. We will be designing this application targeting .NET 5 and we will be using Visual Studio 2019 for writing code.
Step 1: Open Visual Studio 2019 and create a new Blazor Web Assembly Project as shown in Figure 2:
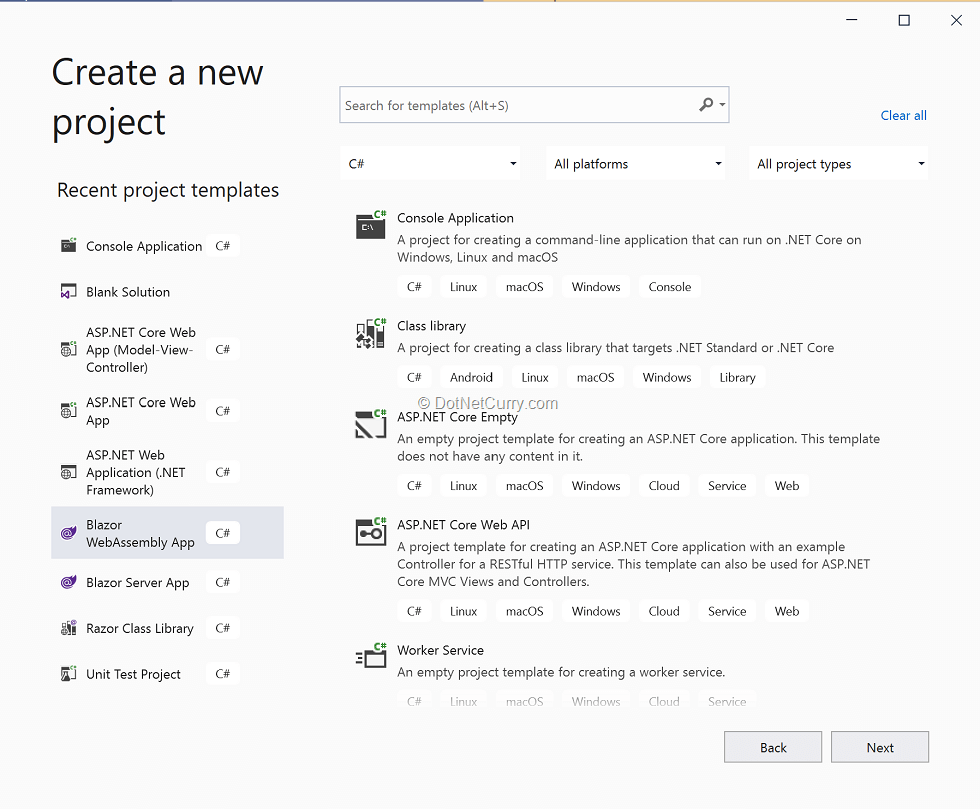
Figure 2: The Blazor Web Assembly Project
Click on the Next button and name this project as Blazor_StateManagement as shown in the Figure 3:
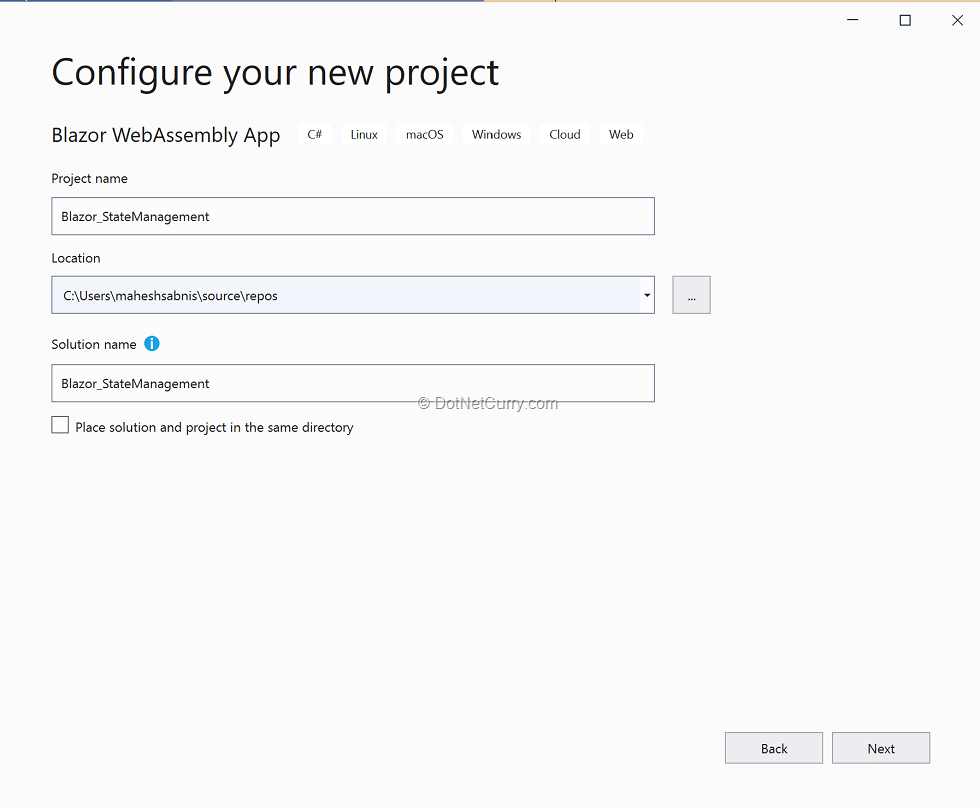
Figure 3: Setting the Project Name
After providing a project name, click on the Next button. A new window will be displayed as shown in Figure 4. In this window, select the Target Framework and other details as needed by the project

Figure 4: The Framework selection
Note: Since this tutorial focuses on Blazor State Management – other features like Authentication Type, ASP.NET Core Hosted, etc. features have been omitted.
Develop Blazor applications in half the time!
Utilize the power of high-performing Grid with 100+ features and truly native, easy-to-customize Telerik UI for Blazor components to cover any requirement. What's more, new components are added every six weeks!
Give it a try with a free 30-day trial. (No Credit Card required).
Adding Model Classes
Step 2: In the project, add a new folder and name it as Models. In this folder, add a new class file and name it as ModelClasses.cs. In this file, add code as shown in listing 1.
public class Category{public int CategoryId { get; set; }public string CategoryName { get; set; }}public class Categories : List<Category>{public Categories(){Add(new Category() { CategoryId = 1, CategoryName = "C1" });Add(new Category() { CategoryId = 2, CategoryName = "C2" });}}public class Product{public int ProductId { get; set; }public string ProductName { get; set; }public int CategoryId { get; set; }}public class Products : List<Product>{public Products(){Add(new Product() { ProductId = 101, ProductName = "P1", CategoryId = 1 });Add(new Product() { ProductId = 102, ProductName = "P2", CategoryId = 2 });Add(new Product() { ProductId = 103, ProductName = "P3", CategoryId = 1 });Add(new Product() { ProductId = 104, ProductName = "P4", CategoryId = 2 });}}Listing 1: The Model classes
The code in listing 1 contains Category and Product classes. The Categories and Products classes contains default data. This data will be displayed in the UI. The CategoryId is a property used to establish relationship across Category and Product classes.
Adding the Global State Container Class
Step 3: As explained in figure 1, to maintain the state of the data across sender to receiver components, we need to create a global state container service class. In the project, add a new folder and name it as StateService. In this folder, add a new class file and name it as StateContainerService. In this file, add code as shown in Listing 2.
public class StateContainerService{/// <summary>/// The State property with initial value/// </summary>public int Value { get; set; } = 0;/// <summary>/// The event that will be raised for state changed/// </summary>public event Action OnStateChange;/// <summary>/// The method that will be accessed by the sender component /// to update the state/// </summary>public void SetValue(int value){Value = value;NotifyStateChanged();}/// <summary>/// The state change event notification/// </summary>private void NotifyStateChanged() => OnStateChange?.Invoke();}Listing 2: The state container service
The code in listing 2 shows the following important features of the StateContainer services.
1. ‘Value’ is the state property declared as integer with default value as 0. This value will be changed by the sender component.
2. ‘OnStateChange’ is an event. This event will be raised when the state is changed.
3. ‘NotifyStateChanged()’ is the method that will be used to raise the OnStateChange event when the state is changed.
4. ‘SetValue()’ method will be invoked by the sender component to modify the old state to the new state. Once the state is changed then the ‘NotifyStateChanged()’ method will be called to raise the state changed event.
Step 4: Modify the Program.cs and register StateContainerService into the dependency container as singleton object as shown below.
builder.Services.AddSingleton<StateContainerService>();Adding Components
Step 5: Right-Click on the ‘Pages’ folder and select add new ‘Razor Component’ as shown in the Figure 5:
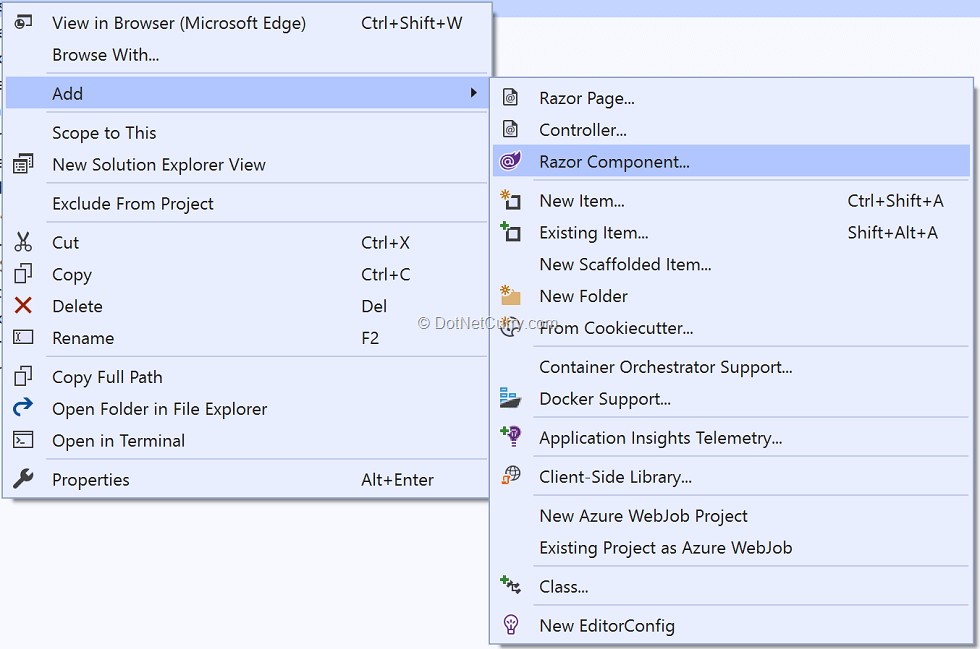
Figure 5: Adding new Razor Component
Name this component as CategorySenderComponent.razor. Repeat this process to add a new Razor Component and name it as ProductReceiverComponent.razor.
Step 6: In the CategorySenderComponent, add code as shown in the listing 3.
@page "/categorysendercomponent"@using Blazor_StateManagement.Models;@inject StateService.StateContainerService stateService;@implements IDisposable@inject NavigationManager uriHelper;<h3>Category Sender Component</h3><div class="container"><table class="table table-bordered table-striped"><thead><tr><th>Category Id</th><th>Category Name</th></tr></thead><tbody>@foreach (var cat in categories){<tr><td>@cat.CategoryId</td><td>@cat.CategoryName</td><td><input type="button" @onclick="@(()=>SelectedCategoey(cat.CategoryId))" value="Select" /></td></tr>}</tbody></table></div>@code {private Category category;private Categories categories;protected override void OnInitialized(){category = new Category();categories = new Categories();stateService.OnStateChange += StateHasChanged;}void SelectedCategoey(int catid){stateService.SetValue(catid);uriHelper.NavigateTo("/productreceivercomponent");}public void Dispose(){stateService.OnStateChange -= StateHasChanged;}}Listing 3: The CategorySenderComponent
The code in listing 3 for the CategorySenderComponent does the following:
1. The component is injected with StateContainerService and NavigationManager classes. We have already seen details of the StateContainerService. The NavigationManager class provides methods to navigate across the components.
2. The OnInitialized() method is used to initialize Category and Categories objects. The most important part in this method is that the component subscribes to the OnStateChange event of the StateContainerService using the StateHasChanged() method. The StateHasChanged() method indicates that the state of the component has changed. This subscription indicates that when the component’s state is changed, it raises an event on the state container service to make sure that the state property is changed to the new value.
3. The SelectedCategory() method of the component class is bound to the click event of the button element rendered inside the table. This method invokes the SetValue() method of the StateContainerService class to update the state. The SelectedCategory() method then navigates to the productreceivercomponent.
4. The Dispose() method unsubscribe the OnStateChange event.
Step 7: In the ProductReceiverComponent.razor, add code as shown in the Listing 4
@page "/productreceivercomponent"@using Blazor_StateManagement.Models;@inject StateService.StateContainerService stateService;@implements IDisposable@inject NavigationManager uriHelper;<h3>Product Receiver Component</h3><div class="container"><h2>The Received Category Id is = @CatId</h2><table class="table table-bordered table-striped"><thead><tr><th>Product Id</th><th>Product Name</th><th>Category Id</th></tr></thead><tbody>@foreach (var prd in filteredProducts){<tr><td>@prd.ProductId</td><td>@prd.ProductName</td><td>@prd.CategoryId</td></tr>}</tbody></table></div>@code {private Products products;private List<Product> filteredProducts;private int CatId;protected override void OnInitialized(){products = new Products();filteredProducts = new List<Product>();CatId = stateService.Value;if (CatId == 0){filteredProducts = products;}else{filteredProducts = products.Where(p => p.CategoryId == CatId).ToList();}}public void Dispose(){stateService.OnStateChange -= StateHasChanged;}}Listing 4: The ProductReceiverComponent
Like the CategorySenderComponent, the ProductReceiverComponent is also injected by the StateContainerService. The OnInitialized() method accesses the modified state from the StateContainerService class using its Value property. Once the modified state is received, the ProductReceiverComponent filters Products data based on the Category data received from the State. The ProductRenderComponent renders products based on the CategoryId.
Step 8: Modify the NavMenu.razor component in the Shared folder and add navigation links for Category and Product components as shown in the listing 5.
<li class="nav-item px-3"><NavLink class="nav-link" href="categorysendercomponent"><span class="oi oi-list-rich" aria-hidden="true"></span> Category </NavLink></li><li class="nav-item px-3"><NavLink class="nav-link" href="productreceivercomponent"><span class="oi oi-list-rich" aria-hidden="true"></span> Product </NavLink></li>Listing 5: The navigation links
Running the Blazor Application
Run the application to load it in the browser as shown in the Figure 6:
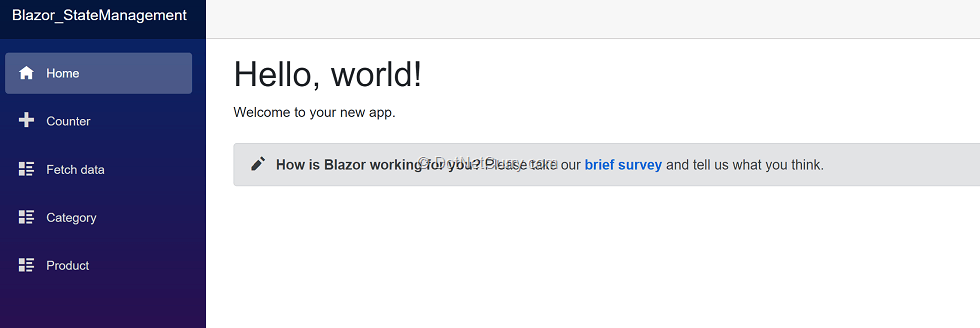
Figure 6: The application loaded in the browser
Click on the ’Category’ link and the CategorySenderComponent will be loaded as shown in the Figure 7:

Figure 7: The CategorySenderComponent
Click on the Select button of the Category Name ‘C1’, the Product Receiver Component will be displayed with the Products in category C1 as shown in Figure 8:
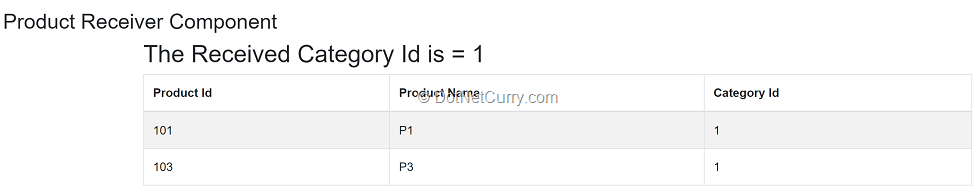
Figure 8: The ProductReceiverComponent
The Product Receiver Component shows Products based on the selected category. A few questions that come to the mind are:
Where is the state in stored?
Is the state stored in the browser?
If yes, then where is the state is maintained?
Here we must understand that we have developed a Blazor WebAssembly project.
The WebAssembly project loads the .NET assemblies in the browser and the application’s execution is managed in the browser. To see all these assemblies, press F12 button to open the developer tools as shown in Figure 9.
Note: I have run this application on Windows 10 machine with Chrome installed on it. A similar experience can be seen on a MacBook with Microsoft Edge and Chrome browsers.
On a Safari browser on MacBook, please use following steps to view Blazor Resources downloaded
Toolbar > Develop Menu > Show JavaScript Console.
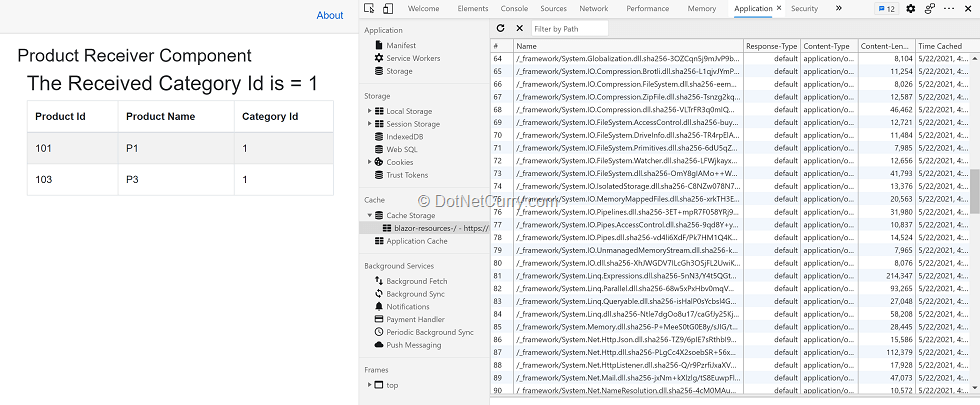
Figure 9: Developer tools
As shown in Figure 9, in the Application tab, select Cache Storage. This shows .NET assemblies loaded in the browser. In this tab in the ‘Filter by Path’ textbox, enter Blazor_StateManagement, this will the current application assembly loaded in the browser as shown in figure 10:
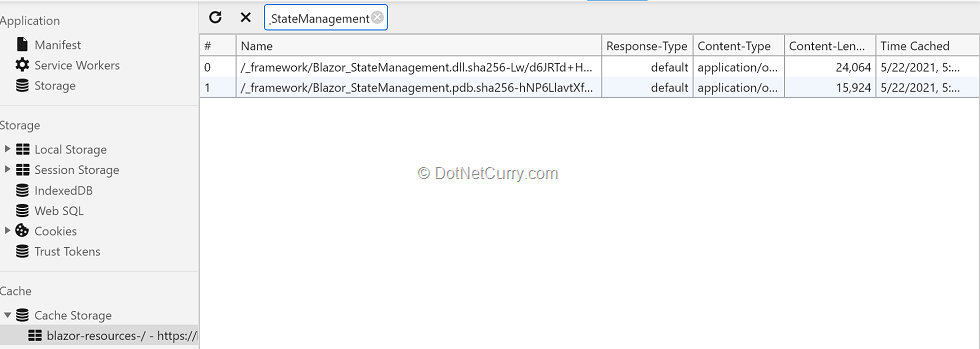
Figure 10: The Application assembly loaded in the browser
The application assembly also contains the StateContainerService class to maintain state in the browser. Instead of using any of the browser resources, state is maintained by the application itself and it can be easily shared across all the components.
Conclusion:
State Management is one of the much-needed features in modern web applications. The advantage of it is that since the data is managed in the browser, frequent postbacks to the server can be avoided.
Most of the front-end JavaScript Libraries and frameworks e.g., React, Angular, etc. provides State Management by using a Global State Container object (aka Store). In Blazor applications (Web Assembly project), we can easily implement State Management using Global State Container Object because the application with its dependencies is loaded and executed in the browser.
Note: Unfortunately due to the lack of time and resources, this article could not be reviewed technically.
Recommend
-
9
Gunnar Peipman – Programming BlogASP.NET Core, Blazor, .NET, Azure, SharePoint, IoT A portal focused on Operatio...
-
6
Using Dapper in ASP.NET Core applicationsTimes ago I blogged about micro ORM-s. I have been busy through all Covid-19 times learning technical side of DDD and during that I met again my old friend Dapper. There are applications wher...
-
9
【ASP.NET Core】Blazor 服务器端的 Base Path 提到 Blazor,没准就会有人问:选用...
-
4
0:00 / 1:10:33 ...
-
9
B7 - Coding with Blazor and ASP.NET Core34 views•Streamed live on May 11, 202130ShareSave
-
5
0:00 / 1:54:17 ...
-
7
【ASP.NET Core】Blazor+MiniAPI完成文件下载 今天老周要说的内容比较简单,所以大伙伴...
-
11
Building backend APIs has become even simpler with ASP.NET Core 6. But what about testing? Learn how to create integration tests for ASP.NET Core 6 WebAPI applications. I’m a software engineer with more than ten years of experience wi...
-
6
ASP.NET Core and Blazor Identity and State 16 Mar 2022 Over the past several weeks I’ve been wrestling with the way in which ASP.NET Core (aspnetcore) and server-side Blazor manage things like context, identity, and state....
-
5
About Joyk
Aggregate valuable and interesting links.
Joyk means Joy of geeK